
An Interest In:
Web News this Week
- April 1, 2024
- March 31, 2024
- March 30, 2024
- March 29, 2024
- March 28, 2024
- March 27, 2024
- March 26, 2024
Some of Our Sources
- Slashdot
- Mashable
- Technology Review
- Joshua Blankenship
- Smashing Apps
- TutsPlus - Design
- Fuel Your Creativity
- Web Designer Depot
- FanExtra - PSD
- Wal You
Help Webnuz
Referal links:
VueJS - Recursive Components
During your web developer career you will probably come across certain scenarios where recursion is needed. And there's more, you might even need to implement it in one of your VueJS components. But don't push yourself too hard! Being capable of identifying when recursion must (or not) be used is not that simple and it's an ability that comes with time and experience. I've also struggled to understand how recursion works. Keep cool and one day a light will be shed on it and you'll fully understand everything like magic.
TL;DR
In this article we define "recursion" and use this approach to create recursive VueJS components, which means that they use themselves within their own implementation.
Concept
Before we start to see Recursive Components, let's move a step backwards and talk about recursion as a programming resource. The term recursion has several definitions according to its context but they all mean basically the same.
The Cambridge Dictionary says that recursion is:
the practice of describing numbers, expressions, etc. in terms of the numbers, expressions, etc. that come before them in a series (within Mathematics and Computing contexts).
or even
the practice of putting a structure such as a phrase inside a structure of the same kind (within Language context).
But the best definition I've ever read is this one found on the University of Utah - School of Computing website:
Recursion is the process of defining a problem (or the solution to a problem) in terms of itself.
Source: https://www.cs.utah.edu/~germain/PPS/Topics/recursion.html
Nearly philosophical!
Recursive Components
Now that you understood (or almost!) what recursion stands for, let's think of some scenarios where it could be applied within a VueJS application.
Imagine that you are building an application similar to a social network where people can comment on posts. Now, imagine that people might be able to comment on comments.
Now, let's say you might need to display the whole structure of a file system containing folders within folders as something we call tree.
There might be other scenarios but these two above are enough for us to think about implementing recursive components.
In the first scenario, a comment might have comments, so we could implement a component that invokes itself in order to display comments within comments.
In the second scenario, we may need to implement a tree node component that might contain other tree nodes inside, which would be the case of folders (or files) inside folders.
Implementation
Let's grab the second example, which is commonly required.
We are going to implement a recursive component that is capable of displaying a tree structure.
There are two important things we must consider:
we want to build an extensible component in terms of layout because we might need to display different trees;
we must have a breaking point within the component to avoid loops. This will work exactly the same way it does within recursive functions to prevent it from calling itself endlessly;
Creating the project structure
First, let's create a basic VueJS project structure. If you like, you might check this other article of mine where I explain how I structure my own boilerplates to get a VueJS project up and running.
Once you've done that, you are ready to move to the next step.
Building a recursive component
First of all let's create the "shell" of our component. We want to display the label of each node.
Let's make use of the b-alert component from Bootstrap Vue just to avoid dealing too much with styling.
Initially we are going to display the node label and also an arrow that will help us show and hide the node children.
Create a TreeNode.vue file within components folder and implement it like the following:
src/components/TreeNode.vue
<template> <b-alert show class="d-flex justify-content-between mb-1"> {{ node.label }} <span class="fas fa-angle-right" /> </b-alert></template>export default { name: 'TreeNode', props: { node: { type: Object, required: true } }}Let's render this new component in Home.vue page.
As the TreeNode represents only one node, we need to use a v-for directive to render all of our nodes.
We're going to use a static set of data in order to see the components working.
This is how we do it:
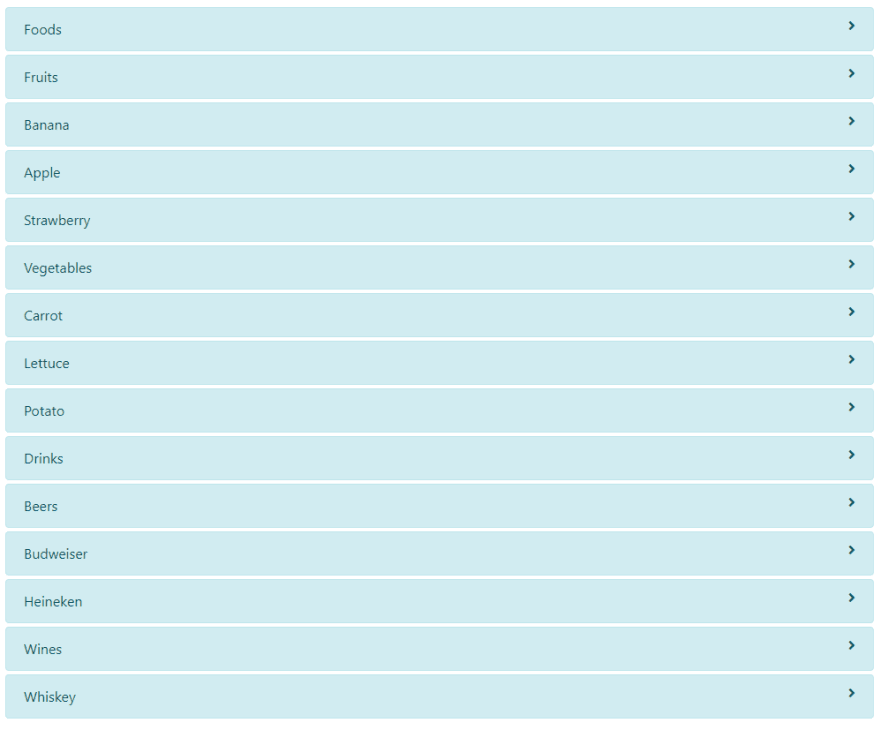
src/views/Home.vue
<template> <div> <TreeNode v-for="node in nodes" :key="node.id" :node="node" /> </div></template>import TreeNode from '@/components/TreeNode/TreeNode'export default { name: 'HomeView', components: { TreeNode }, computed: { nodes() { return [ { id: 1, label: 'Foods', children: [ { id: 2, label: 'Fruits', children: [ { id: 3, label: 'Banana' }, { id: 4, label: 'Apple' }, { id: 5, label: 'Strawberry' } ] }, { id: 6, label: 'Vegetables', children: [ { id: 7, label: 'Carrot' }, { id: 8, label: 'Lettuce' }, { id: 9, label: 'Potato' } ] } ] }, { id: 10, label: 'Drinks', children: [ { id: 11, label: 'Beers', children: [ { id: 12, label: 'Budweiser' }, { id: 13, label: 'Heineken' } ] }, { id: 14, label: 'Wines' }, { id: 15, label: 'Whiskey' } ] } ] } }}This is how it will look like:

Now let's implement the magic.
The TreeNode component must be able to reference itself in order to display the children nodes of each node. As a tree structure may contain several levels, our component must support that.
In order to achieve that, we are going to implement a breaking point checking if the node has children or not. If it has, it will render a v-for loop of itself to display the nested nodes.
This is how it will look like:
<div> <b-alert show class="d-flex justify-content-between mb-1"> {{ node.label }} <span class="fas fa-angle-right" /> </b-alert> <div v-if="hasChildren"> <TreeNode v-for="child in node.children" :key="child.id" :node="child" /> </div> </div>export default { name: 'TreeNode', props: { node: { type: Object, required: true } }, computed: { hasChildren() { const { children } = this.node return children && children.length > 0 } }}And this is how it should look like:
Now we can see all nodes of our tree structure, but it still doesn't look like a tree, right?!
We need to manipulate styling in order to achieve that.
So, what we do is: let's add a left margin to each node according to its level.
We're going to add a spacing prop to the TreeNode component and use it to set a margin-left style into the layout. We are also going to pass this prop to the children nodes incrementing it by 10 (which result in 10px when rendering).
Check this out:
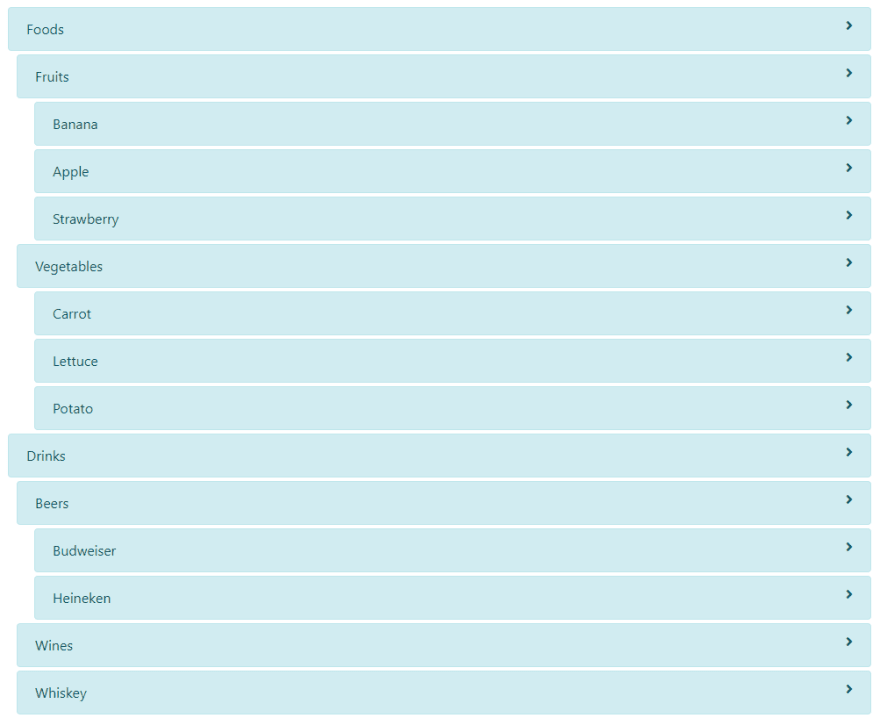
<template> <div :style="nodeMargin"> <b-alert show class="d-flex justify-content-between mb-1"> {{ node.label }} <span class="fas fa-angle-right" /> </b-alert> <div v-if="hasChildren"> <TreeNode v-for="child in node.children" :key="child.id" :node="child" :spacing="spacing + 10" /> </div> </div></template>export default { name: 'TreeNode', props: { node: { type: Object, required: true }, spacing: { type: Number, default: 0 } }, computed: { nodeMargin() { return { 'margin-left': `${this.spacing}px` } }, hasChildren() { const { children } = this.node return children && children.length > 0 } }}This is how it will look like:
We're almost there. Now, we just need to make sure that the right-side arrow will be displayed only if the node has children and also implement a method that will show and hide children nodes.
In order to do that we are going make the arrow icon dynamic using a computed property and also create a reactive variable to control if the children nodes of that respective node are being displayed or not and call it from the click event of the icon.
<template> <div :style="nodeMargin"> <b-alert show class="d-flex justify-content-between mb-1"> {{ node.label }} <span v-if="hasChildren" :class="toggleChildrenIcon" @click="toggleChildren" @keypress="toggleChildren" /> </b-alert> <div v-if="hasChildren" v-show="showChildren"> <TreeNode v-for="child in node.children" :key="child.id" :node="child" :spacing="spacing + 10" /> </div> </div></template>export default { name: 'TreeNode', props: { node: { type: Object, required: true }, spacing: { type: Number, default: 0 } }, data() { return { showChildren: false } }, computed: { nodeMargin() { return { 'margin-left': `${this.spacing}px` } }, hasChildren() { const { children } = this.node return children && children.length > 0 }, toggleChildrenIcon() { return this.showChildren ? 'fas fa-angle-down' : 'fas fa-angle-right' } }, methods: { toggleChildren() { this.showChildren = !this.showChildren } }}And this is the result:
https://www.loom.com/share/233a8108a4ca43ecb5723d4e791ceb20
You may want to customise this base component to support your layout and business requirements by adding some more advanced functionality like:
- close all children nodes when closing a parent node;
- props to allow the user to customise classes;
- node search;
Conclusion
When building web applications we need to be aware of which data structures we're going to deal with.
There are several scenarios where data must be displayed as a tree.
In this article, I explained one (of some) approaches to build a recursive component that will help you display data as a tree without much effort.
Extra
In the example above we assumed the data would be structured as tree using the children approach but this is not the only way of defining a tree in terms of data.
Sometimes all we have is a flat array with items that reference themselves to inform which node is the parent of which node.
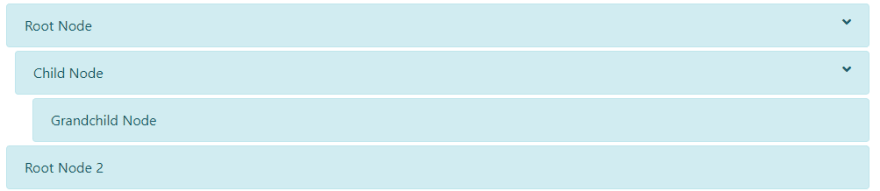
Like the following:
[ { id: 1, label: 'Root Node', parentId: null, order: 1 }, { id: 2, label: 'Child Node', parentId: 1 order: 1 }, { id: 3, label: 'Grandchild Node', parentId: 2 order: 2 }, { id: 4, label: 'Root Node 2', parentId: null, order: 2 }]This same structure can be displayed as a tree like this:
If this is your case, you might want to use this reduce function to help you transform data before passing it to your recently-learnt Tree Component. :)
You can find the full source code in this repository.
I hope you liked it!
Please, comment and share...
Original Link: https://dev.to/vcpablo/vuejs-recursive-components-2549
Dev To
More About this Source Visit Dev To