
An Interest In:
Web News this Week
- April 26, 2024
- April 25, 2024
- April 24, 2024
- April 23, 2024
- April 22, 2024
- April 21, 2024
- April 20, 2024
Some of Our Sources
- Slashdot
- BoingBoing
- TutsPlus - Code
- Pearsonified
- Smashing Magazine
- Smashing Apps
- TutsPlus - Design
- Creative Curio
- Fuel Your Creativity
- Android Headlines
Help Webnuz
Referal links:
AJAX file upload in chunks using Django, with a progress bar.
Hello!!!
There are lot of methods and technologies who allows to create a file uploader. Django also allows you to create a server where you can upload any type of file but the problem with that is Django will upload the file as a whole and reload the page after performing an upload which sometimes forces a user to do only singular tasks. This won't bother if the file size is small but things get tricky with the increasing file size.
The key point which makes a website flexible is allowing users to do multiple tasks simultaneously. Imagine you are uploading a video whose size is 1 GB and until the video is uploaded you can't do anything. How painful! The idea of uploading file as a whole turns out to be really bad when we are dealing with files whose size are in GB's. There is a concept of uploading files in chunks which can be very handy here. A chunk is an instance of file at a particular time. Uploading files in chunks requires breaking your file into smaller chunks and uploading each of them synchronously.
In this tutorial, we will see how can we upload a file in chunks to a Django server using AJAX request and response cycle. Without wasting any time, let's jump to the interesting part.
Setting up our project
( you can skip this part if you already have a project setup ready)
Creating a new Django project
django-admin startproject fileUploadercd fileUploaderRunning our project
python manage.py runserverCreating a new app inside our project
python manage.py startapp uploaderLet's quickly configure our code to include uploader app into our project.
- Create urls.py file in uploader
- Configure project level urls.py file to include the urls of this file
from django.contrib import adminfrom django.urls import path, includeurlpatterns = [ path('admin/', admin.site.urls), path('fileUploader/', include('uploader.urls')),]- Create three folders namely static, media and templates under fileUploader.
- Create two folders namely css and js inside static folder.
- Create a file named index.html inside templates folder
- Create a file named app.css inside css folder
- Create a file named app.js inside js folder
- Configure project level settings.py file to include this changes
INSTALLED_APPS = [ ... 'uploader',]TEMPLATES = [ { ... 'DIRS': [os.path.join(BASE_DIR,'templates')], ... }]STATIC_URL = '/static/'STATICFILES_DIRS = [ os.path.join(BASE_DIR, 'static')]MEDIA_ROOT = os.path.join(BASE_DIR, 'media')MEDIA_URL = '/media/'With this we are done with the setup. Let's move to the actual implementation.
Setting up UI
index.html
This is the HTML file which will contain the UI. I have kept this really simple, you can style the way you like. As you may have noticed, we will use bootstrap 4 components and some custom CSS. PS: Make sure to include csrf_token in the form :)
{% load static %}<!doctype html><html lang="en"><head> <meta charset="utf-8"> <meta name="viewport" content="width=device-width, initial-scale=1, shrink-to-fit=no"> <link rel="stylesheet" href="https://stackpath.bootstrapcdn.com/bootstrap/4.5.2/css/bootstrap.min.css" integrity="sha384-JcKb8q3iqJ61gNV9KGb8thSsNjpSL0n8PARn9HuZOnIxN0hoP+VmmDGMN5t9UJ0Z" crossorigin="anonymous"> <link rel="stylesheet" href="https://stackpath.bootstrapcdn.com/font-awesome/4.7.0/css/font-awesome.min.css" crossorigin="anonymous"> <title>AJAX + DJANGO File Uploader</title> <link rel="stylesheet" href="{% static 'css/app.css' %}"></head><body> <div class="col-lg-6 col-md-6" style="margin: 0 auto; display: block; margin-top: 100px;"> <form enctype="multipart/form-data" method="POST" action=""> {% csrf_token %} <div class="form-group"> <label>Select file to upload.</label> <input type="file" class="form-control" id="fileupload" placeholder="Select file"> </div> <input type="submit" value="Upload" id="submit" class="btn btn-success"> </form> <div id="uploaded_files"></div> </div> <script src="https://ajax.googleapis.com/ajax/libs/jquery/3.3.1/jquery.min.js"></script> <script src="{% static 'js/app.js' %}"></script></body></html>app.css
Let's add some of our own CSS to make our UI more aligned. We are also adding styles for the progress bar which will appear dynamically while uploading the file.
#myProgress { width: 100%;}#uploaded_files { margin-top: 25px; display: flex;}label { font-weight: bold;}.file-icon i { font-size: 60px; color: rgb(0, 0, 0);}.file-details { margin-top: -2px; padding-left: 10px; width: 100%;}.file-details p { margin-bottom: -7px;}small { margin-top: 0; color: black;}This is how our UI will appear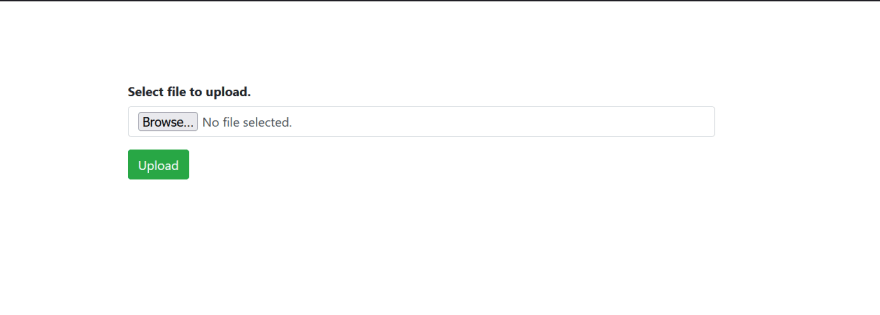
app.js
So, this is the heart of our code. I have used a objected oriented approach over here, the functional approach would work fine as well with little changes.
There is an attribute called max_length which indicates the maximum size of the chunk that can be uploaded at a time. There is a method upload() which we will be called when the click event of button is fired.
class FileUpload { constructor(input) { this.input = input this.max_length = 1024 * 1024 * 10; // 10 mb } upload() { this.create_progress_bar(); this.initFileUpload(); }(function ($) { $('#submit').on('click', (event) => { event.preventDefault(); var uploader = new FileUpload(document.querySelector('#fileupload')) uploader.upload(); });})(jQuery);initFileUpload() method
Following is the list of variables which are used:
- existingPath - null if file can be uploaded as a whole or contains the path at which the previous chunk was uploaded
- nextChunk - next part of file if exists
- currentChunk - current part of file
- uploadedChunk - aggregation of all chunks uploaded so far
- formData - An object to hold the data that will be sent to server.
- end - whether an upload is ended or not.
First we create an instance of FormData and append all the values into it that we want to send to the server. Then we create an instance of AJAX using $.ajax() which comes with lot of properties. Here we have used
- xhr() - to compute the amount of file that has been uploaded
- error() - called when error occurs while doing some action
- success() - called when action is successfully completed
- url - the url at which the request will be made
- type - request method
- dataType - the type in which we pass the data
- data - actual data that will be passed
upload_file(start, path) { var end; var self = this; var existingPath = path; var formData = new FormData(); var nextChunk = start + this.max_length + 1; var currentChunk = this.file.slice(start, nextChunk); var uploadedChunk = start + currentChunk.size if (uploadedChunk >= this.file.size) { end = 1; } else { end = 0; } formData.append('file', currentChunk); formData.append('filename', this.file.name); formData.append('end', end); formData.append('existingPath', existingPath); formData.append('nextSlice', nextChunk); $('.filename').text(this.file.name) $('.textbox').text("Uploading file") $.ajaxSetup({ // make sure to send the header headers: { "X-CSRFToken": document.querySelector('[name=csrfmiddlewaretoken]').value, } }); $.ajax({ xhr: function () { var xhr = new XMLHttpRequest(); xhr.upload.addEventListener('progress', function (e) { if (e.lengthComputable) { if (self.file.size < self.max_length) { var percent = Math.round((e.loaded / e.total) * 100); } else { var percent = Math.round((uploadedChunk / self.file.size) * 100); } $('.progress-bar').css('width', percent + '%') $('.progress-bar').text(percent + '%') } }); return xhr; }, url: '/fileUploader/', type: 'POST', dataType: 'json', cache: false, processData: false, contentType: false, data: formData, error: function (xhr) { alert(xhr.statusText); }, success: function (res) { if (nextChunk < self.file.size) { // upload file in chunks existingPath = res.existingPath self.upload_file(nextChunk, existingPath); } else { // upload complete $('.textbox').text(res.data); alert(res.data) } } }); };create_progress_bar() method
Here we create a bootstrap progress bar which will be shown while uploading a file. It's always good that user can visualize how much progress has been made.
create_progress_bar() { var progress = `<div class="file-icon"> <i class="fa fa-file-o" aria-hidden="true"></i> </div> <div class="file-details"> <p class="filename"></p> <small class="textbox"></small> <div class="progress" style="margin-top: 5px;"> <div class="progress-bar bg-success" role="progressbar" aria-valuenow="0" aria-valuemin="0" aria-valuemax="100" style="width: 0%"> </div> </div> </div>` document.getElementById('uploaded_files').innerHTML = progress }With this we are done with the front end. Now let's build a model and a server to try this code.
Setting up server (uploader)
urls.py
The url where the request will be made
urlpatterns = [ path('', views.index, name='index'),]views.py
The request made to the server are handled by function defined in views.py. When we get a POST request, we retrieve the data and create a new file or append to an existing file inside the media folder and send the path to which the file was stored as a response. Notice that we are storing file in binary mode.
from django.shortcuts import renderfrom django.http import JsonResponseimport osfrom .models import Filedef index(request): if request.method == 'POST': file = request.FILES['file'].read() fileName= request.POST['filename'] existingPath = request.POST['existingPath'] end = request.POST['end'] nextSlice = request.POST['nextSlice'] if file=="" or fileName=="" or existingPath=="" or end=="" or nextSlice=="": res = JsonResponse({'data':'Invalid Request'}) return res else: if existingPath == 'null': path = 'media/' + fileName with open(path, 'wb+') as destination: destination.write(file) FileFolder = File() FileFolder.existingPath = fileName FileFolder.eof = end FileFolder.name = fileName FileFolder.save() if int(end): res = JsonResponse({'data':'Uploaded Successfully','existingPath': fileName}) else: res = JsonResponse({'existingPath': fileName}) return res else: path = 'media/' + existingPath model_id = File.objects.get(existingPath=existingPath) if model_id.name == fileName: if not model_id.eof: with open(path, 'ab+') as destination: destination.write(file) if int(end): model_id.eof = int(end) model_id.save() res = JsonResponse({'data':'Uploaded Successfully','existingPath':model_id.existingPath}) else: res = JsonResponse({'existingPath':model_id.existingPath}) return res else: res = JsonResponse({'data':'EOF found. Invalid request'}) return res else: res = JsonResponse({'data':'No such file exists in the existingPath'}) return res return render(request, 'index.html')models.py
We cannot store data until we have a model. So here is how we can make one for this uploader
class File(models.Model): existingPath = models.CharField(unique=True, max_length=100) name = models.CharField(max_length=50) eof = models.BooleanField()Run these commands in the terminal to migrate your model
python manage.py makemigrationspython manage.py migrateNow we are all set to test our application. Go to your browser and run the serving URL, select a file and click on upload. You can see the beautiful thing that you just built. I guess the progress bar filled very quickly right, so this time try a larger file ( any size you may want, it won't collapse) and see how the file gets uploaded in chunks.
This are few snapshots of the output.

Hope this could help you to learn something new today. Thank you for your precious time.
Adios!
Original Link: https://dev.to/shubhamkshatriya25/ajax-file-upload-in-chunks-using-django-with-a-progress-bar-4nhi
Dev To
More About this Source Visit Dev To