
Some of Our Sources
- BoingBoing
- Techcrunch
- Technology Review
- Just Creative
- TutsPlus - Design
- You The Designer
- Creative Curio
- FanExtra - PSD
- 24 Ways
- Android Headlines
Help Webnuz
Referal links:
Journey to the real world by cloning DEV.to backend server(part 4)
In the last series we have created our first server but we have not tested it in our machine locally. so in this series we will work more on creating better project structure and much more with prisma
open the prisma/schema.prisma file and now lets create our User model which will represent our readers , admin and moderators of our platform
devblog_server/prisma/schema.prisma
model User { id Int @id @default(autoincrement()) email String @unique name String? username String @unique password String createdAt DateTime @default(now()) updatedAt DateTime @updatedAt avatar String? bio String? displayEmailOnProfile Boolean @default(false) location Decimal[] role UserRole @default(USER)}enum UserRole { USER // normal reader MODERTOR // handle and verify posts ADMIN // handle USER and MODERATOR}Explanation
Above id is our unique field and it will auto increment when a new row will be added hence we provided @id which tells it a id field. @default is used to add default data during row creation we provided autoincrement() which will increment by one when new row will be created.You can use cuid() and uuid() for unique id creation. You can can learn more the difference between uuid() and cuid() here.
@unique() provide a constraint validation for our schema that the no two row will have same data in field. In the above we provided email and username should be unique.
now() function return current DateTime hence we used this in createdAt field so that it will automatically populated with the DateTime when a new user will register in our platform
@updatedAt attribute will automatically provide the timestamp when our model will updated . In this way we can track the user when they have updated their profile.
Int, String , Boolean , DateTime, Decimal are data types provided by prisma it map with data type of databases in background . Recent version of prisma provide capability to map native data type directly in prisma schema like @db.VarChar(255).
? it make the fields optional by default all fields are required.
Decimal[] here we have stored coordinate of user lat and lng so that we can easily show user location on map.
At last i have created role field which will be an enum.
you can read more about enum in prism here.
Now we will apply migrations for our user model.
npx prisma migrate dev --name user_modeldev is compulsory if you are in development environment.
It will create new migration directory inside prisma directory and there it will generate migration file and suffix with the user_model.
We have completed most of the stuff with prisma but the last things is we have not generated prisma client yet. When we will generate prisma client it will provide type for our model which helps to improve our development fast.
npx prisma generateNow we will start our development server and will test both REST endpoint and GraphQL endpoints
If you have remembered we have imported prisma in context from prisma.js but we have not created this file yet. Lets create this and import @prisma/client here.
prisma.js
const { PrismaClient } = require("@prisma/client");const prisma = new PrismaClient();module.exports = prisma;Above i have imported @prisma/client and created their install and export from this file so that our application can use only one instance of prisma client.
I have talk about the downside of initialize more than one prisma client instance in previous post.Here we are safe because we have only one instance of prisma client which we will provide to context so that all resolvers will use this instance for db stuff.
Start development server
To start development server we will setup nodemon in package.json so that we have not headed to start dev server again again on every change. Nodemon will do for us
package.json
{ "name": "devblog_server", "version": "1.0.0", "main": "src/server.js", "license": "MIT", "scripts": { "start": "node src/server.js", "dev": "nodemon src/server.js" },...}Now start server
pnpm run devOpen your favourite browser and browse http://localhost:3000 will give you json response from express server and http://localhost:3000/graphql will open graphql playground provided by apollo server
write first query
{ hello}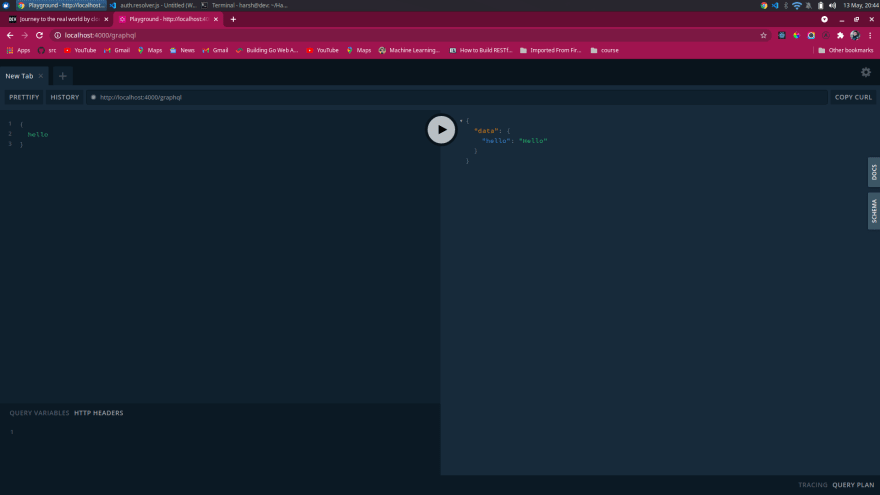
this will resolve hello query and you will get results in right section.
In our next post we will implement authentication in graphql server and we will see how we will secure our api with JWT token authentication
Original Link: https://dev.to/harshmangalam/journey-to-the-real-world-by-cloning-dev-to-backend-server-part-4-1cb3
Dev To
More About this Source Visit Dev To