
An Interest In:
Web News this Week
- April 1, 2024
- March 31, 2024
- March 30, 2024
- March 29, 2024
- March 28, 2024
- March 27, 2024
- March 26, 2024
Some of Our Sources
- BoingBoing
- Technology Review
- Team Treehouse
- Pearsonified
- Web Designer Depot
- Noupe
- My Ink Blog
- Stylized Web
- Spyre Studios
- Hashedout
Help Webnuz
Referal links:
How to 3D Scan an Object for Synthetic Data
Synthetic datasets are becoming a standard part of model training for computer vision. While new tools have made synthetic datasets more accessible, many require a basic understanding of 3D modeling in addition to standard machine learning processes. The easiest shortcut is to take existing objects from the real world and import those into a 3D scene. In this article, well run through how to 3D scan an object for synthetic data. Its a workflow that takes you from real object to a basic implementation inside Blender. Then, using the synthetic data toolkit zpy, you can create the labels, segments, and random variations needed for a synthetic dataset of any size.
To replicate this experiment at home, you'll need to use Blender, Meshroom, zpy and your phone camera.
Step 1: 3D Scan an Object
Taking pictures for a 3D scan can be extremely straightforward if we adhere to a few best practices. Try to eliminate deep shadows and make lighting consistent. For this, we used a really simple reading lamp. Keep the entire object in focus as much as you can.

Using a phone camera, we want to get coverage of the entire object from every angle possible. This helps the structure from motion algorithm figure out the shape of our object and reconstruct it into a point cloud.
Something to note: once you start taking pictures, do not move the object or change the lighting, or youll have to start over again. Even objects that move in the background (like the curious pet pictured above) can cause problems with the 3D reconstruction.
We took 54 pictures in the space of about 5 minutes. On the one hand theres no such thing as too many pictures, but there is such a thing as driving yourself crazy trying to get full coverage. You dont need thousands of pictures for a small object, so just stop when you think you have enough.
After taking the pictures, uploading into Meshroom is easyjust drag and drop into the images folder. Once youve done so, hit Start and Meshroom does the rest. It can be good to keep an eye on the Meshroom log while its working, as otherwise its not clear that anything is happening. Meshroom has a pretty great short video on how to use their product, so we wont go in depth as to how Meshroom works, but all it really takes is a few clicks and some time to output a model.
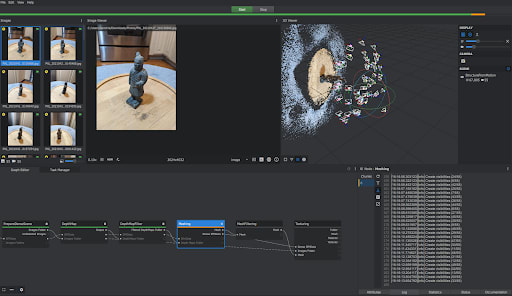
Upon finishing the model, we can check the Meshroom cache listed in the output.
Step 2: Importing Into Blender
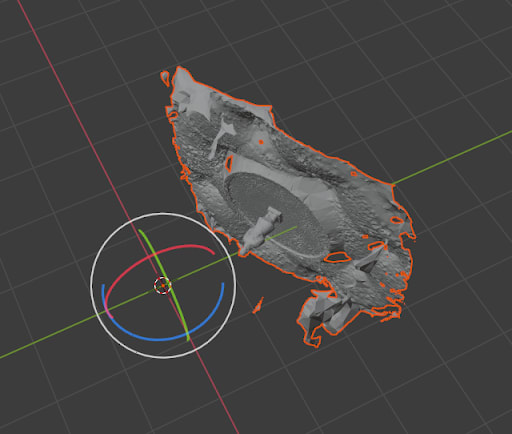
Next we're going to import and clean up the Meshroom output. Open up Blender and click File, and then Import. Select OBJ, then navigate to the Meshroom Cache to select our textured mesh. The result is often a model that isnt correctly rotated or scaled.

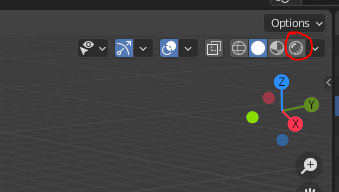
We can fix this using the simple tools provided on the left side of the screen, the move, rotation and scale buttons being the three pictured here from top to bottom.
Blender is a really complex software package with a huge community, so if you have more questions and want to dive deep into 3D animation, there are a wealth of tutorials available on Youtube.
For now, were going to get our model upright and sized correctly. We can toggle to our textured version by hitting the far right Circle button. If your model is looking really dark, try adding lights to adjust the brightness of the scene.
Even without any editing, we already have a great result!

But as you can also see, we captured a lot of the surrounding area in our mesh. If we want to create a machine learning dataset, we need to isolate the object from the background.
To get that isolation, we can select our object by clicking on it, hitting the tab button and then clicking and dragging in order to box select the areas we want to delete.
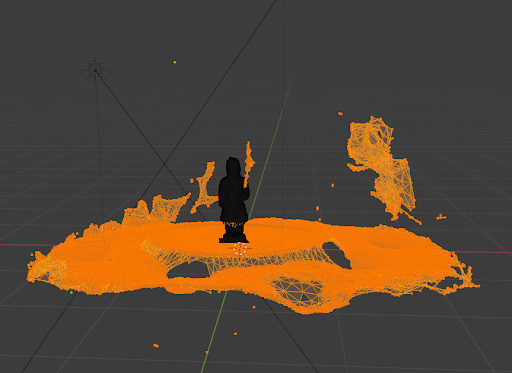
Hit the delete button and select Vertices, then hit tab again and now we have a really nice 3D scanned model to use inside of Blender.

Just a bit more cleanup before we get into dataset creation. The Origin should be centered around our geometry, so that we get consistent rotation and scaling. Do that by selecting the Object tab, choosing Select Origin and then Origin to Geometry.

You've now got a 3D model of your real world object. A lot more work could go into creating a scene centered around it, but whether that's worth the time and energy depends entirely on your use case and how far you'd like to take the scene.
Step 3: Generating Synthetic Data
With a 3D model complete, you're ready to jump into zpy. As an open source toolkit that adds functionality to Blender, it lets us create the huge variety of images that constitute a dataset for machine learning purposes. You could choose to implement a randomized background for your 3D model, randomized camera angle, randomized lighting, and even introduce other objects in order to add complexity to your dataset.
The easiest way to get started with zpy (available on GitHub) is to follow the steps outlined in this short video tutorial series.
Hopefully this gives you a solid idea of how to 3D scan an object and get started with synthetic data. If you have questions on the process, please feel free to reach out.

Original Link: https://dev.to/sammiezumo/how-to-3d-scan-an-object-for-synthetic-data-132a
Dev To
More About this Source Visit Dev To