
An Interest In:
Web News this Week
- April 26, 2024
- April 25, 2024
- April 24, 2024
- April 23, 2024
- April 22, 2024
- April 21, 2024
- April 20, 2024
Some of Our Sources
- BoingBoing
- Just Creative
- Smashing Magazine
- TutsPlus - Design
- Creative Curio
- Fuel Your Creativity
- Web Designer Depot
- Android Headlines
- Daily Now
- The Verge
Help Webnuz
Referal links:
Write Your First Python-Powered Web Server
Mark Wahlbeck from Devslopes thinks beginners shouldn't learn Python. I don't know if he's right or not, but I do want to stress that this tutorial is for people who already have some experience with JavaScript, have built a server with Node and Express, and want to try something new. If nothing else, building your server with Python and Django might cement your understanding of how your Node server is working. And if you get comfortable with Python, it can be a good catch-all language for automating your daily tasks, even if it never gets you hired as a junior developer.
Setting Up Your Dev Environment
Because this tutorial is for JavaScript coders, we'll be working in VS Code instead of PyCharm. I'm working in Ubuntu 18.04, so ideally this is for other Linux users, but I will include alternative commands for Mac and Windows where possible.
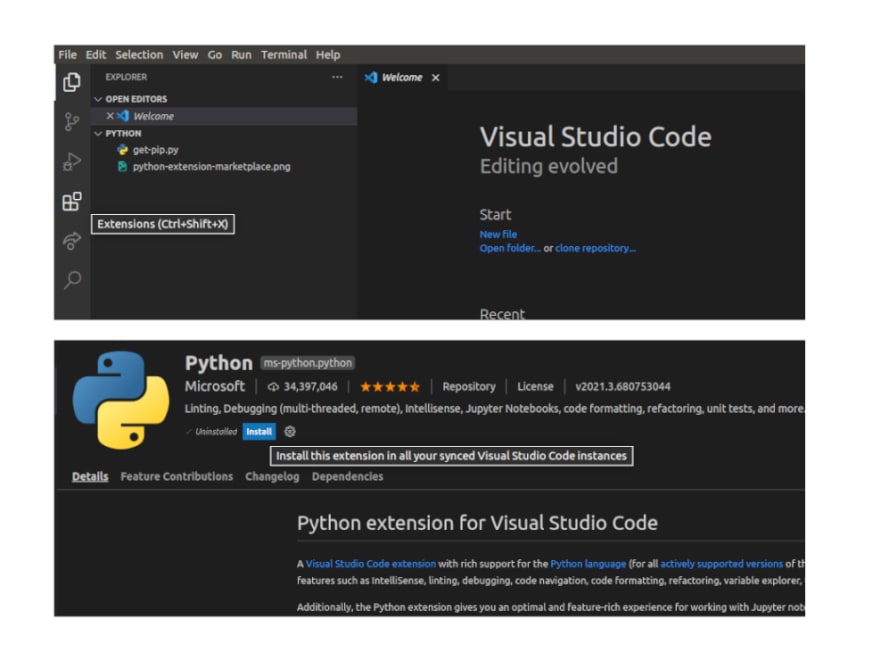
The first thing you'll need to do is fire up VS Code. I created a directory named "python" to work in. Install the Python extension for VS Code.
Next you'll need a Python package manager and interpreter. Ubuntu users can install Pip with the commands sudo apt update followed by sudo apt install python3-pip in the terminal. Enter pip3 --version to confirm you did it right. You'll get back something like this: pip 9.0.1 from /usr/lib/python3/dist-packages (python 3.6). Windows and Mac users can follow the respective links for instructions on installing package managers.
Linux users should have Python3 as a default Python interpreter. If you're not sure if you have it, or if you'd like to change it, you can press ctrl+shft+P and type "Python: Select Interpreter" into the search box. Click the one you want. I'm using Python 3.6.9. If you have an interpreter set up, you should have a ".vscode" folder in your project folder with a "settings.json" file that includes a "python.pythonPath" key whose value is the file path to your interpreter.
Testing Python
In your root directory, create a folder called "test.py" (touch test.py for Linux users), and enter the following two lines:
msg = "Its Alive"print(msg)Save the file, and run it by pressing the play button at the top-right of your VS Code window. You've probably never used this thing if you're used to writing JavaScript, so here's a picture with the button highlighted.
Pressing it should have the same effect as running node [somefile].js. If you see the text "Its Alive" in your terminal, you are officially coding in Python.
Virtual Environment
Before we install Django, we're going to create a virtual envrironment. I'm running Linux, so I'll run the following two commands in my terminal:
sudo apt-get install python3-venvpython3 -m venv envHere are the MacOS and Windows alternatives:
python3 -m venv env (for Mac)python -m venv env (for Windows)Say yes to all the prompts. Your project folder should now contain an "env" directory with some folders in it ("bin", "include", "lib", ect). It should sort of look like your standard JavaScript / Node project. You're going to redirect your Python interpreter to this folder. So once again press ctrl+shft+P and search for "Python: Select Interpreter". You should see a new option with ('env') at the end. Click it, and it should update your "settings.json" file to direct to the new file path ("env/bin/python" on my end).
Press ctr+shift+P again, and this time type "Terminal: Create New Integrated Terminal" into the search bar. Click the result, and your terminal window should display a command line starting with "(env)". This is your integrated terminal window, where we'll install Django. If at any point you close your project and come back, your terminal will not default to the integrated terminal window. The following commands will bring you back into your integrated terminal window:
source env/bin/activate (Linux or Mac)env\Scripts\Activate.ps1 (Windows)Django
In your integrated terminal window, enter the following two commands:
python -m pip install --upgrade pippython -m pip install djangoIf you're using Windows, and these commands don't work, try troubleshooting with this link.
When the installation is complete, you're ready to make a Django app. You'll start your project by running the following command in your integrated terminal:
django-admin startproject web_project .
This will create a new folder called web_project in your parent directory as well as a few utility files. Next, create your database and start your server:
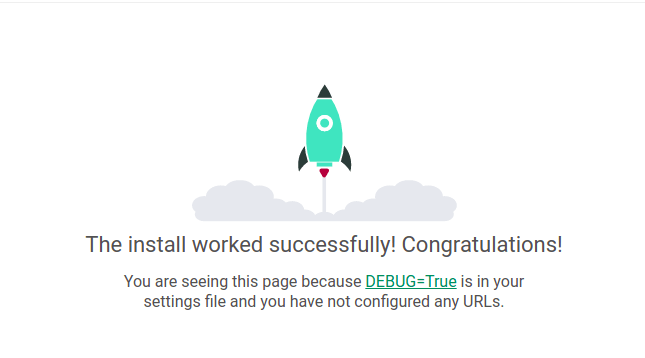
python manage.py migratepython manage.py runserverYour terminal will give you a link to http://127.0.0.1:8000/ and you'll see the following default message on your page:
Next step is to replace the default success screen with some personalized content, which we'll do with the startapp command:
python manage.py startapp myfirstpythonThis will create a "myfirstpython" folder with a "views.py" file. Replace the contents of "views.py" with the following code and save:
from django.http import HttpResponsedef home(request): return HttpResponse("Boilerplate Django App")Now, in your "myfirstpython" folder, create a file called ursl.py with the following code:
from django.urls import pathfrom hello import viewsurlpatterns = [ path("", views.home, name="home"),]Your web_project folder also contains a urls.py file. Replace its code with this:
from django.contrib import adminfrom django.urls import include, pathurlpatterns = [ path("", include("myfirstpython.urls")), path('admin/', admin.site.urls)]Save and re-run the command to start your server in your integrated terminal:
python manage.py runserverFollowing the link to http://127.0.0.1:8000/ should bring up a plain white page with the text "Boilerplate Django App." And there you have it. Your first webpage without any JavaScript. It's not much, but if you study Python, and follow some of the links below, you can make a fully interactive page with Django. Feel free to fork this boilerplate and run with it.

Citations:
Installing Python
Installing Pip
Django
For Windows Users
For Mac Users
More Windows Troubleshooting
Cooler and more complex Django App Code-along
Original Link: https://dev.to/michaelpaulkunz/write-your-first-python-powered-web-server-3pee
Dev To
More About this Source Visit Dev To