
An Interest In:
Web News this Week
- April 26, 2024
- April 25, 2024
- April 24, 2024
- April 23, 2024
- April 22, 2024
- April 21, 2024
- April 20, 2024
Some of Our Sources
- Slashdot
- TutsPlus - Code
- The Logo Smith
- Six Revisions
- Abduzeedo
- Creative Curio
- Noupe
- CSS Tricks
- Willems Lab
- The Verge
Help Webnuz
Referal links:
Deploy your NodeJS App to a server with Docker
Hey there! Welcome to my short crash course on deploying your NodeJS app to a DigitalOcean VPS using Docker and NGINX
Introduction and comparision to Heroku
If you've wanted to deploy your web apps easily, you would have come across something called Heroku. Heroku is a PaaS, or Platform as a Service, that allows you to deploy your apps without worrying about servers, scaling, load balancing, maintenance or any of that jazz. It does have a free tier, which is nice to get started with, but once you have some sort of revenue from your app, it's time for you to upgrade
Why upgrade?
The Heroku free tier has something called sleeping apps. Sleeping apps will "sleep", i.e. shut down after 30 minutes of inactivity, i.e. 30 minutes of nobody visiting your website. After it sleeps, it takes a good 15-30 seconds to start back up, and this is REALLY BAD for an API. Because of your API sleeping, it can cause the performance of the apps who use your API to suffer, making them move to other APIs. If you only want to remove the sleeping apps thing, it would cost you $7 a month, PER APP. Your app will get 512MB of ram. If we compare this pricing to something like DigitalOcean, you can see that we get a 1GB ram instance for just $5 a month.
I'm using DigitalOcean because I have a bit of the free credit left
Creating and setting up a droplet
Let's create a DigitalOcean Droplet. A droplet is DigitalOcean's way of saying VPS, or Virtual Private Server. A VPS is usually a linux server, but it can have the windows operating system too. You'll be dealing with linux most of the time when you want to deploy. If you want to go the Windows route, just be prepared for a lot of frustration!
I'll create a brand new Ubuntu 20.04 LTS droplet. Ubuntu is a linux distro, and it is the most used one too. I'm choosing the LTS (Long Time Support) release. I'll go with the $5/month plan, and I'll pick my location to be Bangalore. For the auth method, I'll add a root password, and the hostname will be the domain I'd like my app to be hosted at, i.e. test.arnu515.gq in my case.
I got this domain from Freenom, which gives you FREE DOMAINS!
While the droplet is getting created, I'll add a record to my domain, arnu515.gq using the built in DNS Management. I'll add an A record called test (which will map to test.arnu515.gq) with the IP of my machine. Remember to set the TTL (Time To Live) to a small number like 300 seconds (5 minutes), so your domain propogates faster.
SSHing into our droplet and securing it
Now for the fun part! Let's login to our droplet from our own computer's terminal using SSH. Open up a new shell and type:
ssh root@IP_OF_YOUR_MACHINEIf you have windows, you will most likely need to use an external SSH client, or use WSL. I'm not going to cover that, so you're on your own.
Enter your root password you set earlier and now we can begin!
First, always run these two commands whenever you create a new VPS:
apt updateapt upgradeThese commands fetch the latest versions of the package repositories and upgrade your existing applications.
Installing docker
Head over to the Docker Installation docs and install docker using the commands given to you, namely:
apt install apt-transport-https ca-certificates curl gnupg-agent software-properties-commoncurl -fsSL https://download.docker.com/linux/ubuntu/gpg | apt-key add -add-apt-repository "deb [arch=amd64] https://download.docker.com/linux/ubuntu $(lsb_release -cs) stable"apt updateapt install docker-ce docker-ce-cli containerd.ioAnd docker should be installed. Run docker -v to verify.
Installing docker-compose
Installing docker-compose is easier than installing docker, but you will need the latter installed first.
All you have to do is download docker-compose, save it in /usr/local/bin and make it executable.
curl -L "https://github.com/docker/compose/releases/download/1.28.0/docker-compose-$(uname -s)-$(uname -m)" -o /usr/local/bin/docker-composechmod +x /usr/local/bin/docker-composeAnd docker-compose should be installed! Run docker-compose -v to verify.
Installing NGINX
I would say that installing NGINX is even easier! All you have to do is:
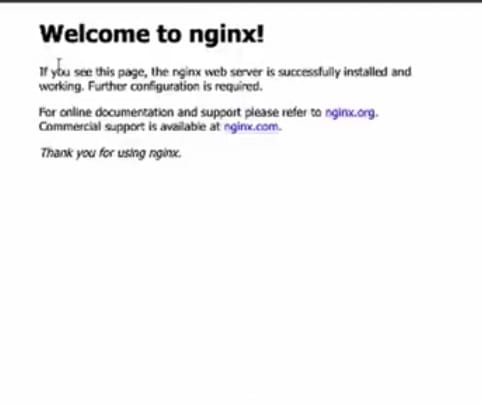
apt install nginxAnd that's it! NGINX is installed. You can visit your machine's IP address or even visit the domain name you set, in my case, test.arnu515.gq and you should see the NGINX default website.
If your IP works but not the domain, you will have to wait a bit longer. If you forgot to set the TTL, you will have to wait an hour until your domain works.
Creating a new user
Let's create a new user, because logging in as the root user will enable us to do ANYTHING we want without having to give any permissions. This can be bad because we may remove certain directories that we usually can't remove because we don't have permissions, but that will get bypassed by root, damaging or destroying our server.
To create a new user,
adduser USERNAMEProvide the password for the user, and you can accept the defaults for everything else by pressing Enter a bunch of times.
For additional security, make sure that your new user's password doesn't match your root password.
Let's allow our new user to execute commands as root, but only when the command is prefixed with sudo. This will allow us to run some command that need root access, like apt, while running others that don't, like cd, without root:
usermod -aG sudo USERNAMELogging in to our user
We can login to our user by typing:
su USERNAMEYou will notice that the prompt changes. We can logout of the user by typing:
exitWe will return back to the root user. Close the connection by typing exit.
Let's login to our user directly from ssh. We'll use our domain name instead of the IP, because it has probably propogated by now.
ssh USERNAME@DOMAINNAMEFor me, the command would be:
ssh [email protected]You should be logged in to your user now.
Securing our server
Let's work on securing our server so some uninvited guests don't barge into your server.
SSH
Let's start with SSH. First of all, let's change the default SSH Port. Attackers will try using the default ssh port to ssh into your machine. If we change this port, then they will have to do a hit and trial method to login to your computer. Then we need to disable logging in as root. Then, we need to disable logging in with a password. Why, you ask? It's because hackers can guess your password if they try hard enough, so if there isn't a password they can guess, how can they log in? Now you may be thinking, how can WE log in? We'll be using something called SSH keys. These keys will identify us, so the server will allow us to login.
Let's change our SSH config file first.
sudo nano /etc/ssh/sshd_configIf nano is not installed, type
sudo apt install nano
This will open up a terminal-based text editor. We can edit the SSH Config file here.
Syntax of the ssh config
The SSH config contains a key and value separated with a space. For example,
Example 10Key valueIf there's a pound (#) in front of a statement, it becomes a comment. Comments are ignored. If a certain field doesn't exist in your SSH config, add it.
Changing the port
Find/Add the option called Port and set it from any number other than 22. I will use 3333.
Port 3333Disabling root login
Find/Add the option PermitRootLogin and set it to no
PermitRootLogin noDisable password auth
Finally, find/add the option PasswordAuthentication and set it to no
PasswordAuthentication noIf the field
PubkeyAuthenticationis set tono, please comment it out or set it toyes, otherwise you CANNOT login to your machine
Exit out of the config by pressing Ctrl+X, y and Enter.
The config won't affect automatically. We have to restart SSH, but first, let's add our SSH Key to the machine.
Adding the SSH Key
Exit out of SSH first. On your local machine, if you don't have an ssh key, create one with ssh-keygen. You should be given a path where the SSH key was stored. You can accept the defaults. Next, let's add the ssh key to our machine.
ssh-copy-id -i PATH_TO_YOUR_SSH_KEY USERNAME@DOMAINFor me, the SSH key is in /Users/arnu515/.ssh/id_rsa, so the command would be:
ssh-copy-id -i /Users/arnu515/.ssh/id_rsa [email protected]You'll be prompted to enter the password. Once done, relog with ssh and you'll see that you don't have to enter a password!
Finally, we can restart ssh on the droplet by typing:
sudo service ssh restart
`
Exit out of SSH and try to log back in again. The command will fail because we're still connecting on port 22, while the new SSH port was 3333, atleast for me. Change the port by specifying the -p flag:
bash
ssh USERNAME@DOMAIN -p PORT
For me, the command will be:bash
ssh [email protected] -p 3333
And congratulations! You've secured SSH!
Firewall
By default, atleast on DigitalOcean, ALL PORTS are allowed. This is really bad, so let's install a firewall called ufw.
bash
sudo apt install ufw
Once that's done, let's whitelist the port 3333 so that we can login to our machine.
bash
sudo ufw allow 3333
We can check the status of the firewall:bash
sudo ufw status
If you get Status: inactive, we need to enable the firewall. Let's do that using:
bash
sudo ufw enable
This MAY disrupt your ssh connection, so if that happens, log back in again.
If we visit our website at our domain, it will no longer work, because ufw blocks it. To allow NGINX to work,
sudo ufw enable "Nginx Full"
And we're done with the security aspect. Let's deploy our app!
Deploy
I made an example application that uses Express with MongoDB and Redis, to show that we can have multiple services. I'll be using docker-compose to connect the mongodb, redis and the app containers together.
We need to put this code on our machine, and the easiest way is using Github. I pushed my code from my local machine over to Github, and we can pull the code from github down to our droplet using git clone. Once that's done, we can build and run the app using docker-compose with:
bash
docker-compose up -d
You will get a PermissionDenied error. This is happening because we don't have access to the docker engine by default. To fix that, run:
sudo usermod -aG docker USERNAME
You need to logout and log back in to SSH and now, if you run docker-compose, it should work! My app is hosted on port 5000. I could manually allow that port in the firewall and you could all visit my app at test.arnu515.gq:5000, but if you see other websites, none of them have a port. That's where NGINX comes in. We can create a proxy_pass, that basically maps all requests coming to port 80, i.e. the default port to port 5000. Let's see how.
Configuring NGINX
On port 80, there's already the default nginx website. We can disable that by running:
sudo rm /etc/nginx/sites-enabled/default
And then, we can restart NGINX
sudo systemctl restart nginx
Now, let's create our website. I'll give it the name test.
sudo nano /etc/nginx/sites-available/test
This will open up the nano text editor, and here, I can write:
`nginx
server {
# Listens on port 80
listen 80;
# For all URLs on port 80,location / { # Send them to port 5000 proxy_pass http://localhost:5000; # Add some headers proxy_set_header Host $host;}}
`
Don't forget the semicolon (;)!
Let's now enable this website by putting the same file in sites-enabled:
sudo cp /etc/nginx/sites-available/test /etc/nginx/sites-enabled
Restart NGINX:
sudo systemctl restart NGINX
And we're done ! Visit your app on port 80, and you can see the amazing app that you've built! Congratulations , you just deployed your app for a fraction of the cost! If you have any doubts, feel free to ask it here or in the comments section of the youtube video.
Original Link: https://dev.to/arnu515/deploy-your-nodejs-app-to-a-server-with-docker-1hcd
Dev To
More About this Source Visit Dev To