
An Interest In:
Web News this Week
- April 1, 2024
- March 31, 2024
- March 30, 2024
- March 29, 2024
- March 28, 2024
- March 27, 2024
- March 26, 2024
Some of Our Sources
- TutsPlus - Code
- Just Creative
- The Logo Smith
- Fuel Your Creativity
- Noupe
- Crazy Leaf Design
- My Ink Blog
- 24 Ways
- CSS Tricks
- Spyre Studios
Help Webnuz
Referal links:
How to write tests for React in 2020
Write React Test with react recommend librariesJest & React Testing Library for a complete beginner.
This article is intended to who just start to learn React and wonder how to write some simple tests with their React applications. And just like most of the people start to create React app using create-react-app, I would start with it as well.
First, let's start with the default example.
Default Dependencies with create-react-app (2020/05/22)
"dependencies": { "@testing-library/jest-dom": "^4.2.4", "@testing-library/react": "^9.3.2", "@testing-library/user-event": "^7.1.2", "react": "^16.13.1", "react-dom": "^16.13.1", "react-scripts": "3.4.1" }There is one test already written to help you to start.
// src/App.test.jsimport React from 'react';import { render } from '@testing-library/react';import App from './App';test('renders learn react link', () => { const { getByText } = render(<App />); //render is from @testing-library/react const linkElement = getByText(/learn react/i); expect(linkElement).toBeInTheDocument(); //expect assertion is from Jest});If you run the command $ yarn test App, you will see a similar result as the following:

With the default create-react-app setting, you can start to write a test without install or configure anything.
From the example above, we should learn -
Where and how I can put my test files? - as you can see
App.test.jsfile is put next toApp.jsfile in the same folder, and it put.test.jssuffix afterAppcomponent name as its filename. It is the default conventions suggested bycreate-react-appteam (link here).Jest and React Testing Library are the tools chain behind the test. They both are ship with create-react-app by default.
// setupTests.js// Jest is importing from a global setup file if you wonderimport '@testing-library/jest-dom/extend-expect';Second, write a test for NavBar component.
I am creating a NavBar component that contains links and logo in it.
First, I would start writing test without writing the actual component (Test Drive Development).
// navBar.test.jsimport React from 'react'; // use "screen" - a newer way to utilize query in 2020 import { render, screen } from '@testing-library/react'; import NavBar from './navBar'; // component to testtest('render about link', () => { render(<NavBar />); expect(screen.getByText(/about/)).toBeInTheDocument();})The test will fail first since I didn't write any code in navBar.js component yet.

With code below in navBar.js, the test should pass now.
// navBar.jsimport React from 'react';const NavBar = () => ( <div className="navbar"> <a href="#"> about </a> </div>);export default NavBar;For now, you should learn:
expect( ... ).toBeInTheDocument()assertion is from Jest.render(<NavBar />);andscreen.getByText(/about/)is from Testing Library.- Jest and React Testing Library work together to make writing tests in React easy.
screen.getByText(/about/)use "getByText" instead of select by class name is because React Testing Library adapting the mindset of focus on User experiences over implementation detail.
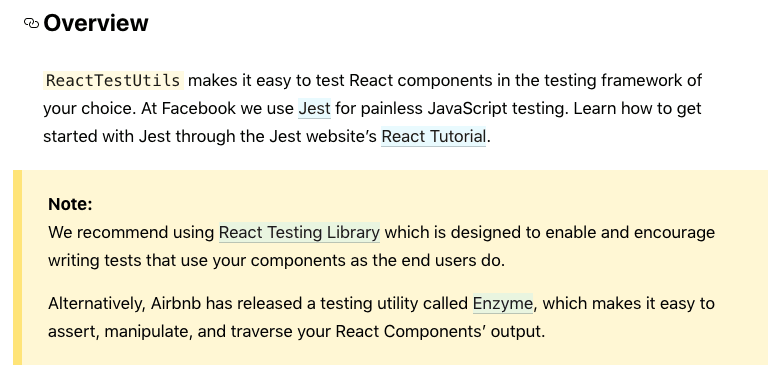
From https://reactjs.org/docs/test-utils.html#overview
- To learn more to expand and alter the test, you can check out the following resources:
Now lets expand the test and component to make it more real -
// navBar.test.jsimport React from 'react';import { render, screen } from '@testing-library/react';import NavBar from './navBar';// include as many test cases as you want hereconst links = [ { text: 'Home', location: "/" }, { text: 'Contact', location: "/contact" }, { text: 'About', location: "/about" }, { text: 'Search', location: "/search" },];// I use test.each to iterate the test cases abovetest.each(links)( "Check if Nav Bar have %s link.", (link) => { render(<NavBar />);//Ensure the text is in the dom, will throw error it can't find const linkDom = screen.getByText(link.text); //use jest assertion to verify the link property expect(linkDom).toHaveAttribute("href", link.location); });test('Check if have logo and link to home page', () => { render(<NavBar />); // get by TestId define in the navBar const logoDom = screen.getByTestId(/company-logo/); // check the link location expect(logoDom).toHaveAttribute("href", "/"); //check the logo image expect(screen.getByAltText(/Company Logo/)).toBeInTheDocument(); });This is what a NavBar component usually look like (maybe need to add some styles).
// navBar.jsimport React from 'react';const NavBar = () => ( <div className="navbar"> <a href="/" data-testid="company-logo"> <img src="/logo.png" alt="Company Logo" /> </a> <ul> <li> <a href="/"> Home </a> </li> <li> <a href="/about"> About </a> </li> <li> <a href="/contact"> Contact </a> </li> <li> <a href="/search"> Search </a> </li> </ul> </div>);export default NavBar;Third, write a signup form component test.
After writing a test for static content, let's write a test for more dynamic content - a signup form.
First, let's think in TDD way - what we need in this signup form (no matter how it look):
- An input field for name, which only allows string between 3 to 30 long.
- An input field for email, which can check whether it is a valid email address.
- An input field for password, which can check its complexity (at least 1 number, 1 string in lower case, 1 string in upper case, 1 special character)
- A submit button.
- All 3 inputs above are required, can't be empty.
Now, let's write the test.
/* Prepare some test cases, ensure 90% edge cases are covered. You can always change your test cases to fit your standard*/const entries = [ { name: 'John', email: 'john_doe@yahoo', password: 'helloworld' }, { name: 'Jo', email: 'jo.msn.com', password: 'pa$$W0rd' }, { name: '', email: '[email protected]', password: '123WX&abcd' }, { name: 'kent'.repeat(10), email: '[email protected]', password: 'w%oRD123yes' }, { name: 'Robert', email: '[email protected]', password: 'r&bsEc234E' },]Next, build up the skull of the test.
// signupForm.test.js// this mostly a input validate testdescribe('Input validate', () => { /* I use test.each to iterate every case again I need use 'async' here because wait for validation is await function */ test.each(entries)('test with %s entry', async (entry) => { ... })})Now, let building the block inside the test.
// signupForm.test.js...test.each(entries)('test with %s entry', async (entry) => { //render the component first (it will clean up for every iteration render(<SignupForm />); /* grab all the input elements. I use 2 queries here because sometimes you can choosehow your UI look (with or without Label text) withoutbreaking the tests*/ const nameInput = screen.queryByLabelText(/name/i) || screen.queryByPlaceholderText(/name/i); const emailInput = screen.getByLabelText(/email/i) || screen.queryByPlaceholderText(/email/i); const passwordInput = screen.getByLabelText(/password/i) || screen.queryByPlaceholderText(/password/i);/* use fireEvent.change and fireEvent.blur to change name input valueand trigger the validation*/ fireEvent.change(nameInput, { target: { value: entry.name } }); fireEvent.blur(nameInput); /* first if-statement to check whether the name is input.second if-statement to check whether the name is valid.'checkName' is a utility function you can define by yourself.I use console.log here to show what is being checked. */if (entry.name.length === 0) { expect(await screen.findByText(/name is required/i)).not.toBeNull(); console.log('name is required.'); } else if (!checkName(entry.name)) { // if the name is invalid, error msg will showup somewhere in the form expect(await screen.findByText(/invalid name/i)).not.toBeNull(); console.log(entry.name + ' is invalid name.'); };// With a similar structure, you can continue building the rest of the test. .../* Remember to add this line at the end of your test to avoid act wrapping warning.More detail please checkout Kent C.Dodds's post:(He is the creator of Testing Library)https://kentcdodds.com/blog/fix-the-not-wrapped-in-act-warning*/ await act(() => Promise.resolve()); })...For the complete Testing code, please find them here.
Ok, now the test is done (maybe we will come back to tweak a bit, but let's move on for now), let's write the component.
// signupForm.jsimport React from 'react';/* I borrow the sample code from formik library with some adjustmentshttps://jaredpalmer.com/formik/docs/overview#the-gist*/import { Formik } from 'formik';/* For validation check, I wrote 3 custom functions.(I use the same functions in test)*/import { checkName, checkEmail, checkPassword,} from '../utilities/check';const SignupForm = () => ( <div> <h1>Anywhere in your app!</h1> <Formik initialValues={{ name: '', email: '', password: '' }} validate={values => { const errors = {}; if (!values.name) { errors.name = 'Name is Required' } else if (!checkName(values.name)) { errors.name = `invalid name`; } if (!values.email) { errors.email = 'Email is Required'; } else if (!checkEmail(values.email)) { errors.email = 'Invalid email address'; } if (!values.password) { errors.password = 'Password is Required'; } else if (!checkPassword(values.password)) { errors.password = 'Password is too simple'; } return errors; }} onSubmit={(values, { setSubmitting }) => { setTimeout(() => { alert(JSON.stringify(values, null, 2)); setSubmitting(false); }, 400); }} > {({ values, errors, touched, handleChange, handleBlur, handleSubmit, isSubmitting, /* and other goodies */ }) => ( <form onSubmit={handleSubmit}> <label> Name: <input type="text" name="name" placeholder="Enter your name here" onChange={handleChange} onBlur={handleBlur} value={values.name} /> </label> <p style={{ 'color': 'red' }}> {errors.name && touched.name && errors.name} </p> <label> Email: <input type="email" name="email" placeholder="Your Email Address" onChange={handleChange} onBlur={handleBlur} value={values.email} /> </label> <p style={{ 'color': 'red' }}> {errors.email && touched.email && errors.email} </p> <label> Password: <input type="password" name="password" placeholder="password here" onChange={handleChange} onBlur={handleBlur} value={values.password} /> </label> <p style={{ 'color': 'red' }}> {errors.password && touched.password && errors.password} </p> <button type="submit" disabled={isSubmitting}> Submit </button> </form> )} </Formik> </div>);export default SignupForm;And the form will look similar like below (no much style, but good enough for our purpose), And with wrong input, the error message will show below the input:

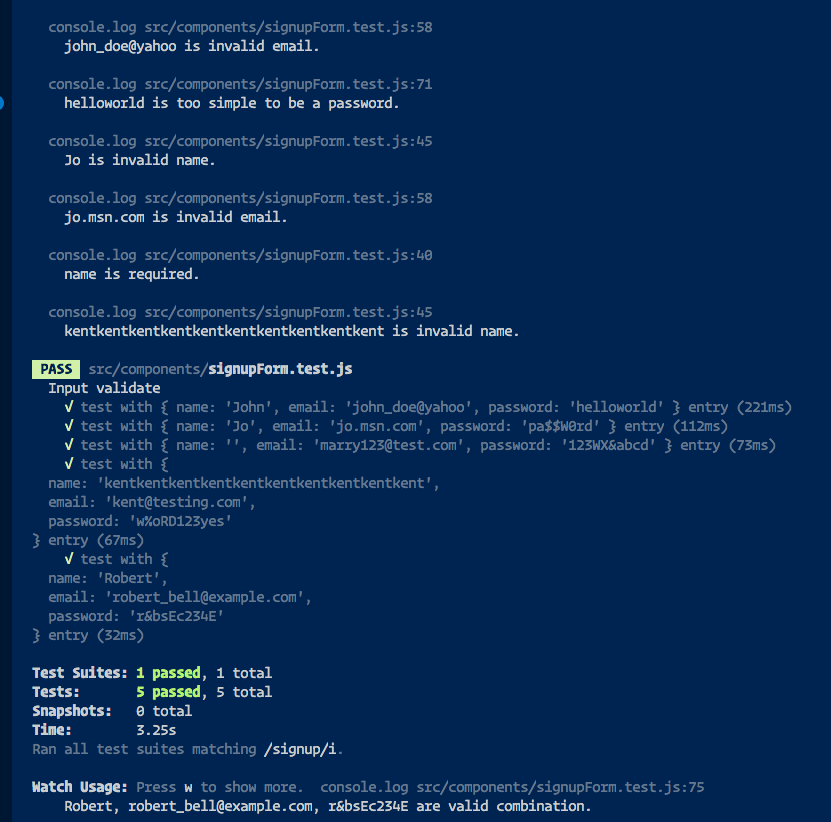
If you finished the test above, now the test should all pass, run yarn test --verbose in your command line, you should see something similar like this.with the verbose option and console.log message, you can see how each case is being tested and which one is a good case and which one is not.
For more testing code examples and different cases, please check out my repo here.

Final words.
For a beginner, it might be too much to learn at once (so just slow down, I learn it in an entire week), and unfortunately, this just the beginning of write test for react applications.
It is a hard topic to grasp, but I believe it is worthy to spend some time on it if you want to become a FrontEnd developer.
And the good news is, you have a good start, you should now know how to leverage Jest and React Testing Library to write a test around your react components, and you can start to explore other libraries and solutions out there with this good foundation.
I am planning to write another article to cover more advance examples if I got positive feedback on this article, Thanks again for your time.
Resources I have referred to this article::
- Common Mistakes with React Testing by Kent C.Dodds
- Fix the not wrapped act warning by Kent C.Dodds
- My Experience moving From Enzyme to React Testing Library (Opinion about which library to use for React Testing)
- Testing Library Recipes (More resources learn about React Testing Library)
- Inside a devs mindRefactoring and debugging a React test By Johannes Kettmann (I started to learn React Test with this article, but it is much more advance, I will write more about it later)
Original Link: https://dev.to/kelvin9877/how-to-write-tests-for-react-in-2020-4oai
Dev To
More About this Source Visit Dev To