
Some of Our Sources
- Slashdot
- BoingBoing
- Pearsonified
- Smashing Magazine
- Fuel Your Creativity
- FanExtra - PSD
- Reencoded
- Wal You
- The Verge
- TechPowerUp
Help Webnuz
Referal links:
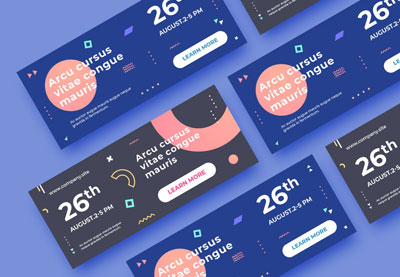
How to Make an Effective Web Banner

Website banners: we see them every day, and they are a great addition to your marketing campaign. In this tutorial, I'll show you how to make a banner. Banner designs and banner templates are composed of a couple of key elements: an offer and a call to action. You can add your logo if you’d like, and an image to enhance the message.
The offer needs to be concise and to the point. You have to let your readers know what you are promoting. The call to action is a text/button that will invite your consumer to your website. Short phrases like “Shop Now” or “Subscribe” are great anchors.
In this tutorial, we’ll design a half-page vertical banner that includes all the essential elements. We’ll apply this design to a pop-up banner size, which is a great example for you to see if you are planning on designing banner templates in the future.
Not ready to make a banner in Photoshop? Placeit is a great online ad maker that's easy to use and quick to customize. With hundreds of options to choose from, you are sure to find a banner template that suits your needs. Envato Elements also offers amazing and effective web banner templates and stock photos that can help you create a stunning campaign. Go check them out!
What You Will Need
You'll need access to Adobe Photoshop. If you don't have the software, you can download a trial from the Adobe website. You'll also need these assets:
Download the assets and make sure the font is installed on your system before starting. When you are ready, we'll get started on creating your website banner!
1. Setting Up a Web Banner Design File
Step 1
In Photoshop, go to File > New. Name the document Web Banner. Set the file to the following dimensions:
Width to 300 px
Height to 600 px
Orientation to Portrait
Resolution to 72 px
Color Mode to RGB
Click Create.

Step 2
Create margins around the document by going to View > New Guide. In the New Guide option window, select Horizontal and set the Position to 20 px. Click OK.
Go to View > New Guide, this time setting the Position to 580 px.

To create vertical lines, go to View > New Guide. In the option window, select Vertical and set the Position to 20 px. Click OK.
Go to View > New Guide, this time setting the Position to 280 px.

2. Designing Your Web Banner
Step 1
Drop the Blonde retro style image onto the document. The width of the image should match the width of the banner. If you need to resize, press Command-T to Transform.

Step 2
Press I to select the Eyedropper tool. Sample the yellow color on the image.
Head over to the Layers panel, and go to Create a New Fill or Adjustment Layer > Solid Color. The foreground swatch should automatically be set. If not, use the following code: #fcf1d3. Click OK.
Move the solid color layer under the image layer.

Step 3
Create a new layer on the Layers panel by pressing Shift-Command-N.
Using the Brush Tool (B) and the #fcf1d3 as foreground, brush over the top right corner of the image. This will create a seamless look.

Step 4
Select all the layers by holding down Shift and selecting the very first and the very last layers. Click on the Create a New Group button. Double-click on the folder and rename it Background.

Step 5
Select the Text Tool (T) from the toolbar. Add the offer or what you are advertising. In this case, I will add ‘Spring’ in a different font than the rest of the banner to emphasize the season.
Head over to the Character panel (Type > Panels > Character Panel). Set the Font to Awosem and the Size to 175 pt. Click on the Color swatch and set it to black.
Use the guides to place the text in the center of the banner.

Step 6
Using the Text Tool (T), add the rest of your copy. In this case, add the rest of the offer: ‘Sale, up to 50% off selected items. Online only.’ You can do this on a single layer or multiple layers.
Head over to the Character panel and use the following settings:
- SALE: Font Morton Bold, Size 110 pt. Set the Color swatch and set it to
#d82a2e. - UP TO 50%: Font Morton Bold, Size 110 pt, Leading 40 pt. Set the Color swatch to black.
- OFF SELECTED ITEMS: Font Morton Bold, Size 25 pt, Leading 25 pt.
- ONLINE ONLY: Font Morton Bold, Size 40 pt, Leading 35 pt.
Place this layer under the Spring layer. Select both layers and create a new folder named Copy.

Step 7
Now it’s time to create the call to action button. In this case, we will call it ‘Shop Now >.’
Using the Text Tool (T), add the call to action and use the following settings: Font Morton Bold, Size 110 pt, Tracking 100 pt. Set the Color swatch to black.
Using the Rectangle Tool (U), create a rectangle. Head over to the Control bar and set the color to white, the Width to 145 px, and the Height to 35 px.

Step 8
To make the call to action stand out, we’ll add a shadow. On the Layers panel, right-click on the Rectangle layer and select Blending Options.
In the Layer Style option window, check and select the Drop Shadow option. In the Drop Shadow settings, set the Opacity to 35%, Angle to 130, Distance to 10 px, and Size to 20px. Click OK.
Select the text and rectangle layers and combine them into one folder called ‘Call to action.’

3. Applying Your Web Banner Design to Other Sizes
There’s no right or wrong way to apply your web banner design to other sizes. Below, I'll show you an example of easily applying a half-page banner to a pop-up size. Use this as an inspiration and try to add your own spin. Then show us your design in the comments section below!
Step 1
In Photoshop, go to File > New. Name the document Web Banner 2. Set the file to the following dimensions:
Width to 500 px
Height to 350 px
Orientation to Portrait
Resolution to 72 px
Color Mode to RGB
Click Create.

Step 2
Create margins around the document. Go to View > New Guide. In the New Guide option window, select Horizontal and set the Position to 20 px. Click OK.
Go to View > New Guide, this time setting the Position to 580 px.
To create vertical lines, go to View > New Guide. In the option window, select Vertical and set the Position to 20 px. Click OK.
Go to View > New Guide, this time setting the Position to 280 px.

Step 3
Drop the Blonde retro style image and press Command-T to Transform. Head over to the Control bar and set the Width and Height to 75%.
Place the image to the left of the banner. A good guide is to have the elbow of the subject touching the margin.

Step 4
Head over to the Layers panel, and go to Create a New Fill or Adjustment Layer > Solid Color. Set the solid color to the following code: #ff634b. Click OK.

Step 5
Create a new layer on the Layers panel by pressing Shift-Command-N.
Using the Brush Tool (B) and #ff634b as the foreground color, brush over the edge of the image and the solid color to create a seamless look.

Step 6
Select all the layers by holding down Shift and selecting the very first and the very last layers. Click on the Create a New Group button. Double-click on the folder and rename it Background.

Step 7
Head back to the Web Banner 1 file. Go to the Layers panel, and select the call to action and Copy folders. Right-click and select Duplicate Layers.
In the Duplicate Layers option window, set the Document to Web Banner 2. Click OK.

Step 8
Head back to the Web Banner 2 file.
Select the Copy folder and press Command-T to Transform, moving the text towards the top left corner.
Open the folder and change the color of the ‘Sale’ text to #fceece.

Step 9
Place the call to action button above the bottom margin.

4. How to Export Your Banner Design for Web
Head over to File > Save and save the file as you would normally.
To save a JPEG for web file, head over to File > Save for Web or Shift-Option-Command-S. Select the file type you want to save the document in—I am choosing JPEG—and set 100 for Quality. Under Image size, you can change the pixel size of the image if you have any size constraints.
On the bottom left-hand side, you can see a preview of the size of the file. This is useful when there are size constraints on a website and you need to lower the quality or the size of the image.
Click on Save… to choose the location in the new window, and click on Save again.

Great Job! You’ve Finished Your Web Banner Template!
In this tutorial, we learned how to make a banner design. We covered tools that will help you design web banners for your next marketing campaign. Today, we learned to:
- set up a website banner file
- use Layer Masks
- organize layers into folders
- export a web-ready JPEG file
If you are new to Photoshop and need a banner template or promotional marketing templates right away, head over to Envato Elements and GraphicRiver. If you are in a hurry, don’t forget to check out Placeit. We’ve got many options for you to explore!

If you liked this tutorial, you might like these:
 Print DesignHow to Make a Banner
 Banner Ads20+ Online Ad Banner (Maker) Template Designs to Customise Now
 Flyers38 Stylish Flyer Templates (PSD Flyer Templates)
 Fonts25+ Best Free Hand Lettering Style Fonts (Designs for 2018)
 Graphic DesignThe Graphic Designer's Resource Kit
Original Link: https://design.tutsplus.com/tutorials/how-to-make-an-effective-web-banner--cms-32610
TutsPlus - Design
More About this Source Visit TutsPlus - Design