
An Interest In:
Web News this Week
- April 12, 2024
- April 11, 2024
- April 10, 2024
- April 9, 2024
- April 8, 2024
- April 7, 2024
- April 6, 2024
Some of Our Sources
- BoingBoing
- Pearsonified
- Smashing Apps
- Inspiredology
- Web Designer Depot
- My Ink Blog
- Line 25
- Spyre Studios
- Web Resource Source
- Willems Lab
Help Webnuz
Referal links:
How to Make a Fundraiser Flyer Template

Creating flyer templates that are easy to change up and versatile is an important skill to have in your arsenal. Learn how to make an event flyer that's easy to customize.
We will be using a few assets from Envato Elements that will take this flyer design to the next level. This fundraising event flyer has space for a couple of images and plenty of places for copy. I will walk you through the process of working with typography, hierarchy, vectors, and images. Let’s get started!
What You Will Need
You'll need access to Adobe InDesign and Adobe Illustrator. If you don't have the software, you can download a trial from the Adobe website. You'll also need the following assets:
Download the assets and make sure the font is installed on your system before starting. When you're ready, we can dive in and create our fundraiser flyer template!
Looking for amazing InDesign Templates? Head on over to GraphicRiver.
1. Setting Up a New Adobe InDesign File
Step 1
For this tutorial, we will be using an A5 size flyer. This is the most popular size for a flyer design like this.
In InDesign, go to File > New. Name the document Fundraiser brochure. Change the Units to Centimetres. Set the Width to 14.8 cm and Height to 21 cm. Set the Orientation to Portrait. Click OK.
Set the Margins to 1 cm. Set the Bleeds to 5 mm. If you are using a professional printer, ask them what kind of bleed they would like you to use. Click Create.

Step 2
Before we start the project, let’s create a grid so that it's easier to align the elements. Head over to Layout > Create Guides. In the Create Guides option window, set the Rows Number to 10 and the Gutter to 0. Set the Columns Number to 2 and the Gutter to 0.5 cm. Under the Options, set the Fit Guides to: Margins and click OK.
Show/Hide the guides and margins by pressing Command-;.

2. How to Create Shapes and Place Images in Your Flyer Design
Let's create the elements that will go between the second and fifth rows of the document.
Step 1
Let’s create two rectangles. The first will house an image, and the second will have text.
On the Toolbar, select the Rectangle Tool (M). Click on the document, and in the Rectangle window option, set the Width to 10.5 cm and the Height to 7.3 cm. Click OK.
Create a second rectangle, this time setting the Width to 6 cm and the Height to 7.3 cm. Click OK.

Step 2
On the Toolbar, select the Direct Selection Tool (A). Select the two points on the right side of the first rectangle, right click, and select Transform > Shear. In the Shear option window, set the Shear Angle to 30° and the Axis to Horizontal. Click OK.
Using the Direct Selection Tool (A), select the two points on the left side of the second rectangle. Right click and select Transform > Shear. In the Shear option window, set the Shear Angle to 30° and the Axis to Horizontal. Click OK.
Below, I’ve highlighted the four points you need to work with in this step.

Step 3
Select the first shape we created. Press Command-D to Place an image. Look for the Woman Holding Heart Shape on your computer. Click Open.
Using the Direct Selection Tool (A), select the image inside the element. Head over to the Control panel, and activate the Constrain Proportions for Width and Height button. This is so that the image resizes proportionally. Set the Percentage to 20%.

Step 4
You will notice that the image doesn’t quite fit on one side. It is common to mirror images to fit the design. Using the Direct Selection Tool (A), select the image inside the element. Right-click and select Transform > Flip Horizontal.
With the Direct Selection Tool (A), move the image around to find a good framing. When framing photos with people, try not to cut through the head. This will make for an odd-looking crop.

Step 5
Using the Selection Tool (V), select the element. Head over to the Control panel and set the Stroke Color as Paper. On the right side, set the Stroke Weight to 4 pt. This is so that the stroke separates the image from the shape we will place behind it in the next step.
Feel free to use the Direct Selection Tool (A), to select the two points closest to the bleeds and extend them. This is so that, when the document is printed, we don’t get the white outline.

Step 6
Let’s work on the duplicated shape we created. Duplicate it once more by pressing Option and dragging. We'll work with one shape and have the other one standing by.
Head over to the Toolbar, and select the Rectangle Tool (M). Click on the document, and in the Rectangle option window, set the Width to 8 cm and the Height to 3.65 cm. Click OK.
We need to crop the top section. Place this rectangle over one of the duplicated shapes. Head over to Object > Pathfinder > Subtract.

Step 7
Head over to Window > Color > Swatches to expand the Swatches panel. Choose New Color Swatch button from the main menu.
Set the values to C=0 M=100 Y=100 K=10. Click Add and OK.
We need to add a darker red for contrast. Repeat this process with these values: C=0 M=100 Y=100 K=42.

Color the bigger shape with the lighter red and the smaller shape with the darker red.
Make the darker shape overlap the lighter shade. To bring the element to the Front, press Shift-Command-]. If you need to move the element to the Back, press Shift-Command-[.
Place both elements just below the image.

Step 8
We will add a quote to the flyer with an image. This time, we will contain the image in a circle. Place this between the ninth and tenth row of the document. Head over to the Toolbar and select the Ellipse Tool (L). Click on the document and set the Ellipse Width and Height to 2 cm. Click OK.
Head over to the Color Swatches panel and select [Black]. Move the Tint setting to 10%.
Bring up the Stroke panel by going to Window > Stroke. Set the Weight to 4 pt.

To place a photo, press Command-D. Find the Woman Smiling photo on your computer. Click Open.
Using the Direct Selection Tool (A), select the image inside the circle. Head over to the Control panel, and activate the Constrain Proportions for Width and Height button. This is so that the image resizes proportionally. Set the Percentage to 5%.

Step 9
It isn’t always necessary to create a rectangle to add an image/vector. As an example, we will add a logo in this step. Place this logo on the first row of the document. To Place a file, press Command-D and find the logo on your computer. Click Open.
Click anywhere on the document to place the file. Head over to the Control panel and set the Height to 1.5 cm. You will notice that the image is bigger than the frame. In order to fix this problem, we can make the content fit the frame. Right click on the frame, and click Fitting > Fit Content Proportionally. You can also press Shift-Option-Command-E.
Place the logo on the top left corner margin.

3. How to Format Typography in Your Flyer
Step 1
On the Toolbar, select the Text Tool (T). Draw a text box that fits from the left to the right margin of the flyer, in the center of the page. We can adjust the height as we go.

Step 2
Add text to the text box by copying and pasting. Use Command-C to Copy and Command-V to Paste.
For this project, we will add the headline of the flyer in the same text box as the copy. Select the text box and press Command-B to access the Text Frame Options. Alternatively, right click on the text box and select Text Frame Options.
In the Text Frame Options window, check the Preview box to see the changes live. Set the Column Number to 2 and the Gutter to 0.5. Check the Balance Columns box. Click OK.

Step 3
The text box option in InDesign gives us the option to have multiple hierarchy elements in one box. Head over to Window > Type & Tables > Paragraph to expand the Paragraph panel.
The two first lines will be the headline. Select these two lines and the empty line underneath with the Text Tool (T).
Head over to the Paragraph panel. From the main menu, select Span Column. On the new window, set Span to All. This will expand the headline across the two columns while keeping the original two body copy columns. Click OK.

Step 4
Bring up the Character panel by going to Window > Type & Tables > Character or pressing Command-T.
To create contrast, add some text over the main headline. Set it to Catesque, Regular and Size 14 pt. This space is great for a call to action.
Select the headline and set the font to Catesque, Black and Size 32 pt. Change the color on both sections to the lighter red swatch.

The body copy should be set to a normal point size that is legible. In this case, I set it in Catesque, Light and Size 10 pt. To add contrast and highlight to the website, set it to Catesque, Bold. Additionally, change the color on the Swatches panel to the lighter red swatch.

Step 5
Let’s add a few more details. Using the Text Tool (T), create a text box on the top right corner of the flyer. Here we can add a hashtag to follow on social media and a website as a quick reference for the audience. Alternatively, here you can add an address or a phone number. Set this text box in Catesque, Medium and Size 8 pt.

We will also be adding a quote from a past participant to go with the circled photograph. If this is a flyer for a product, this could be a review. Set this text box in red; this swatch should be saved in your color swatches. Set the font to Catesque, in Light and Bold. This is a great way to create contrast and highlight the most important part of a quote.
In a smaller type (Size 7 pt) and set in Catesque, Light Italic is the name of the person quoted.
You will notice that the lines of text are aligned to the quotation mark. This is called hanging quotations. This is great so we don’t disturb the flow of the reader, and it is visually pleasing. To do this, type Command-\ and all the text included in the paragraph will be shifted.

Step 6
Place the rounded photograph on the right side of the text box. This is great to create a balance with the bigger photo at the top.
Select the quote text box and the rounded photograph using the Selection Tool (V). Bring up the Align panel by going to Window > Object & Layout > Align. On the panel, press the Align Horizontal Center button.

To Group these two objects, press Command-G. This time, on the Align panel, set the Align To option to Page. Click on the Align Vertical Center button.

Step 7
Using the Text Tool (T), create two additional boxes over the red vectors we created. These are great placements for a short call to action and details about an event. I’ve set these two text boxes in Size 12 pt, but I used two different weights: Regular and Black. This is to create contrast as one message is more important than the other.

4. How to Add Vector Icons
Step 1
On the Toolbar, select the Rectangle Tool (M). Click on the document and set the Width to 15.8 cm and the Height to 2.25 cm. Place the rectangle at the bottom of the flyer. Make sure that the left, right, and bottom edges are touching the bleed marks.
Lock the rectangle by pressing Command-L. This is useful so that the Text Tool (T) doesn’t create a text box within the rectangle.

Step 2
Let’s create a text box for contact information. Using the Text Tool (T), draw a text box. On the Control panel, set the Width to 12.8 cm and the Height to 0.45 cm.
While selecting the text box, press Command-B to open the Text Frame Options. Under Columns, set the Number to 3. Click OK.
Here, we can add contact information: business/charity name, address, phone and fax number, and email addresses. Because it is smaller information, set the font to Catesque, Light and Size to 6 pt.

Step 3
For a professional look, we can add icons to this section. Open the Contact Icon Set file in Adobe Illustrator. Select the Solid style icons and ungroup by pressing Shift-Command-G.
Select the map, email and phone icons by pressing Shift and clicking on each icon. Press Command-C to Copy.

Step 4
Head back to the InDesign file. Press Command-V to Paste. On the Control panel, set the Color swatch to [Paper]. The icons will be grouped; to ungroup them, press Shift-Command-G.
To resize the icons, select each icon and head over to the Control panel. Activate the Constrain Proportions button as we will set only the Height. The Width will change automatically. Set the Height to 0.45 cm.

Step 5
Select all three icons. Head over to Window > Text Wrap. On the Text Wrap panel, activate the Wrap Around Bounding Box button and set the Right Offset to 0.2 cm. This will push the text to the right when we place the icons over the text. box. Move each icon to the left side of each column.

The flyer seems bottom heavy. To add balance to the top of the poster, create a rectangle using the Rectangle Tool (M). Set the Width to 15.8 cm and the Height to 0.75 cm. Place the rectangle at the very top of the poster, making sure the sides and top are touching the bleed marks.

5. How to Export a File for Printing
Before exporting a file for printing, is useful to take a look around all the edges of the flyer. This is to make sure all the images and vectors bleeding out are touching the bleeds. Press W to go between Preview mode and Normal mode.
Step 1
To export the file, go to File > Export. Name the file Fundraiser brochure, and choose Adobe PDF (Print) from the Format dropdown menu. Click Save.

Step 2
In the Export Adobe PDF window, set the Adobe PDF Preset to Press Quality.

On the left side of the panel, select Marks and Bleeds. Check All Printer’s Marks and Use Document Bleed Settings. Click Export. You will have a PDF file ready to be printed.

Great Job! You’ve Finished This Tutorial!
In this tutorial, you’ve learned how to make a timeless flyer design. This fundraiser flyer template is easy to customize even if you are not a designer. It has all the necessary elements that allow you to edit it quickly and easily. Today, we've learned to:
- set up a ready-to-print file in Adobe InDesign
- properly place images into frames
- format typography for the different sections of the flyer
- use the Text Wrap tool
- export a ready-to-print PDF file
If you would like to explore more flyer ideas, you can find many customizable event flyer templates over at Graphic River and Envato Elements. Check it out!

Interested in taking a course on how to make an event flyer? Visit this short course by Melody Nieves and take a look!
If you liked this tutorial, you might like these:
 Marketing20 Business Flyer Templates With Creative Layout Designs
 Adobe Photoshop50+ Amazing Christmas and New Year's Eve Flyers for the Holiday Season
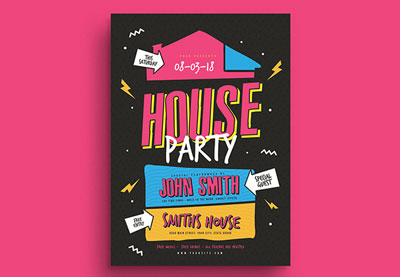 Flyers18 Best New Event Flyers for 2018
 FlyersHow to Create a 90s Style Event Flyer in Adobe InDesign
Original Link: https://design.tutsplus.com/tutorials/how-to-design-a-fundraiser-flyer-template-in-adobe-indesign--cms-32149
TutsPlus - Design
More About this Source Visit TutsPlus - Design