
An Interest In:
Web News this Week
- April 27, 2024
- April 26, 2024
- April 25, 2024
- April 24, 2024
- April 23, 2024
- April 22, 2024
- April 21, 2024
Some of Our Sources
- Techcrunch
- Technology Review
- Pearsonified
- Smashing Apps
- Abduzeedo
- Crazy Leaf Design
- Web Design Ledger
- Specky Boy
- Web Resource Source
- Hashedout
Help Webnuz
Referal links:
How to Create a Set of Food Icons in Adobe Illustrator
Hey, everyone! Less is more, right? In this tutorial you will learn how to create three food-related icons in a unique style, using simple shapes, shadows and halftones.
1.Create a Background
Let’s create a600 x 300 px New Document. Using theRectangle Tool (M), create a600 x 300 pxrectangle,color #958496,click twice on the layer you just created andname it "background", and click on the lock icon to lock the layer.

2.Create the Tea Icon
Step 1
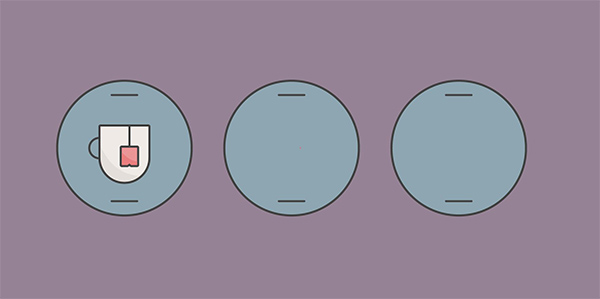
Using the Ellipse Tool (L),create a130 x 130 pxcircle(fill color #8EA5B2, stroke color #444444, 2 pt—please always use these stroke parameters in this tutorial). Hold Alt and drag the mouse to the right, to duplicate the circle. Press Control-D to transform again. You should have three identical circles.

Step 2
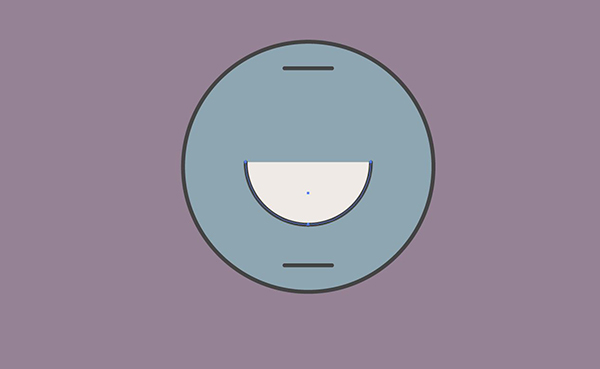
Create a147x147 pxcircle(fill color #EFEAE6). Using theStroke panel, make all strokes rounded and Align Stroke to Outside.

Place the circle you just created in the middle of the first blue circle and, using theDirect Selection Tool (A), select the upper point and hit Backspace to delete it. Using theAlign panel,with both shapes selected, click on the blue circle to make it active and click on Horizontal Align Center.

Using thePen Tool (P),create a shape as shown in the picture below and drag it a little below the center.

Step 3
Create a circle, using the same stroke parameters,around20 x 20 pxand, using theDirect Selection Tool (A) as before, delete the right anchor point as shown in the pictures below.


Step 4
Let's create a shadow. Select the cup shape and useAlt toduplicate it next to the art board.
Now use thePen Tool (P) tocreate a shadow shape as shown in the picture, and make it 5% black. Using the Pathfinder panel, click on Intersectto separate the shapes.
Now you have a shadow. Place it on our Tea icon.

Step 5
Let's create the tea bag. Select thePen Tool (P)and draw a line about 20 px long starting from the cup's upper edge.
For the tea bag, create a15 x 17 px rectangleshape(fill color #EB9696, keep the stroke the same as everywhere else, anddon'tforget to Align Stroke To Outside).

Using theAdd Anchor Point Tool (+),create three points on the bottom of the tea bag and with theDirect Selection Tool (A) click in the middle and drag it up a little.

Step 6
Create a shadow for the tea bag the same as for the cup, using a slightly darker shade for the shadow color.

Step 7
Using thePen Tool (P),create two lines about25 px long, place them as shown in the picture, and group them(Control-G). With the grouped lines and the blue circle selected, go to the Align panel and click on Horizontal Align Center and Vertical Distribute Center.

Follow the same process with the grouped lines for all three circles.
3.Create the Hamburger Icon
Step 1
Using theEllipse Tool (L),create a75 x 57 px circle (the same color and stroke as for the cup). Place it in the middle of the second blue circle—this will be our hamburger icon.
Take theLine Segment Tool (\) and create a line like this.

With the smaller circle and the line selected, open thePathfinder panel.

Take theDirectSelection Tool (A)and delete every point under the line, including the line itself. Round the corners using the handles.

Step 2
Usingthe Rectangle Tool (M),create a 50 x 7 px rectangle(fill color#EB9696, keep the stroke the same as everywhere else, anddon'tforget to Align Stroke to Outside).Make the corners round.

Step 3
Create a shadow the same way as for the tea bag, using the same fill color.
Step 4
Use thePen Tool (P) tocreate a line about 50 px long. Go to Effects > Distort & Transform > Zig Zag.

Make the size 1 px,Ridges per segment 7, Points Smooth, and then select Preview to see if you are happy with result and click OK.

Step 5
Using theRectangle Tool (M),create a50 x 8 pxrectangle(the same color and stroke as for the cup).
Using theDirect Selection Tool (A), select the points and withthe left and right arrowsmake it look like a trapezoid. Round the corners a little.

4.Create the Soup Icon
Step 1
Using theEllipse Tool (L), create a66 x 66 pxellipseusing the same white color and stroke. Take theDirect Selection Tool (A)and delete the upper point.

Step 2
Using thePen Tool (P)create a shape like this:

Fill it with the same red color as we used before.
Step 3
Create a shadow for the bowl the same way as for the tea bag, using the same fill color.

Ok, we are almost done!
5.Create a Halftone Shadow
Using theEllipse Tool (M), create a0.3 px circle (fill color #2D2A2D) and just drag it into theSwatch panel. Click twice on your new swatch and click Done.
That'sbasicallyit! Create a circle and fill it with halftone pattern and place it behind your icons. As for the hamburger icon, Control-C / Control-F to copy and paste in front of the selected object, lose the stroke and fill in with halftone pattern. Go to theTransparency panel and, with both shapes selected, choose 40%.

That’s All for Now
That's it! Hope you learned how to create icons and halftone swatches and will be able to create something new on your own! See you in the next tutorial!
Original Link:
TutsPlus - Design
More About this Source Visit TutsPlus - Design