An Interest In:
Web News this Week
- April 30, 2024
- April 29, 2024
- April 28, 2024
- April 27, 2024
- April 26, 2024
- April 25, 2024
- April 24, 2024
Some of Our Sources
- Technology Review
- Joshua Blankenship
- Six Revisions
- Noupe
- Line 25
- Specky Boy
- Web Resource Source
- Codrops
- Android Headlines
- Hashedout
Help Webnuz
Referal links:
How to Properly Add a Stroke Using Photoshop Layer Styles
Photoshop layer styles are a popular way to add effects, such as drop shadows and strokes, to layers in a non-destructive way. With the right knowledge and experience, any effect can be achieved. To achieve these effects, however, you need to understand what each setting does and how they can be combined to create a certain look. In this series by John Shaver from Design Panoply, we will explain every aspect of Photoshop’s layer styles feature and show you how to unlock their potential.
In this article, Part 11: How to Properly Add a Stroke Using Photoshop Layer Styles, we will explain the settings behind Stroke, and the ways it can be used to create different effects. Let’s get started.
The Uses for Stroke
The Stroke effect is used to add strokes and borders to layers and shapes. It can be used to create solid-color lines, colorful gradients, as well as patterned borders.
Although you can only apply the Stroke effect once, it can be used in conjunction with other effects to create more interesting and diverse styles.

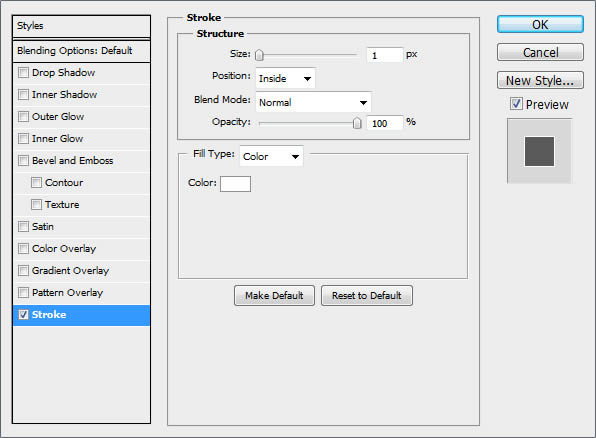
The Layer Styles Stroke Dialog Box
Stroke is one of the easiest effects to work with, because almost all the settings are self explanatory. When you change any of the settings, it’s very easy to see the difference on your canvas.
There are a few tricks to the stroke effect though. Let’s find out what they are.
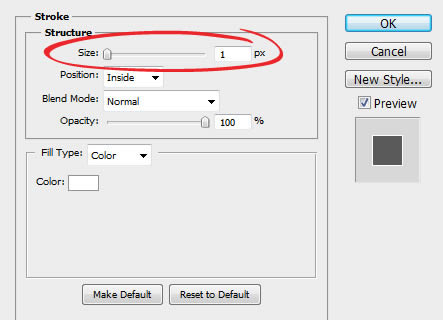
Size
The Size slider simply sets the width of your stroke, anywhere from 1px to 250px.