Abduzeedo is a blog about design. There are all sorts of articles for those who want to look for inspiration. Also you will find very useful tutorials for the most used applications out there, with a special selection of Photoshop Tutorials and Illustrator Tutorials. You can get in follow us via Twitter at @abduzeedo
Metal Car Logo Effect in Photoshop
Last week I discovered a new Web site about chrome logos in cars. I spent hours browsing through that site and it's definitely one of my favorites right now. The site is called Chromeography and you can visit at https://chromeography.com/. The site inspired me so much that I decided to try to do something in Photoshop.
So in this tutorial I will show you how to create a nice chrome effect in Photoshop using only Photoshop. The process is a bit long but it is a very useful technique and there is still a lot to evolve in terms of layer styles values.
Step 1
Open Photoshop and create a new document. I am using 2560x 1600 pixels. After that fill the background layer with red, like Ferrari red, or blood red :)
Step 2
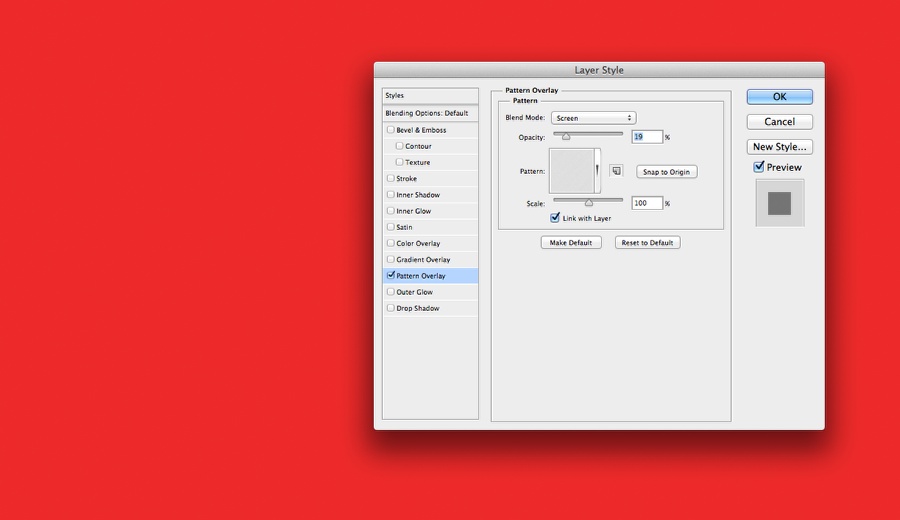
Go to Layer>Layer Styles>Pattern Overlay. Select a metal texture. I am using a light aluminun effect from https://subtlepatterns.com
Step 3
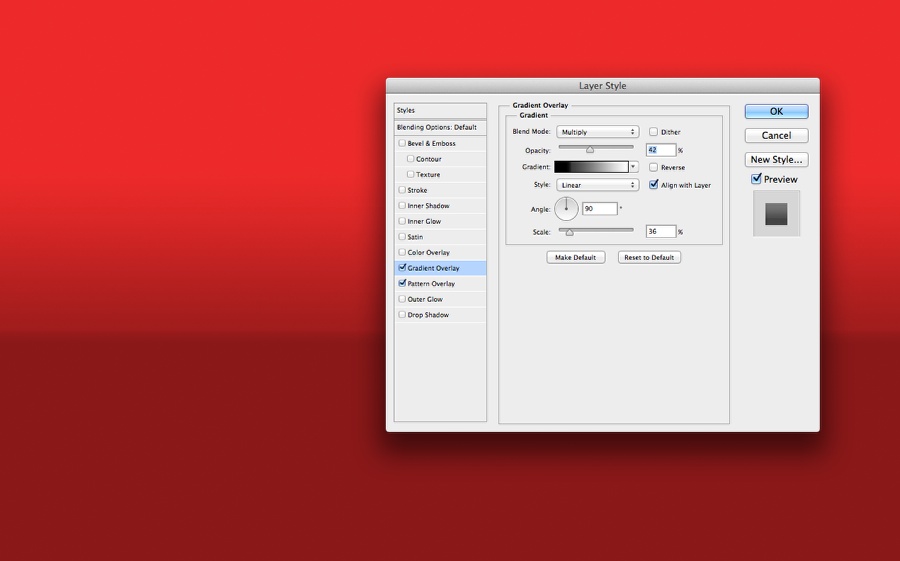
Click on Gradient Overlay. Use black and white for the color but notice that the black is a bit close to the center. Also change the Blend Mode to Multiply at 40% Opacity. Afte that change the Scale to 35%.
Step 4
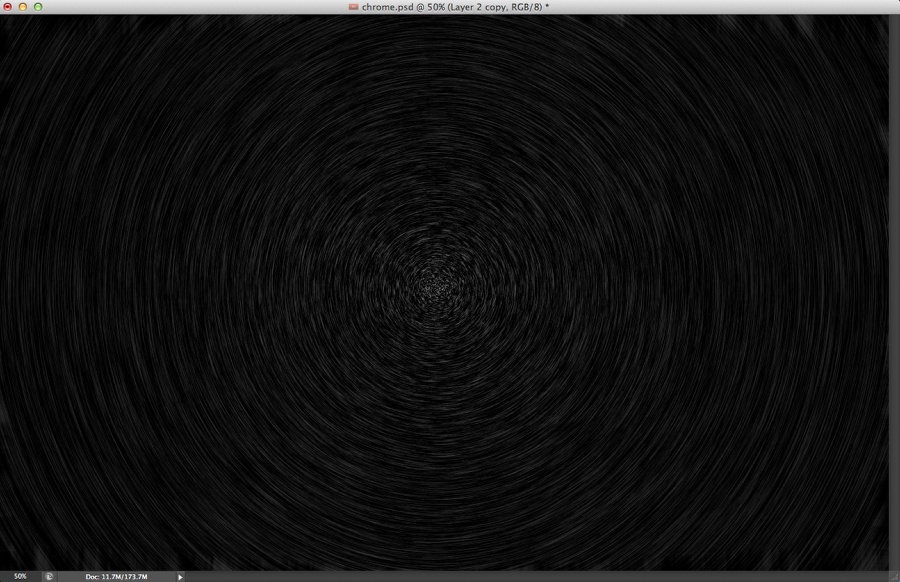
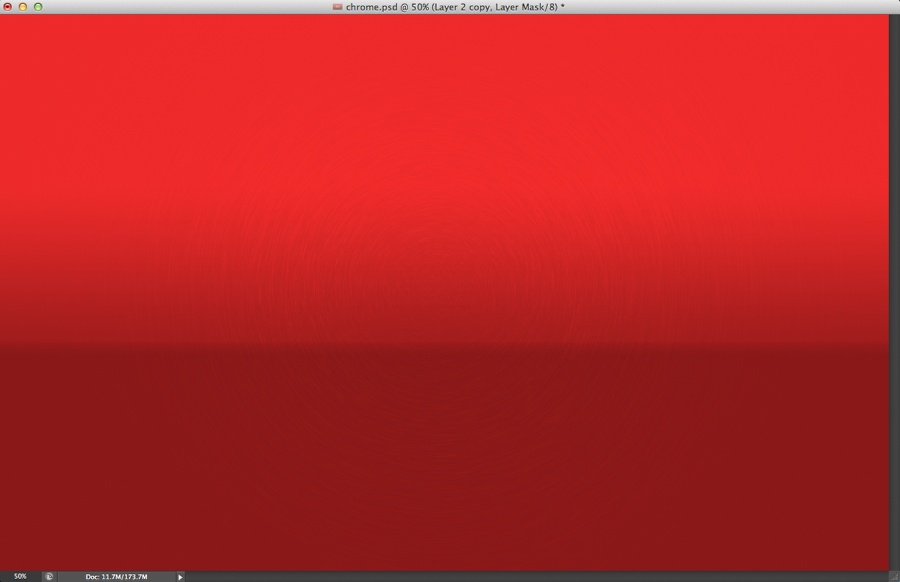
Add a new layer on top of the others and fill it with white. After that make sure you have black and white for the foreground and background color, then go to Filter>Noise>Add Noise. Use 10% for the amount. After that go to Image>Adjustments>Invert, then go to Image>Adjustments>Levels. Then make sure that the background is almost black with just some white details. The last thing to do here is go to Filter>Blur>Radial Blur. Use Best for the Blur Method and Best for the Quality.
Step 5
Change the Blend Mode to Color Dodge.
Step 6
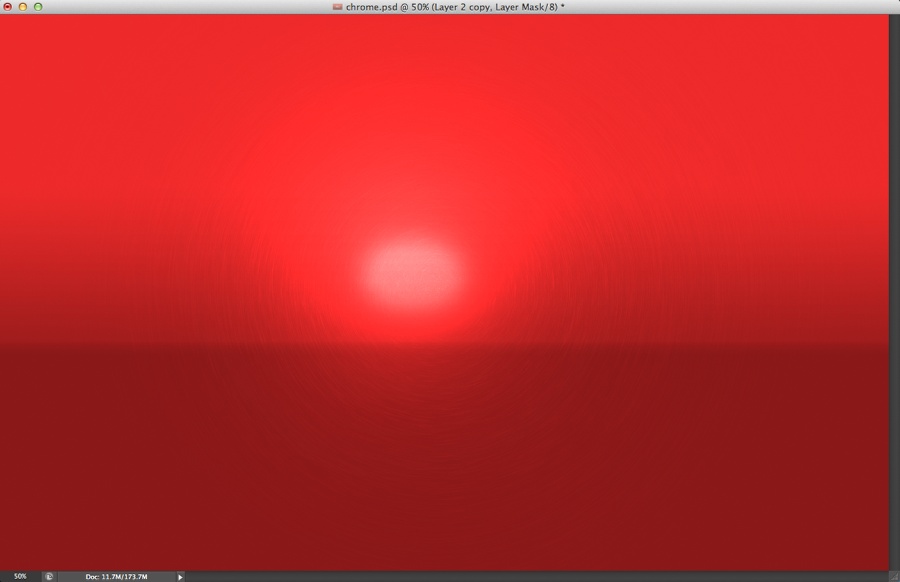
Add a new layer and group into a folder. Change the Blend Mode of the folder to Color Dodge. Select the layer inside the folder and then with the Brush Tool (B) use a very soft brush with white. Paint almost in the center of the image a little highlight. Use the image below fore reference.
Step 7
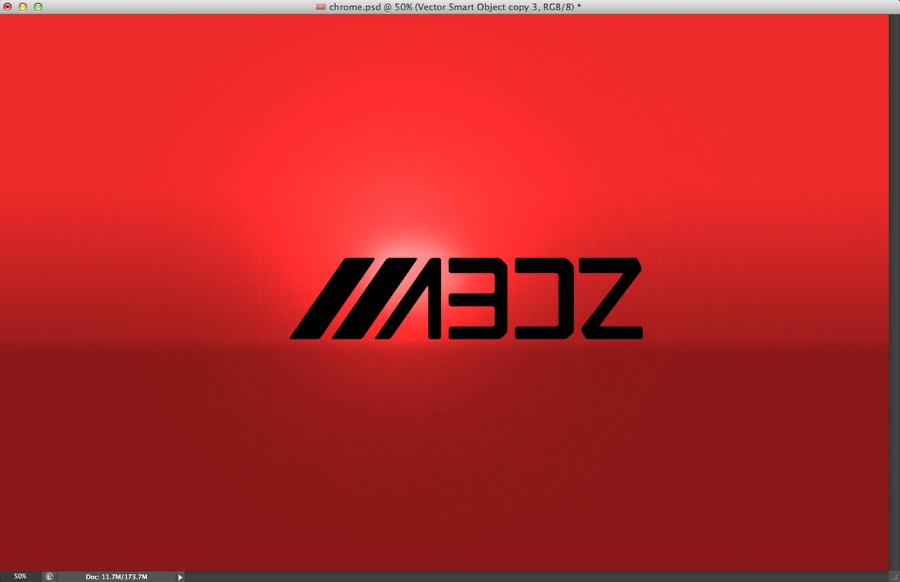
Add the text you want to apply the chrome effect. The one I am using I created in illustration and it is inspired by AMG cars
Step 8
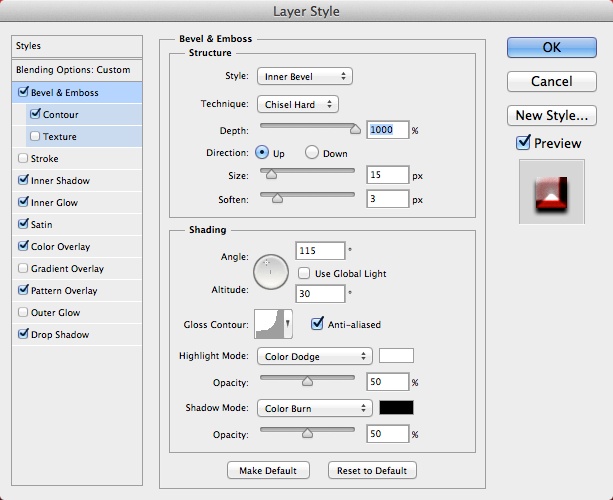
Let's add some layer styles. Just follow the images below for the values.
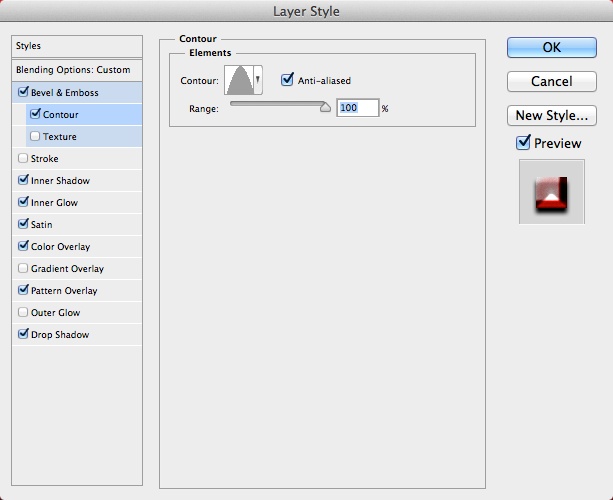
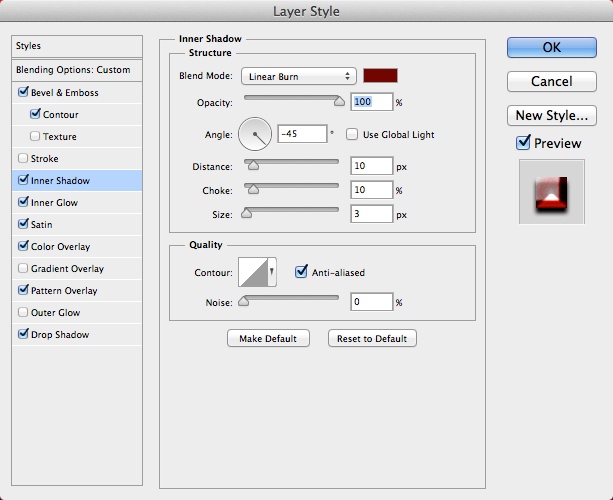
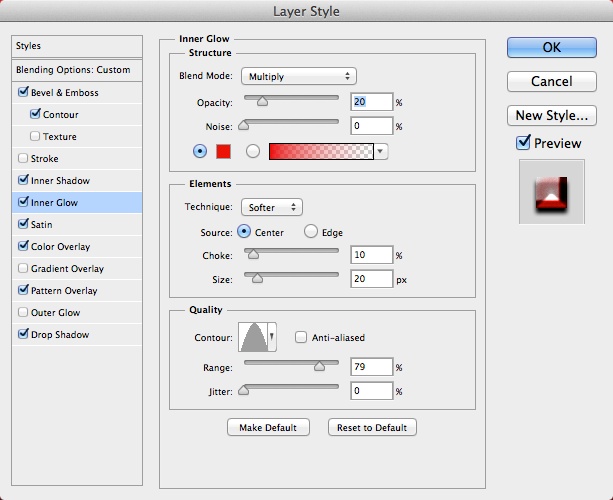
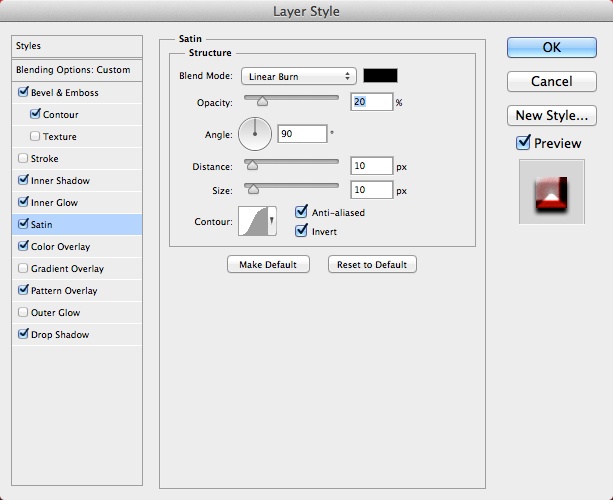
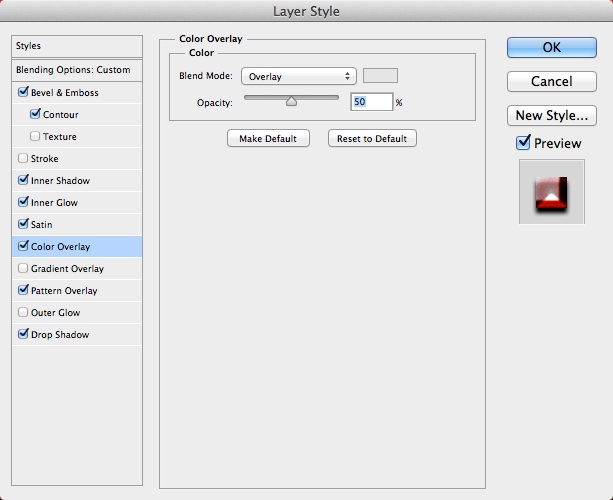
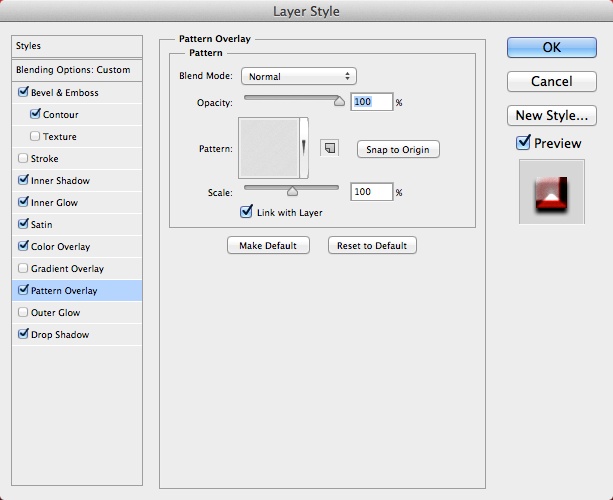
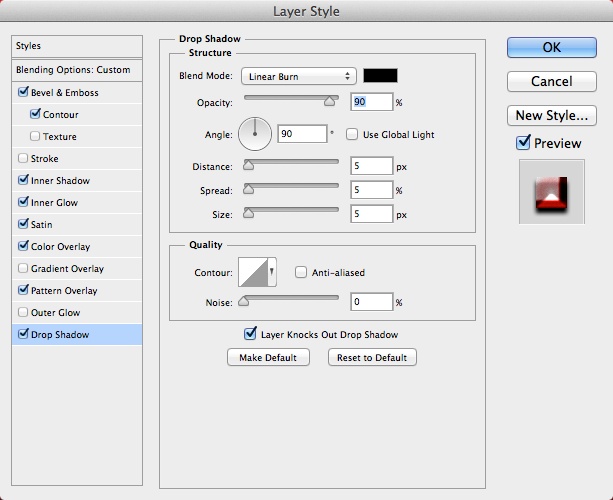
Step 9
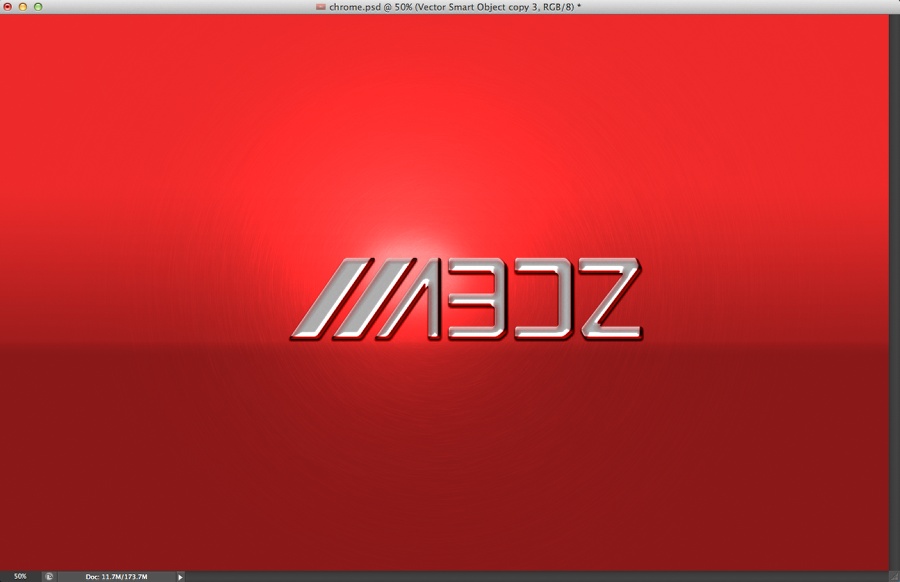
This is the final result you will get after the layer styles.
Step 10
Now let's add some adjustments. The first thing to do is go to Layer>New Adjustment Layer>Gradient Map. Use the defaul black and white and change the Blend Mode to Soft Light.
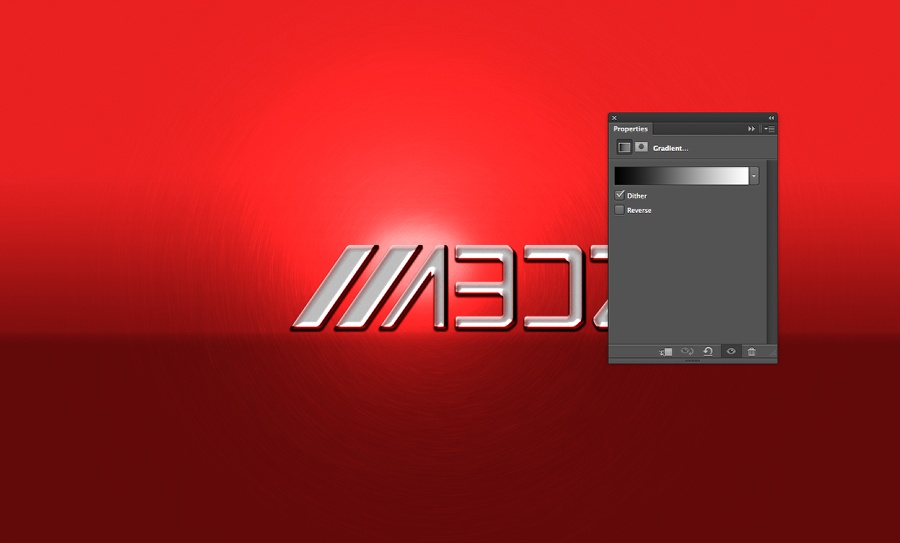
Step 11
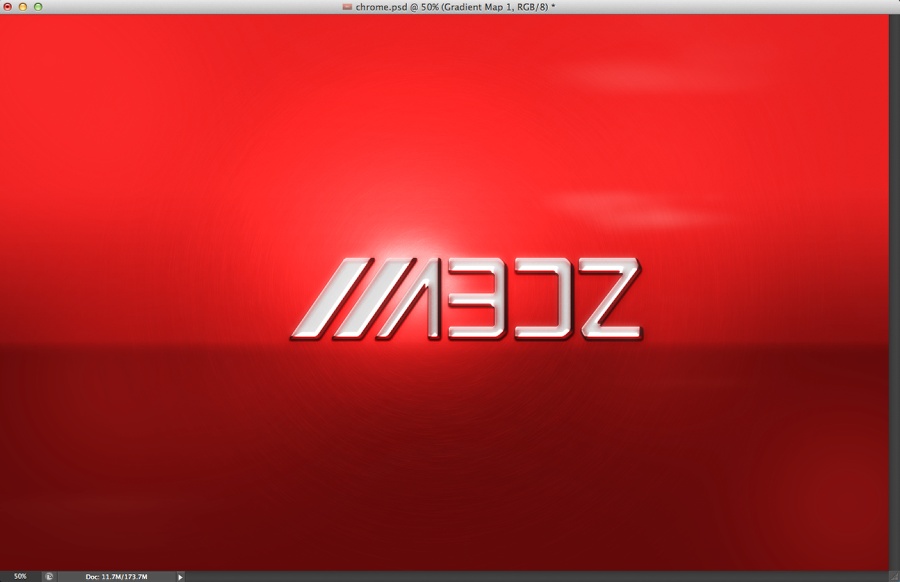
Select all layers and duplicate them. After that merge all the new layers into one, then go to Filter>Blur>Gaussian Blur. Use 5 pixels for the radius. Change the Blend Mode to Overlay at 100%. Duplicate this layer and change the Blend Mode to Screen at 50%. With the Eraser tool delete some areas of these two layers to create some differences in the light. Use the image below for reference.
Step 12
Add another layer and group it into a folder. Change the folder's Blend Mode to Color Dodge. After that with the Brush Tool (B) and a soft white brush create a reflection on top of the letter A.

Step 13
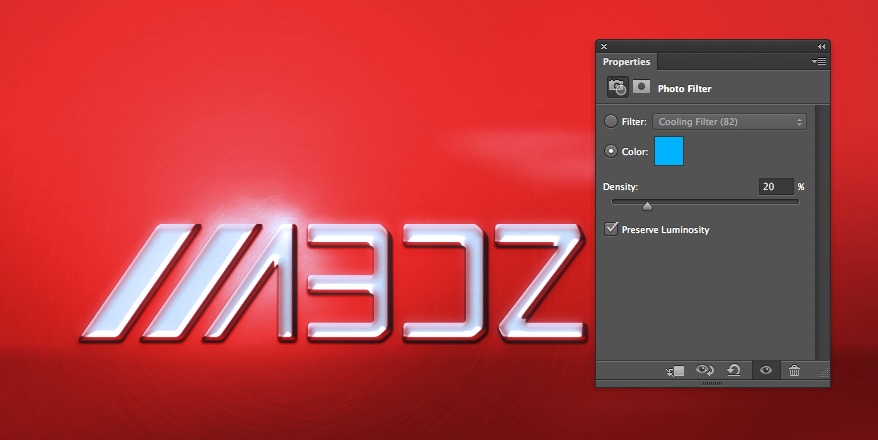
Go to Layer>New Adjustment Layer> Photo Filter. Use Cooling Filter (82) with 20% Density.
Conclusion
And here we have it, a nice chrome effect using just layer styles and basic Photoshop filters. Of course we can improve this effect and make it even more realistic, it's all about playing with the Layer Styles values. But that is up to you now :)

Download the Photoshop file
Download the Photoshop file used for this tutorial

Original Link: http://feedproxy.google.com/~r/abduzeedo-tutorials/~3/YOU7tZfXsAY/metal-car-logo-effect-photoshop
Abduzeedo
 Abduzeedo is a collection of visual inspiration and useful tutorials
More About this Source Visit Abduzeedo

