
An Interest In:
Web News this Week
- May 1, 2024
- April 30, 2024
- April 29, 2024
- April 28, 2024
- April 27, 2024
- April 26, 2024
- April 25, 2024
Some of Our Sources
- BoingBoing
- Technology Review
- The Logo Smith
- Six Revisions
- Vandelay Design
- You The Designer
- Web Designer Depot
- Noupe
- Stylized Web
- Wal You
Help Webnuz
Referal links:
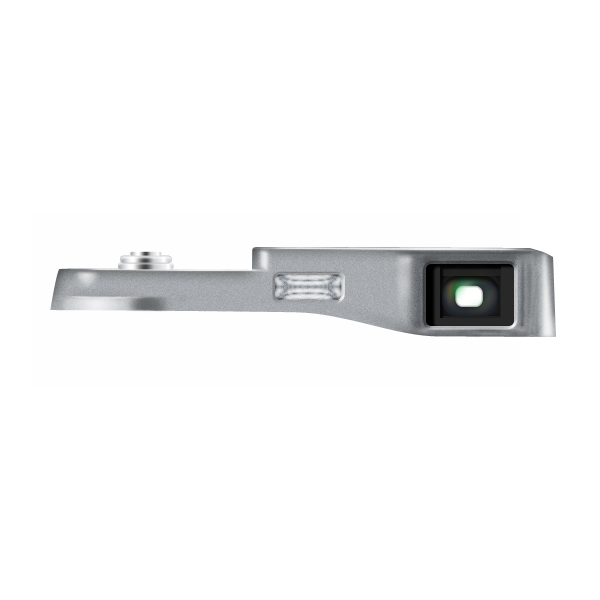
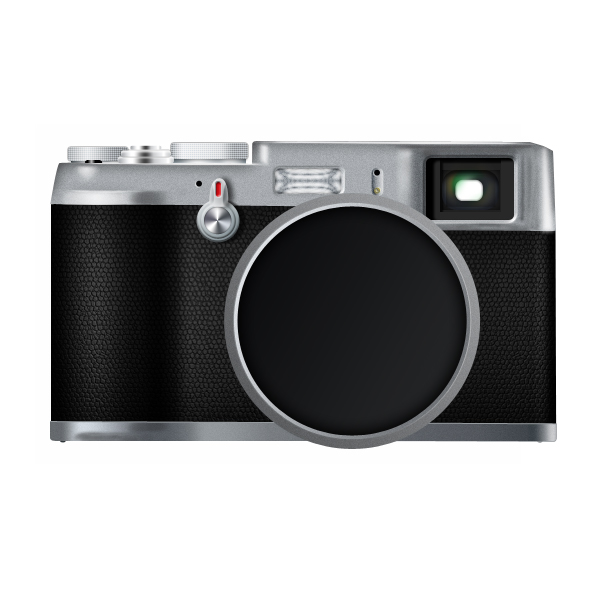
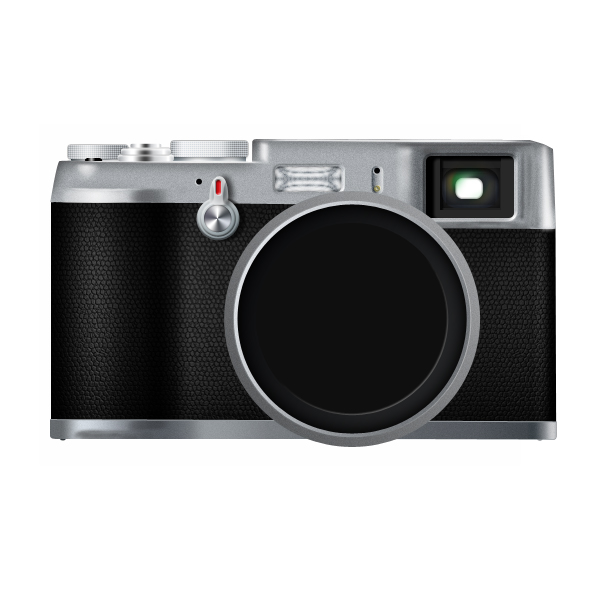
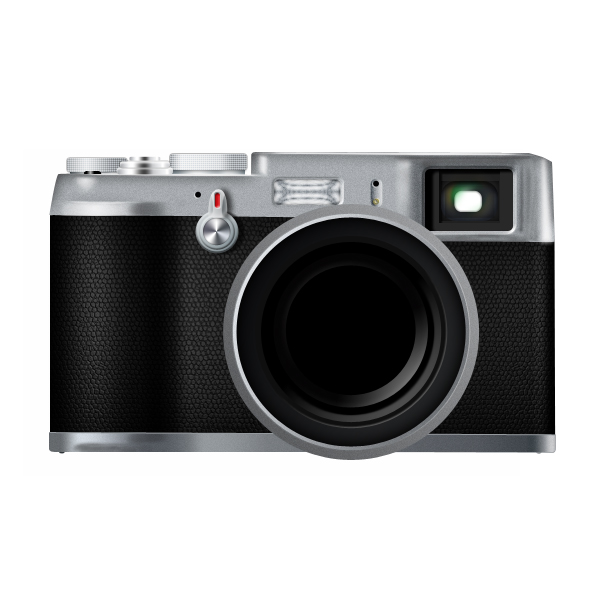
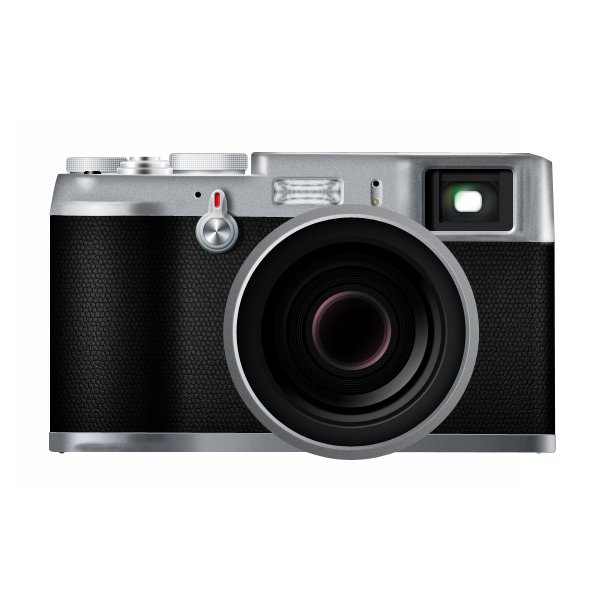
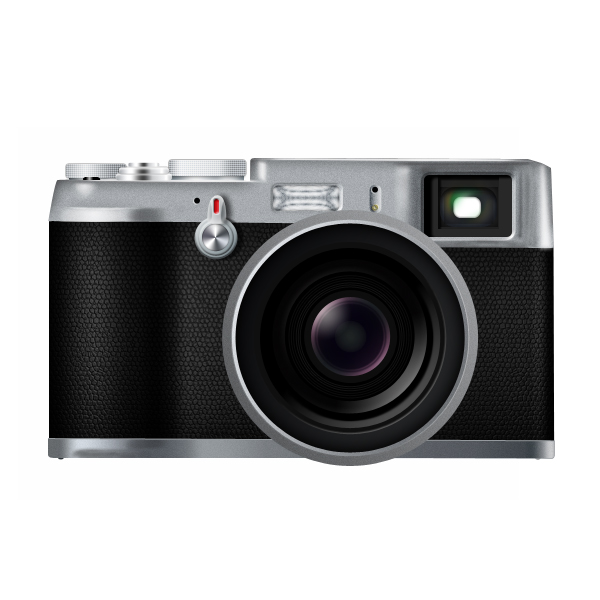
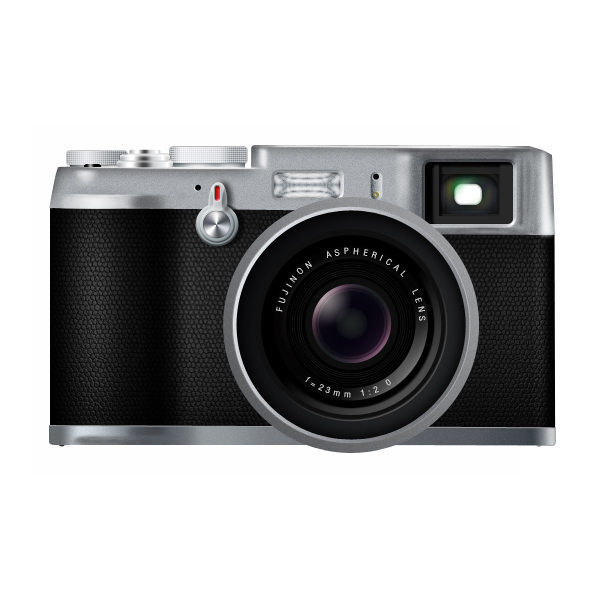
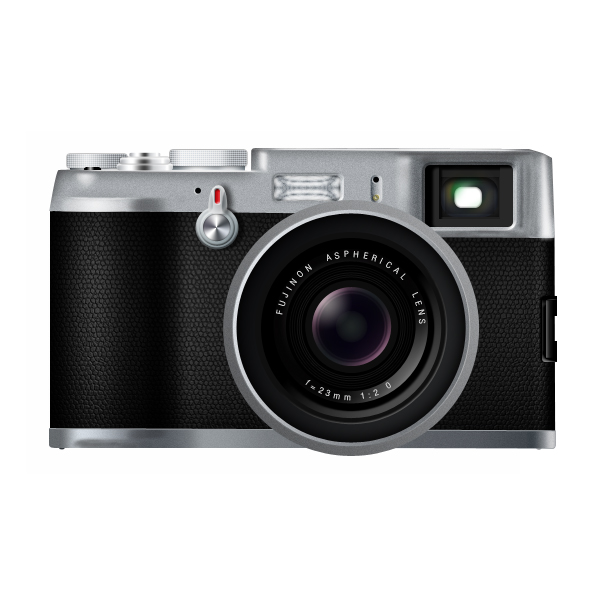
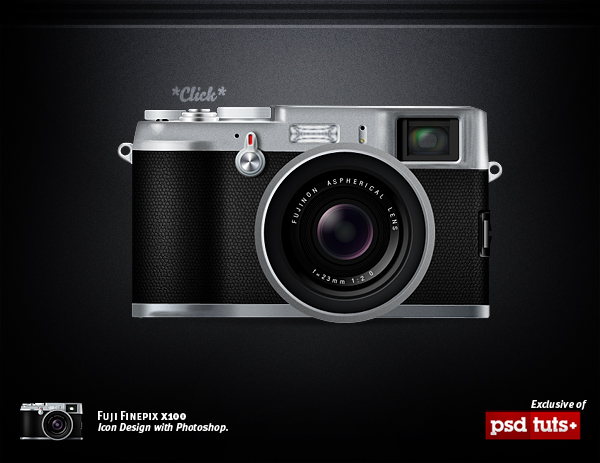
Create a Detailed Camera Icon in Photoshop
Icons can be a lot of fun to create. Simple icons are relatively easy to create but more realistic icons can be quite challenging. In today’s tutorial we will demonstrate how to create a detailed Fuji X100 camera icon in Photoshop. Let’s get started!
Tutorial Assets
The following assets were used during the production of this tutorial.
Step 1
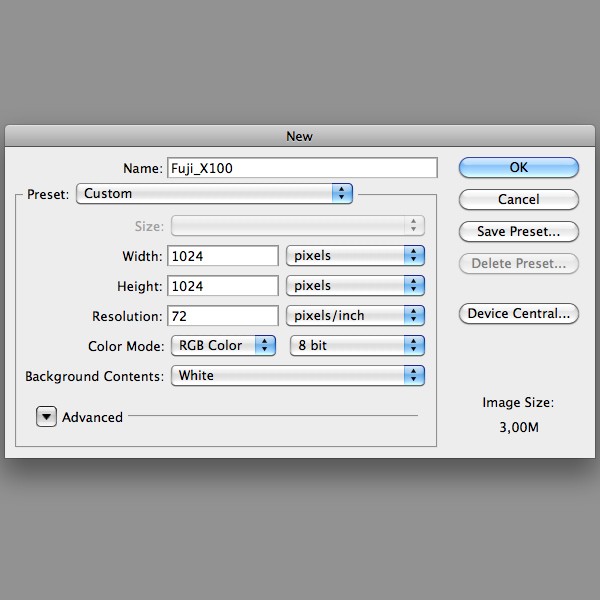
Open a new document in Photoshop. Set a resolution of 1024×1024 pixels.
Step 2
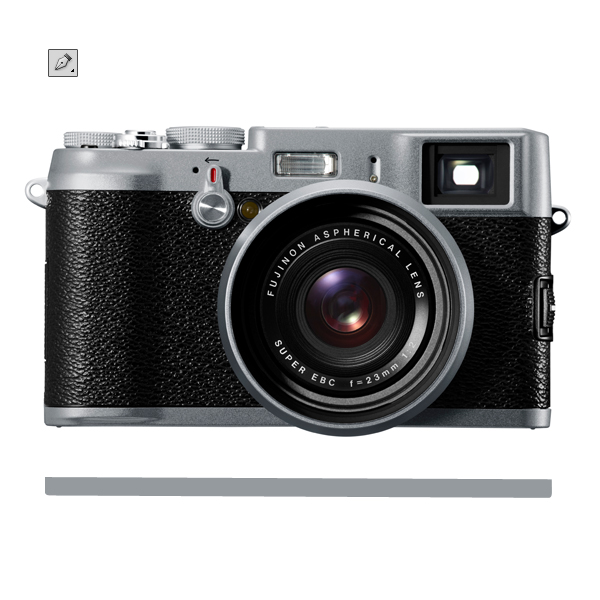
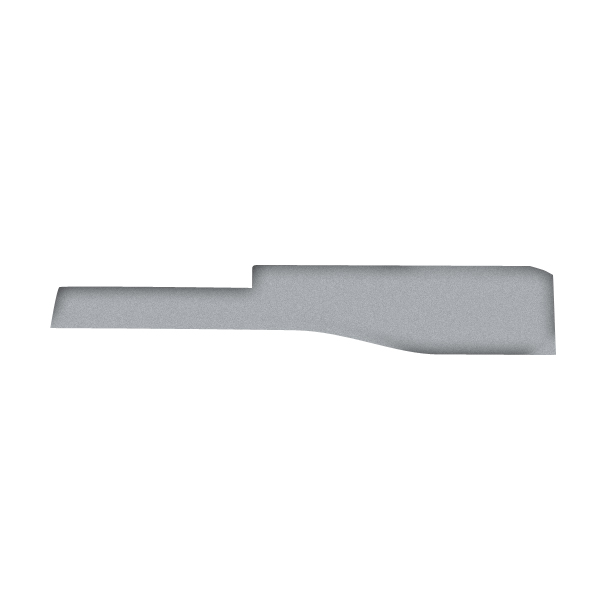
Then insert the image reference for the camera. With the Pen Tool (P) begin to trace the metal bottom part.
Step 3
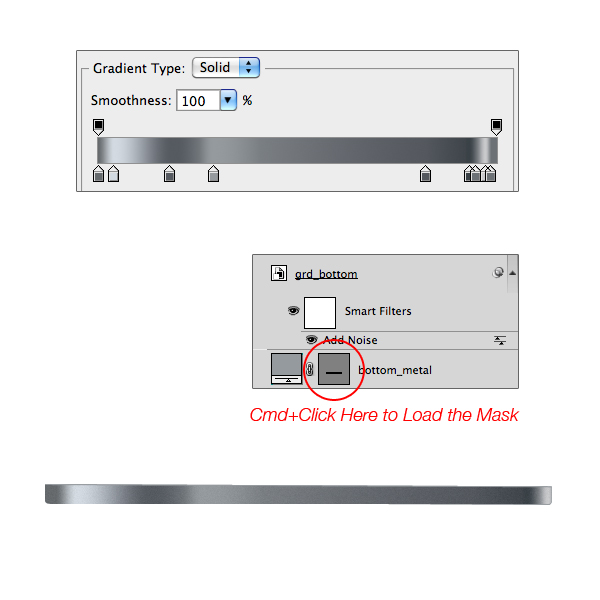
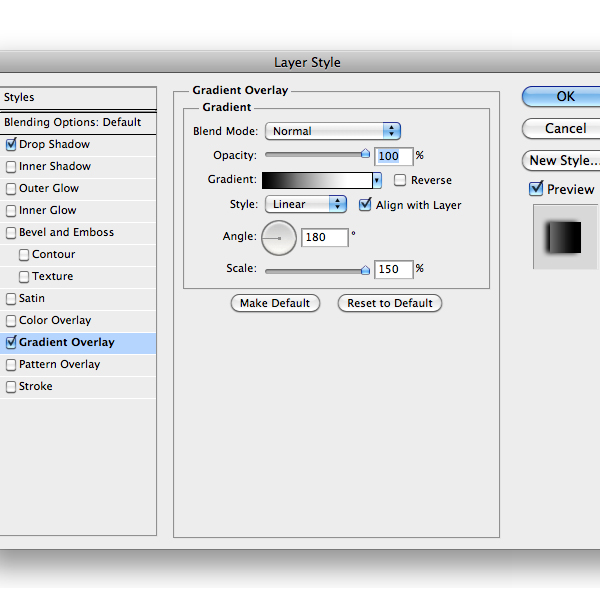
Load the metal layer as a selection by pressing Command/Ctrl and clicking on the vector mask in the Layers Palette. Add a new Gradient Adjustment Layer with the following style. Then convert the gradient layer into Smart Object and add some noise with Filter > Noise > Add Noise.
Step 4
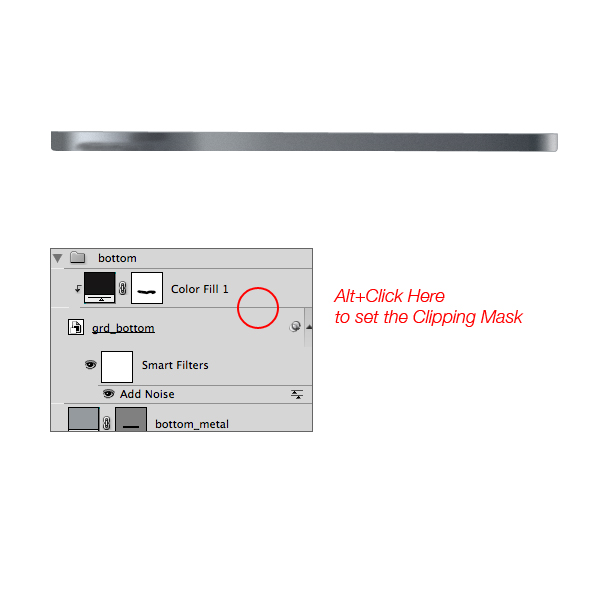
Add a Color Adjustment Layer and select black. Then with the Brush Tool (B) paint into the layer mask with a soft brush to create the metal shadows as the image below. To achieve a better result decrease the brush opacity. Set the layer as a Clipping Mask.
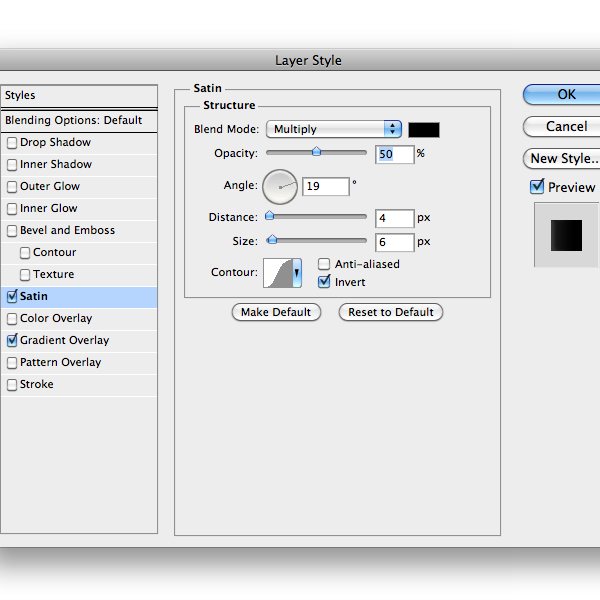
Step 5
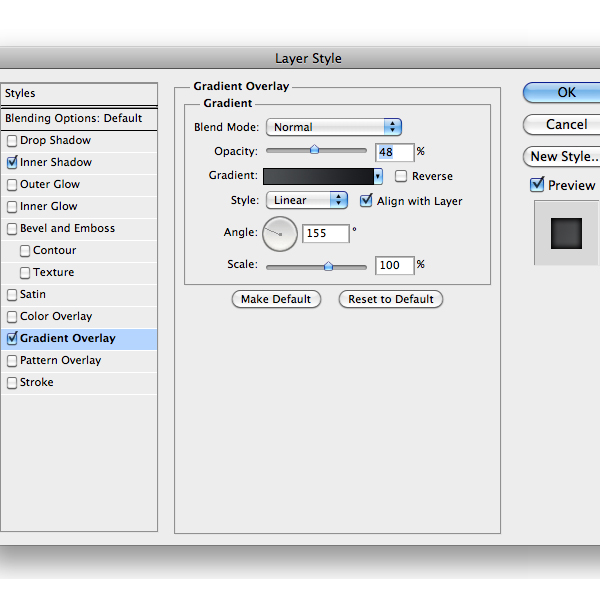
For the upper metal part do the same as the bottom part (Step 3-4) but this time do not use the Gradient Adjustment Layer. Use a Color Adjustment Layer instead. This is because the metal reflections are a bit more complex.
Step 6
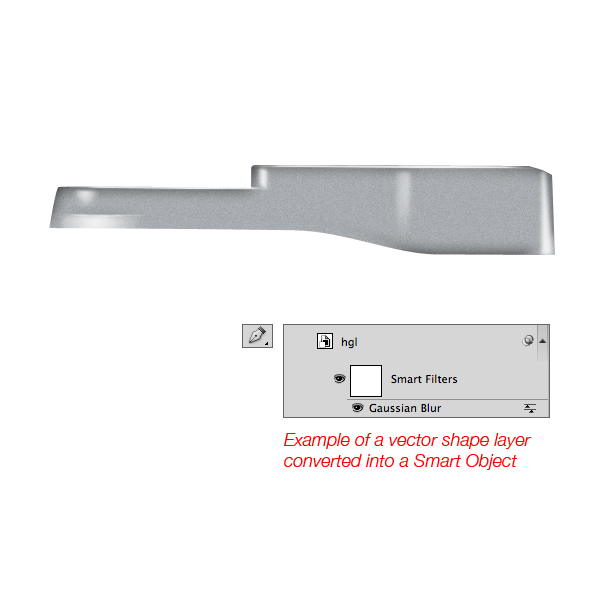
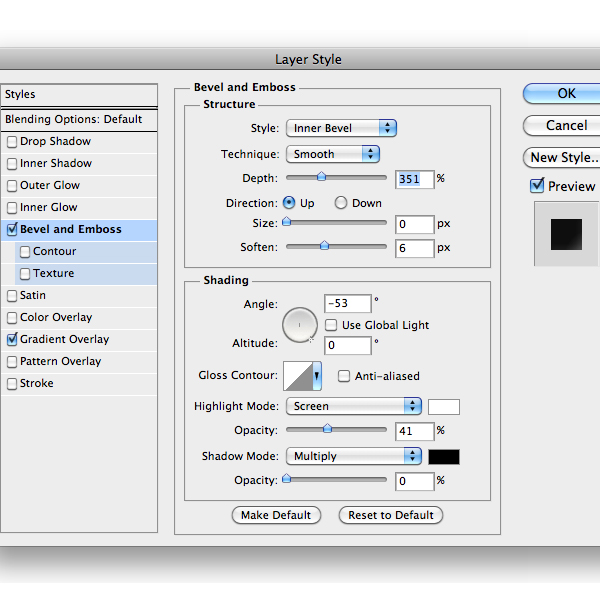
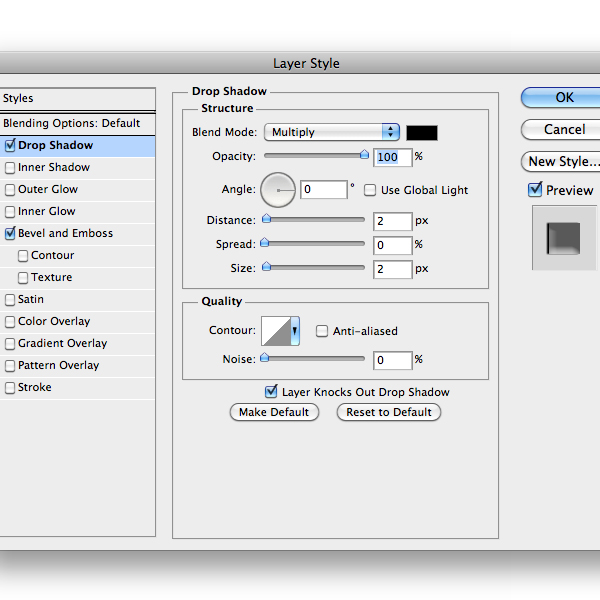
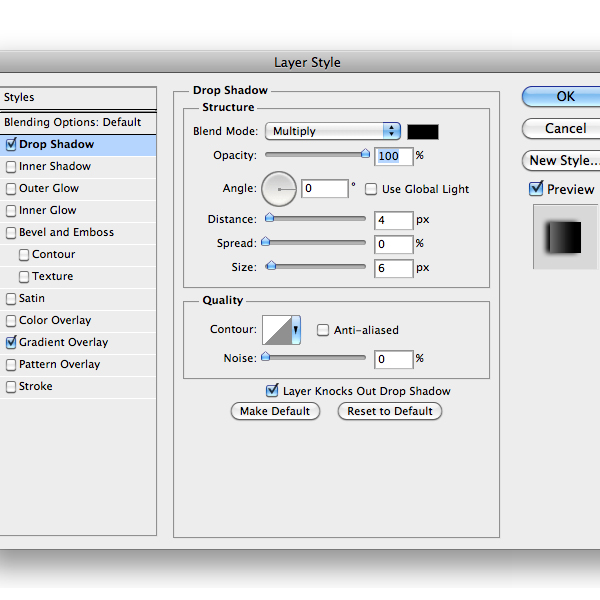
To create the upper metal reflection select the Pen Tool (P) and trace a white basic shape. Convert it into a Smart Object and add a Gaussian Blur Filter in Filter > Blur > Gaussian Blur menu. You have to repeat this process for the other reflections. As you can notice I’ve add a little drop shadow Layer Style in a reflection on the left part. Try to decrease the layer opacity too.
Step 7
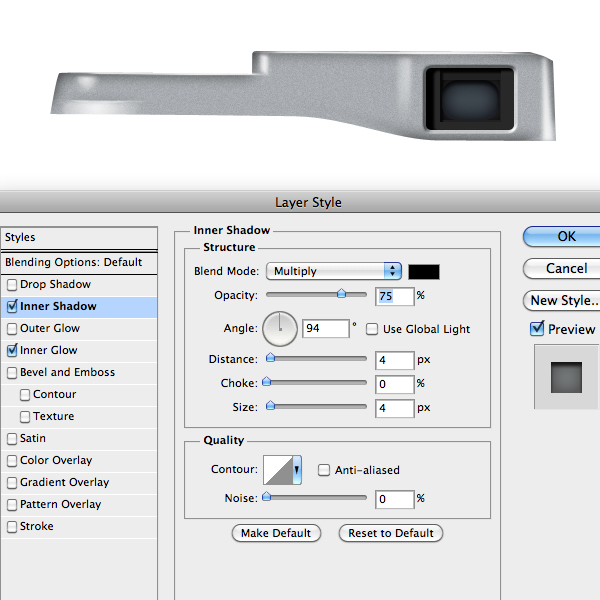
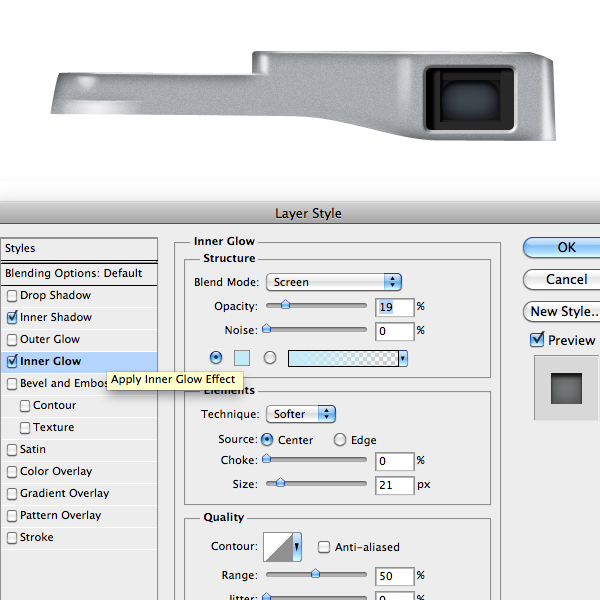
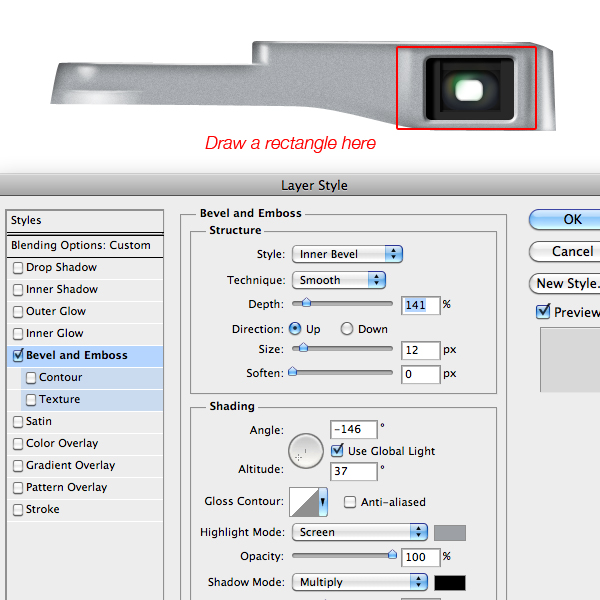
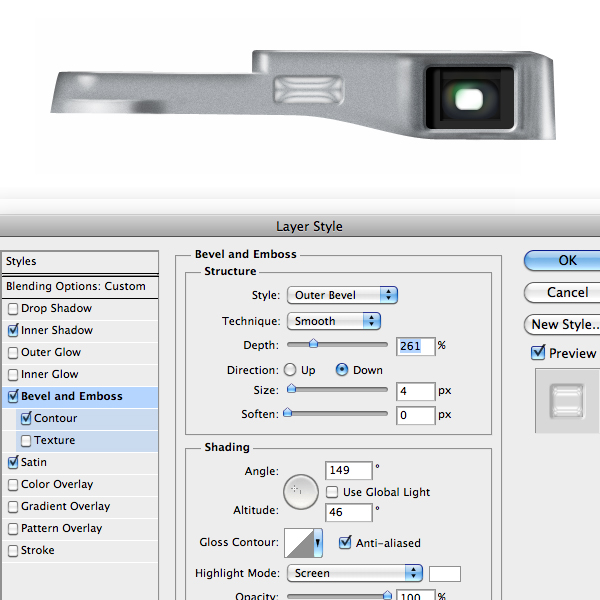
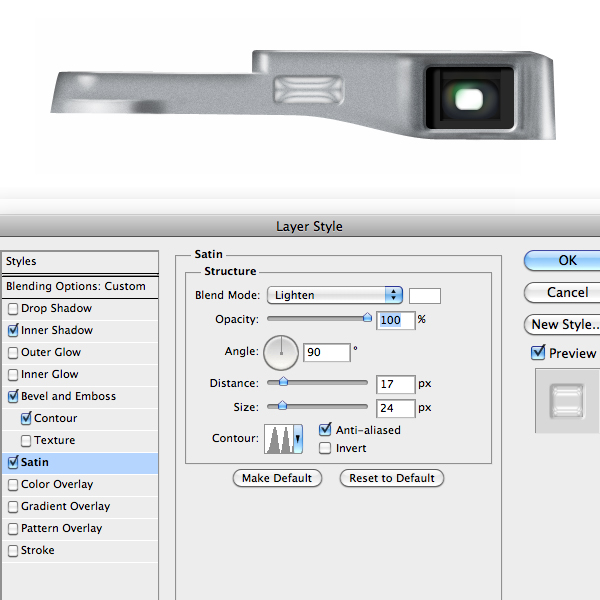
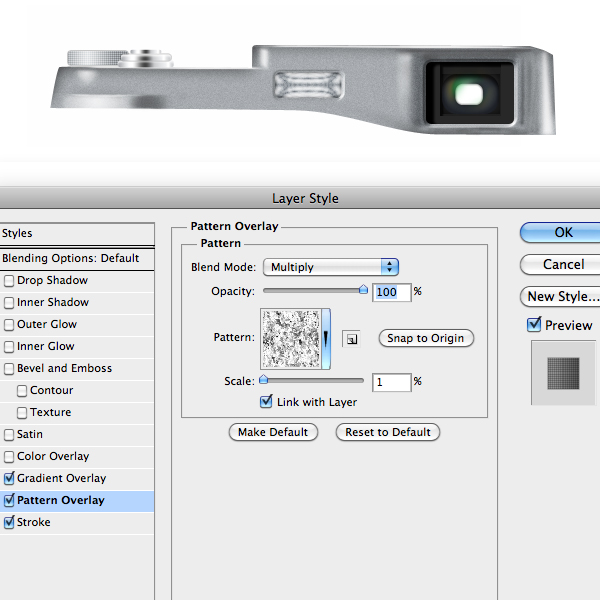
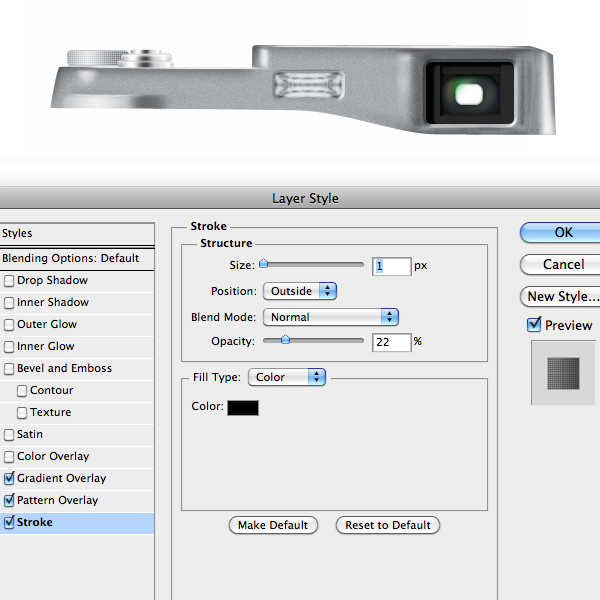
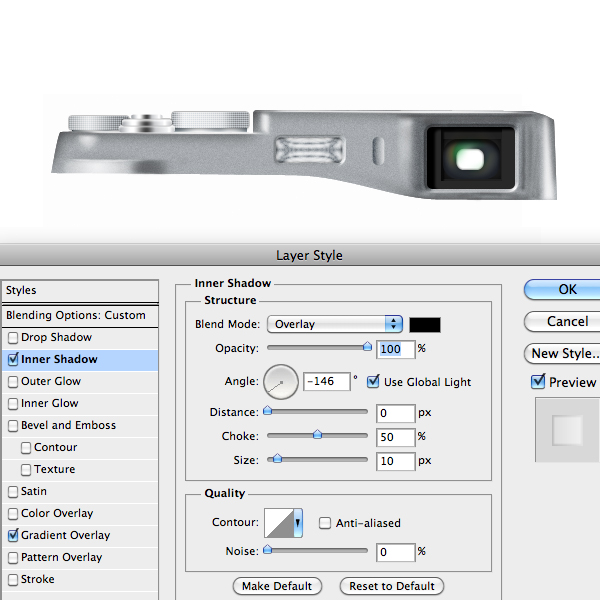
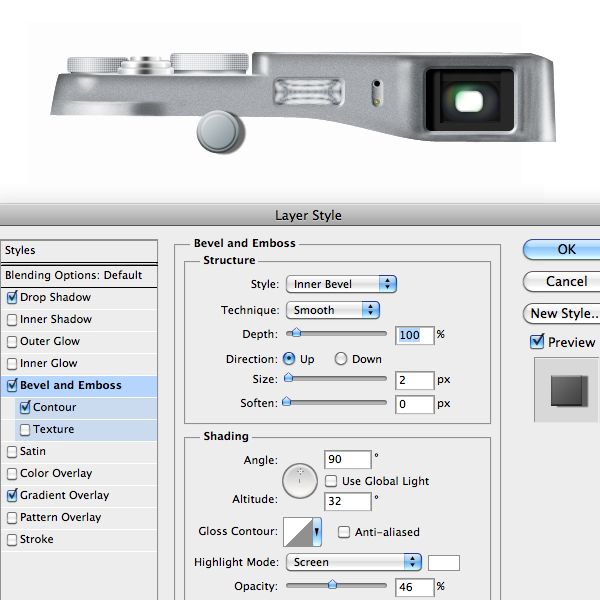
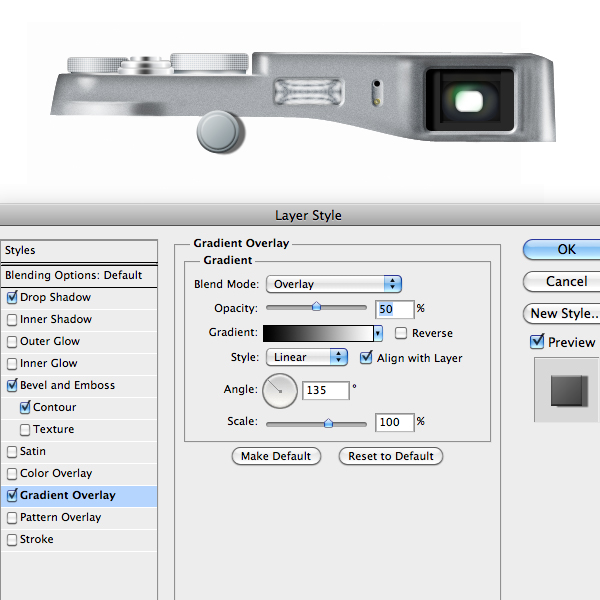
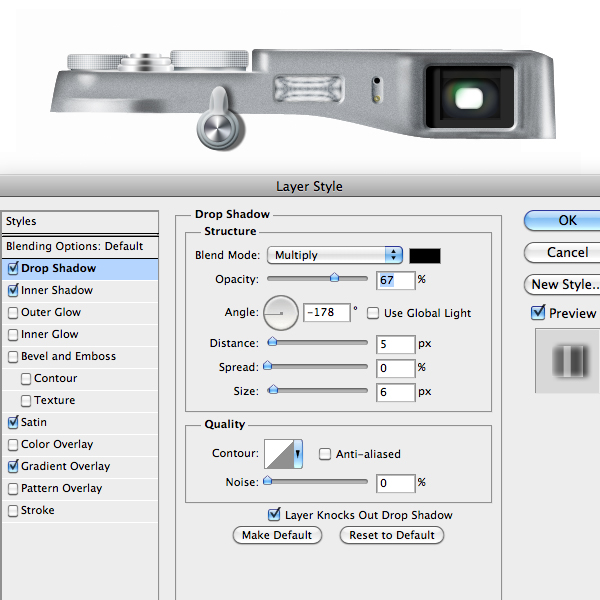
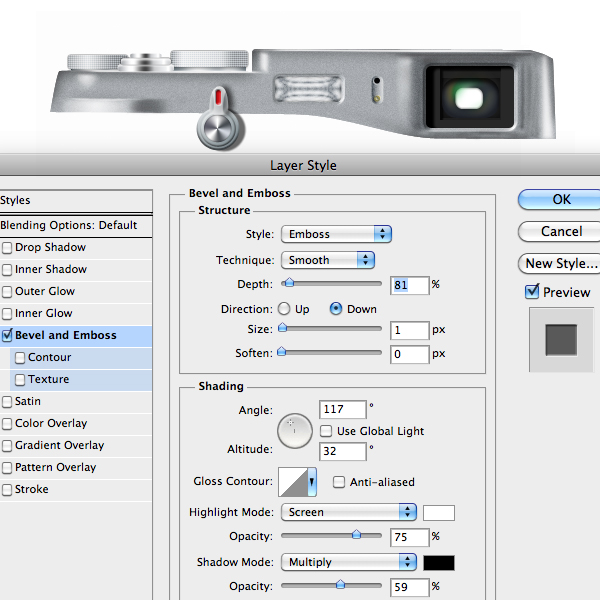
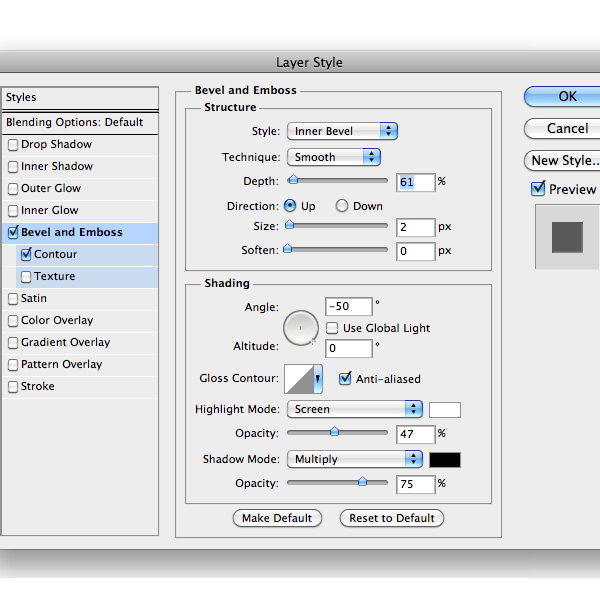
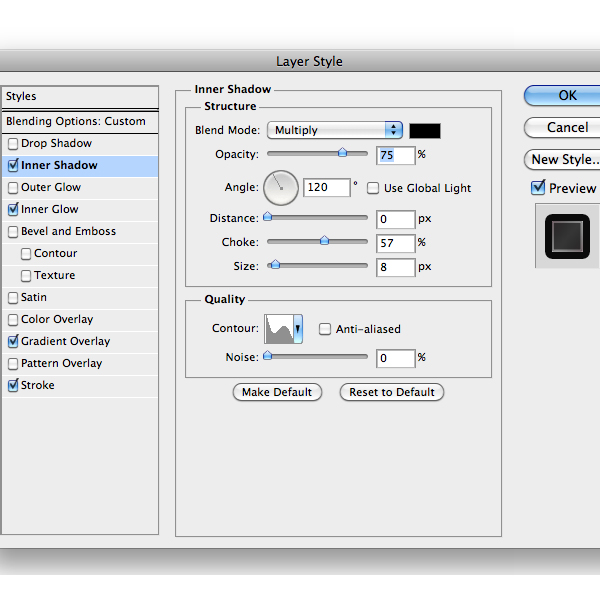
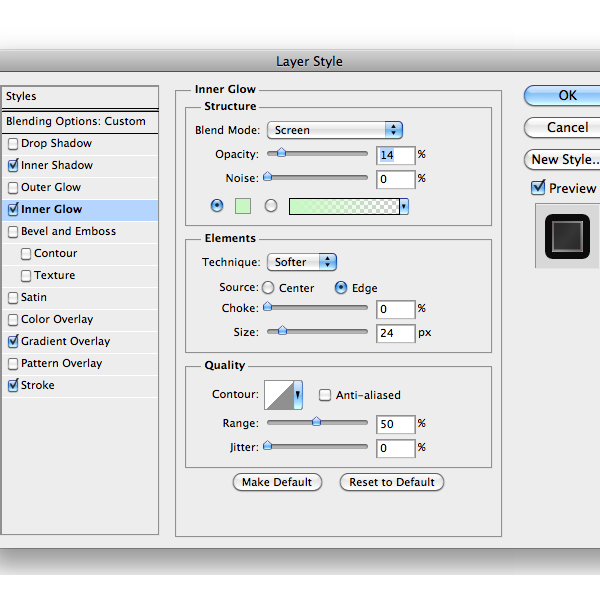
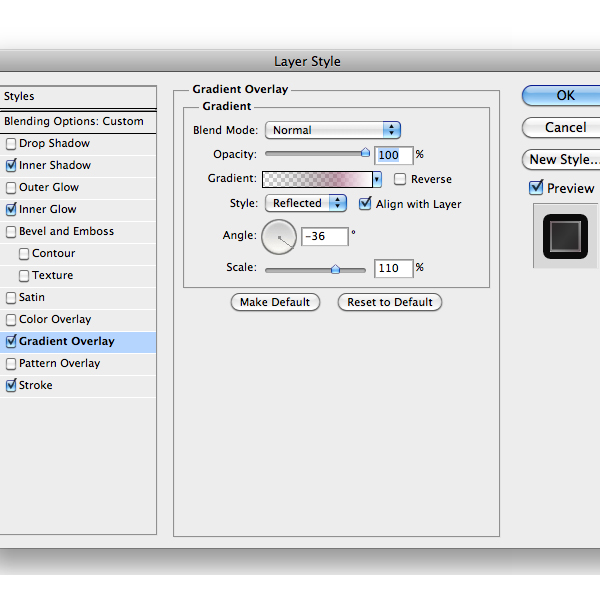
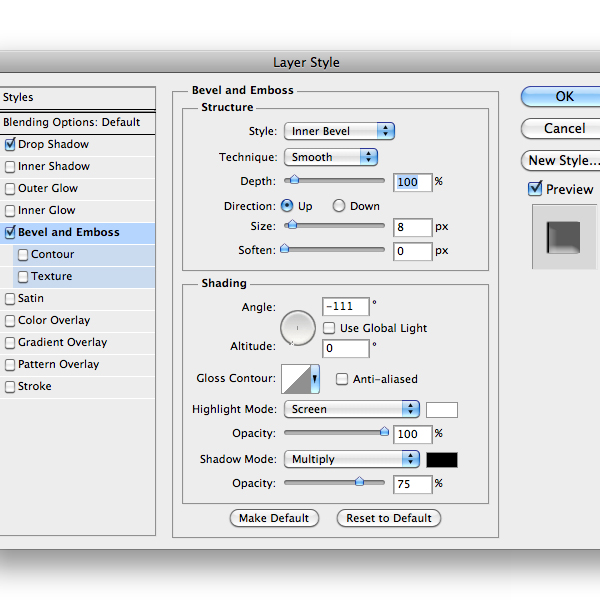
The viewfinder is composed by two main parts. We’ll begin with the outer part. With the Rounded Rectangle Shape Tool (U) draw a rectangle with a dark gray color as below and add the following style.
Step 8
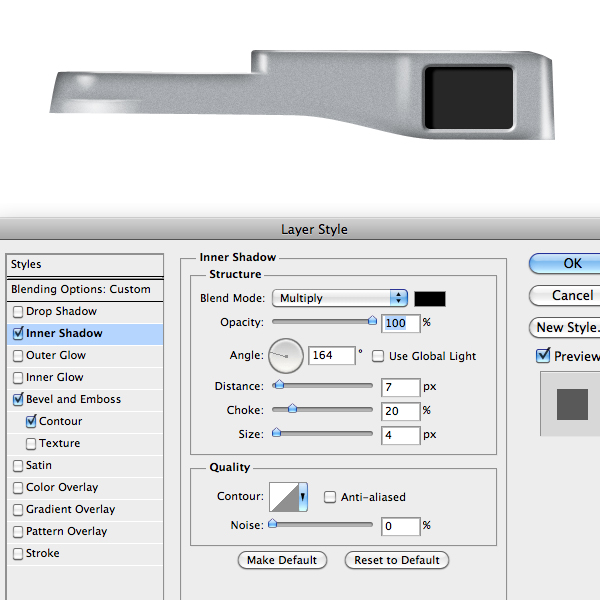
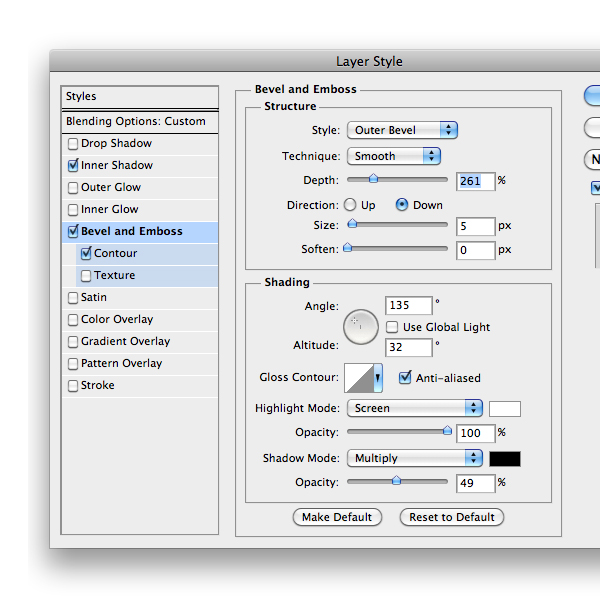
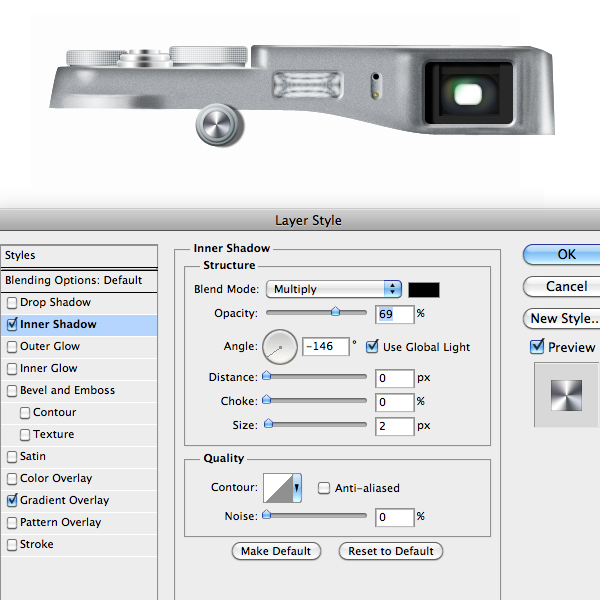
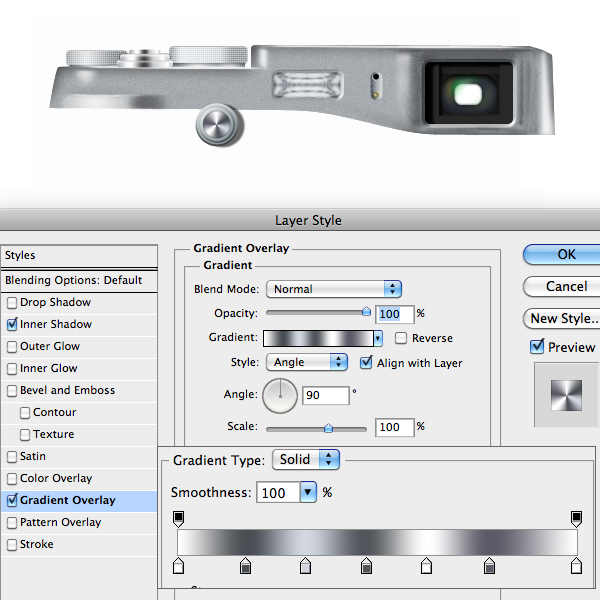
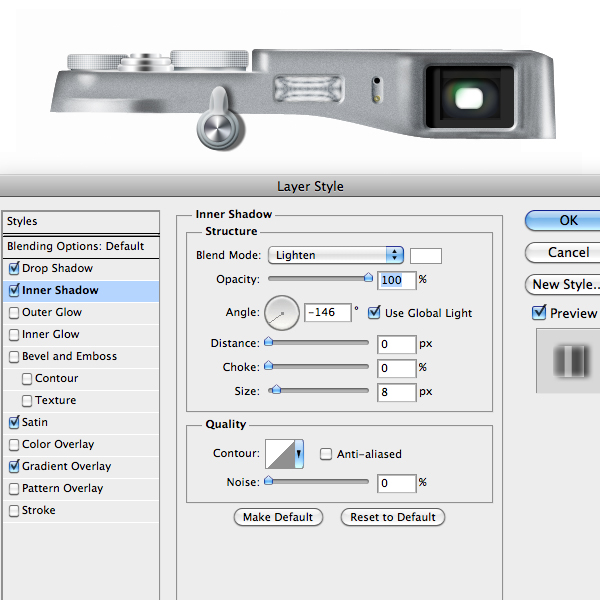
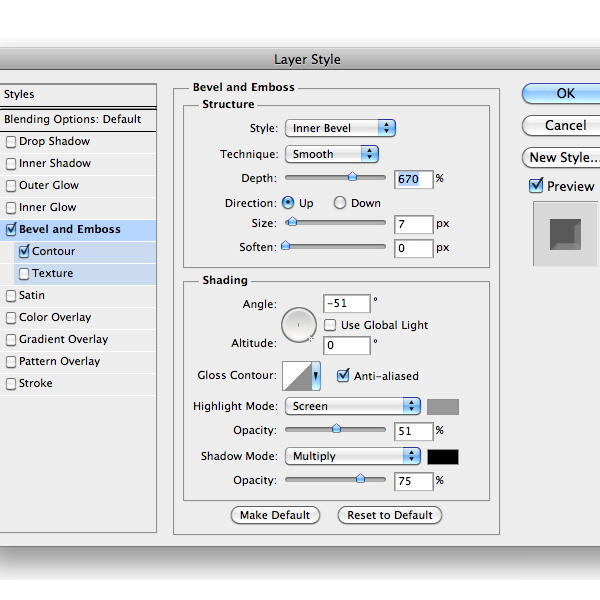
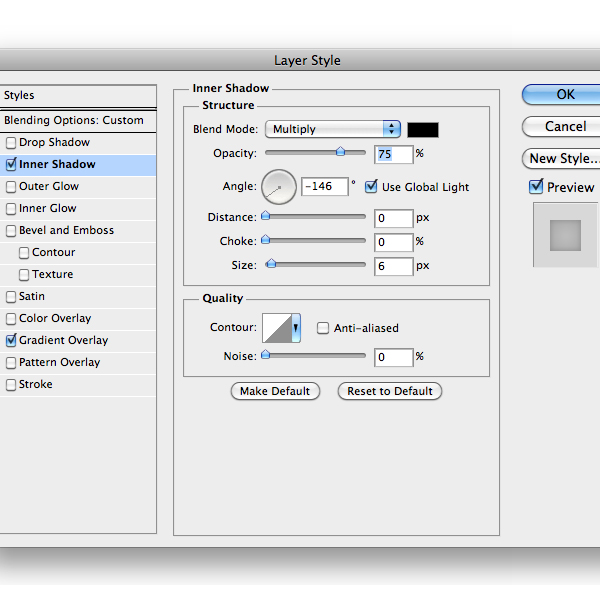
Now with the Rectangle Shape Tool draw a dark grey rectangle and add an Inner Shadow layer style with a low distance amount. Duplicate the rectangle and this time set a higher distance amount. Use the image below as a reference.

Step 9
With the Ellipse Shape Tool draw a dark blue shape and add the following style.
Step 10
Create another shape with the same tool but use the white color, then and add the following style.
Step 11
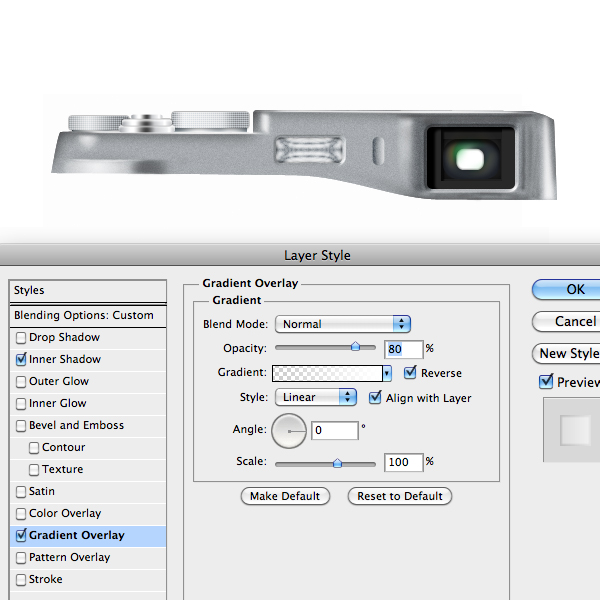
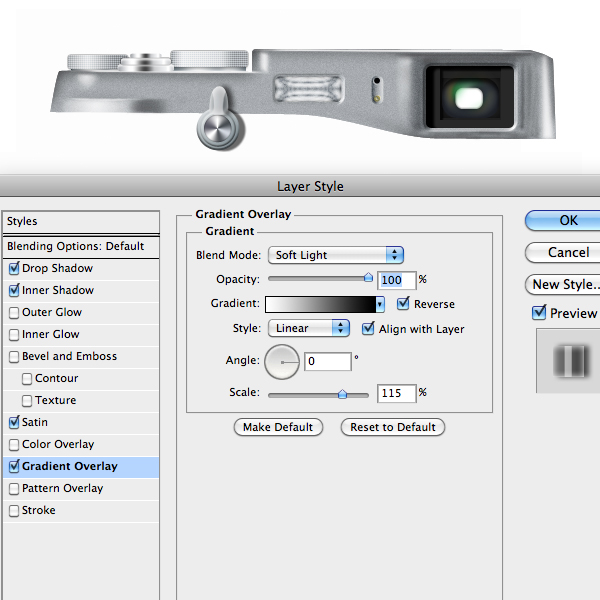
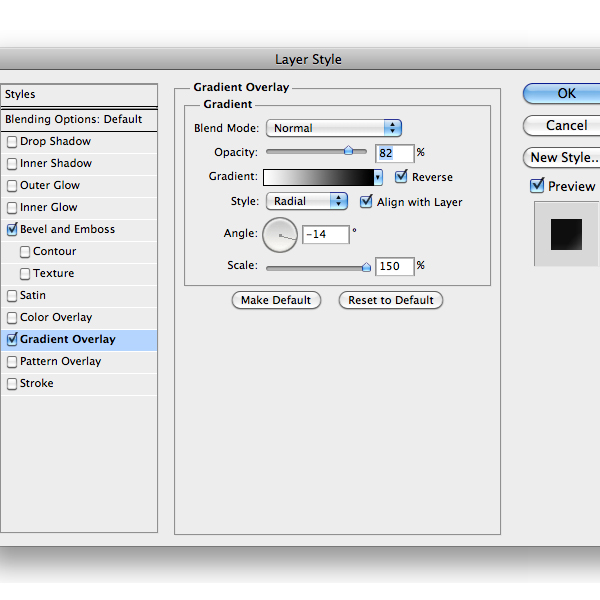
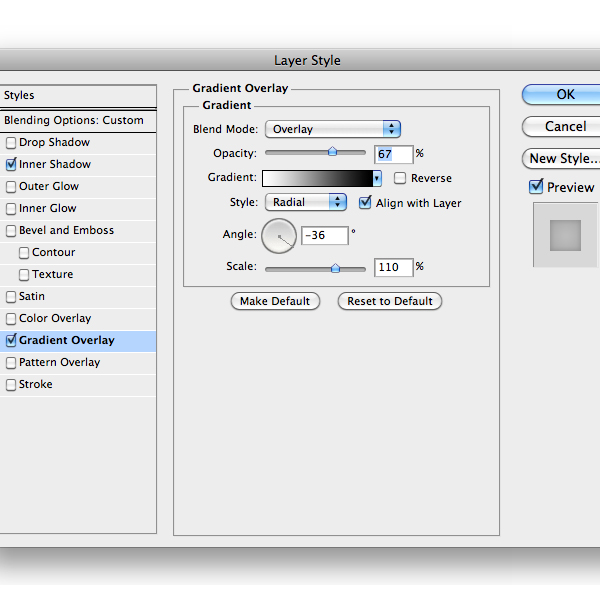
Add a Gradient Adjustment tool in the Radial mode with the following gradient setting to create the glass reflections. Use the Layer Mask to limit the reflection.

Step 12
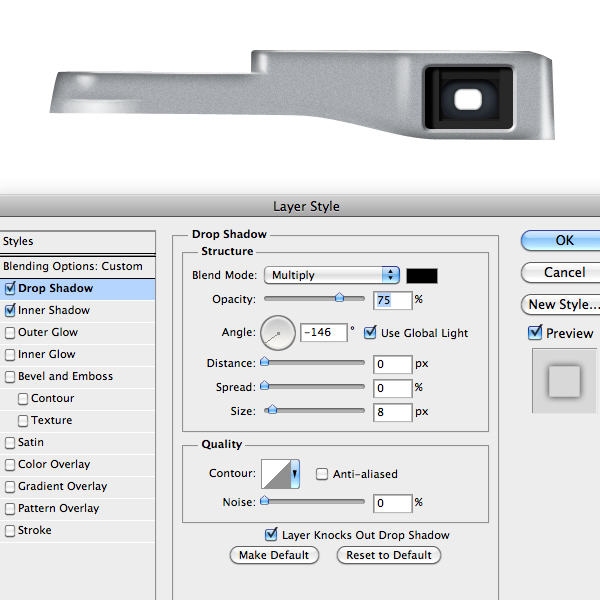
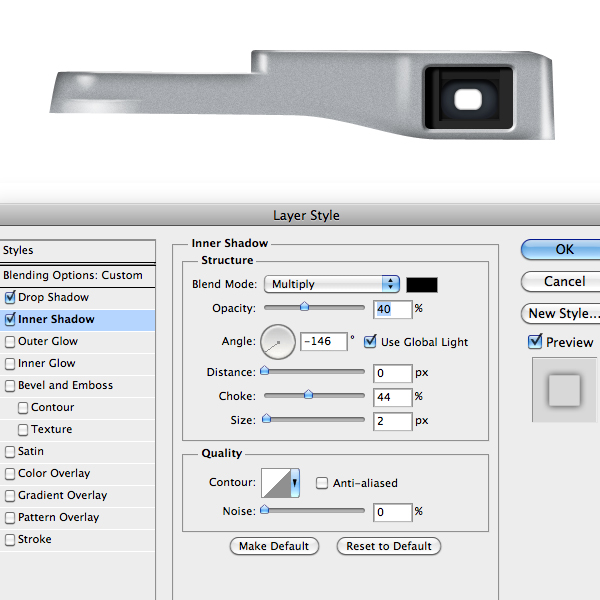
The next step is to draw a rectangle shape and add this style. Then decrease the shape fill opacity to 0%.
Step 13
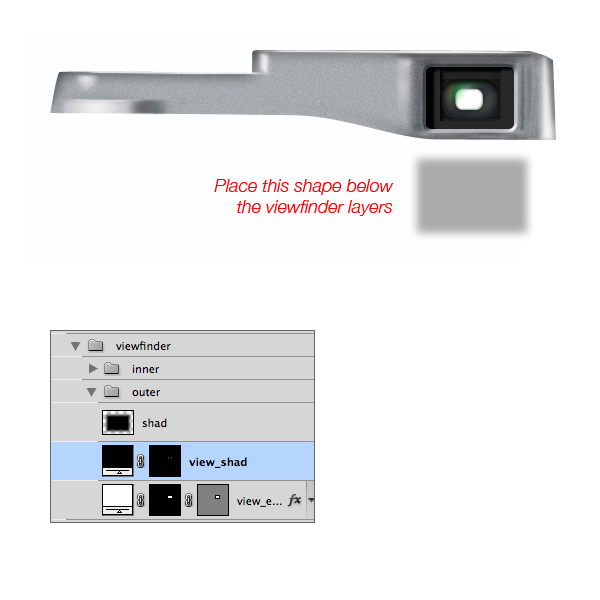
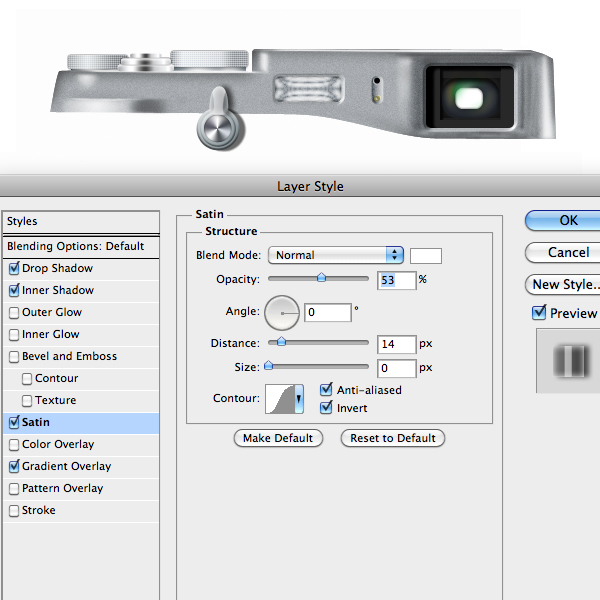
Use as usual a Color Adjustment Layer to create some shadow in the metal part as below. Then create a gray rectangle shape and add a Gaussian Blur Filter. Place the shape below the viewfinder and set the blending mode to Overlay and the opacity to 33%.
Step 14
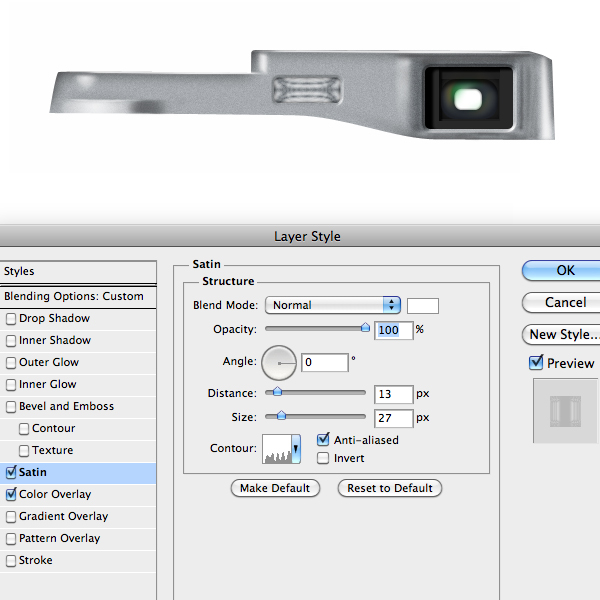
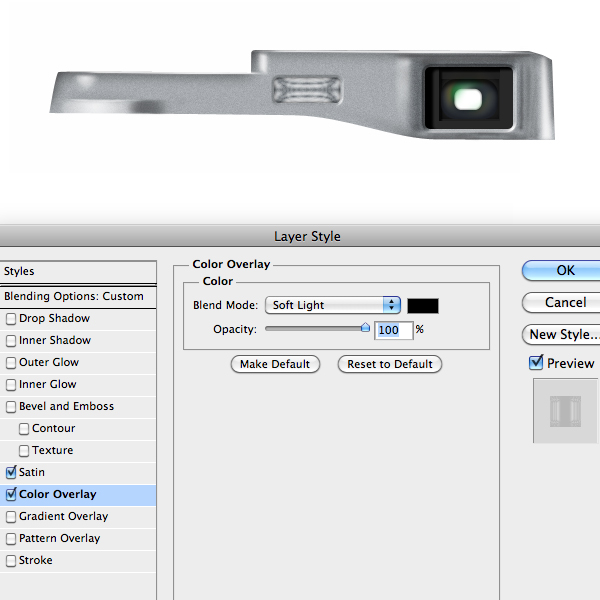
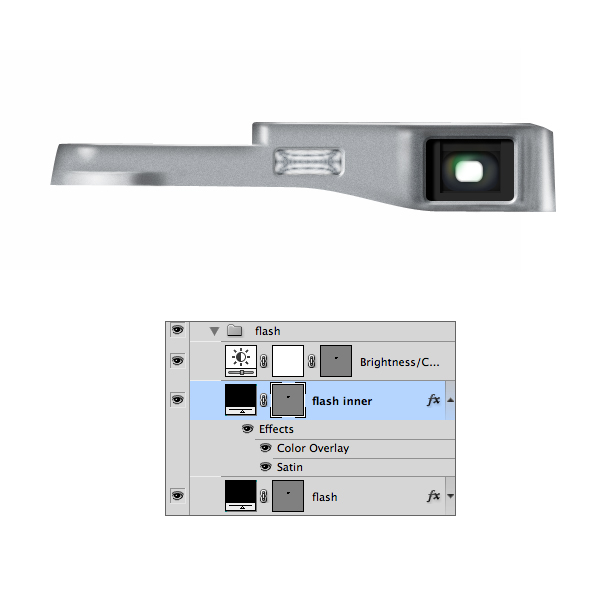
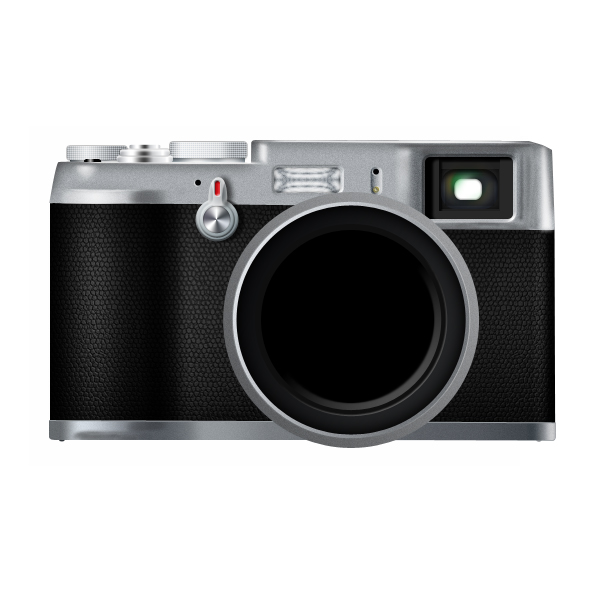
The viewfinder is done. Let’s start with the flash. Draw the correct shape and add this Layer Style.

Step 15
Repeat this step but this time use this Layer Style instead. If you want you can add a Brightness/Contrast Layers Adjustment to brighten up the flash as I do.
Step 16
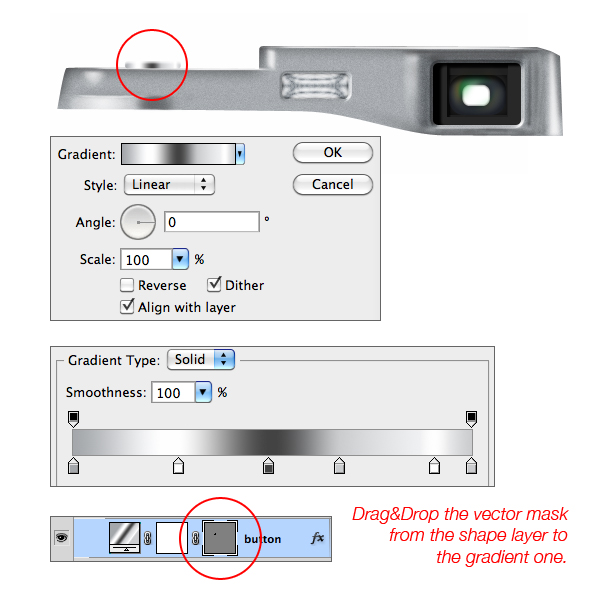
For the shutter button create a thin shape as below with the Rounded Shape Tool (U). Next add a Gradient Adjustment Layer with this style. Now all you have to do is to drag and drop the vector layer mask from the previous shape layer to the gradient one. Simple and Easy. ![]() Finally add a little Inner Shadow Layer Style the gradient layer.
Finally add a little Inner Shadow Layer Style the gradient layer.
Step 17
Duplicate two times the previous layer. Then decrease their width by pressing Command/Ctrl + T. Arrange them as below.
Step 18
To create the handles draw a shape with the Rounded Rectangle Tool (U) and add this Layer Style.

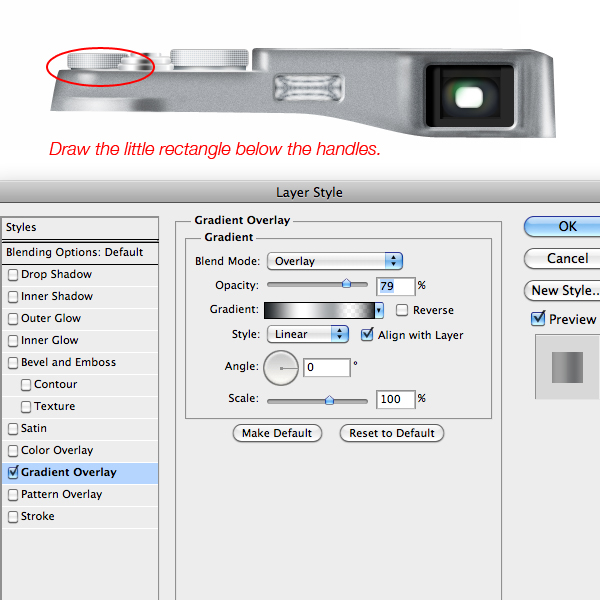
Step 19
With the Rectangle Shape Tool draw a little rectangle and put it below the previous shape. Next add this Layer Style. Duplicate the handle and place it as the image below.
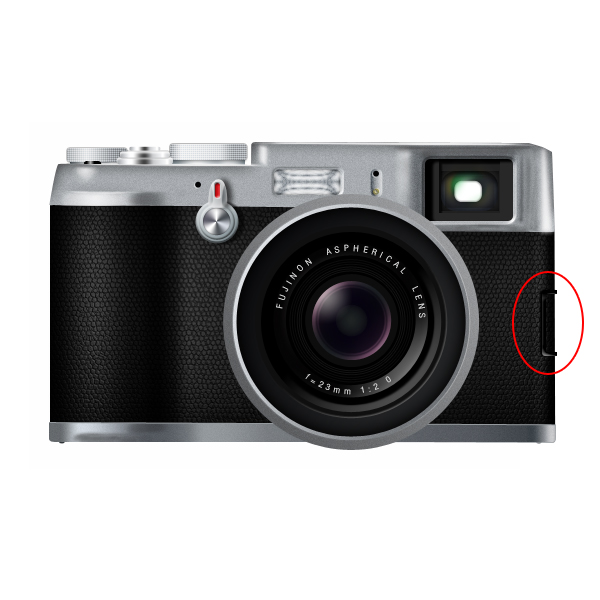
Step 20
Create a little shape between the flash and the viewfinder with the Rounded Rectangular Tool (U) and add this Layer Style.
Step 21
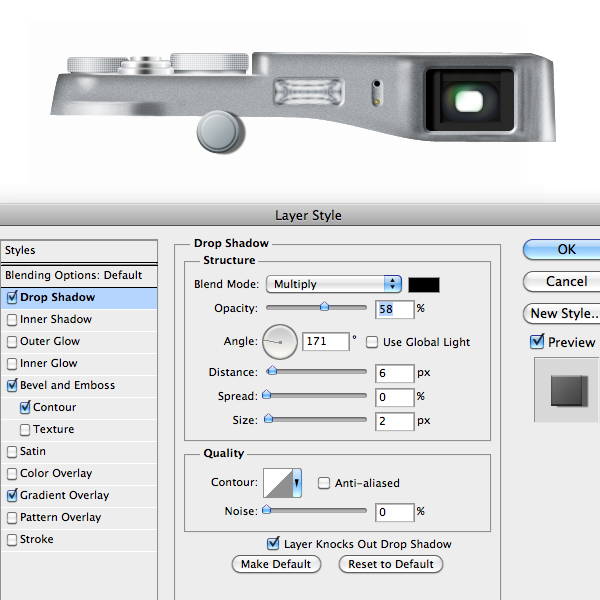
Draw two circles with the Ellipse Shape Tool (U), the first with a black color and the second with a dark yellow. Then add this Layer Styles.

Step 22
Draw another with the Ellipse Shape Tool (U), use a metallic color. Then add this Layer Style. Now duplicate the circle shape and decrease his dimension with Ctrl/Cmd + T. Use the Drop Shadow Style only for the first ellipse.
Step 23
Now draw the final circle an add this Layer Style to create the metal reflection.
Step 24
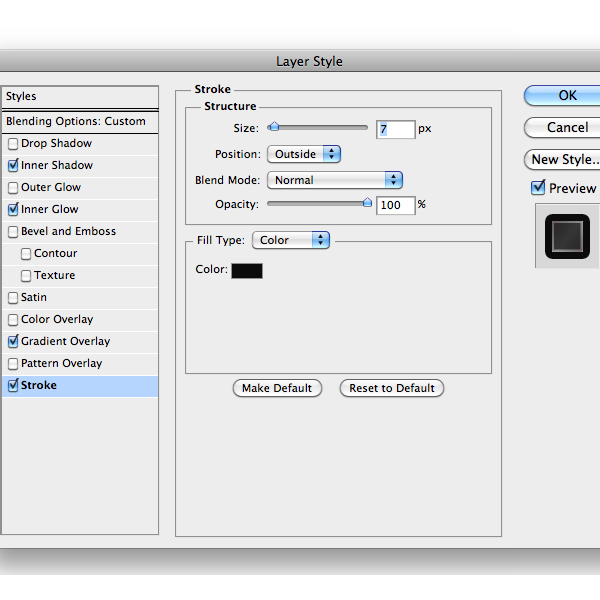
With the Pen Tool (P) draw a shape like below as usual use a metallic color. Now add the following Layer Style.
Step 25
Use another Rounded Rectangular shape to achieve the little red mark. Apply this Layer Style.
Step 26
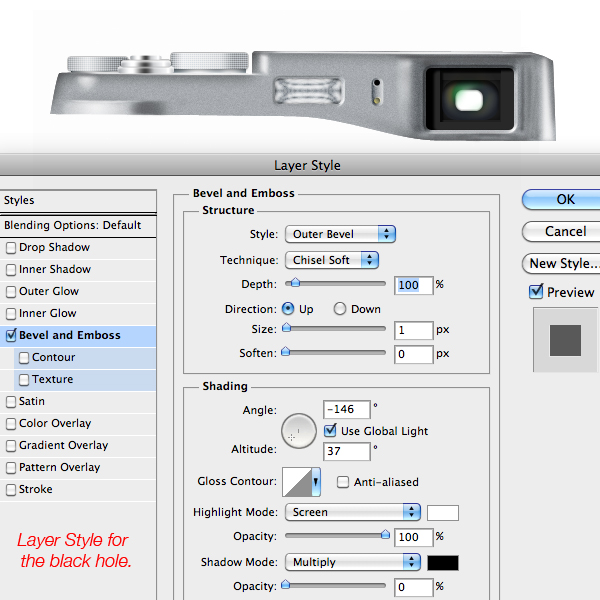
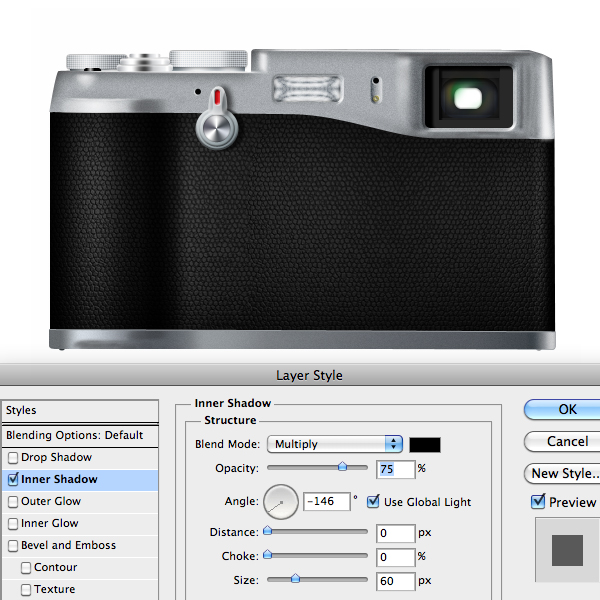
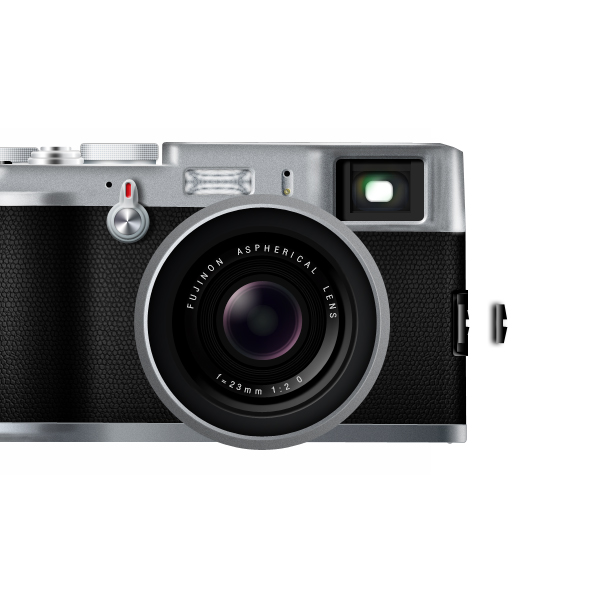
For the middle part draw the appropriate shape with the Pen Tool (P) with a dark gray color. The for the leather texture you can follow this useful tutorial, obviously on PsdTuts+ . As you probably notice I’ve add another hole, a small black button shape and two little dark shape on the bottom part.
Step 27
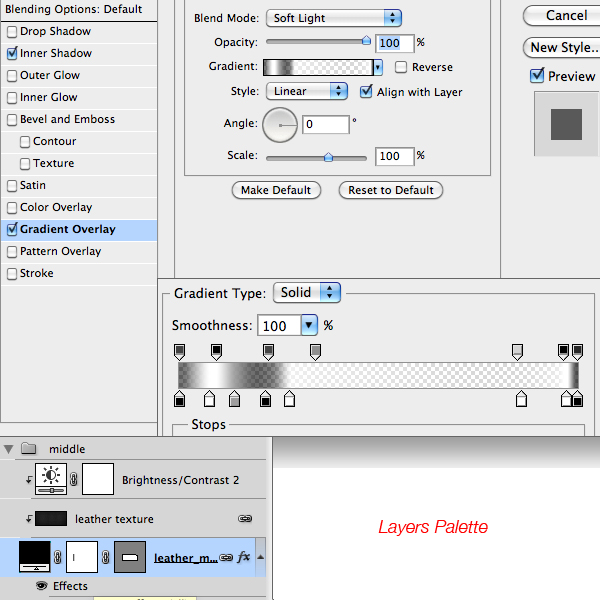
When the texture is done you can add an Adjustment Layer to change his brightness. Then add this Layer Style to the middle shape layer.
Step 28
Let’s do the lens now. First draw a circle with a metallic color and add this style.

Step 29
Draw another smaller circle and add this Layer Style instead. Then select the two circle layers in the Layer Palette and merge them into a Smart Object. Finally add some noise via Filter > Noise > Add Noise.


Step 30
Select a dark gray color and draw a circle as below. Add this Layer Style.
Step 31
Now we have to create other three circle. Here it is the Layer Style for the first one.
Step 32
The style for the second one.
Step 33
And finally the last one.
Step 34
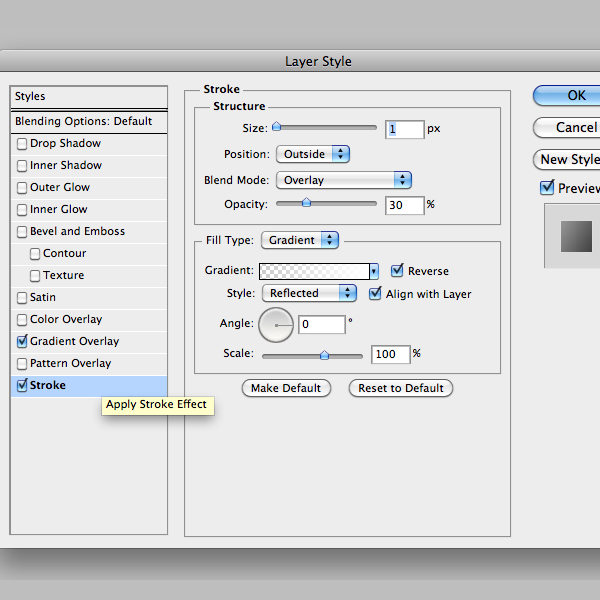
Create another circle and decrease the Fill Opacity to 0% in the Layer Palette. Add a thin Layer Style Stroke with a dark green color. Then duplicate and transform the circle as below.
Step 35
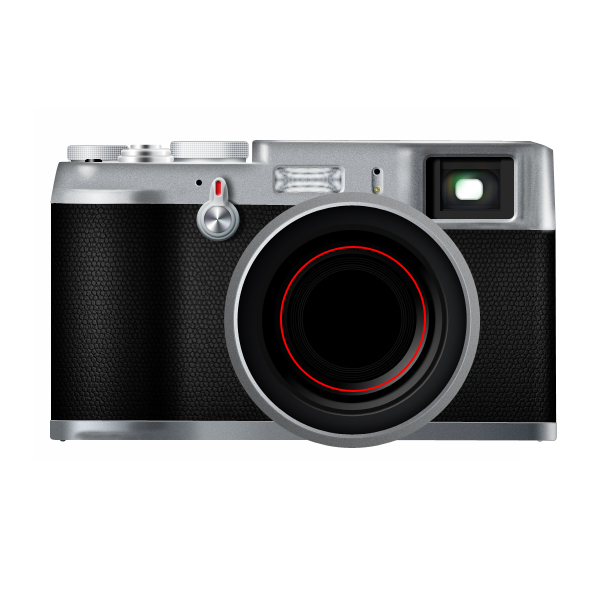
For the glass the procedure is the same. Add a circle with the following Layer Style.
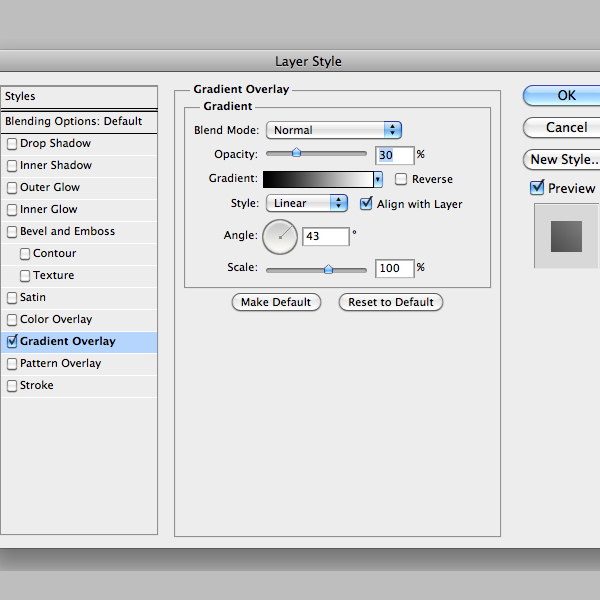
Step 36
Add a second smaller circle inside the first one with this Layer Style.
Step 37
Draw a circle with the same size of the circle in Step 36 and use this Layer Style to add the reflection. Try to change the gradient position while the Layer Style window is open by simply clicking on it in the canvas.


Step 38
Add some text inside the lens. To achieve this curved style create a circular path with the Ellipse Tool (U) and then with the Text Tool click on the path and add the text.
Step 39
Draw a C black shape with the Pen Tool and add this Layer Style.
Step 40
Add a black rectangle shape below the C shape with this style.

Step 41
Finally draw another shape like below with this Layer Style.
Step 42
One final step is to add two little metal shapes with the Pen Tool (P).

Conclusion
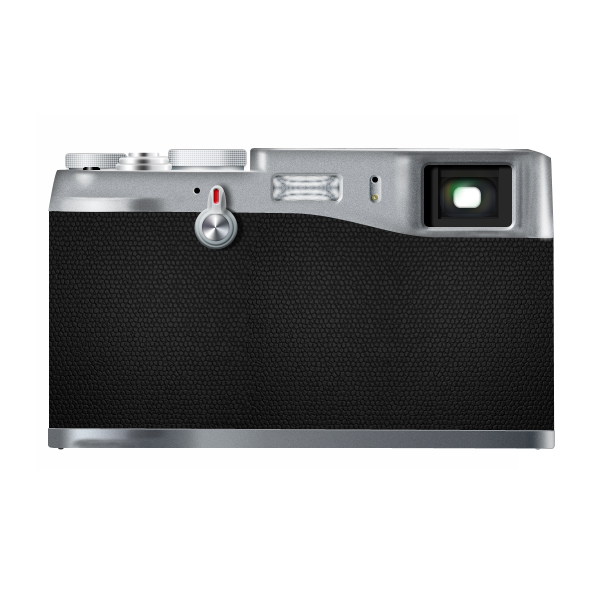
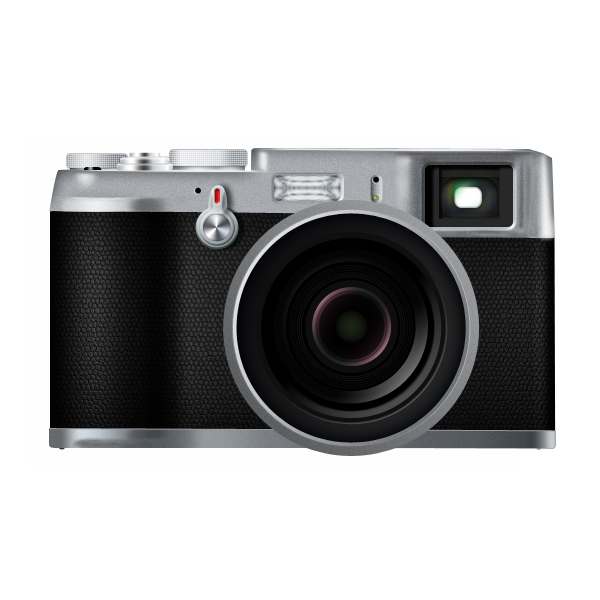
So the Fuji X100 is done! I’ve add a custom background. Of course you can customize the icon as you like. Final Tip: improve the sharpening with the Unsharp Mask Filter. Hope you like it!
Original Link: http://feedproxy.google.com/~r/psdtuts/~3/3LmHFMrG7ZM/
TutsPlus - Design
More About this Source Visit TutsPlus - Design