
An Interest In:
Web News this Week
- April 25, 2024
- April 24, 2024
- April 23, 2024
- April 22, 2024
- April 21, 2024
- April 20, 2024
- April 19, 2024
Some of Our Sources
- BoingBoing
- Engadget
- Pearsonified
- The Logo Smith
- Spoon Graphics
- Six Revisions
- Fudge Graphics
- Web Design Ledger
- 24 Ways
- Android Dissected
Help Webnuz
Referal links:
Build a Todo App with Next.js and AWS Amplify
Introduction
In this tutorial, you'll learn how to build a serverless todo application using Next.js, a popular React framework for building server-rendered applications, and AWS Amplify, a JavaScript library for cloud-based app development.
Prerequisites
Before getting started, you will need to have the following tools installed on your development machine:
- Node.js (version 12 or higher)
- npm (comes with Node.js)
- AWS Amplify CLI
You can learn how to setup the AWS Amplify CLI here.
Step 1 - Set Up Next.js App
To create a new Next.js app, run the following command:
npx create-next-app todo-appThis will create a new directory called todo-app with Next.js project dependencies.
Next, navigate to the todo-app directory and start the development server by running the following command:
cd todo-appnpm run devThis will start the development server at http://localhost:3000. You should see the default Next.js welcome page.
Step 2 - Initialize AWS Amplify
Next, initialize AWS Amplify in your Next.js project root folder by running the following command:
amplify init -y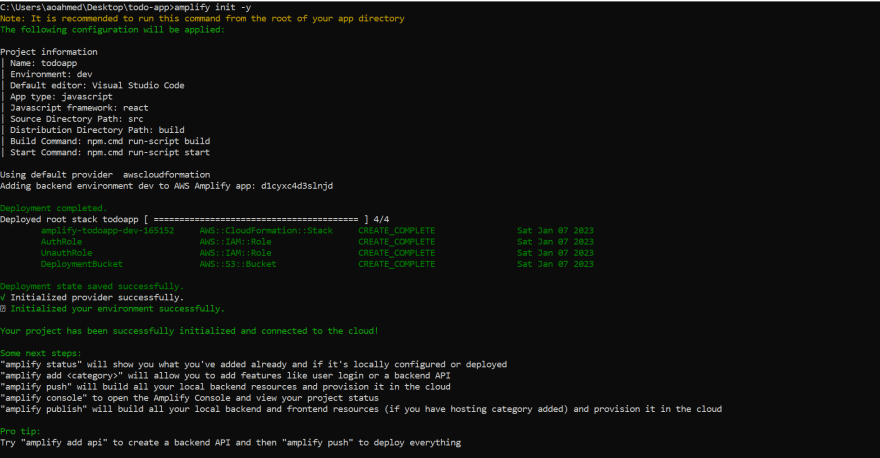
Step 3 - Configure Amplify API
Once Amplify has been initialized, add a backend service to the app. For this tutorial, we will use a GraphQL API with AWS AppSync. To add the API, run the following command:
amplify add apiFollow the prompts to create a new GraphQL API with AWS AppSync. When asked for the type of API, choose GraphQL. This will create a schema.graphql file in the amplify/backend/api/todoapp directory.

Step 4 - Update Todo Schema
After setting up the API, update the todo app GraphQL schema tospecify the data types:
//schema.graphqltype Todo @model { id: ID! title: String! completed: Boolean!}The code above defines a Todo type with fields for the todo title, and completion status.
Now, push the changes made to the Amplify backend by running:
amplify push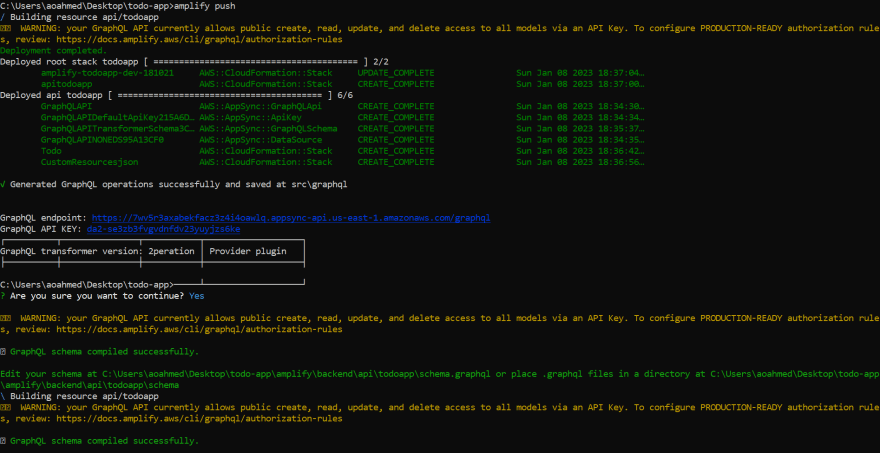
Step 5 - Build the Todo UI
Now that you've fully configured the API, the next step is to build out the frontend of the application.
First, connect Amplify to the Next.js app by installingAmplify library:
npm install aws-amplifyThen, create a components folder in the root of the application which will consist of these three components: CreateTodo.jsx, Todos.jsx and TodoItem.jsx.
In order to follow along with the styling used in this application, add the Tailwind CSS & Fontawesome CDN link to the
Headtag of your pages/_document.js.
<link rel="stylesheet" href="https://cdnjs.cloudflare.com/ajax/libs/tailwindcss/2.2.19/tailwind.min.css" /><link rel="stylesheet" href="https://cdnjs.cloudflare.com/ajax/libs/font-awesome/6.1.1/css/all.min.css" />Next, update the pages/index.js file as shown below:
//index.jsimport Head from "next/head";import React, { useState } from "react";import { Amplify, API } from 'aws-amplify';import awsconfig from '../src/aws-exports';import * as mutations from "../src/graphql/mutations";import * as queries from '../src/graphql/queries';Amplify.configure(awsconfig);export default function Home() { return ( <> <Head> <title>Create Next App</title> <meta name="description" content="Generated by create next app" /> <meta name="viewport" content="width=device-width, initial-scale=1" /> <link rel="icon" href="https://dev.to/favicon.ico" /> </Head> <main> <h1>Hello World</h1> </main> </> );}Fetch Todo Data
Using Next.js getStaticProps functionality, let's fetch the todo data from the Amplify backend:
//index.jsexport async function getStaticProps() { const todoData = await API.graphql({ query: queries.listTodos, }); return { props: { todos: todoData.data.listTodos.items, } };}export default function Home({ todos }) { const [todoList, setTodoList] = useState(todos); ...}In the code above, we used Amplify's automatically generated query listTodos imported from the ../src/graphql/queries directory to get a list of all the Todos from the backend API, which is then passed as props to the main component.
Create Todo
In the index.js file, write a onCreateTodo function that will be called when a todo is created by the user:
//index.jsimport CreateTodo from "../components/CreateTodo";export default function Home({ todos }) {...const onCreateTodo = async (todo) => { const newTodo = { title: todo, completed: false, }; try { await API.graphql({ query: mutations.createTodo, variables: { input: newTodo }, }); setTodoList((list) => [...list, { ...newTodo }]); console.log("Successfully created a todo!"); } catch (err) { console.log("error: ", err); } };return ( ... <CreateTodo onCreateTodo={onCreateTodo} /> ... )}Here, the onCreateTodo function receives an input of an object with title and completed values. Also, this function is passed to the CreateTodo component as a prop
Next, let's implement the CreateTodo component UI:
//CreateTodo.jsximport React, { useState } from "react";const CreateTodo = ({ onCreateTodo }) => { const [todoItem, setTodoItem] = useState(""); const onInputChange = (e) => { const { value } = e.target; setTodoItem(value); }; const onSubmit = (e) => { e.preventDefault(); onCreateTodo(todoItem) setTodoItem(""); }; return ( <> <form className="flex justify-center mt-10"> <div className="bg-yellow-300 px-4 py-2 rounded-lg w-96"> <h1 className="text-center mt-4 mb-4 text-2xl text-white font-bold"> TodoList </h1> <div className="mt-6 flex space-x-4 m-10 justify-center"> <input className="bg-gray-100 rounded-md py-2 px-4 border-2 outline-none" id="todo" name="todo" value={todoItem} placeholder="Create a new Todo" onChange={onInputChange} /> <button className="bg-black text-white px-4 rounded-md font-semibold" onClick={onSubmit} > <i className="fa-solid fa-plus"></i> </button> </div> </div> </form> </> );};export default CreateTodo;Delete Todo
To delete a todo, add a onDeleteTodo function to the index.js file that deletes a todo based on its 'id' field and then pass it as a prop to the Todos.jsx component:
//index.jsimport Todo from "../components/Todos";export default function Home({ todos }) {...const onDeleteTodo = async (id) => { try { await API.graphql({ query: mutations.deleteTodo, variables: { input: { id } }, }); const filterTodo = todoList.filter((todo) => todo.id !== id); setTodoList(filterTodo); console.log("Successfully deleted a todo!"); } catch (err) { console.log({ err }); } };return ( ... <Todo todoList={todoList} onDeleteTodo={onDeleteTodo} /> ... )}Note that the
onDeleteTodofunction will be implemented on a delete button for each todo items later on in the tutorial
Display Todos Component
Next, we will implement the UI for displaying the list of todos. Update the Todos.jsx with the following content:
//Todos.jsximport React from "react";import TodoItem from "./TodoItem";const Todo = ({ todoList, onDeleteTodo }) => { return ( <> <div className="h-screen"> <div> {todoList.map((todo) => ( <TodoItem key={todo.id} todo={todo} onDeleteTodo={onDeleteTodo} /> ))} </div> </div> </> );};export default Todo;From the code above, we iterated through the array of todos which will then display each todo as a TodoItem component.
Update Todo
In the TodoItem.jsx component, let's create a onUpdateTodo function that uses the API's updateTodo mutation imported from the ../src/graphql/mutations directory to allow users mark a todo as completed or not:
//TodoItem.jsximport React, { useState } from "react";import { API } from "aws-amplify";import * as mutations from "../src/graphql/mutations";const onUpdateTodo = async (event) => { setIsCompleted(event.target.checked); const input = { id: todo.id, completed: event.target.checked }; try { await API.graphql({ query: mutations.updateTodo, variables: { input: { input }, }, }); console.log("Todo successfully updated!"); } catch (err) { console.log("error: ", err); } };Display Todo Items
Let's update the TodoItem component so we can display each todo item with a working checkbox and delete icon:
//TodoItem.jsxconst TodoItem = ({ todo, onDeleteTodo }) => { const [isCompleted, setIsCompleted] = useState(todo.completed); ... return ( <> <div className="flex justify-center"> <div className=" relative justify-center mt-6 w-96"> <div className="bg-white px-8 pt-8 pb-6 rounded-md text-gray-500 shadow-lg"> <div key={todo.id} style={{ textDecoration: isCompleted ? "line-through" : undefined, }} > <input type="checkbox" checked={isCompleted} onChange={OnUpdateTodo} className="h-4 w-4" /> <span className="pl-3">{todo.title}</span> </div> </div> <div className="absolute flex top-5 right-0 p-3 space-x-2"> <span className="text-red-500 cursor-pointer" onClick={() => onDeleteTodo(todo.id)} > <i className="fa-solid fa-trash"></i> </span> </div> </div> </div> </> );};export default TodoItem;Step 6 - Deploy the App
Now that we have our todo app implemented, we can deploy it to the cloud.
To deploy the app, run the following command:
amplify add hostingThen, run:
amplify publishThis will build the app and deploy it to AWS. When the deployment is complete, you will see a URL where you can access the app.
Conclusion
In this tutorial, we have successfully built a serverless todo app using AWS Amplify and Next.js. We defined a GraphQL API using AWS AppSync. Finally, we deployed the app to the cloud using AWS Amplify.
I hope you have found this tutorial helpful!. You can find the full source code in this Github repo and the demo here
Original Link: https://dev.to/aws-builders/build-a-todo-app-with-nextjs-and-aws-amplify-59ld
Dev To
More About this Source Visit Dev To