
An Interest In:
Web News this Week
- April 2, 2024
- April 1, 2024
- March 31, 2024
- March 30, 2024
- March 29, 2024
- March 28, 2024
- March 27, 2024
Some of Our Sources
- Mashable
- Techcrunch
- Web Designer Wall
- Pearsonified
- Abduzeedo
- Vandelay Design
- Crazy Leaf Design
- Web Design Ledger
- CSS Tricks
- Dev To
Help Webnuz
Referal links:
How to Create Guarded Routes using React Router
React router is one of the most popular libraries for setting up client-side routing in React apps. Guarded routes allow restricting user access to certain parts of your app.
If you have worked on a React App with React Router Dom, you would have felt the need to restrict user access to some specific part of your app. It can be authentication-based, permission-based, etc. In this article, we are going to have a look at how to set up Guarded Routes in React with React Router to restrict user access based on a defined condition.
What are Guarded Routes?
As the name signifies, the routes are guarded which means that a particular guarded route can only be accessed if the condition that guards the route is true. So the user can only access that route if the user has access to do so.
Why are Guarded Routes Required?
Routes are required to be guarded to restrict access to a specific set of users only. For example, if your app has authentication in place there can be 3 types of routes:
Authenticated Routes: The routes that only a logged-in or authenticated user can access. Eg: User profile and settings page.
Non-authenticated Routes: The routes that can only be accessed if the user is not logged in. Eg: Log in and registration routes.
Open Routes: The set of routes that any user can access regardless of being logged in or not.
In case, you have something like Role Base Access Control (RBAC) system in place for your users, implementing guarded routes is even more important.
How to Implement Guarded Routes?
To implement guarded routes, we would first need to add react-router-dom to a react application. Im going to use my Vite based react template for all the boilerplate code to get started. Lets jump on to the implementation part directly.
1. Add React Router Dom
React router dom is the go-to package for enabling client-side routing in react apps. We need to install the react-router-dom package from npm to set up routing for our app.
yarn add react-router-domThe latest version is 6.6.2 at the time of writing this article.
2. Add Guarded Route
The guarded route would be making use of Outlet and Navigate from the react-router-dom library to implement the business logic for guarding a set of routes. An <Outlet /> is used in parent route elements to render their child route elements. It allows nested UI to show up when child routes are rendered. While the <Navigate /> elements change the current location when it is rendered. We will be using a combination of these two to guard one or more routes behind a isRouteAccessible condition. When the condition holds, we would be rendering the <Outlet /> which in turn renders its child route element. On the contrary, if the condition is false, we navigate to a fallback page. This page can be a not found page or the login page as well based on different scenarios.
Given that we understand how we are going to implement the logic, lets jump on to the code part. Lets now create routes/GuardedRoute.tsx the file that would be used in the main routes configuration to define access controls for the routes:
3. Add the Application Routes
Now, we would be required to add the set of routes that we require to set up in our application. We would be required to add one route of each type:
Home route for the authenticated route. This is going to be guarded based on if the user is authenticated.
Login route for the non-authenticated route. This is going to be only accessible if the user is not logged in.
An open unguarded route: about the route. This would be accessible irrespective of whether the user is authenticated or not.
Apart from these, there would be a 404 route that would be added at the end to render when there is no matching route found.
React router allows us to pass an Route element as children of another Route element. We are going to use this ability to implement access control based on a condition for one or more routes in the code given below:
4. Add the Router
Now that we have defined all the route configurations, we need to add them to our app. We are going to use BrowserRouter for the same. We need to add BrowserRouter to our App.tsx and add the above create AppRoutes as its child element. Along with all of this, we are going to define a boolean state variable isAuthenticated to control the route-guarding capability with a login/logout button that toggles the state. Lets have a look at our apps App.tsx file:
5. Run the App
By now, we have added all the code required to create Guarded Route. Lets run our app using yarn run dev and we see the login page as the app loads:
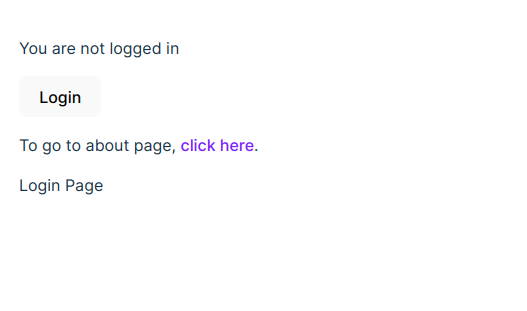
Since we are not logged in as of now, we should be able to access the about page as follows:

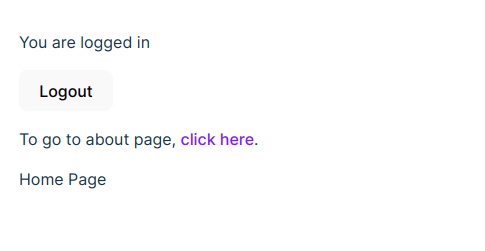
But if we try accessing the home page, we would be redirected back to the login page. Now, lets click on the login button and we would stay on the same about page:

Now, if we try hitting the login page (in a logged-in state), we would be redirected to the home route instead:
Conclusion
We have finally implemented Guarded Route in React using react-router-dom. Here is the link to the complete setup guide on GitHub.
Thanks for reading. Do share your thoughts on implementing Guarded Routes in React. Also, if you found this article useful, do consider following me on Dev and sharing this article within your circle.
References
Original Link: https://dev.to/eshankvaish/how-to-create-guarded-routes-using-react-router-1cai
Dev To
More About this Source Visit Dev To