
An Interest In:
Web News this Week
- March 27, 2024
- March 26, 2024
- March 25, 2024
- March 24, 2024
- March 23, 2024
- March 22, 2024
- March 21, 2024
Some of Our Sources
- Techcrunch
- Technology Review
- Joshua Blankenship
- Smashing Magazine
- FanExtra - PSD
- Noupe
- My Ink Blog
- Willems Lab
- Hashedout
- The Verge
Help Webnuz
Referal links:
Render Pipelines in wgpu and Rust
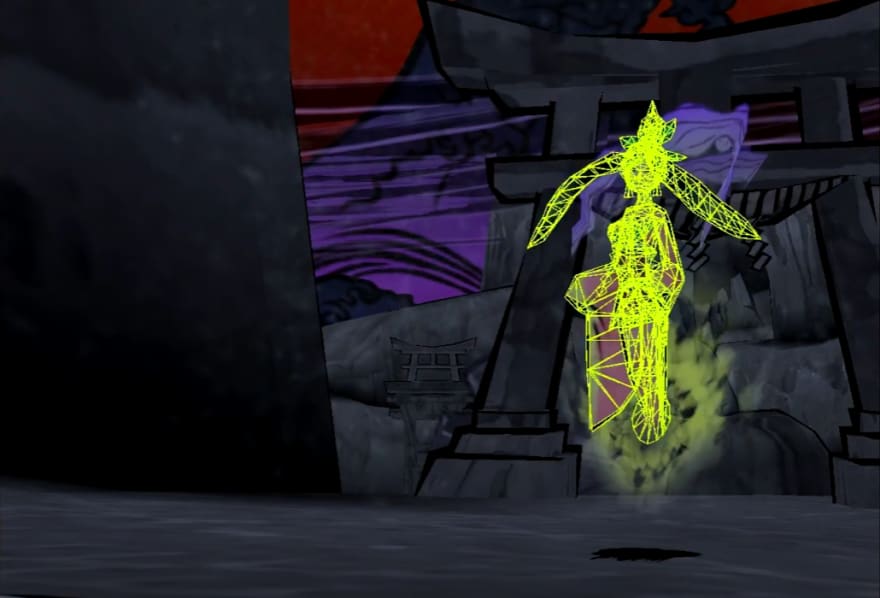
I finished this great wgpu tutorial that gets you up and running with WebGPU and Rust using the wgpu crate. It teaches you to setup the graphic context and render pipeline, import and render a textured model, and even add lighting. You can see the end result in this video:


Afterwards though, you end up with a few modules, but most of the code is in one giant file. In a real application, youd probably split up a lot of the functionality happening into reusable modules. I started to ask myself: how would I render multiple models with different textures or an entire scene?
I thought Id share my approach as I take the wgpu tutorial code and refactor it. Well split the functionality out and build in an architecture to allow for a flat scene of 3D models. Ill even sprinkle in a little bit of nested scene architecture. This process helped me (and hopefully you) attain a deeper understanding of the render pipeline and how each component works together.
TLDR?: Heres the final code.
This is part of a series on wgpu in Rust. Find more posts in the #wgpu tag.

Research
Before I set off on the journey of refactoring, I looked for other wgpu projects to see how they structured their app architecture. I found 2 great examples that I primarily referenced - both with b names funnily enough: baryon and bevy.
baryon is a lightweight toy renderer for prototyping 3D applications in Rust. It uses wgpu to render 3D elements, hecs for an ECS system (to make a scene with entities like 3D models), and winit for handling cross-platform window management (just like the wgpu tutorial). It also allows for setting different render passes, like a Phong (cartoony/fast) vs PBR (realistic) pass.
Bevy is an entire game engine for creating 2D or 3D games in Rust. It uses wgpu for rendering everything, and a few other dependencies - mostly their own crates. Its not fully featured like Unity or Godot since its so early but its jam-packed with a lot of great functionality (like most recently compute shaders).
I ended up referring to baryon more, because the codebase was much smaller and simpler. But bevy was a great alternate reference for specific functionality (like figuring out how to render primitives - or soon, parsing and rendering different 3D file formats).
Breaking down baryon
I wont go too deep here, but I want to quickly overview the architecture of Baryon to see what we can takeaway for our own app.
The best place to start is the librarys simplest example to understand the shape of the API and kind of functions well see run.
- A
Windowis created and built (likely using the builder pattern) (L#9) Contextis initialized using a reference to the window, and we usepollsterto block the main thread from stopping (L#10)- A
Sceneis created. (L#11) - A
Camerais created with initial data (like a position and clear color) - Then the scene is populated with a light and 2 primitive entities.
- We create a render pass - in this case a Phong pass (L#42)
- Now the magic happens we
runtheWindowmethod, which creates a infinite loop that we can render inside by matching theEvent::Drawenum. - Inside the draw event, we use the
Contexttopresent(or likely render our scene)
Thats it! Not too bad. But theres a bit happening behind the scenes to make this code look so short and elegant. You can also see some similar modules from the wgpu tutorial, like the Camera.
My goal was to use baryon as inspiration, but not just copy paste. I wanted to truly refactor the app and experience why and how baryon author got to their code (or end up on my own path if needed). Itll be hard to convey everything I learned, so I highly recommend doing something like this as an exercise, especially if you want to learn more advanced Rust (like me).
The Process
Well break down the app into a few different parts:
- Window
- Context
- Render Pass
I tried to keep the commits fairly organized, so feel free to cruise through the commits to get a clearer picture if needed.
The gimmes
The wgpu tutorial did a great job of modularizing some of the code already, like the Camera or Instance structs. We can take those and separate them into their own modules to clean up the library file a bit. Here are the commits for Camera and Instance. Great practice for basic understanding Rust modules.
Window
This was probably the easiest module to pull out. I grabbed all the initialization methods at the top of the app and put them into a Window struct.
use winit::{ event::*, event_loop::{ControlFlow, EventLoop, EventLoopWindowTarget}, window,};pub struct Window { pub event_loop: EventLoop<()>, pub window: window::Window,}impl Window { pub fn new() -> Self { // TODO: Add size let event_loop = EventLoop::new(); let window = window::WindowBuilder::new() .with_title("ryos wgpu playground") .build(&event_loop) .unwrap(); Self { event_loop, window } }}Then in the app, we could initialize the new Window struct and use the window reference we store inside:
let window = Window::new();// Later in the appwindow.window.set_inner_size(PhysicalSize::new(450, 400));This worked great, but we get left with our event loop code (window.event_loop) outside the Window struct. And theres a lot of boilerplate code happening that could be moved into the Window struct. So lets do that (commit for reference).
First we have to create some window events to match inside our render loop. These are just winit events we pass down, like the window resizing, or keyboard events:
pub enum WindowEvents { Resized { width: u32, height: u32, }, Keyboard { state: ElementState, virtual_keycode: Option<VirtualKeyCode>, }, Draw,}I tried not to create new keyboard events like baryon, and just keep it simple by using the types provided by winit - like VirtualKeyCode.
Now we need a method to run our window loop. And it needs to accept a callback function that gets the window event enums we just created. I looked up how to do a callback function parameter in Rust and it was recommend to use the Fn() or FnMut() types to wrap the result you return (the enum in this case WindowEvents). Rust did not like this
// Compiler error!pub fn run(self, mut callback: FnMut(WindowEvents) -> ()) {I ended up doing essentially the same function signature as the baryon project because the Rust compiler suggested it using the impl 'static + prefix:
pub fn run(self, mut callback: impl 'static + FnMut(WindowEvents) -> ()) {Once I figured that out, it was just a matter of copying/pasting the giant event loop in the Window.run() method and adding the callback param.
Now in the app, the window loop looked much cleaner :
window.run(move |event| match event { WindowEvents::Resized { width, height } => { state.resize(winit::dpi::PhysicalSize { width, height }); } WindowEvents::Draw => { state.update(); state.render(); } WindowEvents::Keyboard { state, virtual_keycode, } => {}});Now that we have a window setup, lets move on to the graphical context.
Context
This was was fairly simple (at first). Since wed be splitting our app into a context and a render pass, the logic for the context itself is very short.
We basically initialize the context (the surface we draw on, the device we use, the queue we schedule draws with, and the config of the surface) and keep it around using the struct. More of the good ol copy paste basically, and making sure the GraphicsContext struct types were correct.
use crate::{texture, window::Window};pub struct GraphicsContext { // Graphic context pub surface: wgpu::Surface, pub device: wgpu::Device, pub queue: wgpu::Queue, pub config: wgpu::SurfaceConfiguration,}impl GraphicsContext { pub async fn new(window: &Window) -> GraphicsContext { let size = &window.window.inner_size(); // The instance is a handle to our GPU // BackendBit::PRIMARY => Vulkan + Metal + DX12 + Browser WebGPU let instance = wgpu::Instance::new(wgpu::Backends::all()); let surface = unsafe { instance.create_surface(&window.window) }; let adapter = instance .request_adapter(&wgpu::RequestAdapterOptions { power_preference: wgpu::PowerPreference::default(), compatible_surface: Some(&surface), force_fallback_adapter: false, }) .await .unwrap(); // Select a device to use let (device, queue) = adapter .request_device( &wgpu::DeviceDescriptor { label: None, features: wgpu::Features::empty(), // WebGL doesn't support all of wgpu's features, so if // we're building for the web we'll have to disable some. limits: if cfg!(target_arch = "wasm32") { wgpu::Limits::downlevel_webgl2_defaults() } else { wgpu::Limits::default() }, }, // Some(&std::path::Path::new("trace")), // Trace path None, ) .await .unwrap(); // Config for surface let config = wgpu::SurfaceConfiguration { usage: wgpu::TextureUsages::RENDER_ATTACHMENT, format: surface.get_supported_formats(&adapter)[0], width: size.width, height: size.height, present_mode: wgpu::PresentMode::Fifo, }; surface.configure(&device, &config); GraphicsContext { surface, device, queue, config, } }}For the time being, I also copied the create_render_pipeline function into the module, since it seemed like a good place (in hindsight, better alternative might be the render pass module).
Heres the full commit for reference.
This is so easy! lol. Not exactly But were moving past a lot the copy + paste stuff now. Time to figure out the render pass.
Render pass
This was the most puzzling part to figure out. What exactly is a render pass in wgpu terms? Why do you need different kinds? Where does it start and end (depth texture, pipeline, buffers, etc)? How would I dynamically swap between one render pipeline and another? There were lots of basic questions that I had to research a bit before being able to answer.
What is a render pass?
A render pass usually represents a single pass of the renderer, using a specific rendering pipeline. This article does a great job of breaking it down.
In most 3D engines, there are often several render passes that combine or composite into the final image. You can see in the Unreal Engine documentation that they do separate render passes for lighting, shadows, reflections, and the unlit models. Or in the Godot docs, you can see post processing as a render pass.
This video breaks down the rendering process for 10 PS2 games - if you go to Metal Gear Solid or Okami section you can see that they render the all the models and lighting, then spend a few passes on post processing effects. If you want to learn more about the process of breaking down the rendering pipeline, I recommend checking out RenderDocs.

It gets even more complex when you go into the parts of a render pass, like depth stencils, but for now well focus on the high level.
The render pass came from inside the house
But lets take a few steps back. During the wgpu tutorial, we actually created 2 separate render passes whether you realized or not.
If you look at the tutorial code, we draw the lights - then the 3D models. This process happens by setting a specific render pipeline (lighting or 3D models), doing the draw calls, then rinse repeat with another pipeline (3D models in this case).
// Setup lighting pipelinerender_pass.set_pipeline(&self.light_render_pipeline);// Draw/calculate the lighting on modelsrender_pass.draw_light_model( &self.obj_model, &self.camera_bind_group, &self.light_bind_group,);// Setup 3D model pipelinerender_pass.set_pipeline(&self.render_pipeline);// Draw the modelsrender_pass.draw_model_instanced( &self.obj_model, 0..self.instances.len() as u32, &self.camera_bind_group, &self.light_bind_group,);Why does this matter though (beyond giving us stacked effects like lighting, shadows, or post-FX)? As you can see in the example above, the render pipeline is also important to this process. With 2 different pipelines, we get 2 shaders running (the light.wgsl and the main shader).
What is the render pipeline?
The render pipeline is in charge of understanding the pipeline layout (aka any uniforms or data we pass to shaders), the shaders well use (vertex, fragment, compute, etc) - as well as the shader code to run (.wgsl files). It also has configurations for how to render the elements, like the cull_mode which can avoid rendering the back of models the camera would never see (to save rendering time).
The big thing we can takeaway from the render pipeline is that it defines the uniforms (all the variables we send to shader) and the actual shader itself.
Why does the render pipeline matter?
So lets say we want to render our 3D scene with a different shader, like a toon shader. What if the shader also required new input (or uniforms), like a color or positional data (to help calculate an outline)?
Wed need a whole new pipeline to accomplish this, since our current pipeline doesnt accommodate for the new uniforms (color + position), and we need to use a different shader file to instruct the pipeline differently.
Sometimes you might even want to do this as a stacked effect (e.g. for post processing). The ability to be able to modularly define a render pass and a pipeline is essential for this.
Creating render passes
In this example Ill focus on creating a Phong pass. Later you could create a PBR (physically based rendering) pass.
Keep in mind though, this wont actually be a Phong shader Im just using that as a placeholder name. Well be migrating the existing render pipeline and shader from the wgpu tutorial.
To start, I basically took all the relevant initialization code and shoved it in a new struct called PhongPass. Inside each pass struct wed store:
- Depth texture
- Bind groups (the uniform structure)
- Render pipelines
- Buffers for uniform data
- Uniform data (optional - could be app-level)
We still need to migrate the render/draw method with the actual render pass.
Because we want to make multiple render passes, we need to create a Trait to define some shared functionality they can all implement. In the pass/mod.rs file, I created a Pass trait that has a draw function. We provide it all the parameters it needs (mostly from the GraphicsContext and the obj_model well be rendering).
pub trait Pass { fn draw( &mut self, surface: &Surface, device: &Device, queue: &Queue, obj_model: &Model, ) -> Result<(), wgpu::SurfaceError>;}And you guessed it - for now lets just throw most of the render code in there from our [lib.rs](http://lib.rs) file:
impl Pass for PhongPass { fn draw( &mut self, surface: &Surface, device: &Device, queue: &Queue, obj_model: &Model, ) -> Result<(), wgpu::SurfaceError> { let output = surface.get_current_texture()?; let view = output .texture .create_view(&wgpu::TextureViewDescriptor::default()); let mut encoder = device.create_command_encoder(&wgpu::CommandEncoderDescriptor { label: Some("Render Encoder"), }); { let mut render_pass = encoder.begin_render_pass(&wgpu::RenderPassDescriptor { label: Some("Render Pass"), color_attachments: &[Some(wgpu::RenderPassColorAttachment { view: &view, resolve_target: None, ops: wgpu::Operations { // Set the clear color during redraw // This is basically a background color applied if an object isn't taking up space load: wgpu::LoadOp::Clear(wgpu::Color { r: 0.1, g: 0.2, b: 0.3, a: 1.0, }), store: true, }, })], // Create a depth stencil buffer using the depth texture depth_stencil_attachment: Some(wgpu::RenderPassDepthStencilAttachment { view: &self.depth_texture.view, depth_ops: Some(wgpu::Operations { load: wgpu::LoadOp::Clear(1.0), store: true, }), stencil_ops: None, }), }); // ...truncatedNice! Now we have a good structure to work with. Our apps render function becomes as simple as:
self.pass.draw( &self.ctx.surface, &self.ctx.device, &self.ctx.queue, &self.obj_model,);This app should work exactly the same as before but a lot of our functionality has been split into its own module. Now we can do the cool stuff, like rendering more than one model.

So whats missing from rendering multiple models now? We currently have one buffer for our instance data (instance_buffer), so if we tried to use self.pass.draw() with another 3D model, theyd share the exact same positions (and number of instances).
In order to have different positions, we need to have a buffer setup for each object and use that as a vertex buffer when we render each model.
We also currently do things like pass the camera and light uniform data every time we render an object. Instead, we could batch them into a combined uniform (or bind group) and define them only once (globally).
Local vs global uniforms
This is a concept that may be familiar to you if you use other 3D engines. There are shader uniforms that are used by all the shaders (like the camera position), and there are other uniforms that are local to the object (like its position, color, normals, etc).
Its a little confusing in our app though, because we setup instancing for models, so our local uniform data (like position) is stored there instead. But we do have local uniforms in the form of our texture data.
So my goal was to take the camera bind group and make it a global bind group. Id also include the texture sampler in the global uniforms (instead of locals, like we do now), so we dont waste buffer space on duplicate data.
Well also create a local bind group. This will contain our object data. You might think we dont need a position uniform here (since our instances each have a position) but we could use this position to offset all our instances (like a <group> in ThreeJS or a GameObject in Unity that have child objects).
#[repr(C)]#[derive(Clone, Copy, bytemuck::Pod, bytemuck::Zeroable)]struct Globals { view_position: [f32; 4], view_proj: [[f32; 4]; 4], ambient: [f32; 4],}#[repr(C)]#[derive(Clone, Copy, bytemuck::Pod, bytemuck::Zeroable)]struct Locals { position: [f32; 4], color: [f32; 4], normal: [f32; 4], lights: [f32; 4],}One note: We store the lights in
Localshere (I think baryon does similar) - but might be better to lift them toGlobals.
Setting up the global + local uniforms
Now to use these uniforms we need to create a bind group layout to describe the data structure, a buffer to transmit data, and a bind group using the layout and buffer.
Since we want to support multiple objects, well also need a way to store multiple buffers and bind groups (since every object will have unique data - like position or color). To do that, we use HashMap to store the bind groups and buffers, and keep track using the objects ID (aka a number or usize).
Note: In this commit/version, I only have 1 uniform buffer, because we dont have multiple objects yet. Well do something special later to handle that.
pub struct PhongPass { // Uniforms pub global_bind_group_layout: BindGroupLayout, pub global_uniform_buffer: wgpu::Buffer, pub global_bind_group: wgpu::BindGroup, pub local_bind_group_layout: BindGroupLayout, local_uniform_buffer: wgpu::Buffer, local_bind_groups: HashMap<usize, wgpu::BindGroup>, // Other properties}impl PhongPass { pub fn new( phong_config: &PhongConfig, device: &wgpu::Device, queue: &wgpu::Queue, config: &wgpu::SurfaceConfiguration, camera: &Camera, ) -> PhongPass { // Other stuff // Initialize global uniforms let global_size = mem::size_of::<Globals>() as wgpu::BufferAddress; let global_bind_group_layout = device.create_bind_group_layout(&wgpu::BindGroupLayoutDescriptor { label: Some("[Phong] Globals"), entries: &[ // Global uniforms wgpu::BindGroupLayoutEntry { binding: 0, visibility: wgpu::ShaderStages::VERTEX | wgpu::ShaderStages::FRAGMENT, ty: wgpu::BindingType::Buffer { ty: wgpu::BufferBindingType::Uniform, has_dynamic_offset: false, min_binding_size: wgpu::BufferSize::new(global_size), }, count: None, }, // Lights wgpu::BindGroupLayoutEntry { binding: 1, visibility: wgpu::ShaderStages::FRAGMENT, ty: wgpu::BindingType::Buffer { ty: wgpu::BufferBindingType::Uniform, has_dynamic_offset: false, min_binding_size: wgpu::BufferSize::new(light_size), }, count: None, }, // Sampler for textures wgpu::BindGroupLayoutEntry { binding: 2, visibility: wgpu::ShaderStages::FRAGMENT, ty: wgpu::BindingType::Sampler(wgpu::SamplerBindingType::Filtering), count: None, }, ], }); // Global uniform buffer let global_uniform_buffer = device.create_buffer(&wgpu::BufferDescriptor { label: Some("[Phong] Globals"), size: global_size, usage: wgpu::BufferUsages::UNIFORM | wgpu::BufferUsages::COPY_DST, mapped_at_creation: false, }); let global_bind_group = device.create_bind_group(&wgpu::BindGroupDescriptor { label: Some("[Phong] Globals"), layout: &global_bind_group_layout, entries: &[ wgpu::BindGroupEntry { binding: 0, resource: global_uniform_buffer.as_entire_binding(), }, wgpu::BindGroupEntry { binding: 1, resource: light_buffer.as_entire_binding(), }, wgpu::BindGroupEntry { binding: 2, resource: wgpu::BindingResource::Sampler(&sampler), }, ], }); }}We add the bind group layout to our pipeline layout:
// Setup the render pipelinelet pipeline_layout = device.create_pipeline_layout(&wgpu::PipelineLayoutDescriptor { label: Some("[Phong] Pipeline"), bind_group_layouts: &[&global_bind_group_layout, &local_bind_group_layout], push_constant_ranges: &[],});And then in our draw method and render pass, we can set the globals first, then the locals. Later, well loop over all objects in the scene and create bind groups and buffers for each object.
render_pass.set_bind_group(0, &self.global_bind_group, &[]);self.local_bind_groups.entry(0).or_insert_with(|| { device.create_bind_group(&wgpu::BindGroupDescriptor { label: Some("[Phong] Locals"), layout: &self.local_bind_group_layout, entries: &[ wgpu::BindGroupEntry { binding: 0, resource: self.local_uniform_buffer.as_entire_binding(), }, wgpu::BindGroupEntry { binding: 1, resource: wgpu::BindingResource::TextureView( &obj_model.materials[0].diffuse_texture.view, ), }, ], })});And well also need to update our shader to accept the Globals now from the correct bind group binding index:
// Define any uniforms we expect from appstruct Globals { view_pos: vec4<f32>, view_proj: mat4x4<f32>, ambient: vec4<f32>,};// We create variables for the bind groups@group(0) @binding(0)var<uniform> globals: Globals;You can see the full commit here.
Writing to the buffer
So how do we update the uniforms? The answer is to use the Queues write_buffer() method to update a specific buffer (like global_uniform_buffer) with the new data. We also need to cast the data into a buffer friendly data format using bytemuck.
In our app file we can update the camera position like so:
self.ctx.queue.write_buffer( &self.pass.global_uniform_buffer, 0, bytemuck::cast_slice(&[self.pass.camera_uniform]),);Multiple models
We finally made it. It took a lot of setup to get here, but I promise, it was worth it. Now it should be much easier to change our system and render 2 models (or more!).
In our app, lets change our obj_model property to models and make it a Vec. This will let us store as many models as we need, and even change the size of the vector dynamically throughout the app (to add or remove models).
models: Vec<model::Model>,Then in our app initialization, we can copy paste our obj_model code using the load_model() function. Make sure to set a different .obj model.
let obj_model = resources::load_model("banana.obj", &ctx.device, &ctx.queue) .await .expect("Couldn't load model. Maybe path is wrong?");let cube_model = resources::load_model("cube.obj", &ctx.device, &ctx.queue) .await .expect("Couldn't load model. Maybe path is wrong?");let models = vec![obj_model, cube_model];And in the render method, lets update the render pass draw call to use the models instead of obj_model:
self.pass.draw( &self.ctx.surface, &self.ctx.device, &self.ctx.queue, &self.models,);And make sure to change that function signature in the Pass trait and the PhongPass implementation of the trait and function.
pub trait Pass { fn draw( &mut self, surface: &Surface, device: &Device, queue: &Queue, // Use the vector of models here models: &Vec<Model>, ) -> Result<(), wgpu::SurfaceError>;}And in the PhongPass draw method, we can loop through the models and render each of them. But before we draw them - we need to create the bind group for each object. And when we create the bind group, we also assign each objects texture.
Note: We do this in a separate loop because of Rust mutability, but you could probably get away with 1 loop and wrapping the bind group assignment in a block.
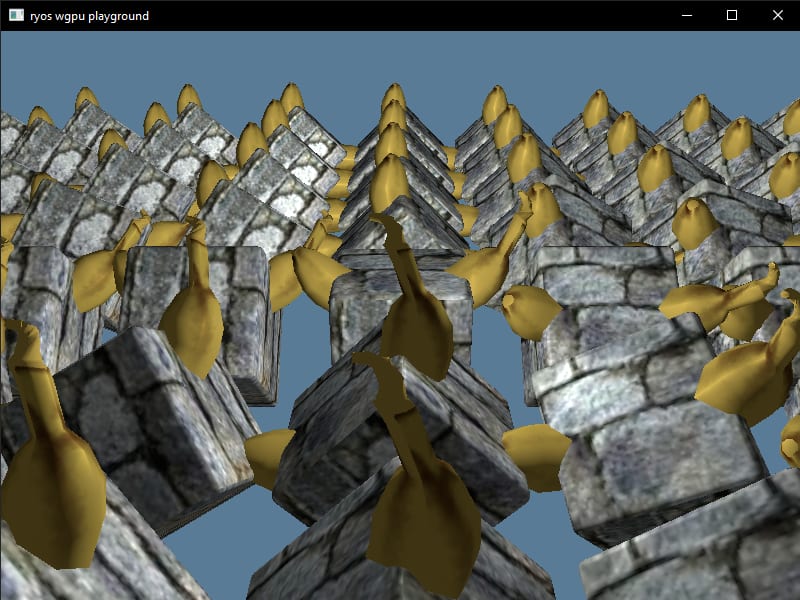
let mut model_index = 0;for model in models { self.local_bind_groups .entry(model_index) .or_insert_with(|| { device.create_bind_group(&wgpu::BindGroupDescriptor { label: Some("[Phong] Locals"), layout: &self.local_bind_group_layout, entries: &[ wgpu::BindGroupEntry { binding: 0, resource: self.local_uniform_buffer.as_entire_binding(), }, wgpu::BindGroupEntry { binding: 1, resource: wgpu::BindingResource::TextureView( &model.materials[0].diffuse_texture.view, ), }, ], }) }); model_index += 1;}model_index = 0;for model in models { // Draw the models render_pass.draw_model_instanced( &model, 0..*&self.instances.len() as u32, &self.local_bind_groups[&model_index], ); model_index += 1;}This should get multiple objects rendering in the scene. But youll notice a couple problems. Both objects are in the same positions! This is because we dont set an instance buffer per-object, we do it once and then render all objects (so they use the same one). We also havent wired up our locals yet, and if you look close, were using the same buffer for all objects there too.
Multiple instance buffers
So lets add the ability to have multiple instance buffers. Itll look very similar to our bind group setup.
The first thing we need to do is define a new type to combine our Model and Instances types. We can name it Node (but Element, Entity, etc are all good). I created a separate file for it (since we might use it across the app). The parent property is for creating nesting later.
pub struct Node { pub parent: u32, // local: Matrix? pub model: model::Model, pub instances: Vec<Instance>,}Now instead of having a Vec<Model> - we have a Vec<Node>. And when we initialize our models, we need to provide separate instance data:
let cube_instances = (0..2) .map(|z| { let z = SPACE_BETWEEN * (z as f32); let position = cgmath::Vector3 { x: z, y: 1.0, z }; let rotation = if position.is_zero() { cgmath::Quaternion::from_axis_angle(cgmath::Vector3::unit_z(), cgmath::Deg(0.0)) } else { cgmath::Quaternion::from_axis_angle(position.normalize(), cgmath::Deg(45.0)) }; Instance { position, rotation } }) .collect::<Vec<_>>();let banana_node = Node { parent: 0, model: obj_model, instances: banana_instances,};let cube_node = Node { parent: 0, model: cube_model, instances: cube_instances,};let models = vec![banana_node, cube_node];Then in our PhongPass render pass, we use a HashMap to store buffers for each instance.
let mut model_index = 0;for node in nodes { // Bind group code here... // Find the instance buffer for this model, or create o ne self.instance_buffers.entry(model_index).or_insert_with(|| { // We condense the matrix properties into a flat array (aka "raw data") // (which is how buffers work - so we can "stride" over chunks) let instance_data = node .instances .iter() .map(Instance::to_raw) .collect::<Vec<_>>(); // Create the instance buffer with our data let instance_buffer = device.create_buffer_init(&wgpu::util::BufferInitDescriptor { label: Some("Instance Buffer"), contents: bytemuck::cast_slice(&instance_data), usage: wgpu::BufferUsages::VERTEX, }); instance_buffer }); model_index += 1;}Then when we draw our model, we use the models specific instance buffer by using the set_vertex_buffer method before the draw:
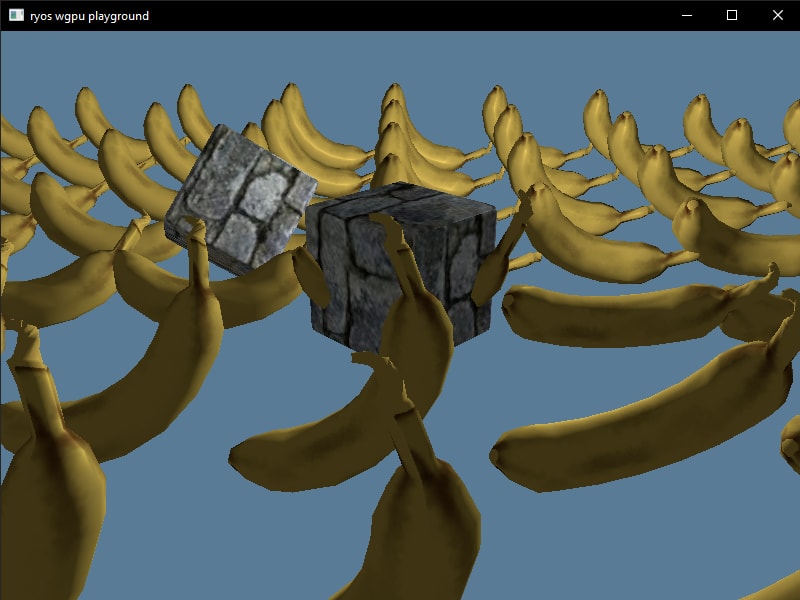
model_index = 0;for node in nodes { render_pass.set_vertex_buffer(1, self.instance_buffers[&model_index].slice(..));And just like that, we have multiple models in our app, each with unique instancing!

Using Local uniforms
We still havent fully setup local uniforms in the app yet. The bind group layout and bind group are there, but we dont have unique buffers for each object. We also dont have any local data to pass yet, so we need to make some.
Lets update our Node struct to accept a locals property:
use crate::{instance::Instance, model, pass::phong::Locals};// This represents a 3D model in a scene.// It contains the 3D model, instance data, and a parent ID (TBD)pub struct Node { // ID of parent Node pub parent: u32, // Local position of model (for relative calculations) pub locals: Locals, // The vertex buffers and texture data pub model: model::Model, // An array of positional data for each instance (can just pass 1 instance) pub instances: Vec<Instance>,}Now when we initialize the nodes, we need to provide local data. We can just use our Locals struct from our render pass file and initialize it with dummy data. Here I provide a blue color to both objects (so we can check for it later in the shader):
// Create the nodeslet banana_node = Node { parent: 0, locals: Locals { position: [0.0, 0.0, 0.0, 0.0], color: [0.0, 0.0, 1.0, 1.0], normal: [0.0, 0.0, 0.0, 0.0], lights: [0.0, 0.0, 0.0, 0.0], }, model: obj_model, instances: banana_instances,};let cube_node = Node { parent: 0, locals: Locals { position: [0.0, 0.0, 0.0, 0.0], color: [0.0, 0.0, 1.0, 1.0], normal: [0.0, 0.0, 0.0, 0.0], lights: [0.0, 0.0, 0.0, 0.0], }, model: cube_model, instances: cube_instances,};We have local data, now we need to create a new buffer for each object. We could do basically what we did for the instances and create the buffers in the render loop using a HashMap to store them. But after looking at baryon, I noticed they use a uniform pool to handle this.
It basically does the same thing as our instance buffer code, but instead of using a HashMap, we use a Vec. This UniformPool struct will also help us add helper methods like update_uniform() to simplify writing to the buffers.
/// Uniform buffer pool/// Used by render passes to keep track of each objects local uniforms/// and provides a way to update uniforms to render pipelinepub struct UniformPool { label: &'static str, pub buffers: Vec<wgpu::Buffer>, size: u64,}impl UniformPool { pub fn new(label: &'static str, size: u64) -> Self { Self { label, buffers: Vec::new(), size, } } pub fn alloc_buffers(&mut self, count: usize, device: &Device) { // We reset the buffers each time we allocate // TODO: Ideally we should keep track of the object it belongs to, // so we can add/remove objects (and their uniform buffers) dynamically self.buffers = Vec::new(); for _ in 0..count { let local_uniform_buffer = device.create_buffer(&wgpu::BufferDescriptor { label: Some(&self.label), size: self.size, usage: wgpu::BufferUsages::UNIFORM | wgpu::BufferUsages::COPY_DST, mapped_at_creation: false, }); self.buffers.push(local_uniform_buffer); } } pub fn update_uniform<T: bytemuck::Pod>(&self, index: usize, data: T, queue: &Queue) { if &self.buffers.len() > &0 { queue.write_buffer(&self.buffers[index], 0, bytemuck::cast_slice(&[data])); } }}Now in our PhongPass struct we can use our UniformPool instead of our local_uniform_buffer.
And in our draw method, we first initialize the buffers for each object:
// Allocate buffers for local uniformsif (self.uniform_pool.buffers.len() < nodes.len()) { self.uniform_pool.alloc_buffers(nodes.len(), &device);}Then when we loop over our nodes and create the bind groups for each object, we can assign each objects unique buffer:
// Loop over the nodes/models in a scene and setup the specific models// local uniform bind group and instance buffers to send to shader// This is separate loop from the render because of Rust ownership// (can prob wrap in block instead to limit mutable use)let mut model_index = 0;for node in nodes { let local_buffer = &self.uniform_pool.buffers[model_index]; // We create a bind group for each model's local uniform data // and store it in a hash map to look up later self.local_bind_groups .entry(model_index) .or_insert_with(|| { device.create_bind_group(&wgpu::BindGroupDescriptor { label: Some("[Phong] Locals"), layout: &self.local_bind_group_layout, entries: &[ wgpu::BindGroupEntry { binding: 0, // We use the buffer from UniformPool here resource: local_buffer.as_entire_binding(), }, wgpu::BindGroupEntry { binding: 1, resource: wgpu::BindingResource::TextureView( &node.model.materials[0].diffuse_texture.view, ), }, ], }) });And since we passed our local bind groups to our draw method previously like so:
// Draw all the model instancesrender_pass.draw_model_instanced( &node.model, 0..*&node.instances.len() as u32, &self.local_bind_groups[&model_index],);We can start using the local uniforms in our shader! Lets open up the shader.wgsl file and add our local uniforms:
// Define any uniforms we expect from appstruct Globals { view_pos: vec4<f32>, view_proj: mat4x4<f32>, ambient: vec4<f32>,};struct Locals { position: vec4<f32>, color: vec4<f32>, normal: vec4<f32>, lights: vec4<f32>,}// We create variables for the bind groups@group(0) @binding(0)var<uniform> globals: Globals;@group(1) @binding(0)var<uniform> locals: Locals;And in our fragment portion of our shader, we can use the locals.color to pass the color from our node all the way to the shader. We can use it directly:
return locals.color;
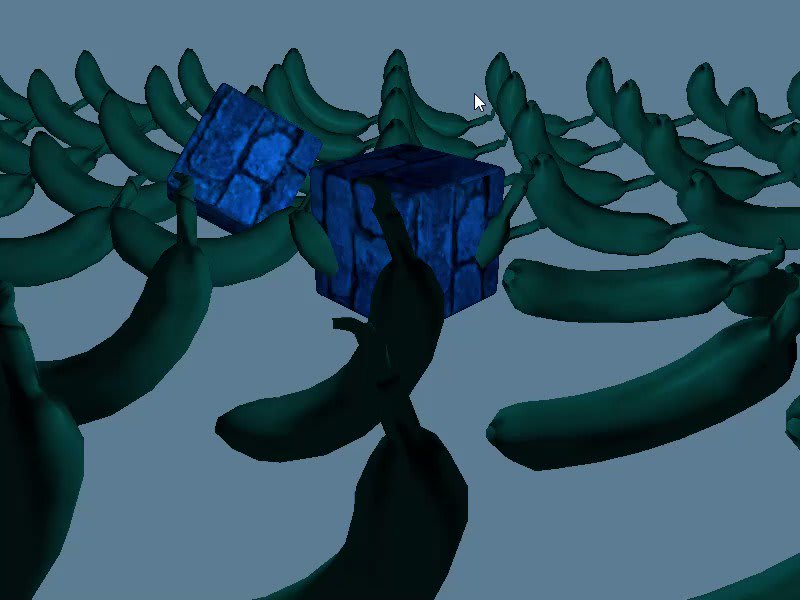
Lets use it to colorize our texture to a certain hue.
return locals.color * vec4<f32>(result, object_color.a);You should see your texture with a blue hue applied!
Updating local uniforms
So how do we update a local uniform, like moving an object while the app is running? Its very similar to the process for globals: write the new data to the appropriate buffer.
In our apps update() method, lets loop over our nodes and change the local data, then send that to the buffer using our UniformPool.update_uniform() method:
// Update local uniformslet mut node_index = 0;for node in &mut self.nodes { node.locals.color = [ node.locals.color[0], (node.locals.color[1] + 0.001), (node.locals.color[2] - 0.001), node.locals.color[3], ]; &self .pass .uniform_pool .update_uniform(node_index, node.locals, &self.ctx.queue); node_index += 1;}This should animate the color of your 3D object to go from blue to green (since were updating the RGBA values and adding/subtracting from the GB parts).
You still here?
This was quite the long and arduous process just to get another 3D model running, but now we should have a nice architecture in place to do cooler stuff. We could create a cartoon or PBR render pass, or start to create a scene with nested objects with relative positioning to their parents. And did I mention all this code runs native and on the web? The potential is endless (or as much as the WebGPU spec allows for anyway).
Want to share your progress or ask any questions? Feel free to reach out to me on Twitter or Mastodon. Also make sure to check out the Rust Game Development groups Discord channel, theres lots of cool people on there that work on wgpu too. And thanks again to the author of Baryon for such a great resource on advanced wgpu architecture.
References
Original Link: https://dev.to/whoisryosuke/render-pipelines-in-wgpu-and-rust-2dh3
Dev To
More About this Source Visit Dev To