
An Interest In:
Web News this Week
- April 25, 2024
- April 24, 2024
- April 23, 2024
- April 22, 2024
- April 21, 2024
- April 20, 2024
- April 19, 2024
Some of Our Sources
- Web Designer Wall
- Team Treehouse
- Joshua Blankenship
- Pearsonified
- You The Designer
- Inspiredology
- Fudge Graphics
- Line 25
- Design Modo
- Willems Lab
Help Webnuz
Referal links:
Symfony 6 and EasyAdmin 4: Admin Panel for User Management System
Summary
EasyAdmin enables you to create admin panel bound to storage such as RDBMS easily.
It is one of the bundles of Symfony, a powerful and flexible PHP framework, also requiring Doctrine ORM entities.
This post shows how to implement admin panel for user management system with Symfony and EasyAdmin.
Environment
Reference
Tutorial
Overview
In order to create admin panel, you need to take the 4 steps:
- Preparation
- Create dashboard
- Introduce access control
- Create a CRUD page
Here we go.
1. Preparation
1-1. Build up user management system with Symfony SecurityBundle
Follow my previous post:

1-2. Install dependency
According to their Design page:
The design of the backend is ready for any kind of application.
all managed by Webpack via Symfony's Webpack Encore.
Install the bundle:
$ php composer require \ symfony/webpack-encore-bundle1-3. Install EasyAdmin bundle
Here is the main command line for getting started :)
$ composer require easycorp/easyadmin-bundleThe output was:
Info from https://repo.packagist.org: #StandWithUkraineUsing version ^4.4 for easycorp/easyadmin-bundle./composer.json has been updatedRunning composer update easycorp/easyadmin-bundleLoading composer repositories with package informationRestricting packages listed in "symfony/symfony" to "6.1.*"Updating dependenciesLock file operations: 3 installs, 0 updates, 0 removals - Locking easycorp/easyadmin-bundle (v4.4.2) - Locking symfony/polyfill-uuid (v1.26.0) - Locking symfony/uid (v6.1.5)Writing lock fileInstalling dependencies from lock file (including require-dev)Package operations: 3 installs, 0 updates, 0 removals - Downloading symfony/polyfill-uuid (v1.26.0) - Downloading symfony/uid (v6.1.5) - Downloading easycorp/easyadmin-bundle (v4.4.2) - Installing symfony/polyfill-uuid (v1.26.0): Extracting archive - Installing symfony/uid (v6.1.5): Extracting archive - Installing easycorp/easyadmin-bundle (v4.4.2): Extracting archiveGenerating optimized autoload files112 packages you are using are looking for funding.Use the `composer fund` command to find out more!Symfony operations: 1 recipe (25a03525415bea10d26670af31f4672d) - Configuring easycorp/easyadmin-bundle (>=3.0): From github.com/symfony/recipes:mainExecuting script cache:clear [OK]Executing script assets:install public [OK] What's next? Some files have been created and/or updated to configure your new packages.Please review, edit and commit them: these files are yours.No security vulnerability advisories found1-4. (Optional) Install additional modules
They are useful to customize forms:
$ php composer require \ symfony/form \ symfony/validator2. Create dashboard
2-1. Generate dashboard modules
Happily, they provide useful maker commands. Run:
$ php bin/console make:admin:dashboardThat's it.
You will be asked some questions. Here, I chose the default at all:
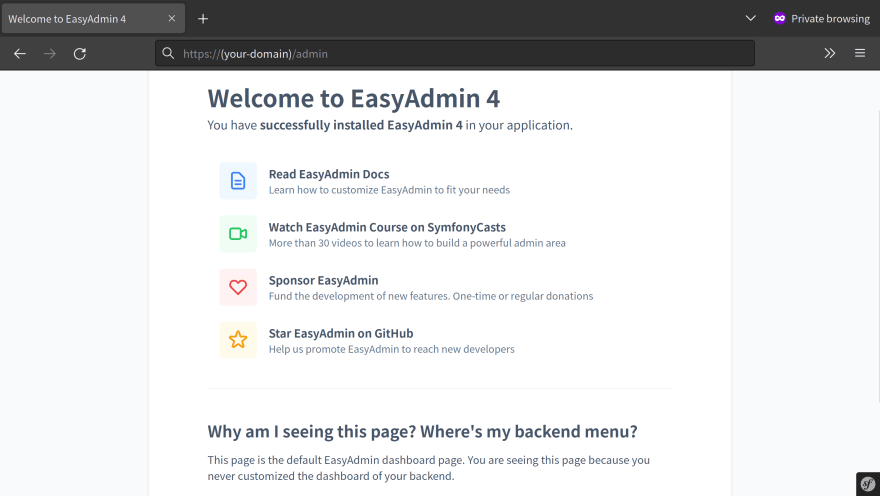
Which class name do you prefer for your Dashboard controller? [DashboardController]: > In which directory of your project do you want to generate "DashboardController"? [src/Controller/Admin/]: > [OK] Your dashboard class has been successfully generated. Next steps: * Configure your Dashboard at "src/Controller/Admin/DashboardController.php" * Run "make:admin:crud" to generate CRUD controllers and link them from the Dashboard.Now you can connect to https://(your-domain)/admin. However, there must be no menus, while welcome messages are shown.
2-2. Build up dashboard for use
First, create the view. Run:
$ mkdir templates/admin$ nvim templates/admin/index.html.twigThen write in it just as below:
+ {% extends '@EasyAdmin/page/content.html.twig' %}Next, edit the controller (src/Controller/Admin/DashboardController.php):
class DashboardController extends AbstractDashboardController { #[Route('/admin', name: 'admin')] public function index(): Response {+ return $this->render('admin/index.html.twig');- return parent::index();- // return parent::index();Finally, generate frontend assets:
$ yarn encore dev$ # alternatively, `npm run dev` is availableOpen again. Your dashboard must have become your own (almost blank for now).

2-3. Introduce access control
Be sure to implement access control if you prevent those who are not authenticated from using your admin panel:
security: # ... access_control: # ...+ - { path: ^/admin, roles: ROLE_USER }Besides, above, you can use ROLE_ADMIN instead of ROLE_USER when your user is admin.
4. Create a CRUD page
4-1. Generate crud modules
Thanks to them, it is also a single command line. Run:
$ php bin/console make:admin:crudThe output was below. Choose your user entity at the first question:
Which Doctrine entity are you going to manage with this CRUD controller?: [0] App\Entity\User > 0 Which directory do you want to generate the CRUD controller in? [src/Controller/Admin/]: > Namespace of the generated CRUD controller [App\Controller\Admin]: > [OK] Your CRUD controller class has been successfully generated. Next steps: * Configure your controller at "src/Controller/Admin/UserCrudController.php" * Read EasyAdmin docs: https://symfony.com/doc/master/bundles/EasyAdminBundle/index.html4-2. Customize crud modules
In order to add a menu for user CRUD to the dashboard, edit src/Controller/Admin/DashboardController.php:
+ use App\Entity\User; # ... class DashboardController extends AbstractDashboardController { # ... public function configureMenuItems(): iterable {- // yield MenuItem::linkToCrud('The Label', 'fas fa-list', EntityClass::class);+ yield MenuItem::linkToCrud('User', 'fas fa-list', User::class);That's it!
5. View in browser
Let's go to the dashboard again and click the User menu. Voil!

Here comes the power to create/update/delete users in your app via browser
Original Link: https://dev.to/nabbisen/symfony-6-and-easyadmin-4-admin-panel-for-user-management-system-53p1
Dev To
More About this Source Visit Dev To