
An Interest In:
Web News this Week
- April 2, 2024
- April 1, 2024
- March 31, 2024
- March 30, 2024
- March 29, 2024
- March 28, 2024
- March 27, 2024
Some of Our Sources
- Just Creative
- Joshua Blankenship
- Pearsonified
- Abduzeedo
- Inspiredology
- Web Designer Depot
- FanExtra - PSD
- Noupe
- My Ink Blog
- Fudge Graphics
Help Webnuz
Referal links:
Integration of Azure AD B2C with .NET web app
1. Introduction
Using Azure Active Directory (Azure AD) B2C, powerful self-service identity management features can be added to desktop app in a few short steps by asp.net software companies USA.
This article shows how to create a .NET Windows Presentation Foundation (WPF) app that includes user sign-up,
sign-in, and profile management. This app includes support for sign-up and sign-in by using a user name or email. It supports sign-up and sign-in by social accounts such as Facebook and Google.
2. Get an Azure AD B2C Directory
Before using Azure AD B2C, we must create a directory, or tenant. A directory is a container for all of your users, applications, groups, and more. If you don't have directory already then create a B2C directory.
3. Create an Application
Next we need to create application in B2C Directory. It gives Azure AD information that need to securely communicate with application. For creating an application in B2C directory follow these steps.
Make sure to:
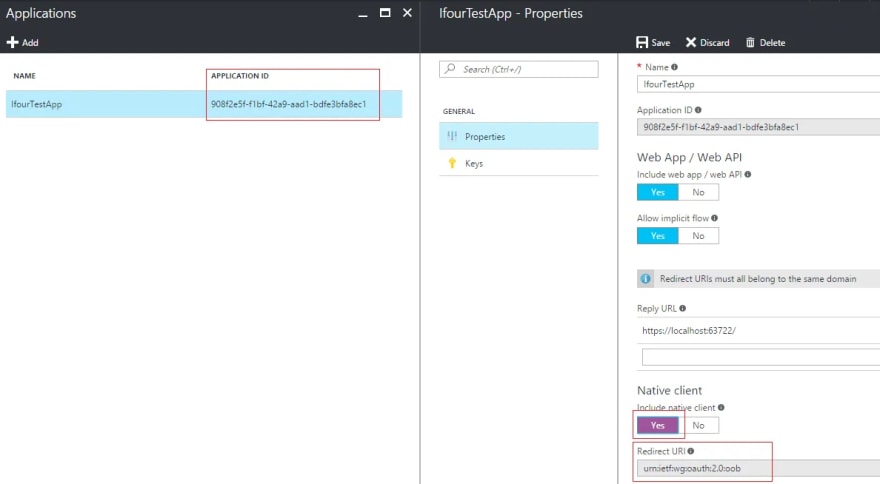
- Include a native client in the application.
- Copy the Redirect URI urn:ietf:wg:oauth:2.0:oob. It's the default URL for application.
- Copy the Application ID that is assigned to your app. we will need it later.
Read More: Integration Of Azure Ad B2c With .net Web App
4. Create a policies

- In Azure AD B2C, every user experience is denoted by a policy. We need to create a policy for each type(Sign-in, Sign-up and Edit-profile).
- When you create the policies, be sure to:


- Choose either User ID sign-up or Email sign-up in the identity providers blade.
- Choose Display name and other sign-up attributes in your sign-up policy.
- Choose Display name and Object ID claims as application claims for every policy.
- Copy the Name of each policy after creating. It should have the prefix b2c_1_.
5. Build a Windows desktop app
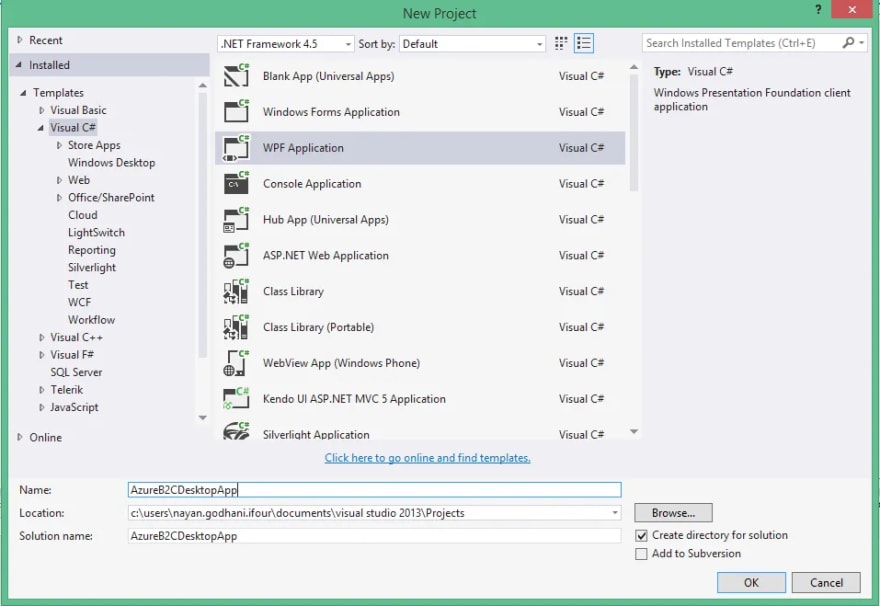
Step 1: Creating WPF Project


The primary class of Microsoft Authentication Library (MSAL) is PublicClientApplication. This class represents your application in the Azure AD B2C system. When the app initializes, create an instance of PublicClientApplication in MainWindow.xaml.cs. This can be used throughout the window.


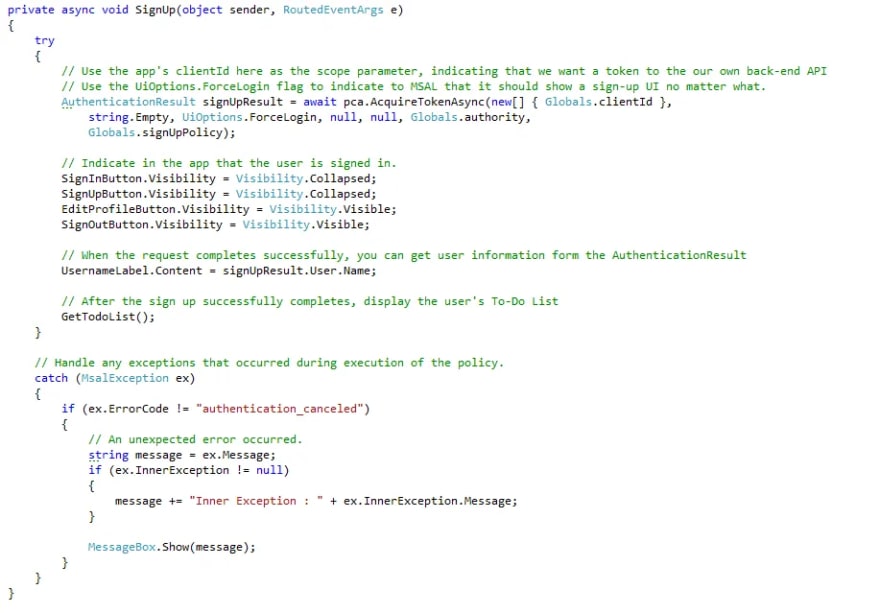
When a user opts to signs up, you want to initiate a sign-up flow that uses the sign-up policy you created. By using MSAL, you just call pca.AcquireTokenAsync(). The parameters you pass to AcquireTokenAsync() determine which token you receive, the policy used in the authentication request, and more.
You can initiate a sign-in flow in the same way that you initiate a sign-up flow. When a user signs in, make the same call to MSAL, this time by using your sign-in policy:

Again, you can execute an edit-profile policy in the same behavior:
In all of these cases, MSAL either returns a token in AuthenticationResult or throws an exception. Each time you get a token from MSAL, you can use the AuthenticationResult.User object to update the user data in the app, such as the UI.

Finally, we can end a user's session with the app when the user selects Sign out. When using MSAL, this is accomplished by clearing all of the tokens from the token cache:

- Add a new WPF application named "AzureADB2CDesktopApp"
- Install the needed NuGet Packages to Configure the MVC App
- Package Microsoft.Identity.Client -IncludePrerelease
- Create a class file Globals.cs, open the file and add property values. his class is used throughout AzureADB2CDesktopApp to reference commonly used values.
- Create a class file FileCache.cs for simple persist cache implementation of desktop app.
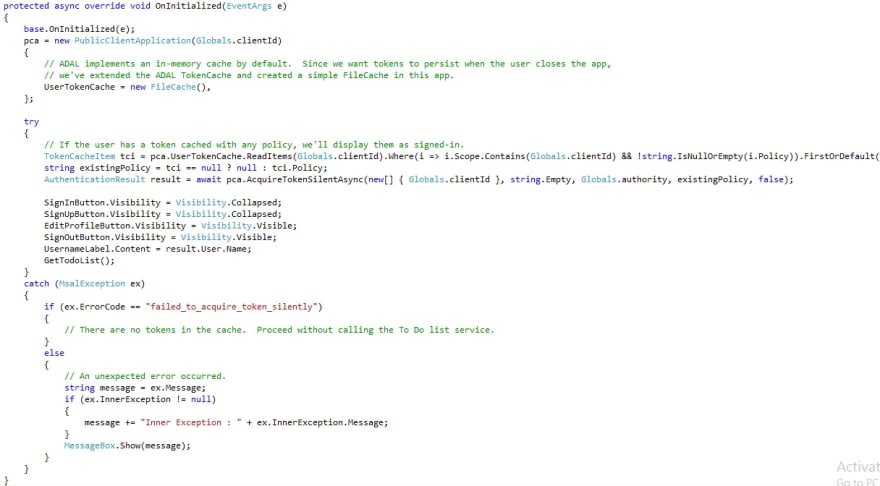
- Create the PublicClientApplication
- Check for tokens on App Start
- Sign-up flow
- Sign-in flow
- Edit-profile flow
- Sign-out flow
Step 2: Run WPF Project

Planning to Hire ASP.Net Developer? Your Search ends here.


- Click on Sign In button, it will open Azure AD B2C Tenant Sign In browser window and enter the credential.
- If the credentials provided are valid then a successful authentication will take place and a token will be obtained and stored in the claims identity for the authenticated user and navigate to main window.
6. Conclusion
By using Azure Active Directory (Azure AD) B2C, ASP.NET software development companies can add powerful self-service identity management features to desktop application.
Original Link: https://dev.to/ifourtechnolab/integration-of-azure-ad-b2c-with-net-web-app-41dh
Dev To
More About this Source Visit Dev To