
An Interest In:
Web News this Week
- April 24, 2024
- April 23, 2024
- April 22, 2024
- April 21, 2024
- April 20, 2024
- April 19, 2024
- April 18, 2024
Some of Our Sources
- Technology Review
- Simplebits
- Smashing Magazine
- Abduzeedo
- TutsPlus - Design
- Fuel Your Creativity
- FanExtra - PSD
- Web Design Ledger
- Spyre Studios
- Android Headlines
Help Webnuz
Referal links:
Building a chat app with Socket.io and React Native
I wrote before on how to build a chat app with React, it got 1660 likes and 52955 views
So I have decided to make another one for React Native.
What is this article about?
Chats are all around us, from Whatsapp to Facebook and Instagram, almost every platform offers a chat in some kind of variation.
In Today's digital world we have all gone mobile! Just before this article I wrote a friend a message on Whatsapp.

Chats are fun, you send a message to a person or a group, they see the message and reply back. Simple yet complex.
To develop a chat app you would need to be aware of new messages as soon as they arrive.
In this article, we will do something a little bit different than the previous React tutorial. We will create a sign in screen where you can enter your name, create groups where people can join and show real-time messages between the people in the group.
Getting Live Information From The Server
There are two ways to get live information from your server about a new bid:
Use long-polling HTTP request, basically an HTTP request every 5 - 10 seconds to get information about a new bid.
Use an open-socket (Websockets) to get information directly from the server when a new bid arrives.
In this article I will talk about Websockets and specifically on the Node.js library - Socket.io
Socket.io is a popular JavaScript library that allows us to create real-time, bi-directional communication between software applications and a Node.js server.
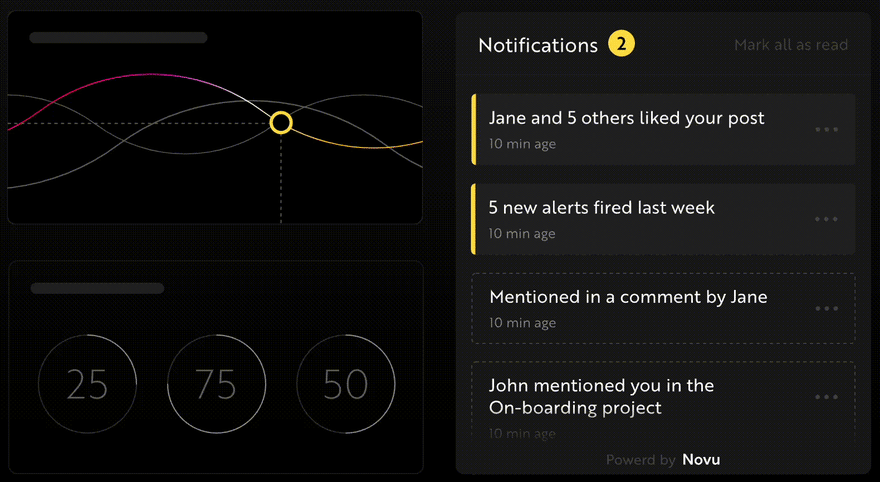
Novu - the first open-source notification infrastructure
Just a quick background about us. Novu is the first open-source notification infrastructure. We basically help to manage all the product notifications. It can be In-App (the bell icon like you have in the Dev Community - Websockets), Emails, SMSs and so on.
I would be super happy if you could give us a star! It will help me to make more articles every week
https://github.com/novuhq/novu
We are sending some awesome swag during Hacktoberfest
How to create a real time connection between React Native & Socket.io
In this tutorial, we'll build the chat application withExpo- an open-source framework that enables us to create native apps for IOS and Android by writing React and JavaScript code.
Installing Expo
Exposaves us from the complex configurations required to create a native application withReact Native CLI, making it the easiest and fastest way to build and publish React Native apps.
Ensure you have theExpo CLI,Node.js, andGitinstalled on your computer. Then, create the project folder and an Expo React Native app by running the code below.
mkdir chat-appcd chat-appexpo init appExpo allows us to create native applications using the Managed or Bare Workflow. We'll use the blank Managed Workflow in this tutorial because all the necessary configurations have been completed for us.
? Choose a template: - Use arrow-keys. Return to submit. ----- Managed workflow ----- blank a minimal app as clean as an empty canvas blank (TypeScript) same as blank but with TypeScript configuration tabs (TypeScript) several example screens and tabs using react-navigation and TypeScript ----- Bare workflow ----- minimal bare and minimal, just the essentials to get you startedInstall Socket.io Client API to the React Native app.
cd appexpo install socket.io-clientCreate a socket.js within a utils folder and copy the code below into the file
mkdir utilstouch socket.js// Paste within socket.js fileAnd add
import { io } from "socket.io-client";const socket = io.connect("http://localhost:4000");export default socket;The code snippet above creates a real-time connection to the server hosted at that URL. (We'll create the server in the upcoming section).
Create a styles.js file within the utils folder and copy the code below into the file. It contains all the styling for the chat application.
import { StyleSheet } from "react-native";export const styles = StyleSheet.create({ loginscreen: { flex: 1, backgroundColor: "#EEF1FF", alignItems: "center", justifyContent: "center", padding: 12, width: "100%", }, loginheading: { fontSize: 26, marginBottom: 10, }, logininputContainer: { width: "100%", alignItems: "center", justifyContent: "center", }, logininput: { borderWidth: 1, width: "90%", padding: 8, borderRadius: 2, }, loginbutton: { backgroundColor: "green", padding: 12, marginVertical: 10, width: "60%", borderRadius: "50%", elevation: 1, }, loginbuttonText: { textAlign: "center", color: "#fff", fontWeight: "600", }, chatscreen: { backgroundColor: "#F7F7F7", flex: 1, padding: 10, position: "relative", }, chatheading: { fontSize: 24, fontWeight: "bold", color: "green", }, chattopContainer: { backgroundColor: "#F7F7F7", height: 70, width: "100%", padding: 20, justifyContent: "center", marginBottom: 15, elevation: 2, }, chatheader: { flexDirection: "row", alignItems: "center", justifyContent: "space-between", }, chatlistContainer: { paddingHorizontal: 10, }, chatemptyContainer: { width: "100%", height: "80%", alignItems: "center", justifyContent: "center", }, chatemptyText: { fontWeight: "bold", fontSize: 24, paddingBottom: 30 }, messagingscreen: { flex: 1, }, messaginginputContainer: { width: "100%", minHeight: 100, backgroundColor: "white", paddingVertical: 30, paddingHorizontal: 15, justifyContent: "center", flexDirection: "row", }, messaginginput: { borderWidth: 1, padding: 15, flex: 1, marginRight: 10, borderRadius: 20, }, messagingbuttonContainer: { width: "30%", backgroundColor: "green", borderRadius: 3, alignItems: "center", justifyContent: "center", borderRadius: 50, }, modalbutton: { width: "40%", height: 45, backgroundColor: "green", borderRadius: 5, alignItems: "center", justifyContent: "center", color: "#fff", }, modalbuttonContainer: { flexDirection: "row", justifyContent: "space-between", marginTop: 10, }, modaltext: { color: "#fff", }, modalContainer: { width: "100%", borderTopColor: "#ddd", borderTopWidth: 1, elevation: 1, height: 400, backgroundColor: "#fff", position: "absolute", bottom: 0, zIndex: 10, paddingVertical: 50, paddingHorizontal: 20, }, modalinput: { borderWidth: 2, padding: 15, }, modalsubheading: { fontSize: 20, fontWeight: "bold", marginBottom: 15, textAlign: "center", }, mmessageWrapper: { width: "100%", alignItems: "flex-start", marginBottom: 15, }, mmessage: { maxWidth: "50%", backgroundColor: "#f5ccc2", padding: 15, borderRadius: 10, marginBottom: 2, }, mvatar: { marginRight: 5, }, cchat: { width: "100%", flexDirection: "row", alignItems: "center", borderRadius: 5, paddingHorizontal: 15, backgroundColor: "#fff", height: 80, marginBottom: 10, }, cavatar: { marginRight: 15, }, cusername: { fontSize: 18, marginBottom: 5, fontWeight: "bold", }, cmessage: { fontSize: 14, opacity: 0.7, }, crightContainer: { flexDirection: "row", justifyContent: "space-between", flex: 1, }, ctime: { opacity: 0.5, },});Install React Navigation and its dependencies.React Navigationallows us to navigate from one screen to another within a React Native application.
npm install @react-navigation/nativenpx expo install react-native-screens react-native-safe-area-contextSetting up the Socket.io Node.js server
Here, I will guide you through creating the Socket.io Node.js server for real-time communication with the React Native application.
Create a server folder within the project folder.
cd chat-appmkdir serverNavigate into the server folder and create a package.json file.
cd server & npm init -yInstall Express.js, CORS, Nodemon, and Socket.io Server API.
npm install express cors nodemon socket.ioExpress.jsis a fast, minimalist framework that provides several features for building web applications in Node.js.CORSis a Node.js package that allows communication between different domains.
Nodemonis a Node.js tool that automatically restarts the server after detecting file changes, andSocket.ioallows us to configure a real-time connection on the server.
Create an index.js file - the entry point to the Node.js server.
touch index.jsSet up a simple Node.js server using Express.js. The code snippet below returns a JSON object when you visit the http://localhost:4000/api in your browser.
// index.jsconst express = require("express");const app = express();const PORT = 4000;app.use(express.urlencoded({ extended: true }));app.use(express.json());app.get("/api", (req, res) => { res.json({ message: "Hello world", });});app.listen(PORT, () => { console.log(`Server listening on ${PORT}`);});Import the HTTP and the CORS library to allow data transfer between the client and the server domains.
const express = require("express");const app = express();const PORT = 4000;app.use(express.urlencoded({ extended: true }));app.use(express.json());// New importsconst http = require("http").Server(app);const cors = require("cors");app.use(cors());app.get("/api", (req, res) => { res.json({ message: "Hello world", });});http.listen(PORT, () => { console.log(`Server listening on ${PORT}`);});Next, add Socket.io to the project to create a real-time connection. Before the app.get() block, copy the code below:
// New imports.....const socketIO = require('socket.io')(http, { cors: { origin: "<http://localhost:3000>" }});// Add this before the app.get() blocksocketIO.on('connection', (socket) => { console.log(`: ${socket.id} user just connected!`); socket.on('disconnect', () => { socket.disconnect() console.log(': A user disconnected'); });});From the code snippet above, the socket.io("connection") function establishes a connection with the React app, then creates a unique ID for each socket and logs the ID to the console whenever you refresh the app.
When you refresh or close the app, the socket fires the disconnect event showing that a user has disconnected from the socket.
Configure Nodemon by adding the start command to the list of scripts in the package.json file. The code snippet below starts the server using Nodemon.
// In server/package.json"scripts": { "test": "echo \\"Error: no test specified\\" && exit 1", "start": "nodemon index.js" },You can now run the server with Nodemon by using the command below.
npm startBuilding the user interface
Here, we'll create the user interface for the chat application to enable users to sign in, create chat rooms, and send messages. The app is divided into three screens - the Login screen, the Chat screen, and the Messaging screen.
First, let's set up React Navigation.
Create a screens folder within the app folder, add the Login, Chat, and Messaging components and render a "Hello World" text within them.
mkdir screenstouch Login.js Chat.js Messaging.jsCopy the code below into the App.js file within the app folder.
import React from "react";// app screensimport Login from "./screens/Login";import Messaging from "./screens/Messaging";import Chat from "./screens/Chat";// React Navigation configurationsimport { NavigationContainer } from "@react-navigation/native";import { createNativeStackNavigator } from "@react-navigation/native-stack";const Stack = createNativeStackNavigator();export default function App() { return ( <NavigationContainer> <Stack.Navigator> <Stack.Screen name='Login' component={Login} options={{ headerShown: false }} /> <Stack.Screen name='Chat' component={Chat} options={{ title: "Chats", headerShown: false, }} /> <Stack.Screen name='Messaging' component={Messaging} /> </Stack.Navigator> </NavigationContainer> );}The Login screen
Copy the code below into the Login.js file.
import React, { useState } from "react";import { Text, SafeAreaView, View, TextInput, Pressable, Alert,} from "react-native";// Import the app stylesimport { styles } from "../utils/styles";const Login = ({ navigation }) => { const [username, setUsername] = useState(""); // checks if the input field is empty const handleSignIn = () => { if (username.trim()) { // Logs the username to the console console.log({ username }); } else { Alert.alert("Username is required."); } }; return ( <SafeAreaView style={styles.loginscreen}> <View style={styles.loginscreen}> <Text style={styles.loginheading}>Sign in</Text> <View style={styles.logininputContainer}> <TextInput autoCorrect={false} placeholder='Enter your username' style={styles.logininput} onChangeText={(value) => setUsername(value)} /> </View> <Pressable onPress={handleSignIn} style={styles.loginbutton}> <View> <Text style={styles.loginbuttonText}>Get Started</Text> </View> </Pressable> </View> </SafeAreaView> );};export default Login;The code snippet accepts the username from the user and logs it on the console.
Lets update the code and save the username usingAsync Storage, so users will not be required to sign in to the application every time they launch the app.
*Async Storageis a React Native package used to store string data in native applications. It is similar to the local storage on the web and can be used to store tokens and various data in string format.*
Run the code below to install Async Storage
expo install @react-native-async-storage/async-storageUpdate the handleSignIn function to save the username via AsyncStorage.
import AsyncStorage from "@react-native-async-storage/async-storage";const storeUsername = async () => { try { // async function - saves the username to AsyncStorage // redirecting to the Chat page await AsyncStorage.setItem("username", username); navigation.navigate("Chat"); } catch (e) { Alert.alert("Error! While saving username"); } }; const handleSignIn = () => { if (username.trim()) { // calls AsyncStorage function storeUsername(); } else { Alert.alert("Username is required."); } };The Chat room
Here, we'll update the user interface for the Chat screen to display the available chat rooms, allow users to create one, and navigate to the Messaging screen when each room is selected.
Copy the code below into the Chat.js file.
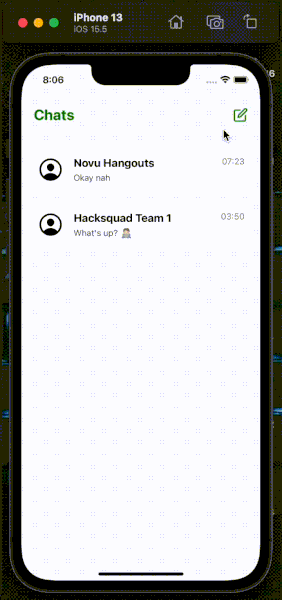
import React from "react";import { View, Text, Pressable, SafeAreaView, FlatList } from "react-native";import { Feather } from "@expo/vector-icons";import ChatComponent from "../component/ChatComponent";import { styles } from "../utils/styles";const Chat = () => { // Dummy list of rooms const rooms = [ { id: "1", name: "Novu Hangouts", messages: [ { id: "1a", text: "Hello guys, welcome!", time: "07:50", user: "Tomer", }, { id: "1b", text: "Hi Tomer, thank you! ", time: "08:50", user: "David", }, ], }, { id: "2", name: "Hacksquad Team 1", messages: [ { id: "2a", text: "Guys, who's awake? ", time: "12:50", user: "Team Leader", }, { id: "2b", text: "What's up? ", time: "03:50", user: "Victoria", }, ], }, ]; return ( <SafeAreaView style={styles.chatscreen}> <View style={styles.chattopContainer}> <View style={styles.chatheader}> <Text style={styles.chatheading}>Chats</Text> {/* Logs "ButtonPressed" to the console when the icon is clicked */} <Pressable onPress={() => console.log("Button Pressed!")}> <Feather name='edit' size={24} color='green' /> </Pressable> </View> </View> <View style={styles.chatlistContainer}> {rooms.length > 0 ? ( <FlatList data={rooms} renderItem={({ item }) => <ChatComponent item={item} />} keyExtractor={(item) => item.id} /> ) : ( <View style={styles.chatemptyContainer}> <Text style={styles.chatemptyText}>No rooms created!</Text> <Text>Click the icon above to create a Chat room</Text> </View> )} </View> </SafeAreaView> );};export default Chat;- From the code snippet above:
- I created a dummy list of rooms, then rendered them through aFlatListinto the
ChatComponent.(yet to be created) - Since the rooms can either be empty or populated, the conditional statement determines the component to display.
- I created a dummy list of rooms, then rendered them through aFlatListinto the
Next, create the ChatComponent within a component folder. It represents a preview of each chat name, time, the last message sent and redirects users to the Messaging component when clicked.
Copy the code below into the components/ChatComponent.js file.
import { View, Text, Pressable } from "react-native";import React, { useLayoutEffect, useState } from "react";import { Ionicons } from "@expo/vector-icons";import { useNavigation } from "@react-navigation/native";import { styles } from "../utils/styles";const ChatComponent = ({ item }) => { const navigation = useNavigation(); const [messages, setMessages] = useState({}); // Retrieves the last message in the array from the item prop useLayoutEffect(() => { setMessages(item.messages[item.messages.length - 1]); }, []); /// Navigates to the Messaging screen const handleNavigation = () => { navigation.navigate("Messaging", { id: item.id, name: item.name, }); }; return ( <Pressable style={styles.cchat} onPress={handleNavigation}> <Ionicons name='person-circle-outline' size={45} color='black' style={styles.cavatar} /> <View style={styles.crightContainer}> <View> <Text style={styles.cusername}>{item.name}</Text> <Text style={styles.cmessage}> {messages?.text ? messages.text : "Tap to start chatting"} </Text> </View> <View> <Text style={styles.ctime}> {messages?.time ? messages.time : "now"} </Text> </View> </View> </Pressable> );};export default ChatComponent;Congratulations! We can now display the list of rooms and redirect the user the Messaging screen.
Before we proceed, let's create a custom Modal component that allows users to create a new group (room) when we press the header icon.

Create a Modal.js file within the components folder, import it into the Chat screen and toggle it whenever we press the header icon.
import React from "react";import { View, Text, Pressable, SafeAreaView, FlatList } from "react-native";import { Feather } from "@expo/vector-icons";import ChatComponent from "../component/ChatComponent";import { styles } from "../utils/styles";// The Modal componentimport Modal from "../component/Modal";const Chat = () => { const [visible, setVisible] = useState(false); //...other variables return ( <SafeAreaView style={styles.chatscreen}> <View style={styles.chattopContainer}> <View style={styles.chatheader}> <Text style={styles.chatheading}>Chats</Text> {/* Displays the Modal component when clicked */} <Pressable onPress={() => setVisible(true)}> <Feather name='edit' size={24} color='green' /> </Pressable> </View> </View> <View style={styles.chatlistContainer}>...</View> {/* Pass setVisible as prop in order to toggle the display within the Modal component. */} {visible ? <Modal setVisible={setVisible} /> : ""} </SafeAreaView> );};export default Chat;Copy the code below into the Modal.js file.
import { View, Text, TextInput, Pressable } from "react-native";import React, { useState } from "react";import { styles } from "../utils/styles";const Modal = ({ setVisible }) => { const [groupName, setGroupName] = useState(""); // Function that closes the Modal component const closeModal = () => setVisible(false); // Logs the group name to the console const handleCreateRoom = () => { console.log({ groupName }); closeModal(); }; return ( <View style={styles.modalContainer}> <Text style={styles.modalsubheading}>Enter your Group name</Text> <TextInput style={styles.modalinput} placeholder='Group name' onChangeText={(value) => setGroupName(value)} /> <View style={styles.modalbuttonContainer}> <Pressable style={styles.modalbutton} onPress={handleCreateRoom}> <Text style={styles.modaltext}>CREATE</Text> </Pressable> <Pressable style={[styles.modalbutton, { backgroundColor: "#E14D2A" }]} onPress={closeModal} > <Text style={styles.modaltext}>CANCEL</Text> </Pressable> </View> </View> );};export default Modal;The Messaging screen
Copy the code below into the Messaging.js file.
import React, { useLayoutEffect, useState } from "react";import { View, TextInput, Text, FlatList, Pressable } from "react-native";import AsyncStorage from "@react-native-async-storage/async-storage";import MessageComponent from "../component/MessageComponent";import { styles } from "../utils/styles";const Messaging = ({ route, navigation }) => { const [chatMessages, setChatMessages] = useState([ { id: "1", text: "Hello guys, welcome!", time: "07:50", user: "Tomer", }, { id: "2", text: "Hi Tomer, thank you! ", time: "08:50", user: "David", }, ]); const [message, setMessage] = useState(""); const [user, setUser] = useState(""); // Access the chatroom's name and id const { name, id } = route.params;// This function gets the username saved on AsyncStorage const getUsername = async () => { try { const value = await AsyncStorage.getItem("username"); if (value !== null) { setUser(value); } } catch (e) { console.error("Error while loading username!"); } }; // Sets the header title to the name chatroom's name useLayoutEffect(() => { navigation.setOptions({ title: name }); getUsername() }, []); /* This function gets the time the user sends a message, then logs the username, message, and the timestamp to the console. */ const handleNewMessage = () => { const hour = new Date().getHours() < 10 ? `0${new Date().getHours()}` : `${new Date().getHours()}`; const mins = new Date().getMinutes() < 10 ? `0${new Date().getMinutes()}` : `${new Date().getMinutes()}`; console.log({ message, user, timestamp: { hour, mins }, }); }; return ( <View style={styles.messagingscreen}> <View style={[ styles.messagingscreen, { paddingVertical: 15, paddingHorizontal: 10 }, ]} > {chatMessages[0] ? ( <FlatList data={chatMessages} renderItem={({ item }) => ( <MessageComponent item={item} user={user} /> )} keyExtractor={(item) => item.id} /> ) : ( "" )} </View> <View style={styles.messaginginputContainer}> <TextInput style={styles.messaginginput} onChangeText={(value) => setMessage(value)} /> <Pressable style={styles.messagingbuttonContainer} onPress={handleNewMessage} > <View> <Text style={{ color: "#f2f0f1", fontSize: 20 }}>SEND</Text> </View> </Pressable> </View> </View> );};export default Messaging;The code snippet above renders the messages in each chatroom via the MessageComponent component.
Create the MessageComponent file and copy the code below into the file:
import { View, Text } from "react-native";import React from "react";import { Ionicons } from "@expo/vector-icons";import { styles } from "../utils/styles";export default function MessageComponent({ item, user }) { const status = item.user !== user; return ( <View> <View style={ status ? styles.mmessageWrapper : [styles.mmessageWrapper, { alignItems: "flex-end" }] } > <View style={{ flexDirection: "row", alignItems: "center" }}> <Ionicons name='person-circle-outline' size={30} color='black' style={styles.mavatar} /> <View style={ status ? styles.mmessage : [styles.mmessage, { backgroundColor: "rgb(194, 243, 194)" }] } > <Text>{item.text}</Text> </View> </View> <Text style={{ marginLeft: 40 }}>{item.time}</Text> </View> </View> );}From the code snippet above, the status variable checks if the user key on the message is the same as the current user so as to determine how to align the messages.
We've now completed the user interface for the application! Next, let's learn how to communicate with the Socket.io server, create chat rooms, and send messages in real time via Socket.io.
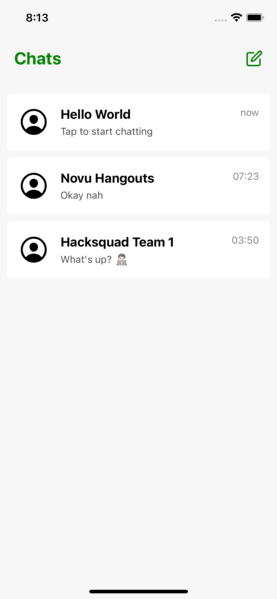
Creating chat rooms with Socket.io in React Native
In this section, I'll guide you through creating chat rooms on the Socket.io server and displaying them on the app.
Update the Modal.js file to send a message to the server when we create a new chat room.
import { View, Text, TextInput, Pressable } from "react-native";import React, { useState } from "react";import { styles } from "../utils/styles";// Import socket from the socket.js file in utils folderimport socket from "../utils/socket";const Modal = ({ setVisible }) => { const closeModal = () => setVisible(false); const [groupName, setGroupName] = useState(""); const handleCreateRoom = () => { // sends a message containing the group name to the server socket.emit("createRoom", groupName); closeModal(); }; return ( <View style={styles.modalContainer}> <Text style={styles.modalsubheading}>Enter your Group name</Text> <TextInput style={styles.modalinput} placeholder='Group name' onChangeText={(value) => setGroupName(value)} /> <View style={styles.modalbuttonContainer}> {/* The create button triggers the function*/} <Pressable style={styles.modalbutton} onPress={handleCreateRoom}> <Text style={styles.modaltext}>CREATE</Text> </Pressable> <Pressable style={[styles.modalbutton, { backgroundColor: "#E14D2A" }]} onPress={closeModal} > <Text style={styles.modaltext}>CANCEL</Text> </Pressable> </View> </View> );};export default Modal;Create a listener on the backend server that saves the group name to an array and returns the whole list.
// Generates random string as the IDconst generateID = () => Math.random().toString(36).substring(2, 10);let chatRooms = [ // Here is the data structure of each chatroom // { // id: generateID(), // name: "Novu Hangouts", // messages: [ // { // id: generateID(), // text: "Hello guys, welcome!", // time: "07:50", // user: "Tomer", // }, // { // id: generateID(), // text: "Hi Tomer, thank you! ", // time: "08:50", // user: "David", // }, // ], // },];socketIO.on("connection", (socket) => { console.log(`: ${socket.id} user just connected!`); socket.on("createRoom", (roomName) => { socket.join(roomName); // Adds the new group name to the chat rooms array chatRooms.unshift({ id: generateID(), roomName, messages: [] }); // Returns the updated chat rooms via another event socket.emit("roomsList", chatRooms); }); socket.on("disconnect", () => { socket.disconnect(); console.log(": A user disconnected"); });});Also, return the chat room list via the API route as below:
app.get("/api", (req, res) => { res.json(chatRooms);});Update the Chat.js file to fetch and listen to the roomsList from the server and display the chat rooms.
const [rooms, setRooms] = useState([]);// Runs when the component mountsuseLayoutEffect(() => { function fetchGroups() { fetch("http://localhost:4000/api") .then((res) => res.json()) .then((data) => setRooms(data)) .catch((err) => console.error(err)); } fetchGroups();}, []);// Runs whenever there is new trigger from the backenduseEffect(() => { socket.on("roomsList", (rooms) => { setRooms(rooms); });}, [socket]);Sending messages via Socket.io in React Native
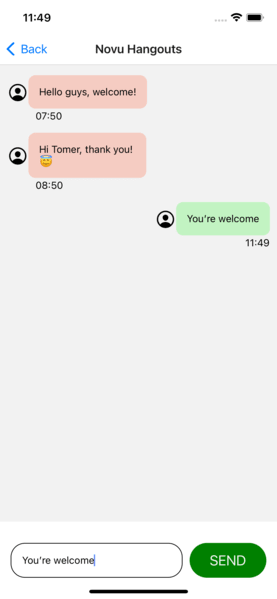
In the previous section, we were able to create new chat rooms, save them in an array on the server, and display them within the app. Here, we'll update the chat room messages by adding new messages to the sub-array.
How to display the chat room messages
Recall that the id of each chat room is passed into the Messaging component. Now, let's send the id to the server via Socket.io when the screen loads.
import React, { useEffect, useLayoutEffect, useState } from "react";import { View, TextInput, Text, FlatList, Pressable } from "react-native";import socket from "../utils/socket";import MessageComponent from "../component/MessageComponent";import { styles } from "../utils/styles";const Messaging = ({ route, navigation }) => { // The id passed const { name, id } = route.params;//...other functions useLayoutEffect(() => { navigation.setOptions({ title: name }); // Sends the id to the server to fetch all its messages socket.emit("findRoom", id); }, []); return <View style={styles.messagingscreen}>...</View>;};export default Messaging;Create the event listener on the server.
socket.on("findRoom", (id) => { // Filters the array by the ID let result = chatRooms.filter((room) => room.id == id); // Sends the messages to the app socket.emit("foundRoom", result[0].messages);});Next, listen to the foundRoom event and display the messages to the user.
// This runs only initial mountuseLayoutEffect(() => { navigation.setOptions({ title: name }); socket.emit("findRoom", id); socket.on("foundRoom", (roomChats) => setChatMessages(roomChats));}, []);// This runs when the messages are updated.useEffect(() => { socket.on("foundRoom", (roomChats) => setChatMessages(roomChats));}, [socket])How to create new messages
To create new messages, we need to update the handleNewMessage function to send message property to the server and add it to the messages array.
const handleNewMessage = () => { const hour = new Date().getHours() < 10 ? `0${new Date().getHours()}` : `${new Date().getHours()}`; const mins = new Date().getMinutes() < 10 ? `0${new Date().getMinutes()}` : `${new Date().getMinutes()}`; socket.emit("newMessage", { message, room_id: id, user, timestamp: { hour, mins }, });};Listen to the event on the server and update the chatRoom array.
socket.on("newMessage", (data) => { // Destructures the property from the object const { room_id, message, user, timestamp } = data; // Finds the room where the message was sent let result = chatRooms.filter((room) => room.id == room_id); // Create the data structure for the message const newMessage = { id: generateID(), text: message, user, time: `${timestamp.hour}:${timestamp.mins}`, }; // Updates the chatroom messages socket.to(result[0].name).emit("roomMessage", newMessage); result[0].messages.push(newMessage); // Trigger the events to reflect the new changes socket.emit("roomsList", chatRooms); socket.emit("foundRoom", result[0].messages);});Conclusion
So far, you've learnt how to set up Socket.io in a React Native and Node.js application, save data with Async Storage and communicate between a server and the Expo app via Socket.io.
Socket.io is a great tool with excellent features that enables us to build efficient real-time applications like sports betting websites,auction and forex trading applications, and of course,chat applicationsby creating lasting connections with a Node.js server.
Feel free to improve the application by:
- adding authentication
- saving the token with Async Storage
- adding a real-time database for the messages, and
- adding push notifications with theexpo notificationpackage.
The source code for this tutorial is available here:
https://github.com/novuhq/blog/tree/main/chat-app-reactnative-socketIO
Thank you for reading!
P.S Novu is sending awesome swag on Hacktoberfest! Come and participate! Happy if you can support us by giving us a star!
https://github.com/novuhq/novu
Original Link: https://dev.to/novu/building-a-chat-app-with-socketio-and-react-native-k1b
Dev To
More About this Source Visit Dev To