
Some of Our Sources
- Pearsonified
- Six Revisions
- TutsPlus - Design
- Vandelay Design
- Inspiredology
- Noupe
- Web Design Ledger
- Wal You
- Android Headlines
- TechPowerUp
Help Webnuz
Referal links:
Tutorial: Adding Holopin badges to your GitHub profile
Making your GitHub profile more awesome!
You probably use a code sharing site like GitHub, GitLab or Bitbucket to showcase your l33t coding skills, and act as a portfolio of the sort of things you work on, but it's probably looking a bit text-heavy?
We're here to help you change that! With Holopin, you can embed a live copy of your badge board so all your badges get automatically added to your profile.
For this guide, we're going to work with GitHub. But these steps should work for any site
that allows you to use a Markdown formatted file as your profile!
Markdown + Holopin =
Markdown is a markup language that lets you write documents with rich formatting like headings,
bullet lists, tables, bold, underline and italic text but in a way that's easy to type
(no angle brackets and keywords like in HTML), fits in a completely plain text file and still looks
readable even as plain text. For example, you can do things like this:
# This is a headingThis is some **bold** text, and some _italics_, and this is **really** important. Markdown is1. Easy to type2. Plain text3. Readable(this whole blog post was written in Markdown!)
Step 1: Create a personal README on GitHub
Jump onto your GitHub account, and hop to your profile. If you've not got a personal README, you'll
need to create one. Use the + symbol and choose New repository:

Once you're there, set the repository name to be your username and you'll see a message to show you're
creating a "special" repo:

Now initialise that with a README.md:

Once your repo is ready, you can hit the button to open an editor in browser:
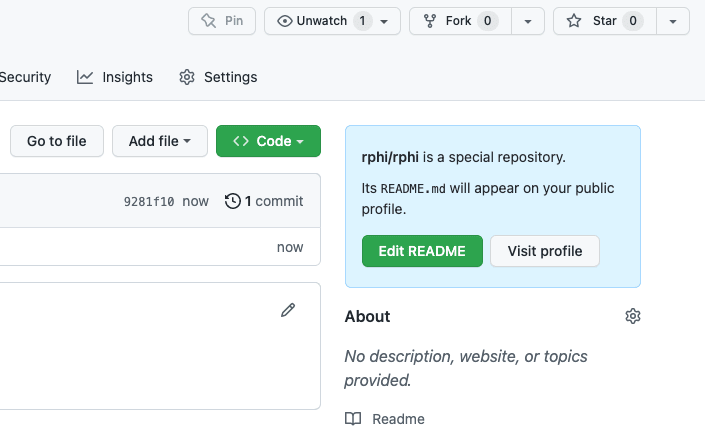
This is the place where you can write a bit about yourself, and add some links to your social media.
Step 2: Customize your Holopin board
If you haven't already, you'll need to create a Holopin account. Hop over to
holopin.io to get started (I hear there's early bird badges available if
you're quick too ).
Once you've got your Holopin account, head to your profile and add your badges from the inventory:
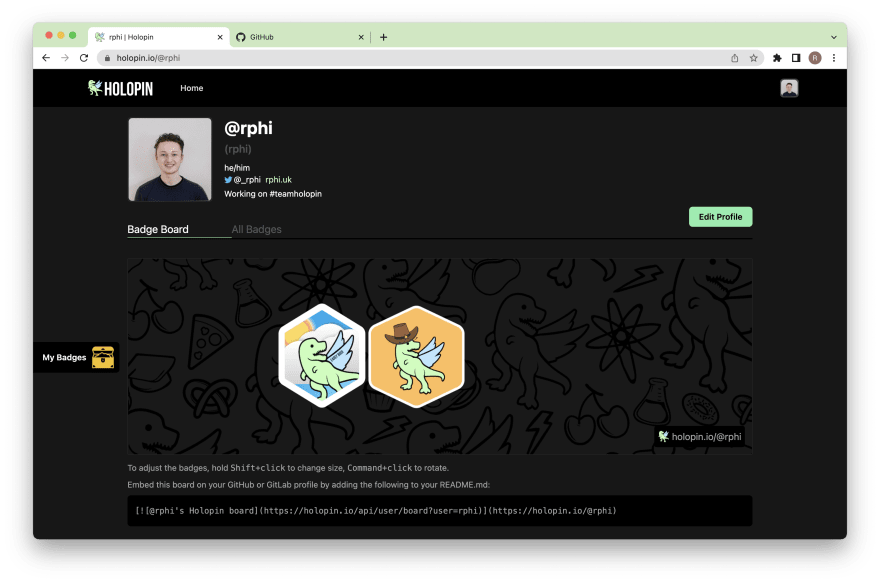
Got it looking nice? Great. You may have spotted there's a bit of code under your board... this is
the magic to get things showing on sites other than Holopin.
Step 3: Add your Holopin board to your GitHub profile
This is where the Markdown comes into action. That link looks like this, and you can find it at the bottom of your board:
[](https://holopin.io/@rphi)But what does it mean? We've got two things going on here, first we're including the image with ![](), and then
we're linking that image to your Holopin profile with [](). This is the same as if you were linking
to an image on the web, but we're using the Holopin API to generate the image on the fly.
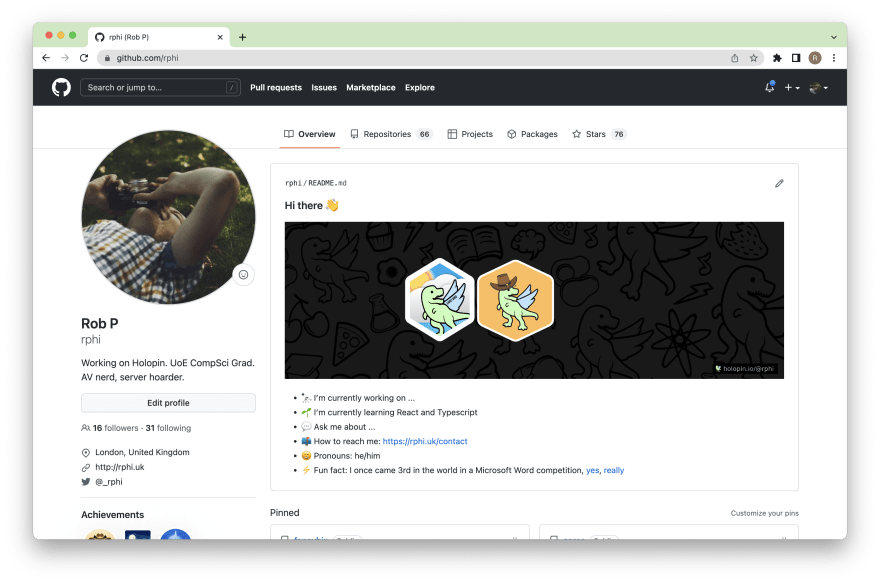
Paste in your Holopin embed, hit commit, and if all has gone to plan, your board will now be in pride
of place on your GitHub profile page!
Whenever you edit your board on the Holopin site, your GitHub profile will update automatically.
We'd love to see how you've incorporated your Holopin badges on your GitHub profile! Tag @holopin_ on Twitter and we'll retweet it with the community... and maybe even send you a badge or two!
Original Link: https://dev.to/rphi/tutorial-adding-holopin-badges-to-your-github-profile-f9c
Dev To
More About this Source Visit Dev To