
An Interest In:
Web News this Week
- April 20, 2024
- April 19, 2024
- April 18, 2024
- April 17, 2024
- April 16, 2024
- April 15, 2024
- April 14, 2024
Some of Our Sources
- Just Creative
- Abduzeedo
- Fuel Your Creativity
- Web Designer Depot
- Crazy Leaf Design
- Fudge Graphics
- Specky Boy
- Spyre Studios
- Codrops
- The Verge
Help Webnuz
Referal links:
VALIDATING REACT FORM WITHOUT A LIBRARY
A form is a user interface element within a website or software application that allows you to enter and submit data. It contains one or more fields and an action button, such as Save or Submit. Forms are a vital part of an application. Many businesses use forms on their websites to get great benefits. Its a great way to get responses and prompt people to engage with you. Form validation is a technical process where a web-form checks if the information provided by a user is correct. The form will either alert the user that they messed up and need to fix something to proceed, or the form will be validated and the user will be able to continue with their registration process.
In this article, well discuss:
- Installing and Setting up React app
- Creating our form application
- Form Value Inputs
- Validating our form
- Conclusion
Installing and Setting up React
The next step is to install our react before we create our form application. Note there are two ways we can use this library: NPM and CDN, but in this article, we will install the application using NPM.
Install the React application using the following command:
npx create-react-app my formWe have successfully installed our react application The next step is to create our form.
Creating our form application
In this section, we will build a simple registration application with a requirement of name, password, email, etc.
Go to your code editor and create an app.jsx file on the src folder, this should be easy to do.
Here is a basic code for form application.
import "./app.css"const App = () => { return <div className="app"> <form> </form> </div>}Now that we have seen the basic syntax of Form component, lets create our form application.
You can choose to do this inside your app.jsx file but I will be creating a components folder and create a Form Input file.
import "./app.css"import FormInput from "./components/FormInput";const App = () => { const handleSubmit = (e)=>{ e.preventDefault()} return <div className="app"> <form onSubmit={handleSubmit}> <FormInput placeholder="Username"/> <FormInput placeholder="Email"/> <FormInput placeholder="Full Name"/> <FormInput placeholder="Sth else"/> <button>Submit</button> </form> </div>;};export default App;import "./formInput.css";const FormInput = (props) => { return ( <div className="formInput"> <input placeholder={props.placeholder}/> </div> )}export default FormInputinput { padding: 15px; margin: 10px 0px;}.app { display: flex; align-items: center; justify-content: center; height: 100vh;}The code blocks above is a form input for the form we are creating, although basic styles were added to it. Below is an illustration of what our form looks like without validation.
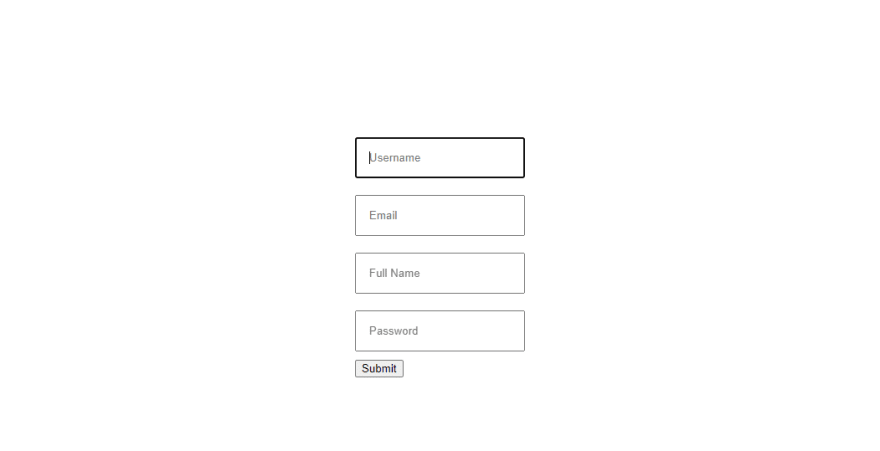
In the output above, if we enter the wrong information, our data will be submitted successfully, but that is not what we want. Lets look at how to validate our form, but first, lets see some advantages of Form Validation.
Form value inputs
Reaching your values without rendering your component you can use the code block below;
const data = new FormData(e.target) console.log(Object.fromEntries(data.entries)Most people are worried about rendering components, if you have states and you change them you should not worry about rendering, its the nature of react, you are changing something and it should be passed through the user screen immediately. We are going to change our code block above to use State.
const App = () => { const [username, setUsername] = useState("")For the inputs; I will be creating a new object instead of username, I will be using values, below is the code block.
const App = () => { const [values, setValues] = useState({ username: "", email: "", birthday: "", password: "", confirmPassword: "", }); .formInput { display: flex; flex-direction: column; width: 350px; } input { padding: 15px; margin: 10px 0px; } label { font-size: 15px; color: gray; } .app { display: flex; align-items: center; justify-content: center; height: 100vh; } .app { display: flex; align-items: center; justify-content: center; height: 100vh; background: linear-gradient( rgba(255, 255, 255, 0.1), rgba(255, 255, 255, 0.3)), url("https://getflywheel.com/layout/wp-content/uploads/2020/11/best-agency-websites-scaled.jpg"); background-size: cover; background-position: center; } form { background-color: white; padding: 0px 20px; border-radius: 8px; } h1 { color: rgb(12, 40, 112); text-align: center; } button { width: 350px; height: 50px; padding: 10px; border: none; background-color: rgb(210, 72, 118); color: white; border-radius: 5px; font-weight: bold; font-size: 18px; cursor: pointer; margin-top: 12px; margin-bottom: 30px; }The code block above is basically adding styles to our form.
Validating our form
There are more validation rules, but if you cant find a rule that meets your demands, you can design your own validation rules, which is something special.
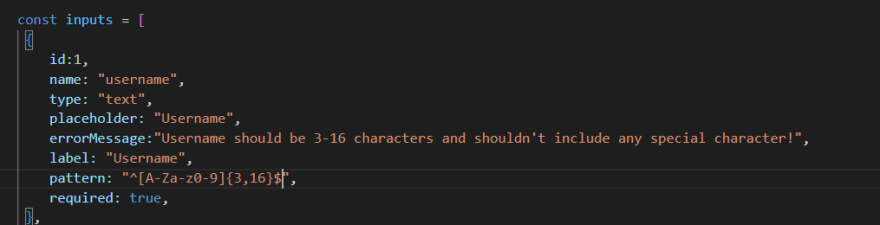
Here is a simple example
const inputs = [ { id:1, name: "username", type: "text", placeholder: "Username", errorMessage:"Username should be 3-16 characters and shouldn't include any special character!", label: "Username", pattern: "^[A-Za-z0-9]{3,16}$", required: true, }, { id:2, name: "Email", type: "Email", placeholder: "Email", errorMessage:"It should be a valid email address!", label: "Email", required: true, }, { id:3, name: "birthday", type: "date", placeholder: "Birthday", label: "Birthday" }, { id:4, name: "password", type: "text", placeholder: "Password", errorMessage:"Password should be 8-20 characters and include at least 1 letter, 1 number and 1 special character!", label: "Password", pattern: `^(?=.*[0-9])(?=.*[a-zA-Z])(?=.*[!@#$%^&*])[a-zA-Z0-9!@#$%^&*]{8,20}$`, required: true, }, { id:5, name: "confirmPassword", type: "text", placeholder: "Confirm Password", errorMessage:"Passwords don't match!", label: "Confirm Password", pattern: values.password, required: true,Lets look at our error messages; First we go into our FormInput.jsx file and edit it to look like the image below;

span { font-size: 12px; padding: 3px; color: red; display: none; }Above is the css file for your error messages;
Now to implement your error messages there is an absolute attribute which is pattern; you can use strings or regex code, below is an example;
In cases where we want the password to match the confirm password we use the code block below;
onFocus={inputProps.name==="confirmPassword" && setFocused (true)}
Conclusion
Handling and validating forms in a large application can be hard work because each form component must be made from scratch, and validation rules must be made for each form component.
I hope this article has helped you learn how to properly handle validation for your forms without any library. We have also covered creating custom errors and customizing error messages.
Original Link: https://dev.to/elobigg/validating-react-form-without-a-library-5gle
Dev To
More About this Source Visit Dev To