
An Interest In:
Web News this Week
- April 19, 2024
- April 18, 2024
- April 17, 2024
- April 16, 2024
- April 15, 2024
- April 14, 2024
- April 13, 2024
Some of Our Sources
- Slashdot
- Technology Review
- Team Treehouse
- The Logo Smith
- You The Designer
- Fudge Graphics
- Web Design Ledger
- CSS Globe
- Freelance Switch
- Dev To
Help Webnuz
Referal links:
Deploy an Nginx Web Server on an EC2 instance with Terraform
In this tutorial, you would learn how to automatically deploy an Nginx Web Server on an EC2 instance, with Terraform.
Pre-requisites
- AWS account
- Text editor of your choice (VSCode Recommended)
- Terraform Installed, you should also have a basic knowldge of how it works.
- Bash scripts
As you should know by now, Terraform is an IaC tool that helps to automate processes which increase delivery time of software. In this tutorial, Terraform would be employed in setting up an ec2 instance and deploying an nginx web server on it using bash scripts which would be provided.
Setting up project environment
First step is to create a folder on your device and open it up in VSCode. We would be creating 3 terraform files for this project;
- terraform.tfvars
- module.tf
- userdata.tpl
1. Terraform.tfvars
Run the below command to create your terraform.tfvars file
touch terraform.tfvarsYour terraform.tfvars file is going to contain private information that shouldn't be shared with the public. In the file, copy and paste the below configuration.
# Private informationaws_access_key = ""aws_secret_key = ""key_name = "demokey"private_key_path = "./demokey.pem"Your access and secret key should be filled in. You can get that from the IAM user you created.
The
key_nameis the name of the key which would be used to ssh into your instance. If you have an existing one you can use that. If you don't, lets create one together.
Creating Key
In your AWS console, search for key pair and click on it.

After selecting it, Click on Create key pair

Give your key pair a name that way you can always search for it easily when needed. Also, change key file format from ".ppk" to ".pem" because we need it in a ".pem" state. Add a tag if you wish to, but that is optional and proceed to create the key pair.

Copy the Key
The just created key pair would be automatically downloaded on your device. It needs to be copied to the working directory for ease of use. In your terminal, run the command
cp ~/Downloads/demokey.pem ./This command basically copies your keypair from its current directory to your working directory.
cpis to copy and~/Downloads/demokey.pemis the directory where my key pair currently is,demokeyis the name of my key pair. Be sure to specify the directory of your own key pair and don't forget to add the extension.pem../means your current working directory, or in other words, where you currently are and want to key pair to be copied to.For the
private_key_pathin theterraform.tfvars file, type in the path of your key. It should look like this./demokey.pem. Remember to replace thedemokeywith your key's name.
2. Module.tf
To create your module.tf file, run the below command in your terminal
touch module.tfInside the module.tf file, copy and paste the below Terraform configurations
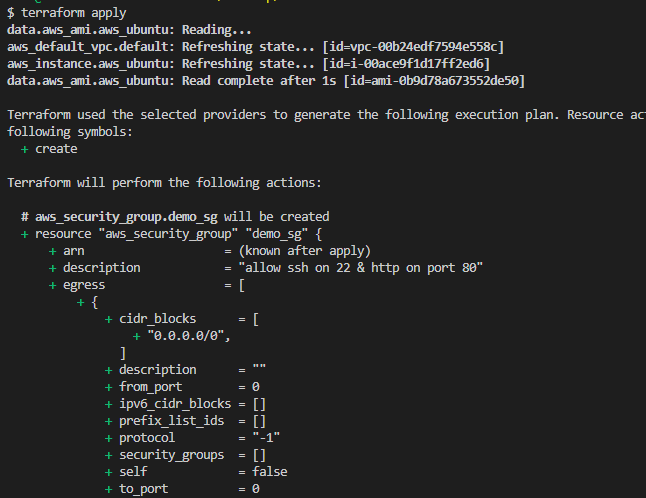
# Variablesvariable "aws_access_key" {}variable "aws_secret_key" {}variable "key_name" {}variable "private_key_path" {}variable "region" { default = "us-east-1"}# Providerprovider "aws" { region = var.region access_key = var.aws_access_key secret_key = var.aws_secret_key}# DATAdata "aws_ami" "aws_ubuntu" { most_recent = true owners = ["amazon"] filter { name = "name" values = ["amzn-ami-hvm*"] } filter { name = "root-device-type" values = ["ebs"] } filter { name = "virtualization-type" values = ["hvm"] }}# RESOURCES# Amiresource "aws_instance" "aws_ubuntu" { instance_type = "t2.micro" ami = "ami-052efd3df9dad4825" key_name = var.key_name user_data = file("userdata.tpl")} # Default VPCresource "aws_default_vpc" "default" {}# Security groupresource "aws_security_group" "demo_sg" { name = "demo_sg" description = "allow ssh on 22 & http on port 80" vpc_id = aws_default_vpc.default.id ingress { from_port = 22 to_port = 22 protocol = "tcp" cidr_blocks = ["0.0.0.0/0"] } ingress { from_port = 80 to_port = 80 protocol = "tcp" cidr_blocks = ["0.0.0.0/0"] } egress { from_port = 0 to_port = 0 protocol = "-1" cidr_blocks = ["0.0.0.0/0"] }}# OUTPUToutput "aws_instance_public_dns" { value = aws_instance.aws_ubuntu.public_dns}- The variable section consists of the variables you created in the terraform.tfvars file
- The provider section contains information of your provider, region and information which connects terraform to your AWS account. Be sure to specify the region you are making use of in AWS. In my case I am using the N.Virginia region (us-east-1)
- The data section contains information of your instance. Data sources are like read-only references in Terraform. They arent resources in the sense that they create anything, but they can be referenced by actual resources to pull information from AWS where applicable.
- The resources section contains information of your ami, VPC and security group. You can modify this depending on your use case.
- The output section is basically what you want to be printed to the screen after your resources have been created. In this case, your instance's public dns would be printed out for you.
3. Userdata.tpl
To create your userdata.tpl file, run the below command in your terminal
touch userdata.tplThis file will contain the bash script which would install nginx on your instance.
#!/bin/bashsudo apt update -y &&sudo apt install -y nginxecho "Hello World" > /var/www/html/index.htmlThis is a very simple bash script that will run on the instance at startup, also known as bootstrapping. It will first update apt, install NGINX on the host, and then overwrite the index.html file produced and write Hello World. No other configuration is necessary to get NGINX to work.
Remember that you can modify the echo output to what you want. It could be echo "Hi, how are you doing?", anything of your choice
If you notice in the module.tf file, under the resources ami section, the user data file was defined. This basically links your user data file to the instance you are creating so that nginx would be installed on the instance.
Run the terraform files
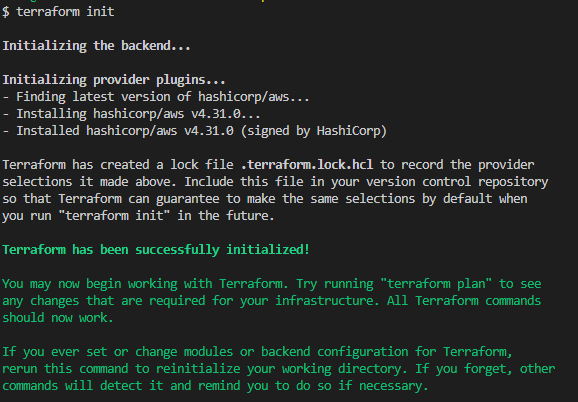
Save your files and run
terraform initThis will initialize your directory and install necessary plugins needed. It is the first command that has to be run after writing a new terraform configuration.
After initialization run
terraform validateThe above commands checks your terraform configuration files for errors.
![]()
Next command to run is the terraform plan
terraform planThis would show you the steps or execution plan that terraform wants to take.

Next, run
terraform applyThis command carries out the plan and creates your infrastructure for you.

You can see the output dns which you asked terraform to print to your screen.
Copy and paste the output dns on a webpage and you should see your echo output message from the bashcript you wrote earlier on.

NB: It might take a while since all the scripts have to be executed "one by one"
Running checks
Navigate to your AWS account and check under ec2 instance, your instance should be running.

If your echo message/ NGINX doesn't load when paste your instance's DNS on the web, proceed to check if Nginx is running.
In your AWS Console under instances, select your running instance

Click on the "Connect" button

Copy and paste the "example" link into your terminal

Now you're logged in, run the command
systemctl status nginxand you should get the below output

This verifies that nginx is running.
To exit from your instance, run the below command
exit
And that's it!!
You can delete your resources with the below command
terraform destroy -auto-approveConclusion
In this article, we learnt how to deploy an Nginx web server on an ec2 instance immediately it was created, all automatically with Terraform.
Original Link: https://dev.to/danielfavour/deploy-an-nginx-web-server-on-an-ec2-instance-with-terraform-621
Dev To
More About this Source Visit Dev To