
An Interest In:
Web News this Week
- April 2, 2024
- April 1, 2024
- March 31, 2024
- March 30, 2024
- March 29, 2024
- March 28, 2024
- March 27, 2024
Some of Our Sources
- Just Creative
- Abduzeedo
- FanExtra - PSD
- Web Design Ledger
- CSS Globe
- Line 25
- Stylized Web
- Wal You
- Codrops
- Daily Now
Help Webnuz
Referal links:
How to Build API with Go and QuestDB
QuestDB is a relational column-oriented database designed for time series and event data. It uses SQL with extensions for time series to assist with real-time analytics.
If you are not familiar enough with QuestDB, here is demo link to get in touch.
In this tutorial, we will build simple API and implement QuestDB as timeseries database in our project. Then, we will use Gin Framework for handling HTTP routes.
Before we begin, Ill assume that you:
- Have Go installed on your machine
- Understand the basics of Go language
- Have a general understanding of RESTful API
Running QuestDB
Firstly, we need to run QuestDB in our local. There are several methods to install it, you can find here. But we will use Docker and the latest questdb Docker image for convenience.
To start QuestDB via Docker, run the following:
docker run -p 9000:9000 \ -p 9009:9009 \ -p 8812:8812 \ questdb/questdbAlternatively, macOS users can use Homebrew:
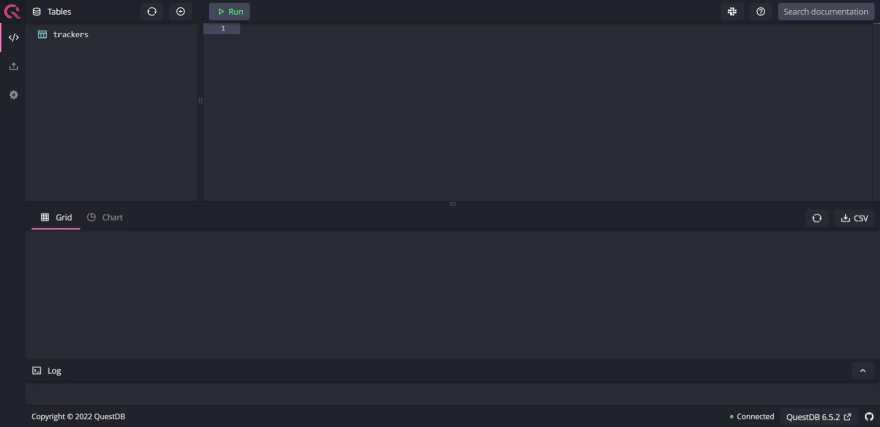
brew install questdbbrew services start questdbAfter starting QuestDB, the web console is available on port 9000, so navigating to localhost:9000 should show the UI which looks like the following:
Alright, QuestDB is ready. Now let's begin to the next step.
Building a REST API in Go using Gin and Gorm
Lets start by initializing a new Go module to manage our projects dependencies.
go mod initNow let's install required dependencies
go get -u github.com/joho/godotenvgo get -u gorm.io/gormgo get -u github.com/gin-gonic/ginAfter installation is complete the folder should contain go.mod and go.sum. Both of the files contain information of the packages that we have installed.
For reference, I published the entire source code in my github. Feel free to clone it.
git clone https://github.com/arifintahu/go-api-questdbSetting up database
Let's start by creating our database connection and models.
// models/tracker.gopackage modelsimport ( "time")type Tracker struct { Timestamp time.Time `gorm:"type:timestamp" json:"timestamp"` VehicleId int `gorm:"type:int" json:"vehicleId"` Latitude float64 `gorm:"type:double" json:"latitude"` Longitude float64 `gorm:"type:double" json:"longitude"`}We have tracker models that will record every position of vehicles. Each tracker should have a timestamp, a VehicleId with type of integer, a Latitude and a Longitude with type of float. We should consider if our types are available in QuestDB types or not as stated here.
Next, we will create setup function to connect to our database. We can interact with a QuestDB database by connecting to various network endpoints such as Web Console, InfluxDB Line Protocol, PostgreSQL Wire Protocol, HTTP REST API.
We will use PostgreSQL Wire Protocol by connecting to port 8812 because we can use gorm as ORM in golang. Before that we need to install gorm driver postgres because we will connect QuestDB using Postgres driver.
go get -u gorm.io/driver/postgresThen we will write function for database connection.
// models/setup.gopackage modelsimport ( "fmt" "gorm.io/driver/postgres" "gorm.io/gorm")var DB *gorm.DBtype DBConfig struct { Host string User string Password string Name string Port string}func (dbConfig *DBConfig) ConnectDatabase() error { dsn := fmt.Sprintf( "host=%s user=%s password=%s dbname=%s port=%s", dbConfig.Host, dbConfig.User, dbConfig.Password, dbConfig.Name, dbConfig.Port, ) database, err := gorm.Open(postgres.Open(dsn), &gorm.Config{}) if err != nil { return err } database.AutoMigrate(&Tracker{}) DB = database return nil}In setup.go, we also define auto migration for tracker model. Therefore, we don't need to create table in our database first.
Writing controllers
Next, we will build simple controllers where we can create and find trackers.
// controllers/trackers.gopackage controllersimport ( "go-api-questdb/models" "net/http" "time" "github.com/gin-gonic/gin")type CreateTrackerInput struct { VehicleId int `json:"vehicleId"` Latitude float64 `json:"latitude"` Longitude float64 `json:"longitude"`}func CreateTracker(c *gin.Context) { var input CreateTrackerInput if err:= c.ShouldBindJSON(&input); err != nil { c.JSON(http.StatusBadRequest, gin.H{"data": err.Error()}) return } tracker := models.Tracker{ Timestamp: time.Now().UTC(), VehicleId: input.VehicleId, Latitude: input.Latitude, Longitude: input.Longitude, } models.DB.Create(&tracker) c.JSON(http.StatusOK, gin.H{"data": tracker})}func GetTrackers(c *gin.Context) { var trackers []models.Tracker models.DB.Find(&trackers) c.JSON(http.StatusOK, gin.H{"data": trackers})}In trackers controller, we have CreateTrackerInput to validate request body in CreateTracker handler, then we just call our DB instance to execute row creation. We also have GetTrackers handler to fetch all rows.
RESTful routes
We almost there!
The last thing we need to do is creating route handler and application entry point.
// main.gopackage mainimport ( "go-api-questdb/controllers" "go-api-questdb/models" "os" "github.com/gin-gonic/gin" _ "github.com/joho/godotenv/autoload")func main() { r := gin.Default() dbConfig := models.DBConfig{ Host: os.Getenv("DB_HOST"), User: os.Getenv("DB_USER"), Password: os.Getenv("DB_PASSWORD"), Name: os.Getenv("DB_NAME"), Port: os.Getenv("DB_PORT"), } err := dbConfig.ConnectDatabase() if err != nil { panic(err) } r.POST("/trackers", controllers.CreateTracker) r.GET("/trackers", controllers.GetTrackers) r.Run("localhost:3000")}In main.go, we have dbConfig for initializing our database connection and we load our database credentials in .env file. Therefore, we need to add .env file in our project.
We will use default user and password of QuestDB as stated here
// .envDB_HOST=localhostDB_USER=adminDB_PASSWORD=questDB_NAME=qdbDB_PORT=8812Alright, let's run out API
go run main.go
Great, our app is successfully running in localhost:3000 and successfully migrating new table.
Let's test it out by sending POST request to localhost:3000/trackers
curl --request POST 'localhost:3000/trackers' --header 'Content-Type: application/json' --data-raw '{ "vehicleId": 1, "latitude": -7.626923, "longitude": 111.5213978 }'Then we got
{ "data": { "timestamp": "2022-09-09T09:56:01.8970862Z", "vehicleId": 1, "latitude": -7.626923, "longitude": 111.5213978 }}Let's test again by sending GET request to localhost:3000/trackers and we got
{ "data": [ { "timestamp": "2022-09-09T09:56:01.8970862Z", "vehicleId": 1, "latitude": -7.626923, "longitude": 111.5213978 } ]}Yeay we have successfully built API with Go and QuestDB
Original Link: https://dev.to/arifintahu/how-to-build-api-with-go-and-questdb-19ld
Dev To
More About this Source Visit Dev To