
An Interest In:
Web News this Week
- March 21, 2024
- March 20, 2024
- March 19, 2024
- March 18, 2024
- March 17, 2024
- March 16, 2024
- March 15, 2024
Some of Our Sources
- Mashable
- Team Treehouse
- Smashing Apps
- Abduzeedo
- TutsPlus - Design
- Inspiredology
- Crazy Leaf Design
- Specky Boy
- Web Resource Source
- Willems Lab
Help Webnuz
Referal links:
Web App Deployment using Spheron Protocol
I deployed my first web app using Spheron Protocol.
It was my first experience of deploying web application and the deployment was pretty smooth. It got completed in just 15 seconds. Isn't it cool .
For those who don't know what Spheron Protocol is or what it does.
Spheron Protocol is a decentralized web app deployment and hosting platform for automating modern dapps.
Using Spheron Protocol, developers can securely launch web apps, store and retrieve assets, host websites and gain HTTPS on every deployment.
Developers can deploy static websites, React, Vue, Angular, Nextjs web apps, dapps and eth apps.
It requires only a one-time fee and has no hidden fees or recurring web archival costs. To know more about the pricing Click on 'Spheron Network Pricing'.
In this blog I'll be sharing my experience of deploying web application using Spheron Protocol.
So, the first step is to head on to the official website of Spheron Protocol.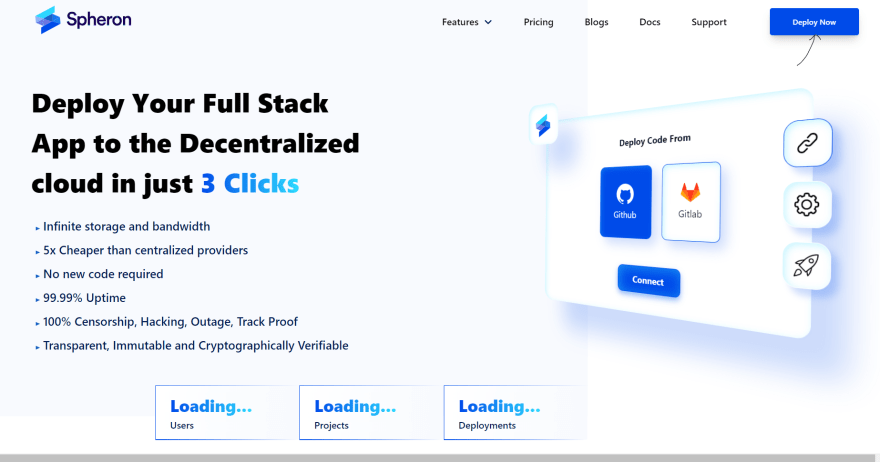
Click on the Deploy Now button to Log in/Sign Up to Spheron Protocol

You can use your GitHub account, GitLab account or Bitbucket account to Log in to Spheron Protocol.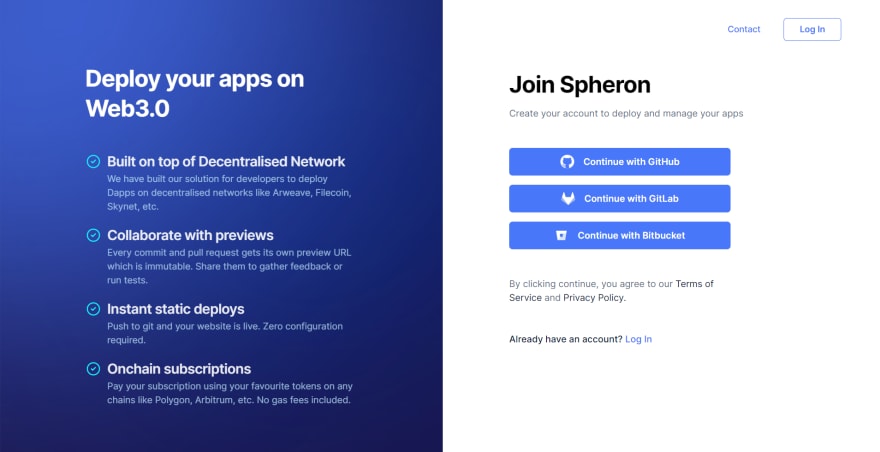
An with just few clicks, your account is ready .
When you've successfully logged in to Spheron Protocol, you'll see your Dashboard similar to the one below 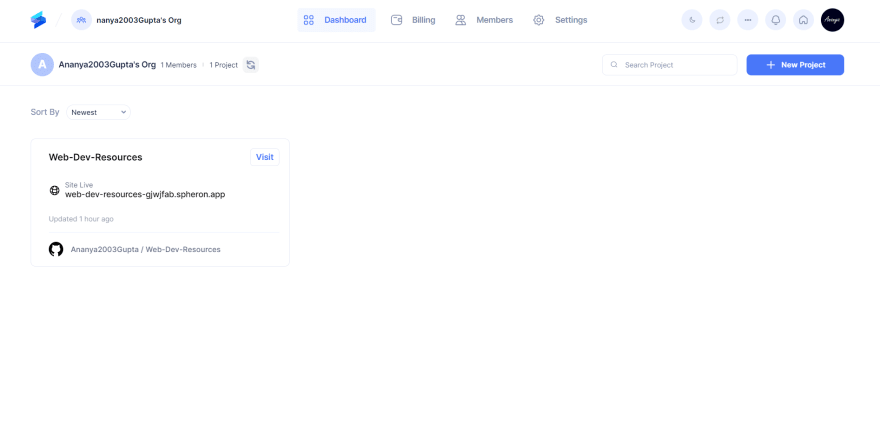
To deploy your project, Click on New Project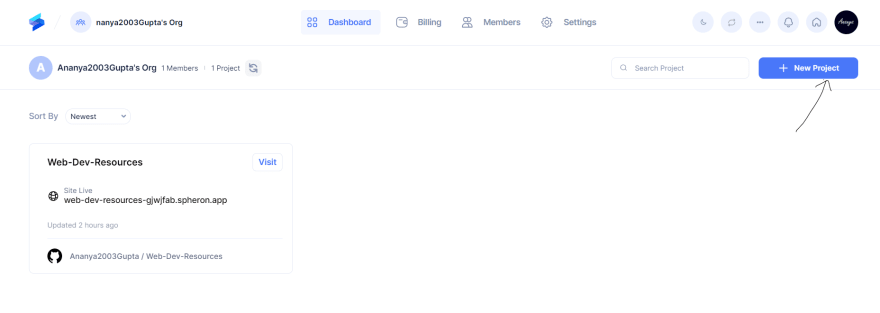
The deployment initiates with three easy steps:
First Step: Pick a repository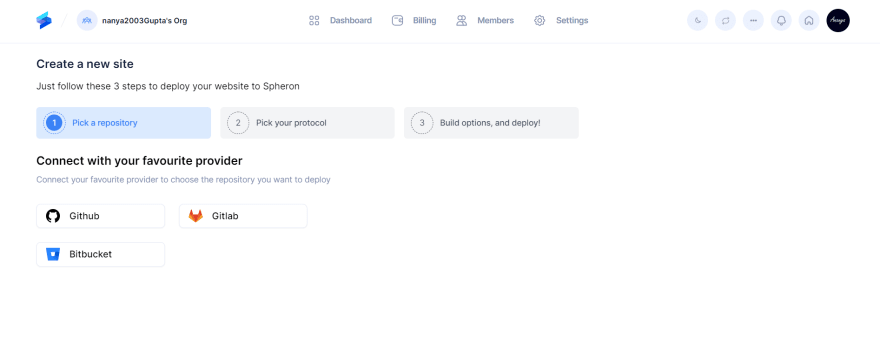
Choose the repository you want to deploy using your GitHub account, GitLab account or Bitbucket account.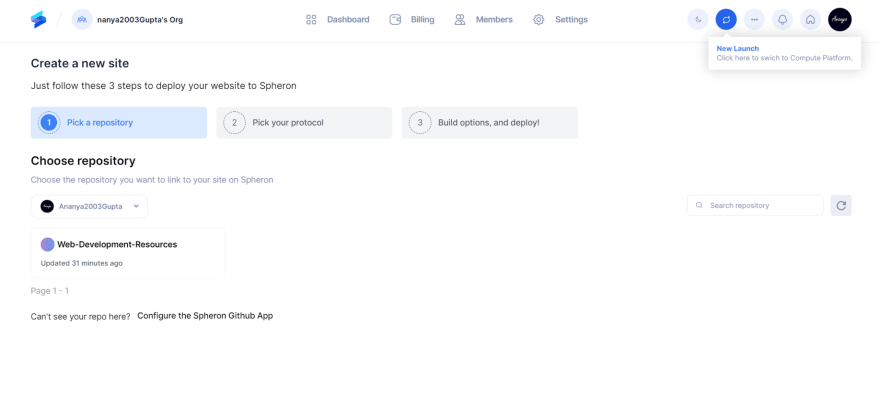
Second Step: Pick your protocol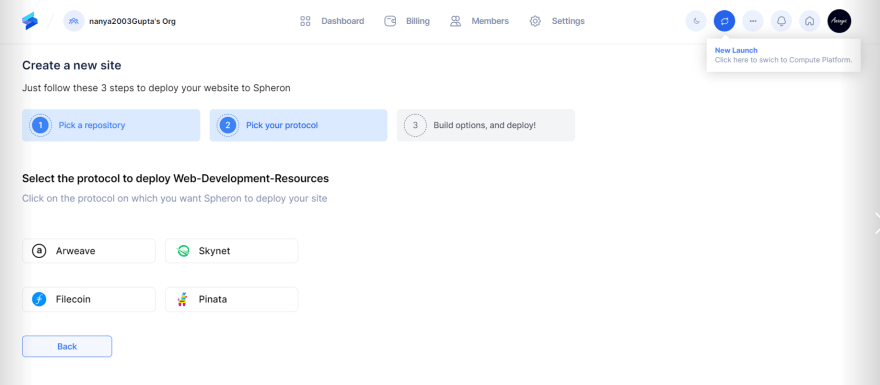
I chose filecoin Protocol for my web application.
Third Step: Build Options and Deploy (The most crucial step!)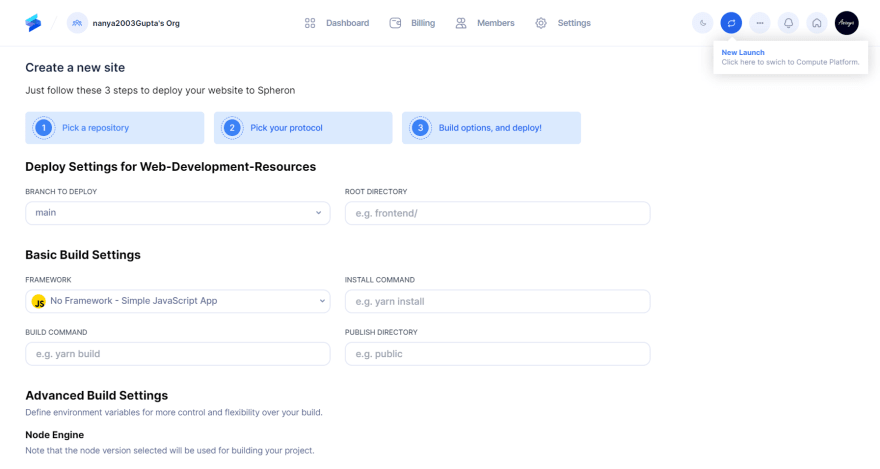
You need to fill the basic information about branch to deploy, root directory, basic build settings, advanced build settings, Node engine and environment variables. Varies with the framework used for the project.
You can refer to the official documentation to know more about the deployment, domains and decentralized protocols.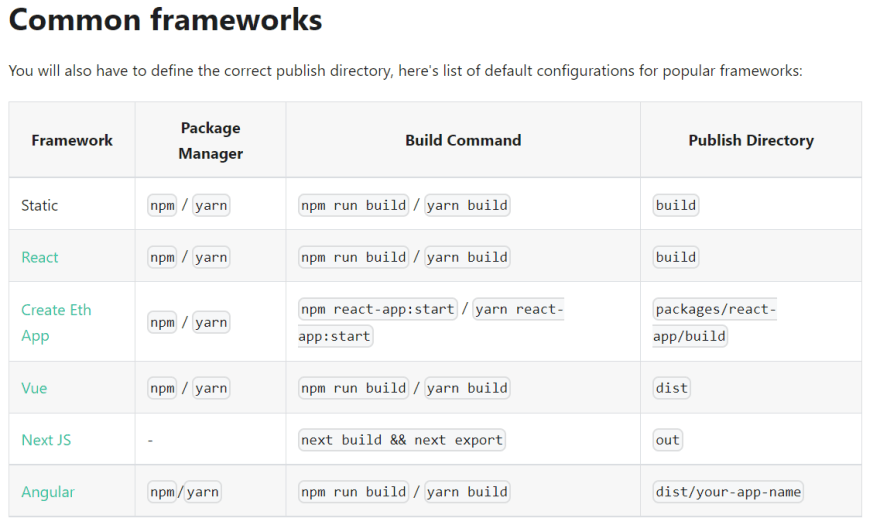
This table will help you with the basic build settings configuration.
The last step is to click on Connect Wallet. 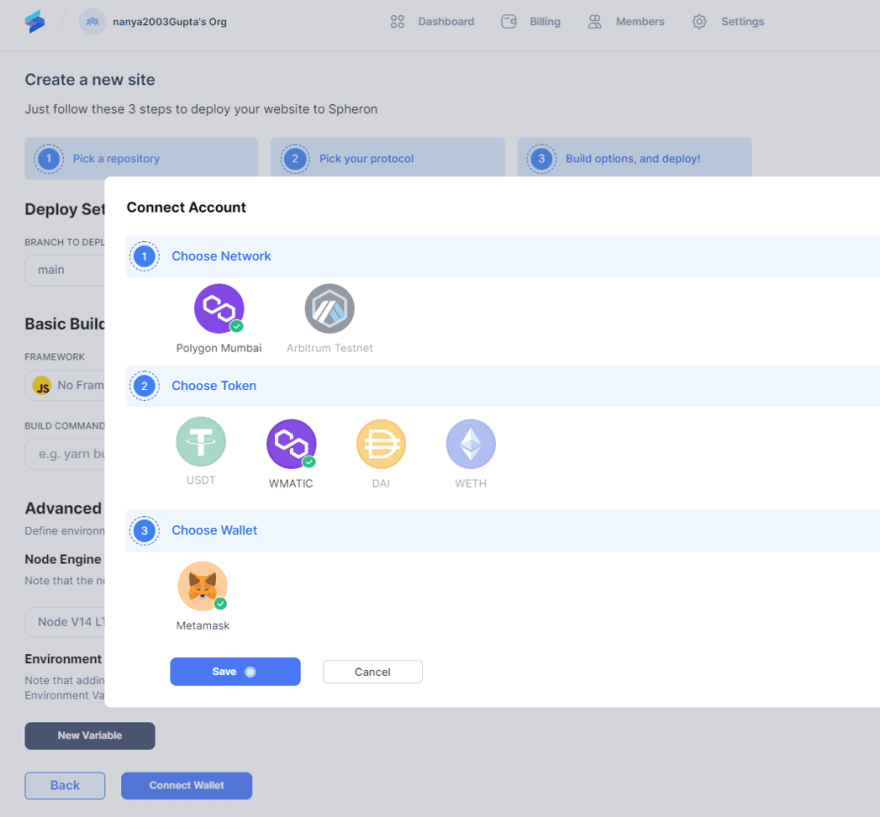
Choose your network, token and connect your Metamask wallet. Click on Save.
And yup, you have completed all the steps necessary for deployment.
Now you'll be able to see the process of deployment and in few seconds your web application will be up and running.
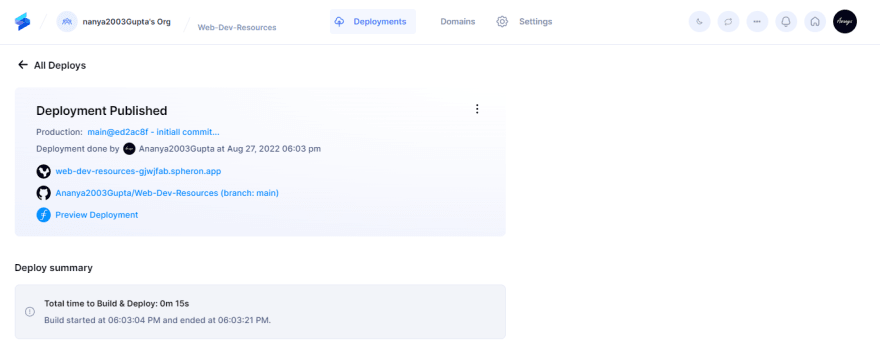
This is the live link of my deployed application.
https://web-dev-resources-gjwjfab.spheron.app/
The website is pretty basic . But its my first web app.
So more amazing web apps coming soon .
Original Link: https://dev.to/ananya2003gupta/web-app-deployment-using-spheron-protocol-3347
Dev To
More About this Source Visit Dev To