
An Interest In:
Web News this Week
- April 2, 2024
- April 1, 2024
- March 31, 2024
- March 30, 2024
- March 29, 2024
- March 28, 2024
- March 27, 2024
Some of Our Sources
- Slashdot
- Techcrunch
- Web Designer Wall
- Creative Curio
- Web Designer Depot
- FanExtra - PSD
- Noupe
- Crazy Leaf Design
- Wal You
- CSS Tricks
Help Webnuz
Referal links:
Build a graph database with Amazon Neptune Part 1 - AWS CloudFormation
How are we all connected?
You may have heard of the term 6 degrees of separation, perhaps you are a 'friend of a friend' on Facebook, you catch a plane from Sydney to San Francisco every month, you purchase your favourite coffee from Starbucks every morning or you purchase a machine learning textbook from Amazon.com and your preferences are similar to other people in your demographic profile.
This is where graph databases may be helpful because relationships cannot be stored in a traditional relational database or queried using structured query language (SQL).
Learning Outcomes
In the AWS Management console, you will learn how to:
- Create an AWS account
- Attach IAM policies to IAM Admin user for CloudFormation and EC2
- Create a graph database using Amazon CloudFormation
What is Amazon Neptune?
Amazon Neptune is a fully managed graph database. It can be very useful when you need to describe and display relationships within your connected datasets.
What is a graph?
A graph consists of nodes (or vertices) which are like tables for SQL, they are connected by edges which represent relationships.

For example, in the case of flight paths, nodes are represented by planes and edges are arrival and departures cities such as London.
In another example, in the case of social networking, nodes are represented by people and edges determine if a friendship exists.
Key Benefits:
Infrastructure is fully managed by AWS
You only pay for the queries that you use
You do not need to provision hardware
Can store billions of relationships
Designed with greater than 99.99 percent availability
Amazon Neptune supports open source query language such as openCypher, Apache TinkerPop Gremlin and the World Wide Web Consortiums (W3C) SPARQL 1.1
What is Amazon Neptune used for ?
Amazon Neptune can be used to describe relationships such as:
Social networking
Map customer journeys for customer experience
Fraud detection
Knowledge graphs used to fight global terrorism
Recommendation engines
Identity graphs to build a Single View of Customer
Architecture
The diagram below is provided by Amazon Web Services outlining the solution overview for building a graph database using Amazon Neptune:

The workflow describes:
Step 1: Bulk loading of a csv file into Amazon Neptune
Step 2: Amazon Neptune stores the data which contains relationships
Step 3: Query the data
Solution overview
The image below is my high level architecture of the solution:

How do you get started?
If you are a new user, you have instant access to AWS Free Tier for 30 days with 750 hours of t3.medium or t4g.medium instance usage.
Prerequisites
Add permissions to an IAM Admin user to work with Amazon Neptune DB cluster.
Create an Amazon EC2 Key Pair to use for launching a Neptune cluster using AWS CloudFormation.
Add IAM policies to grant permissions needed to use the AWS CloudFormation template.
Use AWS CloudFormation stack to create an Amazon Neptune DB cluster.
Tutorial 1: Create a service-linked role policy for Amazon Neptune
Create an IAM user with permissions to access Amazon Neptune by following intructions here.
Step 1: Create an AWS account and sign in with IAM Admin user. You may follow instructions here to create an account if you do not have one.
Step 2: Login with your IAM Admin user credentials.

Step 3: Download and save a copy of the Amazon Neptune User Guide on your computer or follow here.
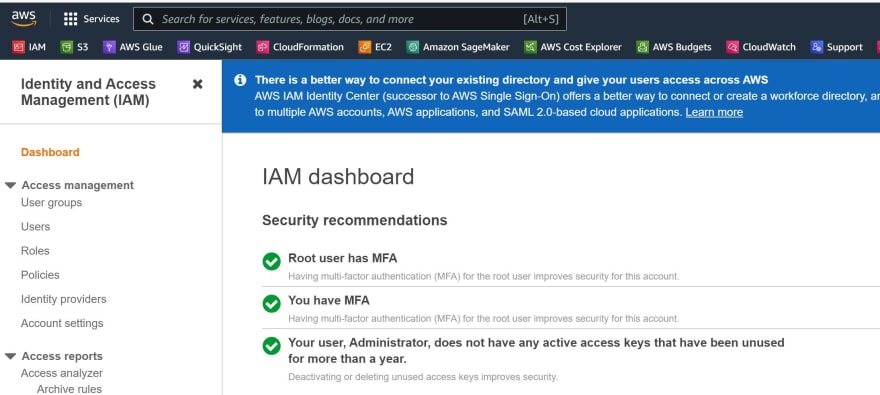
Step 4: Sign to the IAM console, type in the navigation bar 'IAM' or this resource might be saved in your bookmarks.

Step 5: Click Policies on the left-hand side menu.
Step 6: Click the blue button Create policy.

Step 7: Copy this code and paste it into the json tab


Step 8: Under Tags retain the default settings and click Next review.

Step 9: Under Review policy, provide a name for the role NeptuneServiceLinked and click Create policy.

Step 10: The service linked role was successfully created.
![]()
Tutorial 2: Create a new IAM user with all necessary permissions for access to Amazon Neptune
Create an IAM user with permissions to access Amazon Neptune by following intructions here.
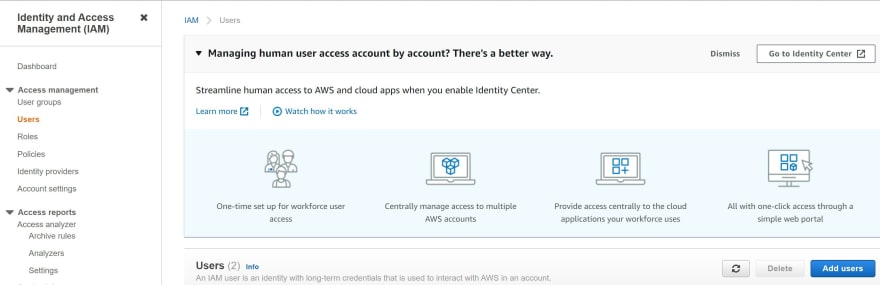
Step 1: Repeat Steps 1-4 from Tutorial 1 and click Users on the left-hand menu from the IAM console.

Step 2: Click Add users.
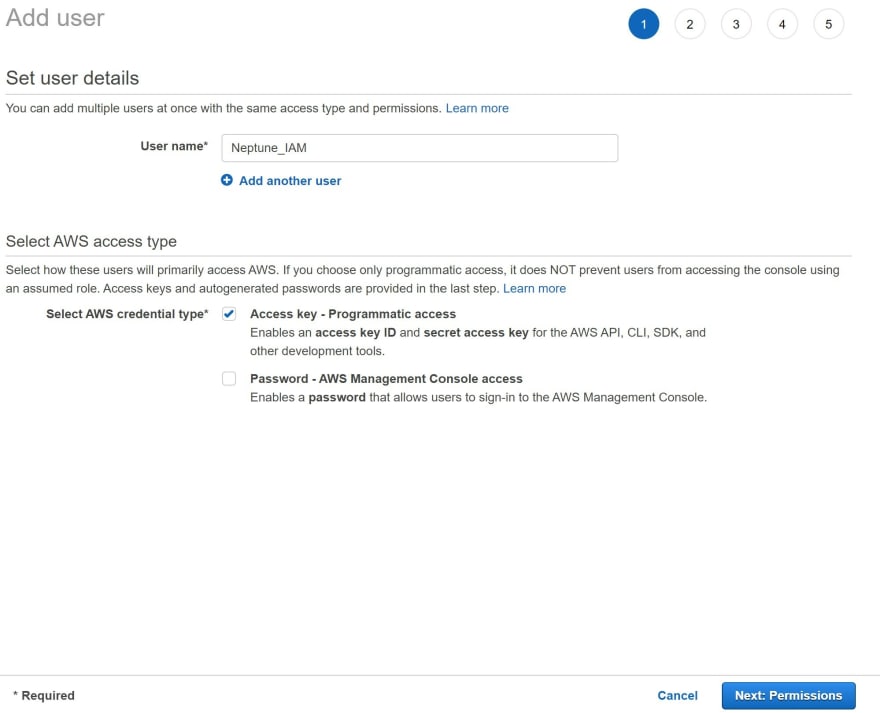
Step 3: Provide a name for the user, click the check box for 'Access Key: Programmatic access' and finally click Next:Permissions.
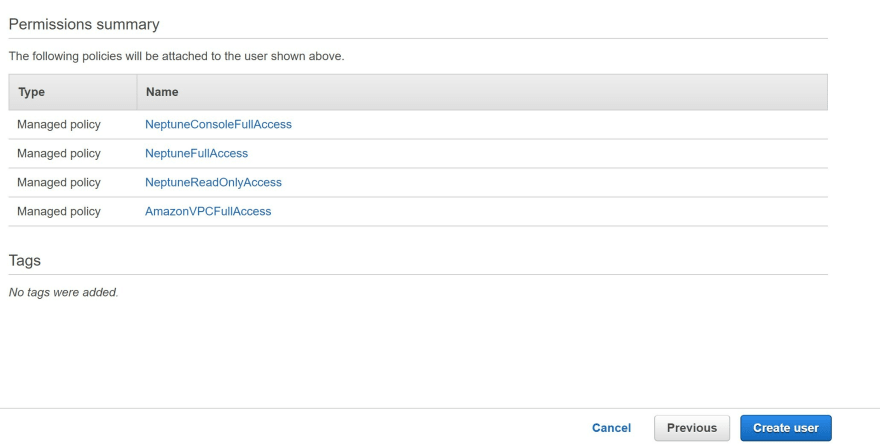
Step 4: Under Set permissions, click on the box Attach policies directly and copy and under the search bar type the word 'Neptune' and check the boxes to provide policy access to:
- NeptuneConsoleFullAccess
- NeptuneFullAccess
- NeptuneReadOnlyAccess

Step 5: On the same page type 'VPC' in the search bar and check the box to provide access to:
*AmazonVPCFullAccess

Click Next:tags.
Step 6: You do not need to include any tags. Click Next:review

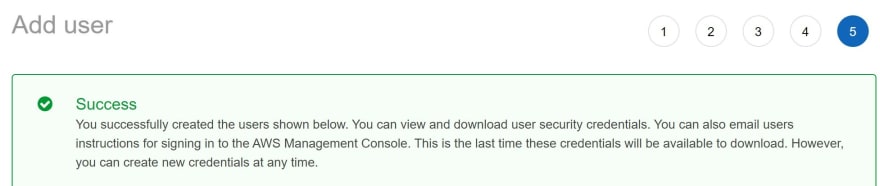
Step 7: Review the access details. Click Create user
Step 8: Click Download as a csv file to save the new user's access key ID and secret access key for programmatic access to interact with AWS using the CLI.
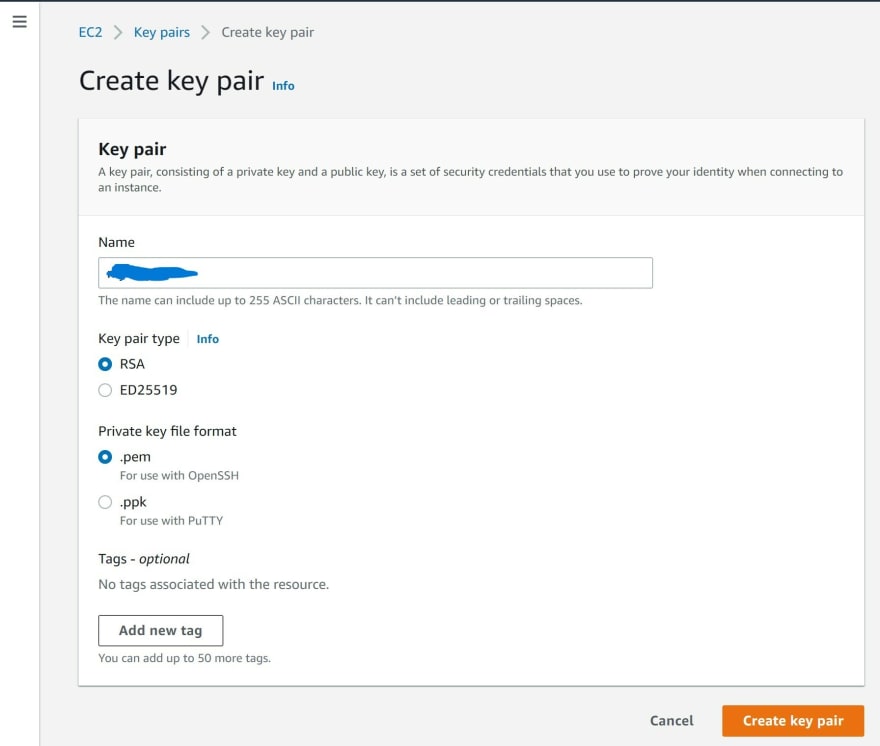
Tutorial 3: Create an Amazon EC2 Key Pair for Windows instance to launch a Neptune DB cluster using AWS CloudFormation template
You may follow the instructions hereto create An Amazon EC2 Key Pair name for Windows instances with pem.
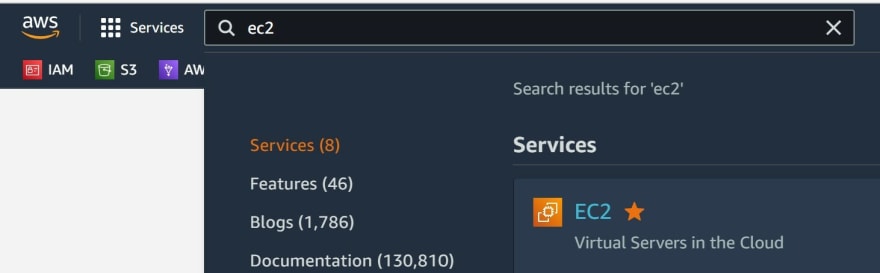
Step 1: Type 'EC2' into the search bar to navigate to the EC2 console.
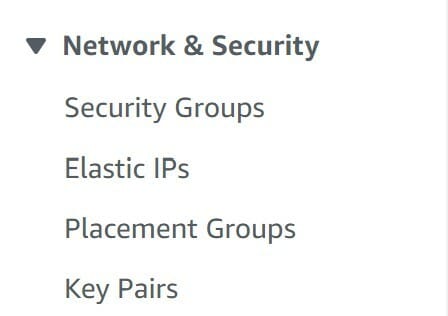
Step 2: On the left-hand menu Network & Security click Key Pairs
Step 3: Click create key pair

Step 4: Provide a descriptive name under Name. For Windows, select 'Key Pair Type' RSA and thirdly select 'Private key file format' as .pem for use with openSSH. Click Create key pair.
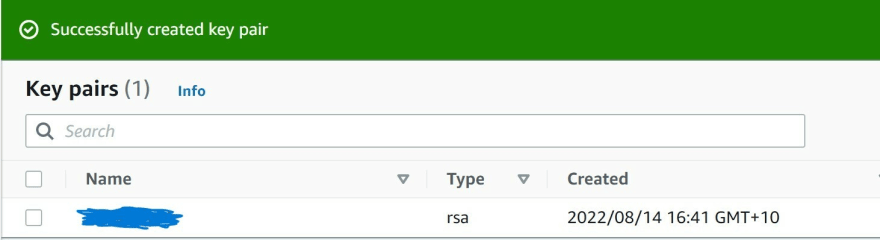
Step 5: Key pair is successfully created. Download and save the private key file details.
Tutorial 4: Add IAM policies to grant permissions to use the AWS CloudFormation template
Follow the instructions from AWS documentation to grant permissions to use AWS CloudFormation.
Step 1: With the newly created user from Tutorial 2, attach a managed policy 'AWSCloudFormationReadOnlyAccess' to provide access to AWS CloudFormation.
Click on Users on the left-hand menu and select Add permissions.
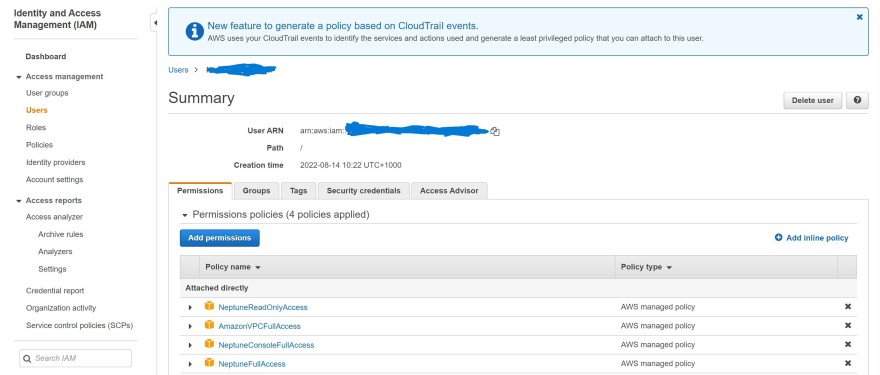
Step 2: Under Grant Permissions, type AWSCloudFormationReadOnlyAccess to filter the policy, check the box and click Next:review

Step 3: Click Add permissions

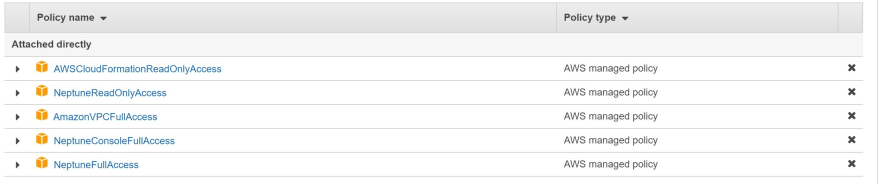
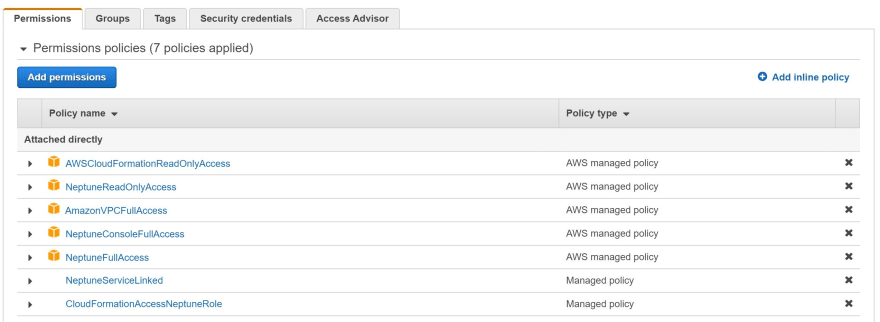
Step 4: You may view the 5 policies applied to the User.
Step 5: Navigate to Policies on the left-hand menu and click the button Create policy.

Step 6: Under Create policy, click on the json tab and copy the code from here and insert into the json. Click Next:tags.


Step 7: Retain the default settings for tags and click Next:review.

Step 8: Under Review policy, provide a name for the role and click Create Policy.

Step 9: Click Users on the left-hand menu and click Add permissions. Click Attach policies directly and Next:review.

Step 10: Click Add permissions
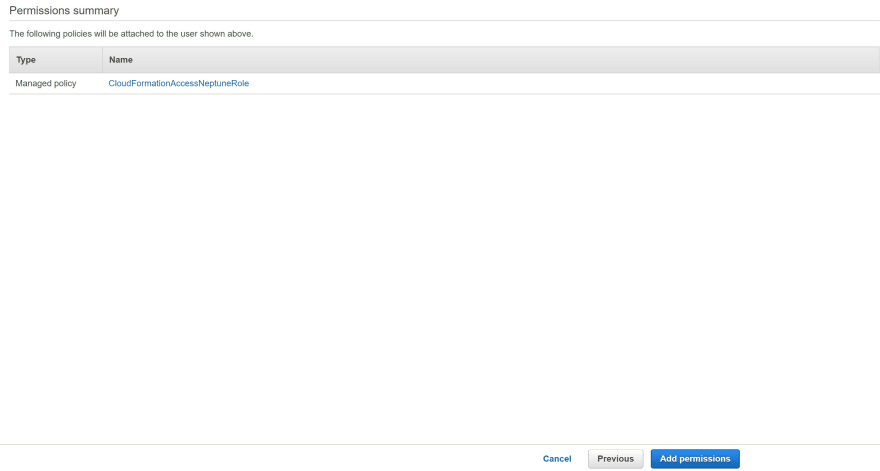
Step 11: You can view the policies attached to the IAM Admin user that provides access to AWS CloudFormation to access Amazon Neptune.
Tutorial 5: Creating an Amazon Neptune DB cluster using AWS CloudFormation template
AWS CloudFormation allows you to manage a collection of AWS services with a template to assist in provisioning and managing services with infrastructure as code.
An AWS CloudFormation stack will be used to create an Amazon Neptune DB cluster to describe AWS resources and other dependencies to launch and configure a stack.
Step 1: From the Amazon Neptune User Guide, use Amazon CloudFormation template to create an Amazon Neptune DB Cluster by clicking Launch Stack for your AWS region from the link here
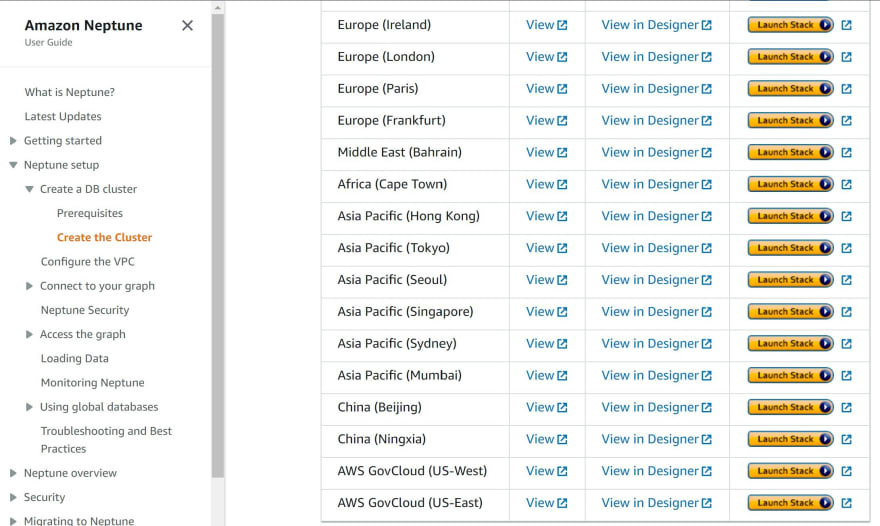
For example, I selected the launch stack for Asia-Pacific(Sydney).
![]()
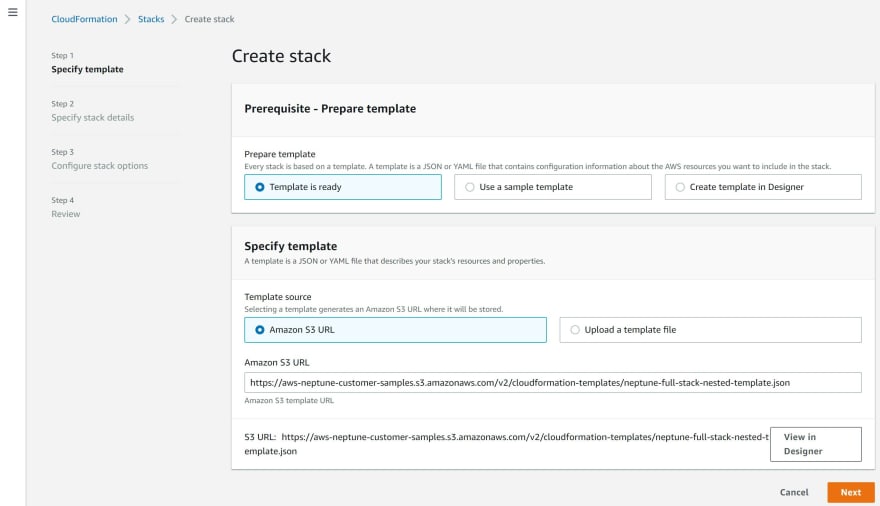
Step 2: From the AWS CloudFormation console, under Template is ready click Next.
Step 3: On the Specify Stack details page, enter the key pair name in the box EC2SSHKeyPairName. Click Next.

Step 4: On this page of Options,click Next.

Step 5: On the page Review Neptune QuickStart, check the two boxes shown in the image to acknowledge that IAM resources will be created by AWS CloudFormation. Click Create Stack.
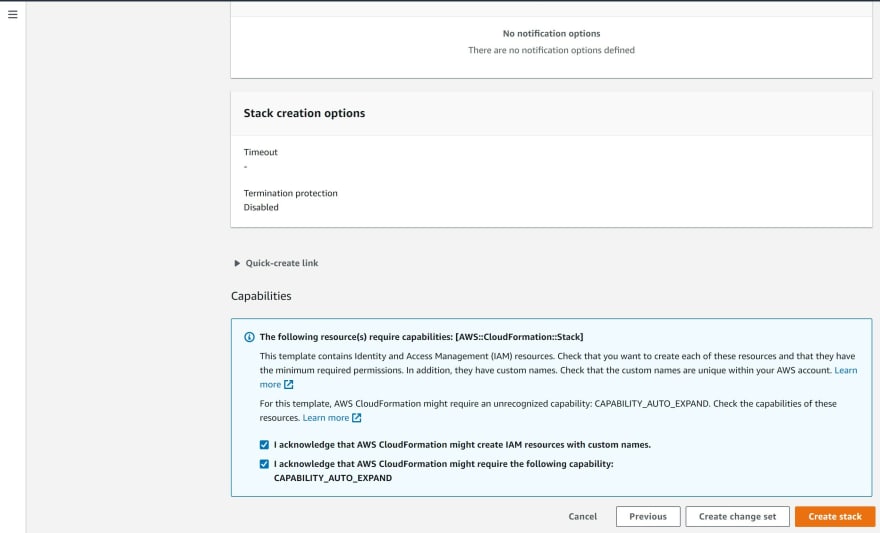
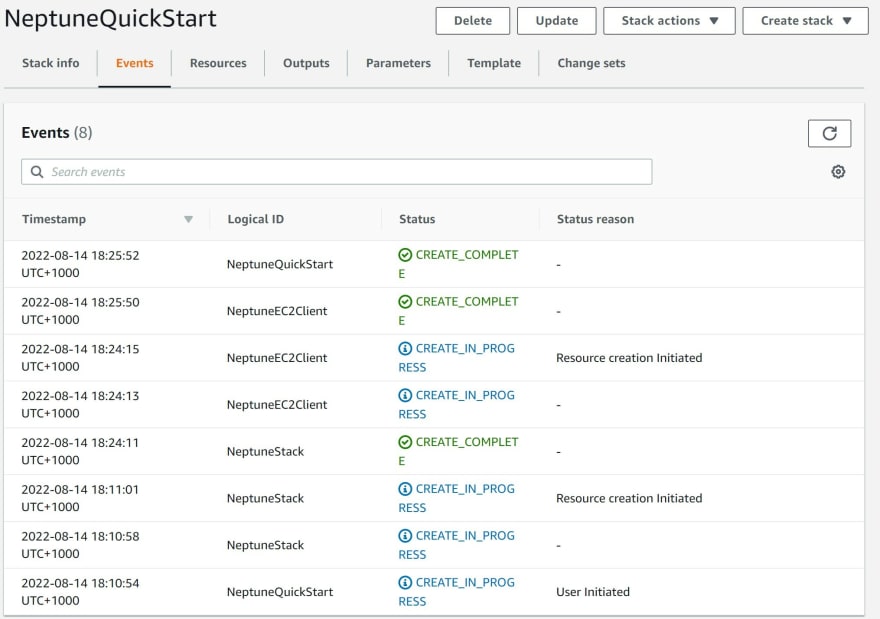
Step 6: AWS CloudFormation is initiating the stack.

The stack creation process was approximately 25 minutes to create an Amazon Neptune DB cluster.
AWS re:Invent 2020: Deep dive on Amazon Neptune with Brad Bebee, GM of Amazon Neptune
AWS re:Invent 2020: New capabilities to build graph apps quickly with Amazon Neptune
References
Simplify Your Infrastructure Management Using AWS CloudFormation
ETL Process for Transforming and Loading data into Amazon Neptune
Additional Resources
Keep up to date withe the latest news from AWS Database Blogs for Amazon Neptune
Amazon Neptune simplifies graph analytics and machine learning workflows with Python integration
AWS Innovate Online Conference APJ - 23 & 25 August 2022
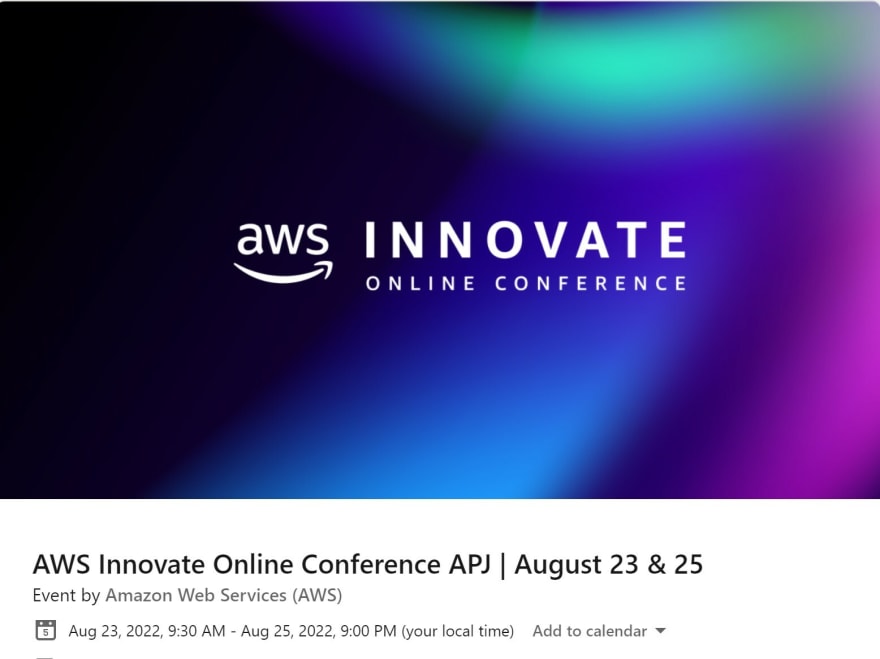
Register at this link
Hot off the press: Introducing Amazon Neptune Global Database
From 27 July 2022, AWS Neptune Global Database can build graph relationships in multiple regions including US East (N. Virginia), US East (Ohio), US West (N. California), US West (Oregon), Europe (Ireland), Europe (London), and Asia Pacific (Tokyo) Regions.
You can read about this announcement from the AWS Database Blog written by author Navtanay Sinha here.
Until the next lesson, happy learning !
Next Lesson
The next tutorial explores data transformation and loading data into Amazon Neptune.
Original Link: https://dev.to/aws-builders/build-a-graph-database-with-amazon-neptune-part-1-launch-aws-cloudformation-stack-43k6
Dev To
More About this Source Visit Dev To