
An Interest In:
Web News this Week
- March 21, 2024
- March 20, 2024
- March 19, 2024
- March 18, 2024
- March 17, 2024
- March 16, 2024
- March 15, 2024
Some of Our Sources
- Engadget
- Team Treehouse
- Abduzeedo
- Fuel Your Creativity
- Fudge Graphics
- Reencoded
- Spyre Studios
- Web Resource Source
- Android Headlines
- Hashedout
Help Webnuz
Referal links:
Just-in-time Worker Nodes with Karpenter
With Kubernetes, the ability to dynamically scale infrastructure based on demand is a major benefit. It provides multiple layers of autoscaling functionality: a horizontal pod autoscaler (HPA) and a vertical pod autoscaler (VPA) as a pod and a cluster autoscaler as a node.
However, setting up cluster autoscaling with existing Kubernetes solutions can be difficult and restrictive. For example, in an AWS EKS cluster, you cannot manage nodes directly. Instead, we need to use additional orchestration mechanisms such as node groups. Suppose we have defined t3.large as instance type of nodegroup. When a new node needs to be provisioned for the cluster, Kubernetes Cluster Autoscaler creates a new instance of type t3.large, regardless of resource requirements. Although we can use mixed instances in node groups, it is not always possible to meet resource demands and be cost effective.
Kubernetes Autoscaling
K8S Autoscaling helps us to scale horizontally or in our applications. Pod-based or HPA-based scaling is a great first step. However, the problem is when we need multiple K8S nodes to hold our PODs.
Karpenter
Karpenter is a node-based scaling solution created for K8S and aims to improve efficiency and costs. It's a great solution because we don't have to configure instance types or create node pools, which drastically simplifies configuration. On the other hand, integration with Spot instances is painless and allows us to reduce our costs (up to 90% less than On-Demand instances)
Karpenter is an open source node deployment project designed for Kubernetes. Adding Karpenter to a Kubernetes cluster can significantly improve the efficiency and cost of running workloads on that cluster.
Features of Karpenter
- Beware of pods that the Kubernetes scheduler has marked as unschedulable.
- Evaluate scheduling constraints (resource requirements, node selectors, affinities, tolerances, and topology distribution constraints).
- Demanded by pods deployment nodes that meet pod needs.
- Schedule pods to run on new nodes.
- Delete nodes when nodes are no longer needed.
Control Loops of Karpenter
Karpenter has two control loops that maximize the availability and efficiency of your cluster.
Allocator
Fast-acting controller that ensures pods are scheduled as quickly as possible
Reallocator
Slow-acting controller replaces nodes as pod capacity changes over time.
Cluster Autoscaler
Cluster Autoscaler is a Kubernetes utility that increases or decreases the size of a Kubernetes cluster (by adding or removing nodes), based on the presence of pending pods and node utilization metrics.
Automatically resize the Kubernetes cluster when one of the following conditions is met:
- There are pods that cannot run on the cluster due to insufficient resources.
- There are nodes in the cluster that have been underused for a long period of time and their pods can be placed on other existing nodes.
A Kubernetes node autoscaling solution is a tool that automatically scales the Kubernetes cluster based on the demands of our workloads. Therefore, there is no need to manually create (or delete) a new Kubernetes node every time we need it.
Karpenter automatically provides new nodes in response to non-programmable pods. It does this by observing events within the Kubernetes cluster and then sending commands to the underlying cloud provider. It is designed to work with any Kubernetes cluster in any environment.
Architecture of Cluster Autoscaler
- The cluster autoscaler looks for pods that cannot be scheduled and nodes that are underutilized.
- It then simulates adding or removing nodes before applying the change to your cluster.
- The AWS cloud provider implementation in Cluster Autoscaler controls the .DesiredReplicas field of your EC2 Auto Scaling groups.
- The Kubernetes cluster autoscaler automatically adjusts the number of nodes in your cluster when pods fail or are rescheduled to other nodes.
- The cluster autoscaler is typically installed as a deployment on your cluster.

Architecture of Karpenter
Karpenter works with the Kubernetes scheduler observing incoming pods throughout the lifetime of the cluster. It starts or stops nodes to optimize application availability and cluster utilization. When there is enough capacity in the cluster, the Kubernetes scheduler will place the incoming pods as usual.
When pods are started that cannot be scheduled using existing cluster capacity, Karpenter bypasses the Kubernetes scheduler and works directly with your provider's compute service to start the minimum compute resources needed in those pods and associate pods with provisioning nodes.
When pods are removed , Karpenter looks for opportunities to terminate underutilized nodes.

Karpenter claims to offer the following enhancements:
Designed to handle the full flexibility of the cloud
Karpenter has the ability to efficiently address the full range of instance types available through AWS. Cluster Autoscaler was not originally built with the flexibility to manage hundreds of instance types, zones and purchasing options.
Node provisioning without groups
Karpenter manages each instance directly, without using additional orchestration mechanisms such as node groups. This allows you to retry in milliseconds instead of minutes when capacity is not available. It also allows Karpenter to take advantage of different types of instances, Availability Zones and purchasing options without creating hundreds of node groups.
Applying Planning
Cluster Autoscaler does not associate pods with nodes it creates. Instead, it relies on the kube scheduler to make the same scheduling decision after the node is online. The kubelet does not need to wait for the scheduler or the node to prepare. It can immediately start preparing the container runtime environment, including pre-fetching the image. This can reduce node startup latency by a few seconds.
In this tutorial you will learn how to:
- Create EKS cluster for Karpenter.
- Configure AWS Roles.
- Install Karpenter.
- Configure Karpenter Provisioner.
- Karpenter node automatic resizing test
Requirements
- AWS CLI
- eksctl
- kubectl
- helm
Create EKS cluster for Karpenter
Before we continue, we need to configure some environment variables
export CLUSTER_NAME=YOUR-CLUSTER-NAMEexport AWS_ACCOUNT_ID=YOUR-ACCOUNT-IDCreating a cluster with eksctl is the easiest way to do this on AWS. First we need to create a yaml file. For example test-demo.yaml
cat <<EOF > test-demo.yaml---apiVersion: eksctl.io/v1alpha5kind: ClusterConfigmetadata: name: ${CLUSTER_NAME} region: us-east-1 version: "1.21" tags: karpenter.sh/discovery: ${CLUSTER_NAME}managedNodeGroups: - instanceType: t3.medium amiFamily: AmazonLinux2 name: ${CLUSTER_NAME}-ng desiredCapacity: 1 minSize: 1 maxSize: 3iam: withOIDC: trueEOFCreate the cluster using the generated file
eksctl create cluster -f test-demo.yaml
Configure AWS Roles
To use Karpenter on AWS we need to configure 3 permissions:
KarpenterNode IAM role
Instance profile with permissions to run containers and configure networks
Creating the KarpenterNode IAM Role
- You need to create the IAM resources using AWS CloudFormation. We need to download the cloud formation stack from the karpenter site and deploy it with our cluster name information.
curl -fsSL https://karpenter.sh/v0.5.5/getting-started/cloudformation.yaml > cloudformation.tmp[ec2-user@ip-*-*-*-* ~]$ aws cloudformation deploy --stack-name ${CLUSTER_NAME} --template-file cloudformation.tmp --capabilities CAPABILITY_NAMED_IAM --parameter-overrides ClusterName=${CLUSTER_NAME}Waiting for changeset to be created..Waiting for stack create/update to completeSuccessfully created/updated stack - makendran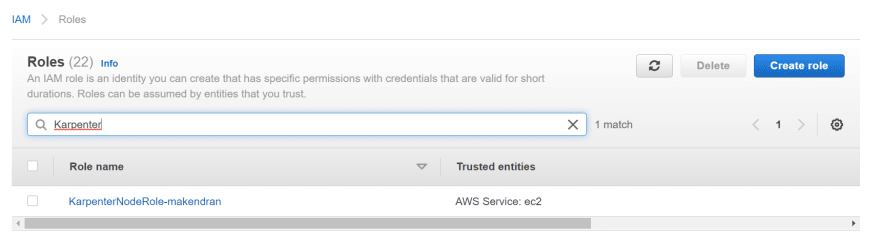
- You need to grant access to the instances by using the profile to connect to the cluster. This command adds the Karpenter node role to the aws-auth configuration directory so that nodes with this role can connect to the cluster.
[ec2-user@ip-*-*-*-* ~]$ eksctl create iamidentitymapping --username system:node:{{EC2PrivateDNSName}} --cluster ${CLUSTER_NAME} --arn arn:aws:iam::${AWS_ACCOUNT_ID}:role/KarpenterNodeRole-${CLUSTER_NAME} --group system:bootstrappers --group system:nodes2022-08-10 07:57:55 [] adding identity "arn:aws:iam::262211057611:role/KarpenterNodeRole-makendran" to auth ConfigMapKarpenter can now launch new EC2 instances and those instances can connect to your cluster.
KarpenterController IAM role
Authorization to launch instances
Create IAM KarpenterController role
Create AWS IAM role and Kubernetes service account and associate them via IAM roles for the service accounts.
[ec2-user@ip-*-*-*-* ~]$ eksctl create iamserviceaccount --cluster $CLUSTER_NAME --name karpenter --namespace karpenter --attach-policy-arn arn:aws:iam::$AWS_ACCOUNT_ID:policy/KarpenterControllerPolicy-$CLUSTER_NAME --approve2022-08-10 07:59:39 [] 1 existing iamserviceaccount(s) (kube-system/aws-node) will be excluded2022-08-10 07:59:39 [] 1 iamserviceaccount (karpenter/karpenter) was included (based on the include/exclude rules)2022-08-10 07:59:39 [!] serviceaccounts that exist in Kubernetes will be excluded, use --override-existing-serviceaccounts to override2022-08-10 07:59:39 [] 1 task: { 2 sequential sub-tasks: { create IAM role for serviceaccount "karpenter/karpenter", create serviceaccount "karpenter/karpenter", } }2022-08-10 07:59:39 [] building iamserviceaccount stack "eksctl-makendran-addon-iamserviceaccount-karpenter-karpenter"2022-08-10 07:59:39 [] deploying stack "eksctl-makendran-addon-iamserviceaccount-karpenter-karpenter"2022-08-10 07:59:39 [] waiting for CloudFormation stack "eksctl-makendran-addon-iamserviceaccount-karpenter-karpenter"2022-08-10 08:00:09 [] waiting for CloudFormation stack "eksctl-makendran-addon-iamserviceaccount-karpenter-karpenter"2022-08-10 08:00:09 [] created namespace "karpenter"2022-08-10 08:00:09 [] created serviceaccount "karpenter/karpenter"Role associated with EC2 Spot service
To run EC2 Spot in our account. EC2 Spot instance is an unused EC2 instance available for less than the price on request.
Create the role associated with the EC2 Spot service
This step is only required if this is your first time using EC2 Spot in this account.
[ec2-user@ip-*-*-*-* ~]$ aws iam create-service-linked-role --aws-service-name spot.amazonaws.com{ "Role": { "Path": "/aws-service-role/spot.amazonaws.com/", "RoleName": "AWSServiceRoleForEC2Spot", "RoleId": "AROAT2DH7G7F6JRN6LIPO", "Arn": "arn:aws:iam::262211057611:role/aws-service-role/spot.amazonaws.com/AWSServiceRoleForEC2Spot", "CreateDate": "2022-08-10T08:00:58+00:00", "AssumeRolePolicyDocument": { "Version": "2012-10-17", "Statement": [ { "Action": [ "sts:AssumeRole" ], "Effect": "Allow", "Principal": { "Service": [ "spot.amazonaws.com" ] } } ] } }}Install Karpenter
We can use Helm to install Karpenter.
helm repo add karpenter https://charts.karpenter.shhelm repo updatehelm upgrade --install karpenter karpenter/karpenter --namespace karpenter --create-namespace --set serviceAccount.create=false --version v0.5.5 --set controller.clusterName=${CLUSTER_NAME} --set controller.clusterEndpoint=$(aws eks describe-cluster --name ${CLUSTER_NAME} --query "cluster.endpoint" --output json) --wait # for the defaulting webhook to install before creating a ProvisionerCheck out Karpenter's resources on K8S.
[ec2-user@ip-*-*-*-* ~]$ kubectl get all -n karpenterNAME READY STATUS RESTARTS AGEpod/karpenter-controller-6474d8f77b-sntgb 1/1 Running 0 2m24spod/karpenter-webhook-7797fd8b6d-7tcd6 1/1 Running 0 2m24sNAME TYPE CLUSTER-IP EXTERNAL-IP PORT(S) AGEservice/karpenter-metrics ClusterIP 10.100.122.232 <none> 8080/TCP 8m37sservice/karpenter-webhook ClusterIP 10.100.197.109 <none> 443/TCP 8m37sNAME READY UP-TO-DATE AVAILABLE AGEdeployment.apps/karpenter-controller 1/1 1 1 8m37sdeployment.apps/karpenter-webhook 1/1 1 1 8m37sNAME DESIRED CURRENT READY AGEreplicaset.apps/karpenter-controller-54d76d6f98 0 0 0 8m37sreplicaset.apps/karpenter-controller-6474d8f77b 1 1 1 2m24sreplicaset.apps/karpenter-webhook-7797fd8b6d 1 1 1 2m24sreplicaset.apps/karpenter-webhook-95d6dd84 0 0 0 8m37sConfigure Karpenter provisioner
A Karpenter framework is to manage various provisioning decisions based on pod attributes such as labels and affinities.
cat <<EOF > provisioner.yaml---apiVersion: karpenter.sh/v1alpha5kind: Provisionermetadata: name: defaultspec: requirements: - key: karpenter.sh/capacity-type operator: In values: ["spot"] limits: resources: cpu: 1000 provider: subnetSelector: karpenter.sh/discovery: ${CLUSTER_NAME} securityGroupSelector: karpenter.sh/discovery: ${CLUSTER_NAME} instanceProfile: KarpenterNodeInstanceProfile-${CLUSTER_NAME} ttlSecondsAfterEmpty: 30EOFkubectl apply -f provisioner.yamlKarpenter is ready to start provisioning nodes.
Karpenter Node Autoscaling Test
This implementation uses the pause image and starts with zero replicas.
cat <<EOF > deployment.yaml---apiVersion: apps/v1kind: Deploymentmetadata: name: inflatespec: replicas: 0 selector: matchLabels: app: inflate template: metadata: labels: app: inflate spec: terminationGracePeriodSeconds: 0 containers: - name: inflate image: public.ecr.aws/eks-distro/kubernetes/pause:3.2 resources: requests: cpu: 1EOFkubectl apply -f deployment.yamlNow we can scale the distribution to 4 replicas
kubectl scale deployment inflate --replicas 4Now we can check Karpenter's logs.
kubectl logs -f -n karpenter $(k get pods -n karpenter -l karpenter=controller -o name)2022-08-10T08:32:46.737Z INFO controller.provisioning Launched instance: i-0d1406393eaee0b4c, hostname: ip-192-168-121-175.ec2.internal, type: t3.2xlarge, zone: us-east-1c, capacityType: spot {"commit": "723b1b7", "provisioner": "default"}2022-08-10T08:32:46.780Z INFO controller.provisioning Bound 4 pod(s) to node ip-192-168-121-175.ec2.internal {"commit": "723b1b7", "provisioner": "default"}2022-08-10T08:32:46.780Z INFO controller.provisioning Waiting for unschedulable pods {"commit": "723b1b7", "provisioner": "default"}Karpenter created a new instance.
- Instance: i-0d1406393eaee0b4c
- Host name: ip-192-168-121-175.ec2.internal
- Type: t3.2xlarge
- Zone: us-east-1c
We can check the nodes,
[ec2-user@ip-*-*-*-* ~]$ kubectl get nodesNAME STATUS ROLES AGE VERSIONip-192-168-121-175.ec2.internal Ready <none> 8m34s v1.21.12-eks-5308cf7ip-192-168-39-32.ec2.internal Ready <none> 52m v1.21.12-eks-5308cf7We now have a new worker node. The node is an EC2 Spot instance. We can check the SpotPrice.
[ec2-user@ip-*-*-*-* ~]$ aws ec2 describe-spot-instance-requests | grep "InstanceType\|InstanceId\|SpotPrice" "InstanceId": "i-0d1406393eaee0b4c", "InstanceType": "t3.2xlarge", "SpotPrice": "0.332800",Finally, we can resize the distribution to 0 to check if the node has been removed
kubectl scale deployment inflate --replicas 0Karpenter cordoned the node and then removed it.
kubectl logs -f -n karpenter $(kubectl get pods -n karpenter -l karpenter=controller -o name)2022-08-10T08:32:46.780Z INFO controller.provisioning Waiting for unschedulable pods {"commit": "723b1b7", "provisioner": "default"}2022-08-10T08:47:14.742Z INFO controller.node Added TTL to empty node {"commit": "723b1b7", "node": "ip-192-168-121-175.ec2.internal"}2022-08-10T08:47:44.763Z INFO controller.node Triggering termination after 30s for empty node {"commit": "723b1b7", "node": "ip-192-168-121-175.ec2.internal"}2022-08-10T08:47:44.790Z INFO controller.termination Cordoned node {"commit": "723b1b7", "node": "ip-192-168-121-175.ec2.internal"}2022-08-10T08:47:45.038Z INFO controller.termination Deleted node {"commit": "723b1b7", "node": "ip-192-168-121-175.ec2.internal"}Check the nodes again. The second node has been removed
[ec2-user@ip-*-*-*-* ~]$ kubectl get nodesNAME STATUS ROLES AGE VERSIONip-192-168-39-32.ec2.internal Ready <none> 60m v1.21.12-eks-5308cf7Cleanup
To avoid additional costs, remove the demo infrastructure from your AWS account.
helm uninstall karpenter --namespace karpentereksctl delete iamserviceaccount --cluster ${CLUSTER_NAME} --name karpenter --namespace karpenteraws cloudformation delete-stack --stack-name Karpenter-${CLUSTER_NAME}aws ec2 describe-launch-templates \ | jq -r ".LaunchTemplates[].LaunchTemplateName" \ | grep -i Karpenter-${CLUSTER_NAME} \ | xargs -I{} aws ec2 delete-launch-template --launch-template-name {}eksctl delete cluster --name ${CLUSTER_NAME}Conclusion
Karpenter is a great tool for configuring the autoscaling of Kubernetes nodes, it's pretty new. However, it has integration with Spot, Fargate (serverless) instances, and other great features. The best part is that you don't need to configure the node pools or choose the size of the instances, it's also very fast, it takes about 1 minute to deploy the pods to the new node.
Gratitude for perusing my article till end. I hope you realized something unique today. If you enjoyed this article then please share to your buddies and if you have suggestions or thoughts to share with me then please write in the comment box.
Original Link: https://dev.to/makendrang/just-in-time-worker-nodes-with-karpenter-1711
Dev To
More About this Source Visit Dev To