
An Interest In:
Web News this Week
- April 2, 2024
- April 1, 2024
- March 31, 2024
- March 30, 2024
- March 29, 2024
- March 28, 2024
- March 27, 2024
Some of Our Sources
- Mashable
- Techcrunch
- Simplebits
- Fuel Your Creativity
- Naldz Graphics
- CSS Globe
- Spyre Studios
- Design Modo
- Web Resource Source
- Android Dissected
Help Webnuz
Referal links:
My Neovim setup for React, TypeScript, Tailwind CSS, etc
Hi, it's Takuya here.
As you may know, I mainly use Neovim to code my app called Inkdrop, a cross-platform Markdown note-taking app.
It's built with Electron for desktop and React Native for mobile platforms.
It's been 1 year since I last posted my Neovim setup.
Neovim and its plugins have been evolved so well.
So, I'd like to share my latest setup for coding React and TypeScript based apps.
The main difference is that the config files are now written in Lua.
I switched from vim-plug to Packer.
I also made a tutorial video on how to set up Neovim from scratch on a new M2 MacBook Air.
If you have your own dotfiles already, you can cherry-pick my config.
I hope you enjoy it!
Ingredients
Here is a quick summary of my set up:
- Neovim >= 0.7
- wbthomason/packer.nvim - A plugin manager for Neovim
- svrana/neosolarized.nvim - A truecolor, solarized dark colorscheme
- nvim-lualine/lualine.nvim - A blazing fast and easy to configure Neovim statusline written in Lua
- onsails/lspkind-nvim - VSCode-like pictograms
- L3MON4D3/LuaSnip - Snippet Engine for Neovim written in Lua
- hrsh7th/cmp-nvim-lsp - nvim-cmp source for neovim's built-in LSP
- hrsh7th/cmp-buffer - nvim-cmp source for buffer words
- hrsh7th/nvim-cmp - A completion engine plugin for neovim written in Lua
- neovim/nvim-lspconfig - A collection of configurations for Neovim's built-in LSP
- jose-elias-alvarez/null-ls.nvim - Use Neovim as a language server to inject LSP diagnostics, code actions, and more via Lua.
- MunifTanjim/prettier.nvim - Prettier plugin for Neovim's built-in LSP client
- williamboman/mason.nvim - Portable package manager for Neovim that runs everywhere Neovim runs. Easily install and manage LSP servers, DAP servers, linters, and formatters
- williamboman/mason-lspconfig.nvim - Extension to mason.nvim that makes it easier to use lspconfig with mason.nvim
- glepnir/lspsaga.nvim - A light-weight lsp plugin based on neovim's built-in lsp with a highly performant UI
- nvim-treesitter/nvim-treesitter - Treesitter configurations and abstraction layer for Neovim
- kyazdani42/nvim-web-devicons - Lua
forkof vim-web-devicons for neovim - nvim-telescope/telescope.nvim - A highly extendable fuzzy finder over lists
- nvim-telescope/telescope-file-browser.nvim - File Browser extension for telescope.nvim
- windwp/nvim-autopairs - Autopairs
- windwp/nvim-ts-autotag - Use treesitter to auto close and auto rename html tag
- norcalli/nvim-colorizer.lua - A high-performance color highlighter
- akinsho/nvim-bufferline.lua - A snazzy bufferline
- lewis6991/gitsigns.nvim - Git integration for buffers
- dinhhuy258/git.nvim - A simple clone of the plugin vim-fugitive
- folke/zen-mode.nvim - Distraction-free mode
- iamcco/markdown-preview.nvim - Markdown live preview
And here is my dotfiles repository:
 craftzdog / dotfiles-public
My personal dotfiles


Takuya's dotfiles
Warning: Dont blindly use my settings unless you know what that entails. Use at your own risk!
Looking for a Markdown note-taking app?
Check out my app called Inkdrop

Contents
- vim (NeoVim) config
- tmux config
- git config
- fish config
- PowerShell config
Neovim setup
Requires Neovim (>= 0.7)
- wbthomason/packer.nvim - A plugin manager for Neovim
- svrana/neosolarized.nvim - A truecolor, solarized dark colorscheme
- nvim-lualine/lualine.nvim - A blazing fast and easy to configure Neovim statusline written in Lua
- onsails/lspkind-nvim - VSCode-like pictograms
- L3MON4D3/LuaSnip - Snippet Engine for Neovim written in Lua
- hrsh7th/cmp-nvim-lsp - nvim-cmp source for neovim's built-in LSP
- hrsh7th/cmp-buffer - nvim-cmp source for buffer words
- hrsh7th/nvim-cmp - A completion engine plugin for neovim written in Lua
- neovim/nvim-lspconfig - A collection of configurations for Neovim's built-in LSP
- jose-elias-alvarez/null-ls.nvim - Use Neovim as a language server to inject LSP diagnostics, code actions, and more via Lua.
- MunifTanjim/prettier.nvim - Prettier plugin for
A tutorial video:
Prerequisites iTerm2 and Patched Nerd Font
iTerm2 is a fast terminal emulator for macOS.
Install one of Nerd Fonts for displaying fancy glyphs on your terminal.
My current choice is Hack.
And use it on your terminal app. For example, on iTerm2:

Install Neovim via Homebrew
brew install neovimDirectory structure
Neovim conforms XDG Base Directory structure. Here is my config file structure:
~/.config/nvim after plugin lua base.lua plugin init.luaNeovim loads $HOME/.config/nvim/init.vim or init.lua first instead of $HOME/.vimrc.
Check out the quickstart guide for more detail:
https://github.com/nanotee/nvim-lua-guide
Install plugin manager: Packer
Install Packer by running the below command:
git clone --depth 1 https://github.com/wbthomason/packer.nvim \ ~/.local/share/nvim/site/pack/packer/start/packer.nvimThen, make ./.config/nvim/lua/plugins.lua like so:
local status, packer = pcall(require, "packer")if (not status) then print("Packer is not installed") returnendvim.cmd [[packadd packer.nvim]]packer.startup(function(use) use 'wbthomason/packer.nvim' -- Your plugins go hereend)Then, require it from init.lua like so:
require('plugins')Color scheme: Neosolarized

I use svrana/neosolarized.nvim with some customizations.
local status, n = pcall(require, "neosolarized")if (not status) then return endn.setup({ comment_italics = true,})local cb = require('colorbuddy.init')local Color = cb.Colorlocal colors = cb.colorslocal Group = cb.Grouplocal groups = cb.groupslocal styles = cb.stylesColor.new('black', '#000000')Group.new('CursorLine', colors.none, colors.base03, styles.NONE, colors.base1)Group.new('CursorLineNr', colors.yellow, colors.black, styles.NONE, colors.base1)Group.new('Visual', colors.none, colors.base03, styles.reverse)local cError = groups.Error.fglocal cInfo = groups.Information.fglocal cWarn = groups.Warning.fglocal cHint = groups.Hint.fgGroup.new("DiagnosticVirtualTextError", cError, cError:dark():dark():dark():dark(), styles.NONE)Group.new("DiagnosticVirtualTextInfo", cInfo, cInfo:dark():dark():dark(), styles.NONE)Group.new("DiagnosticVirtualTextWarn", cWarn, cWarn:dark():dark():dark(), styles.NONE)Group.new("DiagnosticVirtualTextHint", cHint, cHint:dark():dark():dark(), styles.NONE)Group.new("DiagnosticUnderlineError", colors.none, colors.none, styles.undercurl, cError)Group.new("DiagnosticUnderlineWarn", colors.none, colors.none, styles.undercurl, cWarn)Group.new("DiagnosticUnderlineInfo", colors.none, colors.none, styles.undercurl, cInfo)Group.new("DiagnosticUnderlineHint", colors.none, colors.none, styles.undercurl, cHint)Status line: Lualine

nvim-lualine/lualine.nvim provides a flexible way to configure statusline.
local status, lualine = pcall(require, "lualine")if (not status) then return endlualine.setup { options = { icons_enabled = true, theme = 'solarized_dark', section_separators = { left = '', right = '' }, component_separators = { left = '', right = '' }, disabled_filetypes = {} }, sections = { lualine_a = { 'mode' }, lualine_b = { 'branch' }, lualine_c = { { 'filename', file_status = true, -- displays file status (readonly status, modified status) path = 0 -- 0 = just filename, 1 = relative path, 2 = absolute path } }, lualine_x = { { 'diagnostics', sources = { "nvim_diagnostic" }, symbols = { error = ' ', warn = ' ', info = ' ', hint = ' ' } }, 'encoding', 'filetype' }, lualine_y = { 'progress' }, lualine_z = { 'location' } }, inactive_sections = { lualine_a = {}, lualine_b = {}, lualine_c = { { 'filename', file_status = true, -- displays file status (readonly status, modified status) path = 1 -- 0 = just filename, 1 = relative path, 2 = absolute path } }, lualine_x = { 'location' }, lualine_y = {}, lualine_z = {} }, tabline = {}, extensions = { 'fugitive' }}Lspconfig
Neovim has a built-in LSP support.
You can easily configure it by using neovim/nvim-lspconfig.
For example, to enable typescript language server on Neovim:
local status, nvim_lsp = pcall(require, "lspconfig")if (not status) then return endlocal protocol = require('vim.lsp.protocol')local on_attach = function(client, bufnr) -- format on save if client.server_capabilities.documentFormattingProvider then vim.api.nvim_create_autocmd("BufWritePre", { group = vim.api.nvim_create_augroup("Format", { clear = true }), buffer = bufnr, callback = function() vim.lsp.buf.formatting_seq_sync() end }) endend-- TypeScriptnvim_lsp.tsserver.setup { on_attach = on_attach, filetypes = { "typescript", "typescriptreact", "typescript.tsx" }, cmd = { "typescript-language-server", "--stdio" }}Don't forget to install typescript language server itself:
npm i -g typescript-language-serverAuto-completion: Lspkind and cmp

To get LSP-aware auto-completion feature with fancy pictograms, I use the following plugins:
- onsails/lspkind-nvim - VSCode-like pictograms
- L3MON4D3/LuaSnip - Snippet engine
- hrsh7th/cmp-nvim-lsp - nvim-cmp source for neovim's built-in LSP
- hrsh7th/cmp-buffer - nvim-cmp source for buffer words
- hrsh7th/nvim-cmp - A completion engine plugin for neovim
Configure it like so:
local status, cmp = pcall(require, "cmp")if (not status) then return endlocal lspkind = require 'lspkind'cmp.setup({ snippet = { expand = function(args) require('luasnip').lsp_expand(args.body) end, }, mapping = cmp.mapping.preset.insert({ ['<C-d>'] = cmp.mapping.scroll_docs(-4), ['<C-f>'] = cmp.mapping.scroll_docs(4), ['<C-Space>'] = cmp.mapping.complete(), ['<C-e>'] = cmp.mapping.close(), ['<CR>'] = cmp.mapping.confirm({ behavior = cmp.ConfirmBehavior.Replace, select = true }), }), sources = cmp.config.sources({ { name = 'nvim_lsp' }, { name = 'buffer' }, }), formatting = { format = lspkind.cmp_format({ with_text = false, maxwidth = 50 }) }})vim.cmd [[ set completeopt=menuone,noinsert,noselect highlight! default link CmpItemKind CmpItemMenuDefault]]Syntax highlightings: Treesitter

Treesitter is a popular language parser for syntax highlightings.
First, install it:
brew install tree-sitterInstall nvim-treesitter/nvim-treesitter with Packer and configure it like so:
local status, ts = pcall(require, "nvim-treesitter.configs")if (not status) then return endts.setup { highlight = { enable = true, disable = {}, }, indent = { enable = true, disable = {}, }, ensure_installed = { "tsx", "toml", "fish", "php", "json", "yaml", "swift", "css", "html", "lua" }, autotag = { enable = true, },}local parser_config = require "nvim-treesitter.parsers".get_parser_configs()parser_config.tsx.filetype_to_parsername = { "javascript", "typescript.tsx" }Autotag and Autopair
For React apps, you often want to close tags quickly.
windwp/nvim-ts-autotag is exactly what you want.
local status, autotag = pcall(require, "nvim-ts-autotag")if (not status) then return endautotag.setup({})windwp/nvim-autopairs is for closing brackets.
local status, autopairs = pcall(require, "nvim-autopairs")if (not status) then return endautopairs.setup({ disable_filetype = { "TelescopePrompt" , "vim" },})Fuzz finder: Telescope
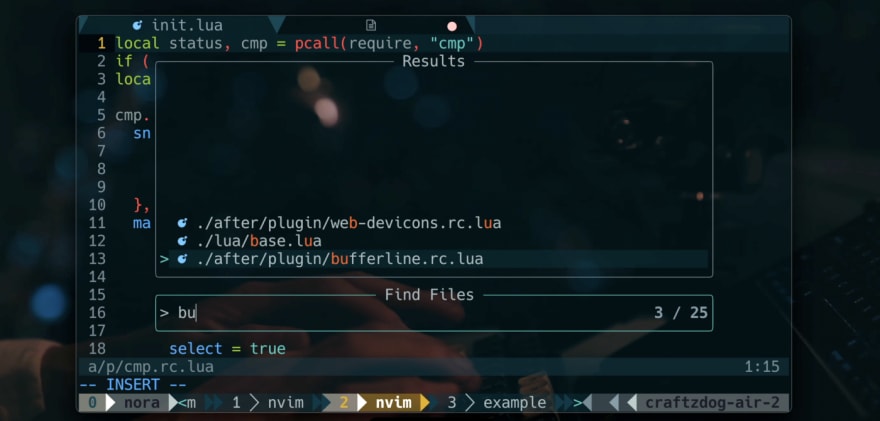
telescope.nvimprovides an interactive fuzzy finder over lists, built on top of the latest Neovim features.
I also use telescope-file-browser.nvim as a filer.
Its so useful because you can search files while viewing the content of the files without actually opening them. It supports various sources likeVim,files,Git,LSP, andTreesitter. Check outthe showcaseof Telescope.
Install kyazdani42/nvim-web-devicons to get file icons on Telescope, statusline, and other supported plugins.
The configuration would look like so:
local status, telescope = pcall(require, "telescope")if (not status) then return endlocal actions = require('telescope.actions')local builtin = require("telescope.builtin")local function telescope_buffer_dir() return vim.fn.expand('%:p:h')endlocal fb_actions = require "telescope".extensions.file_browser.actionstelescope.setup { defaults = { mappings = { n = { ["q"] = actions.close }, }, },}-- keymapsvim.keymap.set('n', ';f', function() builtin.find_files({ no_ignore = false, hidden = true }) end)vim.keymap.set('n', ';r', function() builtin.live_grep()end)vim.keymap.set('n', '\\\\', function() builtin.buffers()end)vim.keymap.set('n', ';t', function() builtin.help_tags()end)vim.keymap.set('n', ';;', function() builtin.resume()end)vim.keymap.set('n', ';e', function() builtin.diagnostics()end)
Use the telescope browser extension:
telescope.setup { defaults = { mappings = { n = { ["q"] = actions.close }, }, }, extensions = { file_browser = { theme = "dropdown", -- disables netrw and use telescope-file-browser in its place hijack_netrw = true, mappings = { -- your custom insert mode mappings ["i"] = { ["<C-w>"] = function() vim.cmd('normal vbd') end, }, ["n"] = { -- your custom normal mode mappings ["N"] = fb_actions.create, ["h"] = fb_actions.goto_parent_dir, ["/"] = function() vim.cmd('startinsert') end }, }, }, },}telescope.load_extension("file_browser")vim.keymap.set("n", "sf", function() telescope.extensions.file_browser.file_browser({ path = "%:p:h", cwd = telescope_buffer_dir(), respect_gitignore = false, hidden = true, grouped = true, previewer = false, initial_mode = "normal", layout_config = { height = 40 } })end)Tabs: Bufferline

I use akinsho/nvim-bufferline.lua to get better looking of tabs.
Make some customizations to make it look better with Solarized theme:
local status, bufferline = pcall(require, "bufferline")if (not status) then return endbufferline.setup({ options = { mode = "tabs", separator_style = 'slant', always_show_bufferline = false, show_buffer_close_icons = false, show_close_icon = false, color_icons = true }, highlights = { separator = { guifg = '#073642', guibg = '#002b36', }, separator_selected = { guifg = '#073642', }, background = { guifg = '#657b83', guibg = '#002b36' }, buffer_selected = { guifg = '#fdf6e3', gui = "bold", }, fill = { guibg = '#073642' } },})vim.keymap.set('n', '<Tab>', '<Cmd>BufferLineCycleNext<CR>', {})vim.keymap.set('n', '<S-Tab>', '<Cmd>BufferLineCyclePrev<CR>', {})LSP Uls: Lspsaga


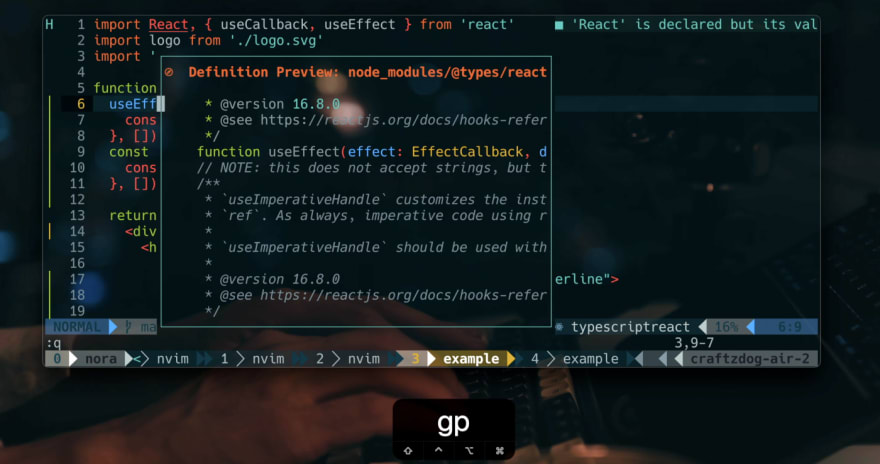
glepnir/lspsaga.nvim is one of my favorite LSP plugins.
It provides beautiful UIs for various LSP-related features like hover doc, definition preview, and rename actions.
My configuration is simple:
local status, saga = pcall(require, "lspsaga")if (not status) then return endsaga.init_lsp_saga { server_filetype_map = { typescript = 'typescript' }}local opts = { noremap = true, silent = true }vim.keymap.set('n', '<C-j>', '<Cmd>Lspsaga diagnostic_jump_next<CR>', opts)vim.keymap.set('n', 'K', '<Cmd>Lspsaga hover_doc<CR>', opts)vim.keymap.set('n', 'gd', '<Cmd>Lspsaga lsp_finder<CR>', opts)vim.keymap.set('i', '<C-k>', '<Cmd>Lspsaga signature_help<CR>', opts)vim.keymap.set('n', 'gp', '<Cmd>Lspsaga preview_definition<CR>', opts)vim.keymap.set('n', 'gr', '<Cmd>Lspsaga rename<CR>', opts)Code formatter: Prettier and null-ls
I heavily rely on Prettier to format TypeScript/JavaScript/CSS files.
Use jose-elias-alvarez/null-ls.nvim and MunifTanjim/prettier.nvim to accomplish that.
First, you need prettierd:
brew install prettierdThen, configure null-ls as following:
local status, null_ls = pcall(require, "null-ls")if (not status) then return endnull_ls.setup({  sources = {    null_ls.builtins.diagnostics.eslint_d.with({      diagnostics_format = '[eslint] #{m}
(#{c})'    }),    null_ls.builtins.diagnostics.fish  }})
Prettier:
local status, prettier = pcall(require, "prettier")if (not status) then return endprettier.setup { bin = 'prettierd', filetypes = { "css", "javascript", "javascriptreact", "typescript", "typescriptreact", "json", "scss", "less" }}Git markers: gitsigns
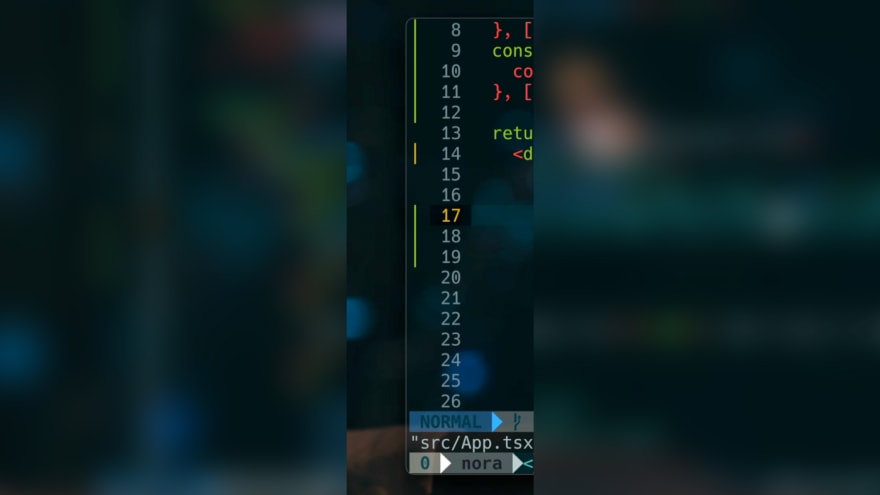
lewis6991/gitsigns.nvim provides git decorations for current buffers.
It helps you know which lines are currently changed.
It works out of the box.
require('gitsigns').setup {}git

I often view the code on GitHub.
dinhhuy258/git.nvim helps open GitHub right from Neovim, and provides git blame view in split view, which are super handy.
local status, git = pcall(require, "git")if (not status) then return endgit.setup({ keymaps = { -- Open blame window blame = "<Leader>gb", -- Open file/folder in git repository browse = "<Leader>go", }})LSP tool: mason

If you need additional LSP support for specific libraries, you may need williamboman/mason.nvim and williamboman/mason-lspconfig.nvim.
I use them for getting Tailwind CSS language server to work on Neovim.
local status, mason = pcall(require, "mason")if (not status) then return endlocal status2, lspconfig = pcall(require, "mason-lspconfig")if (not status2) then return endmason.setup({})lspconfig.setup { ensure_installed = { "sumneko_lua", "tailwindcss" },}Add lspconfig:
local nvim_lsp = require "lspconfig"nvim_lsp.tailwindcss.setup {}Thats pretty much it!
I hope its helpful for improving your Neovim environment.
Follow me online
- Check out my app calledInkdrop A Markdown note-taking app
- Twitterhttps://twitter.com/inkdrop_app
- Bloghttps://blog.inkdrop.app/
- YouTubehttps://www.youtube.com/devaslife
- Instagramhttps://instagram.com/craftzdog
Original Link: https://dev.to/craftzdog/my-neovim-setup-for-react-typescript-tailwind-css-etc-58fb
Dev To
More About this Source Visit Dev To