
An Interest In:
Web News this Week
- April 20, 2024
- April 19, 2024
- April 18, 2024
- April 17, 2024
- April 16, 2024
- April 15, 2024
- April 14, 2024
Some of Our Sources
- Technology Review
- TutsPlus - Code
- Vandelay Design
- Creative Curio
- Naldz Graphics
- FanExtra - PSD
- My Ink Blog
- CSS Globe
- Line 25
- Dev To
Help Webnuz
Referal links:
Create a Quiz App Using Android Studio
By Samrat Chakraborty
For an Android app developer,user interface is the key.
Your app may have cutting edge functionality, but if its wrapped in an unappealing UI, its unlikely that users will stay around long enough to discover how great your app really is.
In this project we will cover the following :
- LinearLayout
- Designing for multiple screens
- Adding image resources
- App accessibility
- Custom XML styles
- Making Buttons
- Toast Notifications
Start by creating an Android project called QuizApp and a new activity go for empty activity. (Refer to my previous blog if you aren't sure how)
Define a LinearLayout
A LinearLayout is a flexible layout that will allow you to organize UI elements in relation to one another. This feature makes it particularly useful to developers needing control over the exact positioning of their UI components.
<?xml version=1.0 encoding=utf-8?><LinearLayout xmlns:android=http://schmas.android.com/apk/res/androidxmlns:app=http://schemas.android.com/apk/res-autoxmlns:app=http://schemas.android.com/toolsandroid:layout_width=match_parentandroid:layout_height=match_parentDesigning for Multiple Screens: Background Image:
Open the res folder here you can add the images that you want to display as background in your app screen.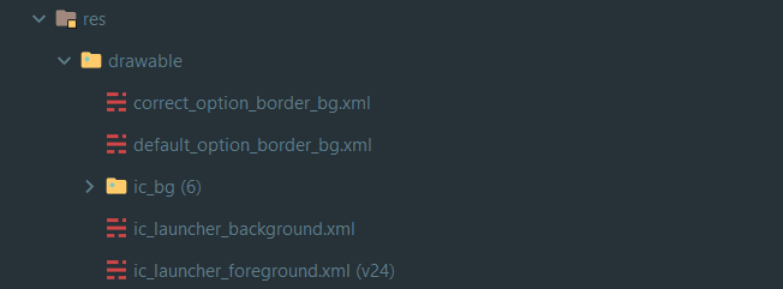
Modify your layout code by adding the id of the background image that you want in your Quiz App.
<?xml version=1.0 encoding=utf-8?><LinearLayout xmlns:android=http://schmas.android.com/apk/res/androidxmlns:app=http://schemas.android.com/apk/res-autoxmlns:app=http://schemas.android.com/toolsandroid:layout_width=match_parentandroid:layout_height=match_parentandroid:gravity=centerandroid:background=@drawable/ic_bgandroid:orientation=verticalTools:context=.MainActivityCreating Buttons:
In the main activity file you can create your own button and give it an ID so that you can access it anywhere in your project.
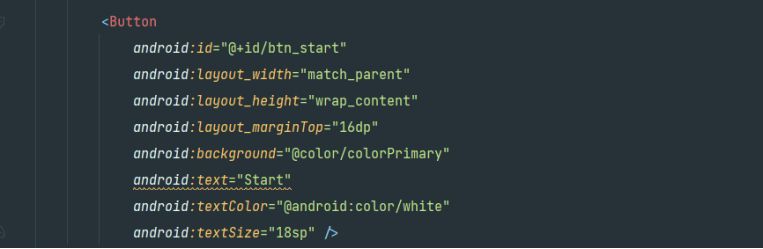
Here is the complete Main Layout code that I'm using :
<?xml version="1.0" encoding="utf-8"?><LinearLayout xmlns:android="http://schemas.android.com/apk/res/android" xmlns:app="http://schemas.android.com/apk/res-auto" xmlns:tools="http://schemas.android.com/tools" android:layout_width="match_parent" android:layout_height="match_parent" android:gravity="center" android:background="@drawable/ic_bg" android:orientation="vertical" tools:context=".MainActivity"> <TextView android:id="@+id/tv_app_name" android:layout_width="match_parent" android:layout_height="wrap_content" android:layout_marginBottom="30dp" android:text="@string/app_name" android:gravity="center" android:textColor="@android:color/white" android:textSize="25sp" android:textStyle="bold" /> <androidx.cardview.widget.CardView android:id="@+id/cv_main" android:layout_width="match_parent" android:layout_height="wrap_content" android:layout_marginStart="20dp" android:layout_marginEnd="20dp" android:background="@android:color/white" app:cardCornerRadius="8dp" app:cardElevation="5dp"> <LinearLayout android:layout_width="match_parent" android:layout_height="wrap_content" android:orientation="vertical" android:padding="16dp"> <TextView android:id="@+id/tv_title" android:layout_width="match_parent" android:layout_height="wrap_content" android:gravity="center" android:text="Welcome" android:textColor="#363A43" android:textSize="30sp" android:textStyle="bold" /> <TextView android:id="@+id/tv_description" android:layout_width="match_parent" android:layout_height="wrap_content" android:gravity="center" android:layout_marginTop="16dp" android:text="Please enter your name." android:textColor="#7A8089" android:textSize="16sp" /> <com.google.android.material.textfield.TextInputLayout android:id="@+id/til_name" style="@style/Widget.MaterialComponents.TextInputLayout.OutlinedBox" android:layout_width="match_parent" android:layout_height="wrap_content" android:layout_marginTop="20dp"> <androidx.appcompat.widget.AppCompatEditText android:id="@+id/et_name" android:layout_width="match_parent" android:layout_height="wrap_content" android:imeOptions="actionGo" android:hint="Name" android:inputType="textCapWords" android:textColor="#363A43" android:textColorHint="#7A8089" /> </com.google.android.material.textfield.TextInputLayout> <Button android:id="@+id/btn_start" android:layout_width="match_parent" android:layout_height="wrap_content" android:layout_marginTop="16dp" android:background="@color/colorPrimary" android:text="Start" android:textColor="@android:color/white" android:textSize="18sp" /> </LinearLayout> </androidx.cardview.widget.CardView></LinearLayout>Adding Questions to your Quiz App:
Under layout tab add another .xml file to add pages to your quiz with questions and give respective IDs to them so that they are easily accessible.
![]()
Above Image code states giving id to the picture displayed in the quiz.
After giving the picture, you now have to go ahead and give the number of options for the answer. Also, create the submit button.
<TextViewandroid:id="@+id/tv_option_one"android:layout_width="match_parent"android:layout_height="wrap_content" android:layout_margin="10dp"android:background="@drawable/default_option_border_bg",android:gravity="center" android:padding="15 dp" android:textcolor="#7A8089" android:textSize="18sp" tools:text="Apple"Repeat the above code for as many options as you want to give.
Make a final Submit button at the end of the quiz and then go to the kotlin file to work on the functionality of the app.
Coding the Kotlin files:
In this File set an On Click Listener to the start button of the quiz.

Make variables for everything displayed in your QuizApp
package com.quizappdata class Questions( val id: Int, val question: String, val image: Int, val optionOne: String, val option Two: String, val optionThree: String, val optionFour: String, val correctAnswer: Int)Set On Click Listener to all the options and the final submit button:
tv_option_one.setOnClickListener(this) tv_option_two.setOnClickListener(this)tv_option_three.setOnClickListener(this)tv_option_four.setOnClickListener(this) btn_submit.setOnClickListener(this)Finally Run the App with your Emulator provided by Android Studio. Boom! You just made your first App :)
Wrapping Up:
Over this blog, you have learned the essentials of Android UI design and have created a simple, yet effective UI with some working functionality. Try applying some of these techniques to your own Android projects, to ensure your UI doesnt let your app down.
You can download the entire source code for this project on my GitHub.
And for more Blogs and Coding related things, you can follow Crazy Codigos social handles.
~ Sam
Original Link: https://dev.to/crazycodigo/create-a-quiz-app-using-android-studio-4boa
Dev To
More About this Source Visit Dev To