
An Interest In:
Web News this Week
- April 24, 2024
- April 23, 2024
- April 22, 2024
- April 21, 2024
- April 20, 2024
- April 19, 2024
- April 18, 2024
Some of Our Sources
- Techcrunch
- TutsPlus - Code
- Pearsonified
- The Logo Smith
- Spoon Graphics
- Smashing Magazine
- Codrops
- Android Headlines
- Willems Lab
- Hashedout
Help Webnuz
Referal links:
12 Rarely Used JavaScript Web APIs that Will Take Your Website to THE MOON
There are over 97 Web APIs, and youre only using 5% of them. Lets unlock that other 95 percent!
After taking a long stroll down the dark realms of the spec, I realized that there were so many technologies out there being left-out.
My goal with this article is to bring them to the light. And Ill prove to you, using practical examples, that some APIs are really worth a shot!
Each section will thoroughly examine each API and provide a fun example that beautifully demonstrates a practical use-case.
Ad: Like freebies?
I made a pack of 100 free hover animations. Get it now, share it, and do whatever you want with it. It's yours forever!

Table of Contents
- Screen Orientation API
- Fullscreen API
- Intersection Observer API
- Screen Wake Lock API
- Screen Capture API
- IndexedDB API
- Local and Session Storage APIs
- Houdini API
- Web Share API
- Clipboard API
- Selection API
- Page Visibility API
Warning about portrait mode

Screen is too narrow. try in landscape mode.
Some apps like non-linear video editors were not meant for vertical devices: they just dont work well in narrow screens!
Sure, the web is supposed to be responsive, but its not always worth it to port a whole wide layout to a narrow display.
Wouldnt it be nice if we could warn our users when their device is rotated in the wrong direction? Let me introduce to you the Screen Orientation API!
In order to avoid errors, its important to check support for the Screen Orientation API. This is as simple as: if ('orientation' in screen). Youll see this pattern again and again throughout this article.
The Screen Orientation API
Browsers expose a global variable named screen, which well use to access the information we need. The [ScreenOrientation](https://developer.mozilla.org/en-US/docs/Web/API/ScreenOrientation) instance can be accessed with screen.orientation. Well be working with this object throughout this section.
Detecting the screen orientation
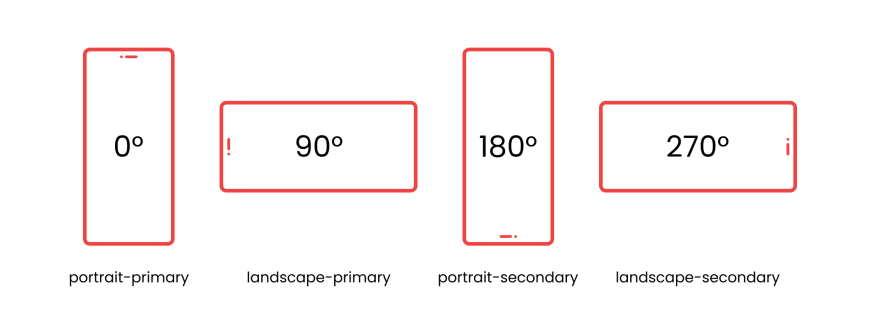
Screen Orientation types and angles: https://w3c.github.io/screen-orientation/#dfn-screen-orientation-values-table
Contrary to popular belief, there are four ways that a screen can be oriented, as can be seen in the picture above. But were only interested in knowing whether the screen is in portrait or landscape mode, and its easy to write a function that tells us exactly that:
function getOrientation() { const isPortrait = screen.orientation.type.startswith('portrait') return isPortrait ? 'portrait' : 'landscape'}Locking the screen orientation
Native apps like Instagram lock the screen orientation while its in-use. As the line between PWAs and native apps is getting blurrier by the day, its not a surprise that this feature is also on the web.
While less supported, its also possible to lock and unlock the screen orientation using this code snippet:
screen.orientation.lock(orientation)Dont forget to handle errors too, because as I already stated, this feature is not well-supported.
Making your website a full-screen experience
Browsers cover our websites with a lot of UI elements, distracting the user from whats important.

Screenshot of Chrome mobile, highlighting the browsers UI elements.
This is especially a problem when it comes to immersive content, such as:
- movies,
- games,
- maximizing images.
and the list goes on-and-on.
Thankfully, the Fullscreen API comes and saves the day!
This feature is very well supported in all modern browsers, so dont worry about using it.
Entering fullscreen mode
Surprisingly, any DOM element can enter fullscreen mode:
el.requestFullscreen()However, most of the time, we want the entire page to enter fullscreen. The root document element <html> can be accessed in JavaScript with document.documentElement.
So its not unusual to see this code snippet floating around the web:
document.documentElement.requestFullscreen()Leaving fullscreen mode
Theres a variety of ways for exiting. Some of them are the browser-default keyboard shortcuts: ESC and F11.
Theres also the possibility to leave by switching tabs Ctrl+Tab or jumping windows Alt+Tab.
However, the most important leaving mechanism is the one that you the developer provide. You can programmatically disembark fullscreen mode with the following:
document.exitFullscreen()In a deployment environment, however, its important to avoid errors by checking if this function exists before calling it:
if (document.exitFullscreen) { document.exitFullscreen()}Verifying if the user is in fullscreen mode
If we wanted to implement a fullscreen toggle as seen in the Codepen at the start, wed need a way to determine whether or not fullscreen mode is active.
Thats totally possible with the following code snippet:
document.fullscreenElement // returns 'null' or the fullscreen-enabled DOM elementFor better browser compatibility, wed have to check for multiple attributes:
document.fullscreenElement || document.mozFullscreenElement || document.msFullscreenElement || document.webkitFullscreenElementWith this in hand, we can implement a fullscreen toggle:
function toggleFullScreen() { if (!document.fullscreenElement) { document.documentElement.requestFullscreen(); } else { if (document.exitFullscreen) { document.exitFullscreen(); } }}Animating an element as it enters the viewport
Consider all the times you needed to do something when an element enters into view:
- Animating it,
- Loading more content (Infinite Scrolling),
- Lazy-loading an image,
- Registering ad revenue.
One naive solution is calling getBoundingClientRect on every scroll event. And I mean it works!
However, its terribly inefficient. It runs on the main thread, so the more event listeners that we register, the slower our app becomes.
Thankfully, browser engineers have blessed us with the Intersection Observer API: an efficient solution that delegates all optimizations to the browser, so that we web developers can focus on whats important.
Were gonna make a pretty cool effect where text elements are highlighted only when they enter into view, creating a sleek and modern animation that our readers will appreciate. See it with your own eyes in the Codepen above.
Creating an observer
Before we start listening for intersection events, we must to create an observer object that handles all the background tasks:
const options = { root: null, // use viewport threshold: 0.75}const observer = new IntersectionObserver(callback, options)You may have noticed threshold. Its an option that tells the browser to only trigger intersection events when N% of the element is visible.
Handling intersection events
Lets define callback, a function that will be called once an intersection event occurs.
We want to handle the event only when the element is shown at least N% in the viewport:
function callback(entry) { if (entry.intersectionRatio > 0.75) { // ... }}Its time to decide what to do with an element when it enters into view. In this case, well simply assign it the .active class name, while delegating the animation responsibilities to CSS.
function callback(entry) { if (entry.intersectionRatio > 0.75) { entry.target.classList.add('active') }}We can also undo this effect once it leaves the screen:
function callback(entry) { if (entry.intersectionRatio > 0.75) { entry.target.classList.add('active') } else { entry.target.classList.remove('active') }}For a deeper introduction to the IntersectionObserver API, read this amazing article by Denys Mishunov.
Preventing the screen from going dark
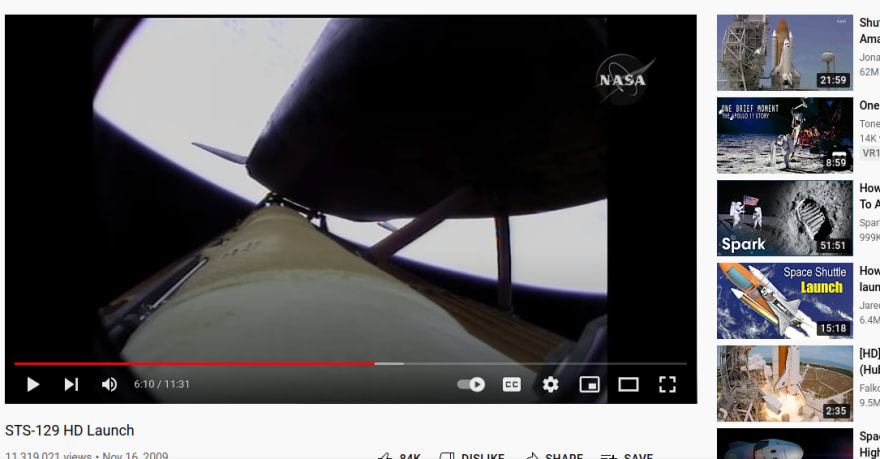
Paused space-launch video on Youtube, showing the video players controls.
Long-form videos require the screen to stay on even without any interaction. This behavior is usually seen on native applications, but with the Screen Wake Lock API, its on the web too!
There are many other use-cases for this API:
- Online games,
- Presentations,
- Drawing on canvas,
- Camera,
- Streaming,
- Timers.
and the list never stops.
Lets delve deeper into its inner-workings!
Firefox and Safari have yet to support this feature. So its always a good idea to check its availability first, in order to avoid all kinds of errors: if ('wakelock' in navigator)
Acquiring wakelock
A video player, such as Youtube, might acquire wakelock in its play function:
let wakelock = nullasync function play() { // wakelock = await navigator.wakeLock.request('screen')}If the users battery is too low, expect it to fail.
Releasing wakelock
Its bad practice to keep the wakelock on forever, as that will hurt the users battery and might even degrade performance. So make sure to always release it when possible:
async function pause() { // ... await wakelock.release()}Whenever the user leaves your websites tab, the wakelock is automatically released.
In this case, you should re-acquirese it by listening to the visibilitychange event, which well learn more about in another section.
But in a nutshell, its triggered when the user leaves/enters the websites tab.
document.addEventListener('visibilitychange', async () => { if (wadocument.addEventListener('visibilitychange', async () => { if (wakelock !== null && document.visibilityState === 'visible') { wakelock = await navigator.wakeLock.request('screen') }})Recording your screen
Theres an increasing number of web-based screen recording apps. But how exactly do they do it? The answer is surprisingly simple.
The secret to their success is the Screen Capture API, an easy-to-use interface that allows users to record their screen in a wide variety of ways:
- Whole screen,
- Specific window,
- Specific tab.
It also comes with extra nifty features, including but not limited to:
- blurring/covering overlapping windows to avoid accidentally sharing sensitive information,
- hiding/showing the cursor,
- recording sound.
Browser compatibility
I hate to be the bearer of bad news, but no mobile browsers support this API as of yet.
On the other hand, its very well-supported by modern desktop navigators! (except Internet Explorer, of course)
Starting screen capture
With this delight of an API, recording the screen is shockingly simple:
const options = { video: { cursor: 'always' // show the cursor }, audio: false // don't record audio}navigator.mediaDevices.getDisplayMedia(options) // returns a promiseWould you believe me if I told you that was it? Well, I never lie.
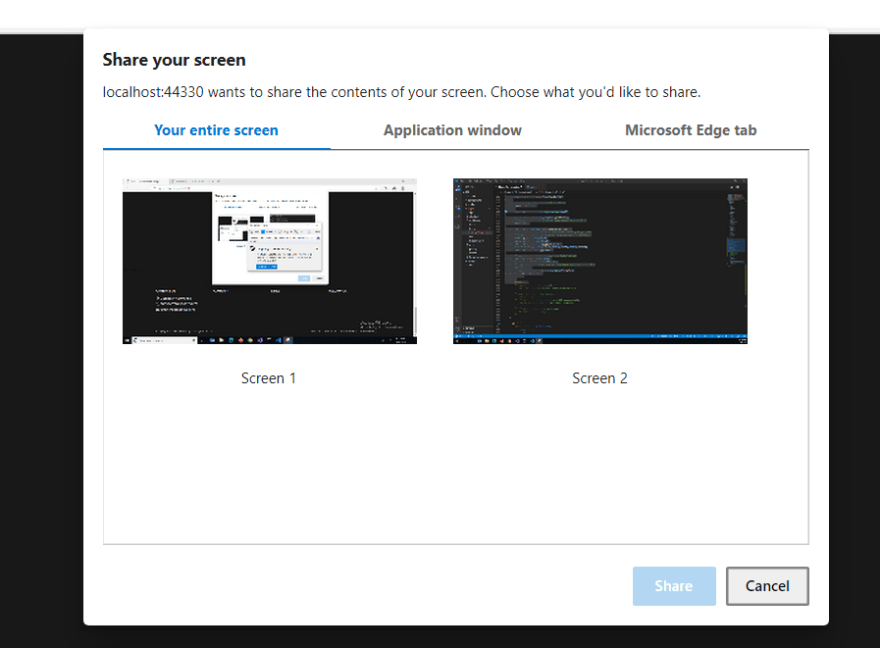
Screen Capture Prompt showing the 3 types: entire screen, window, tab.
The above function tells the browser to show a prompt for selecting the desired recording surface, as can be seen on the image above. (try it yourself in the codepen at the start of this section)
Preview the recording
It would be nice if we could see exactly what the website is seeing. Thankfully, thats terribly easy to do:
<video autoplay id="preview"></video>And that was it for the HTML. Now, lets move into the JavaScript logic:
previewElem = document.getElementById('preview')previewElem.srcObject = await navigator.mediaDevices.getDisplayMedia(options)Thats it! Now you can see whats being recorded, in real time.
Stopping screen capture
With one method, we can achieve everything! Note that its important to have a preview element first, as demonstrated in the last subsection.
let tracks = previewElem.srcObject.getTracks()tracks.forEach(() => track.stop())previewElem.srcObject = nullStoring tabular data in an on-device database
Theres an entire NoSQL database system hidden right in your browser, and its accessed with the IndexedDB API!
Each operation is asynchronous, so it never slows down other operations. Its also cleared once the user erases the browsers cache or locally-stored data.
In addition to all of that, it also supports the usual search, get, and put actions, with transactions on the side. It can store almost all kinds of data, including but not limited to File, images and videos as Blob, and String of course.
Unfortunately, not all browsers agree on which kind of data should be supported. Safari on iOS, for example, cannot store Blob data. However, its possible to convert all other formats to an
ArrayBuffer, which is very well-supported by all platforms.
Storage limit is not an issue, because most browsers allocate a bunch of space that your websites can consume freely. Also, each database is tied not only to a domain name, but to the very specific subdomain. To add to all of that, browser compatibility is not an issue at all, not even on IE11.
There are many things that we can do with this treat of an API, including but not limited to:
- Storing structured data for offline use,
- Speeding up the loading time for repeated visits,
- Caching user-generated data,
- Temporarily saving data before uploading it to a server.
Lets see how we can store contact data in IndexedDB!
Using IndexedDB
Before we can do anything, we should use a wrapper library on top of IndexedDB because, by default, its too complicated; it uses events instead of promises.
import { openDB } from 'idb';const db = await openDB('contacts', 1, { // Creates a new database if it doesn't exist. upgrade(db) { db.createObjectStore('contacts', { // The 'id' property of the object will be the key. keyPath: 'id', // If it isn't explicitly set, create a value by auto incrementing. autoIncrement: true, }) // Create an index on the 'name' property of the objects. store.createIndex('name', 'name'); }})And with that done, we can start storing structured data like its no ones business!
await db.add('contacts', { name: 'John Doe', age: 25, email: '[email protected]'})And we can just as easily retrieve all of it:
// Get all contacts in name order:const contacts = await db.getAllFromIndex('contacts', 'name')Thats all we need to know for our simple use-case. But if youre still interested, you can delve deeper into the documentation.
Storing text data on the device even when the user leaves
While we can use IndexedDB to store large and complicated data on the browser, its still important to consider those other times when all we need to save is a simple key-value pair:
- Login information,
- Newsletter subscription state,
- Cookies consent,
- Analytics tracking pixels.
Its important to note that sensitive information (passwords, credit card information, social security numbers, etc) should NEVER be saved in the browser, because its vulnerable to XSS attacks in addition to other exploits.
Theres a special utensil for such simple cases, and its called the Web Storage API. And just like IndexedDB, its tied to the particular subdomain. Its also cleared if the user empties the browsers cache or data.
In this API, youll find two types of storage: localStorage and sessionStorage. They offer different benefits:
- Local storage persists data even when the user leaves the website, unlike session storage which clears all data as soon as the tab is closed.
- Local storage can store more data, unlike session storage which is maxed-out at 5MB.
Using local storage
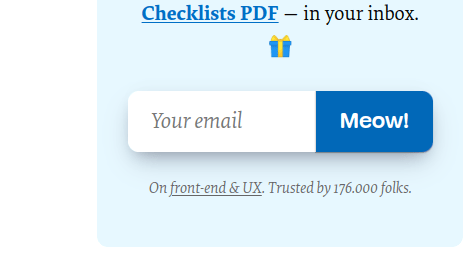
Say that were implementing a newsletter subscription form. We dont want to keep showing it to the user even after theyve subscribed, so well use the localStorage global variable to conditionally display it:
function subscribe() { // ... localStorage.setItem('is-newsletter-subscribed', true)}You can now use DevTools to see the new item, saved right in your computer.
And now, lets write a function that decides whether or not to show the subscription form:
function isSubscribed() { return localStorage.hasOwnProperty('is-newsletter-subscribed') ? localStorage.getItem('is-newsletter-subscribed') : false}As you can see, were first checking if the newsletter-subscribed item exists. If it does, we simply return its value using getItem(), otherwise, we return false because the user hasnt subscribed yet.
Creating a location-aware ripple effect
With the advance of the web, special effects have grown too. These days, CSS properties are just not enough to achieve our wildest dreams.
Our last resort used to be GIFs and images, but with the CSS Painting API, thats not the case anymore!
Now, we can use all the stylish effects that come with the HTML Canvas to draw anything over an elements background.
Browser compatibility is not that great. Firefox and Safari on iOS are yet to support it. Therefore, its very important to run the following: if ('paintWorklet' in CSS)
Lets build a ripple effect without any pseudo-elements, inspired by Googles own implementation.
The JavaScript Logic
For this effect to work, we need to use JavaScript events to get the cursors x and y positions:
// index.jsbutton.addEventListener('click', (e) => { const {x: offsetX, y: offsetY} = button.getBoundingClientRect() const [x, y] = [e.clientX - offsetX, e.clientY - offsetY] button.style.setProperty('--x', x) button.style.setProperty('--y', y) // ...})Since the ripple effect is an animation that evolves over time, we need to keep track of its timeline using a tick variable:
// index.jsbutton.addEventListener('click', (e) => { // ... const start = performance.now() requestAnimationFrame(function step(now) { const tick = Math.floor(now - start) button.style.setProperty('--tick', tick) // Continue animation requestAnimationFrame(step) })})The above code uses [requestAnimationFrame](https://developer.mozilla.org/en-US/docs/Web/API/window/requestAnimationFrame) to create an efficient and optimized animation. During each animation step, we calculate the tick and assign it to a CSS property.
If we leave it like this, it will run forever. So lets add an end condition to end the animation. Were gonna stop it when it reaches 1 second (meaning 1000 milliseconds):
// index.jsbutton.addEventListener('click', (e) => { // ... requestAnimationFrame(function step(now) { const tick = Math.floor(now - start) button.style.setProperty('--tick', tick) // Stop the animation after 1 second if (tick > 1000) { button.style.setProperty('--tick', 0) return } // Continue animation requestAnimationFrame(step) })})And thats it for the logic!
The Paint Worklet
Lets make the actual ripple effect, using the Paint API.
This effect should go into a separate file, which well call ripple.js.
Lets start by retrieving the CSS properties that we just defined:
// ripple.jsregisterPaint('ripple', class { static get inputProperties() { return ['--x', '--y', '--tick'] }})Next, well use the Canvas API to draw a circle into the buttons background:
// ripple.jsregisterPaint('ripple', class { //... paint(ctx, {width}, props) { // Retrieve props const x = parseFloat(props.get('--x').toString()) const y = parseFloat(props.get('--y').toString()) let tick = parseFloat(props.get('--tick').toString()) // Clamp tick in [0, 1000] if (tick < 0) tick = 0 if (tick > 1000) tick = 1000 // Draw ripple const rippleColor = 'rgba(255,255,255,0.54)' ctx.fillStyle = rippleColor ctx.globalAlpha = 1 - tick/1000 ctx.arc( x, y, // center width * tick/1000, // radius 0, 2 * Math.PI // full circle ) ctx.fill() }})Registering the paint worklet
Go back into your index.js file, and add the following code:
// index.jsif ('paintWorklet' in CSS) { CSS.paintWorklet.addModule('ripple.js')}It will first check if CSS Paint API is supported, and only then will it link the ripple effect.
And were done! All thats left is to use this effect. So add the following code to your CSS:
button { background-color: #0d1117; background-image: paint(ripple);}For a deeper introduction to the CSS Paint API, read this amazing article by Adrian Bece.
Showing a native sharing menu
There is so much content on the web that we may want to share with others:
- links,
- images,
- paragraphs.
and the list never ends.
Normally, a developer would implement their own sharing system with links to Twitter, Facebook, and other social media sites.
These components, however, always fall short compared to their native counterparts, which come with a gigantic quantity of options:
- sharing with contacts,
- sharing with other apps,
- sharing over bluetooth,
- copying to clipboard.
and the list, again, never ends.
These native sharing menus used to be exclusive to native applications, but with the Web Share API, that fact is no longer true.
Browser compatibility is excellent in mobile browsers, but struggles a bit when it comes to Firefox on desktop.
Try it yourself in the Codepen above, and if its not supported in your device, heres what it can to look like:
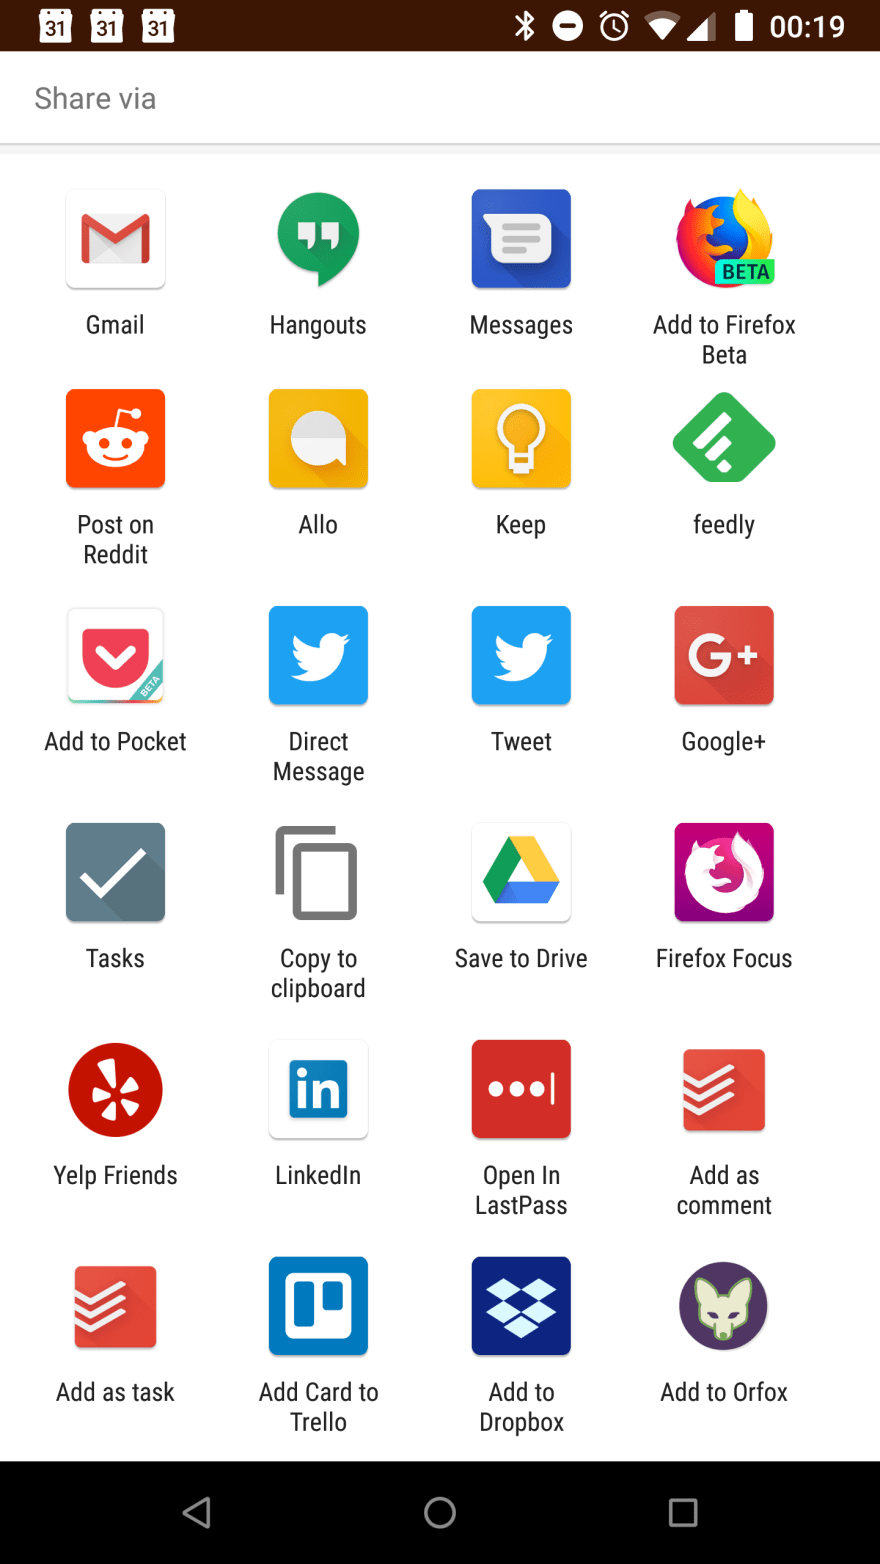
Sharing menu with many options including Gmail, Messages, Reddit, and LinkedIn.
Sharing URLs
The method to look for is navigator.share. It takes an object containing a title, a string of text, and a URL.
const shareData = { title: 'Smashing Magazine', text: 'Smashing Magazine For Web Designers And Developers', url: 'https://www.smashingmagazine.com/'}await navigator.share(shareData)Note that this function is protected by transient activation, meaning it requires a UI event (like clicking) before it can be handled.
Copying text to the clipboard
The clipboard is one of the most underrated features in todays computers. Would we developers survive without the constant Ctrl+Cing code from Stackoverflow? Doubt it.
Clipboards are all about moving digital information from point A to point B. The only alternative is rewriting content by-hand, which is a huge opportunity for errors. Modern clipboards also allow the copying of images and other forms of media.
With the advent of the Clipboard API, developers can shine the beauty of UX on their users by programmatically copying important information to the users clipboard. This feature is also seen everywhere, from code in the MDN website to Twitter. Its only missing in Stackoverflow, and for good reason.
Browser compatibility is also great, except IE of course.
Using the Clipboard API
Copying text is extremely simple:
await navigator.clipboard.writeText('Howdy, partner!')And reading it is just as easy:
const text = await navigator.clipboard.readText()Sharing the selected text

Selected text on a blog with a sharing tooltip on top of it.
Multiple blogs such as Medium allow users to effortlessly share selected text with other social platforms.
Being such a useful feature, it encourages the sharing of content, and as a result, it grows the blog to enormous proportions.
We already saw how to invoke a native sharing menu in a previous section, so lets just focus on text selection.
Also, we wont see how to add a tooltip on top of selected text, but well delve into using the Selection API to retrieve the selected portion of text, because this whole article is about APIs and their use-cases.
And no need to worry about the browser compatibility, because its just perfect!
Getting the selected text
This is a terribly easy thing to do:
const text = window.getSelection().toString()Thats it! Now seek the previous section on the Web Share API to pop-up an OS-defined sharing menu, and let your users go wild!
Changing the title when the user leaves the tab
Website title changing from Shopping website to Please stay when the user leaves the tab.
Its possible for a website to tell if its being viewed or not with the Page Visibility API.
While I dont advocate using the Page Visibility API to grab the users attention with annoying messages, it has many positive use-cases:
- showing new notifications,
- reporting engagement analytics,
- pausing video and audio,
- stopping an image carousel.
Browser compatibility is not an issue.
Detecting page visibility
We can get the pages visibility state any time with the following code:
document.visibilityState // 'visible' or 'hidden'But real use-cases require listening to events and respectively changing some behavior.
Unfortunately, the event name varies by browser, so we have to do the following:
let hidden;let visibilityChange;if (typeof document.hidden !== "undefined") { // Opera 12.10 and Firefox 18 and later support hidden = "hidden"; visibilityChange = "visibilitychange";} else if (typeof document.msHidden !== "undefined") { hidden = "msHidden"; visibilityChange = "msvisibilitychange";} else if (typeof document.webkitHidden !== "undefined") { hidden = "webkitHidden"; visibilityChange = "webkitvisibilitychange";}We then can listen for page visibility events, like this:
document.addEventListener(visibilityChange, handleVisibilityChange);function handleVisibilityChange() { if (document[hidden]) { // page is hidden } else { // page is visible }}For the purposes of our demonstration, well just change the document title:
function handleVisibilityChange() { if (document[hidden]) { document.title = 'Please stay!!!' } else { document.title = 'Shopping website' }}Note that I dont recommend doing this, as its just annoying to the user and a fundamental malpractice in ethical web design.
Conclusion
Web APIs these days are bridging the gap between the web applications and the native applications.
The web is starting to become a real threat to the monopolies created by the App Store and the Google Play Store, and its showing no signs of stopping. Lets discuss this in the comment section below!
There are many more APIs that we havent explored yet, and some can do unbelievable things like scanning bar-codes and even recognizing speech! So stay tuned for a part 2!
Honorable Mentions
It would be a shame to not mention another group of APIs that are very rarely used, and yet have so many interesting and practical use-cases:
Like freebies?
I made a pack of 100 free hover animations. Get it now, share it, and do whatever you want with it. It's yours forever!
Original Link: https://dev.to/eludadev/12-rarely-used-javascript-web-apis-that-will-take-your-website-to-the-next-level-4lf1
Dev To
More About this Source Visit Dev To