
An Interest In:
Web News this Week
- April 2, 2024
- April 1, 2024
- March 31, 2024
- March 30, 2024
- March 29, 2024
- March 28, 2024
- March 27, 2024
Some of Our Sources
- BoingBoing
- Simplebits
- Spoon Graphics
- You The Designer
- Web Designer Depot
- CSS Globe
- Wal You
- Spyre Studios
- Freelance Switch
- Android Headlines
Help Webnuz
Referal links:
Deploying a react application to Amazon s3 and github actions
Github actions were introduced by GitHub in mid-december 2020, which is a platform to automate developer workflows. Some of these workflows are CI/CD which involves continuous integration, continuous delivery, and continuous deployment.CI/CD pipeline enables developers to ship software efficiently & easily and less risky.
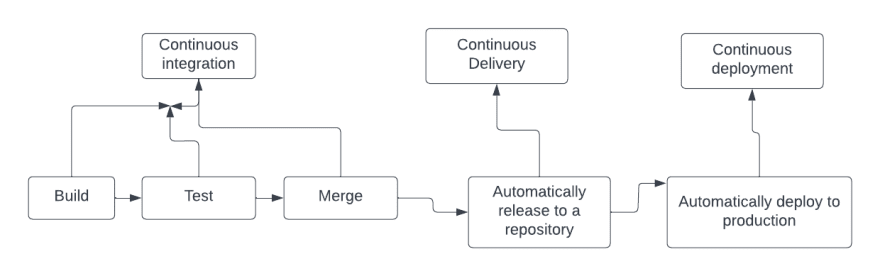
The process of GitHub actions is sub-divided into several components which are
1.Event
We can define event as any specific activity that happens to repository to trigger a workflow .Literally it can a pull request ,push ,contribution or even a issue
2.Job
This are steps in a workflow that run once a event has been triggered
3.Action
Actions are individual tasks that you can combine to create jobs and customize your Workflow
4.Runners
A runner is a server that runs your workflows when they're triggered.Each runner can run a single job at a time
5.Workflow
A workflow is an automated procedure that can be configured to execute one or more operations. Workflows are defined by a YAML file that is checked into your repository and run when prompted by an event there, manually, or according to a set schedule.
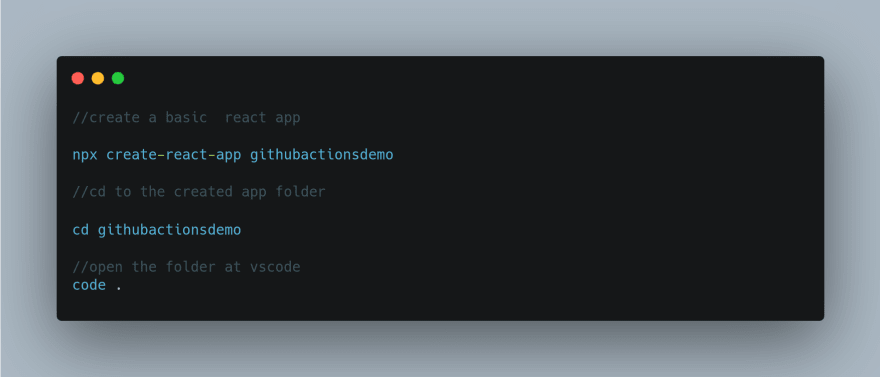
To get started ,We will do a demo using a react app .
Follow this steps to create a basic react app
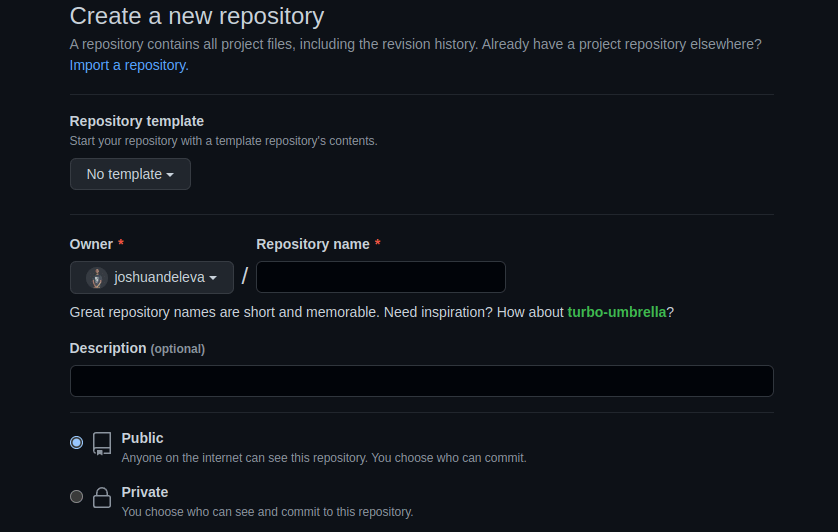
Then proceed to your github account and create a repository from github as shown below.Fill the fields as required
To set up a github actions you can create directly from the action tab on github as shown below or in the root of your project create a folder called .github , inside it create another folder called workflows and in this folder create a yml file
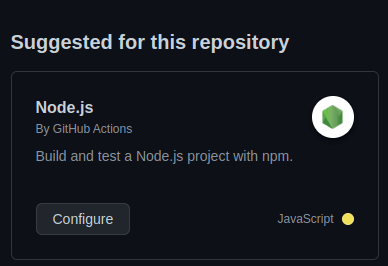
Once your done creating your repository ,select action tab
Pick a template you would like to use ,Since we are working on a react application, we are choosing the node js as shown below
Once you selected ,Click configure to setup and the click to Start commit in the far top right corner.By the end of this you would have set up your github action as required.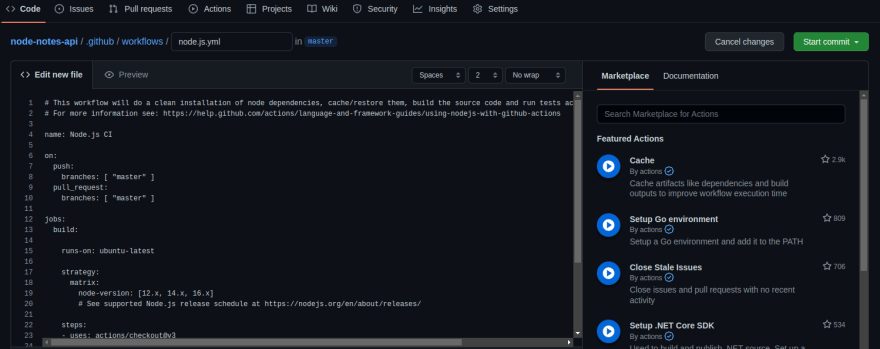
Lets discuss the content of this YML file created **
It has the following parts as shown in the figure below
**Name:
This defines the name of your workflow that is displayed on the github action field.You can call your workflow the name of your choice .![]()
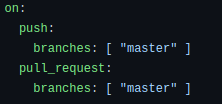
On:
It defines the events that trigger the workflow.It can be a single event or a array of events.
Jobs
Jobs define the functionality that will run the workflow
Note
By default , jobs run in parallel
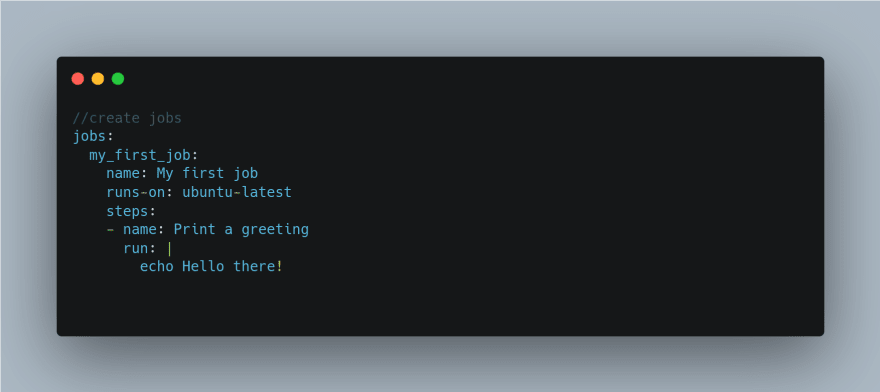
Runs-on:
Its a keyword that defines the OS **your workflow should run on.
Examples of runs-on you can define here are **ubuntu-latest ,self-hosted etc
Build matrix
Allows you to test across across multiple platforms and languages
Example of a sample yml file
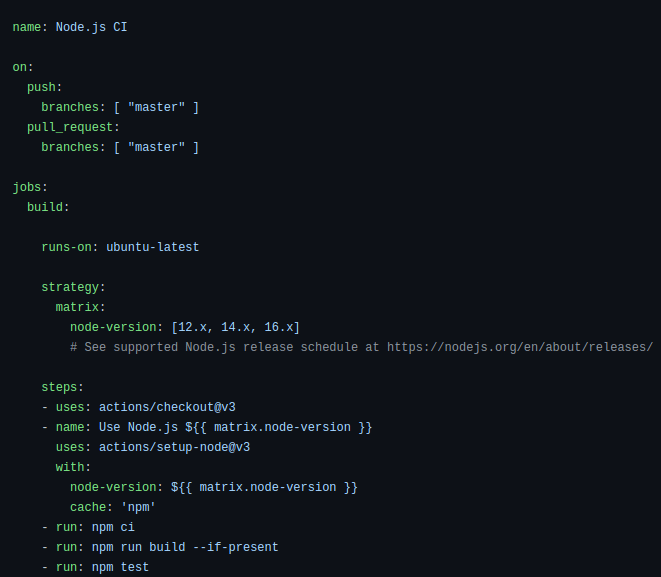
Now you have successfully configured your yml file.
Lets connect with aws for deployment
Prerequisites for AWS s3 **
Amazon Web Service Account
You can create one at AWS if you havent and follow the **steps
Step one . Creating a s3 bucket
Login to your aws account and from the services select s3

Click on the create bucket account and fill the details as shown here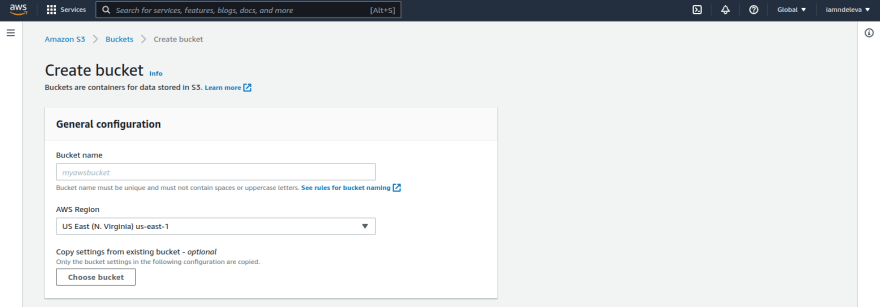
Your bucket will be available here
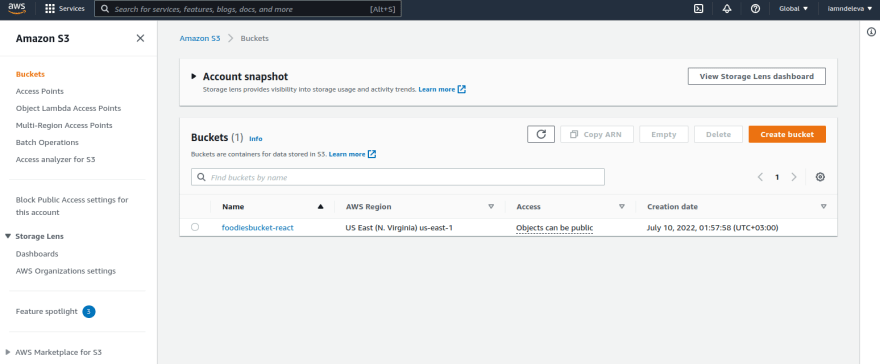
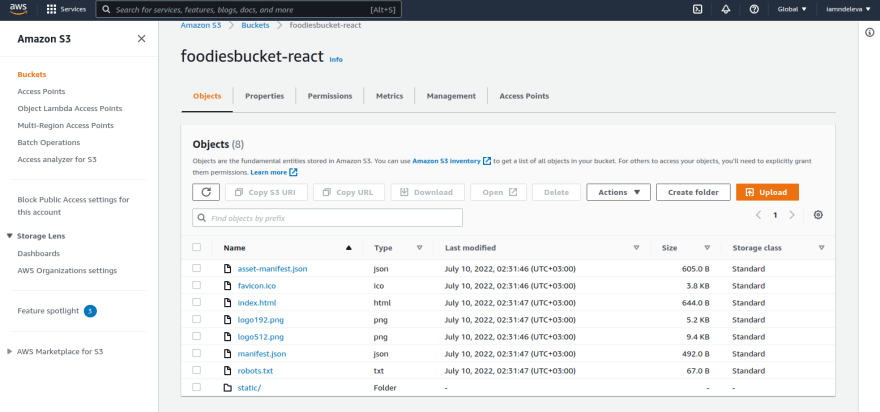
Click you bucket (mine is called foodiesbucket-react) , select the permissions tab
And make your object public
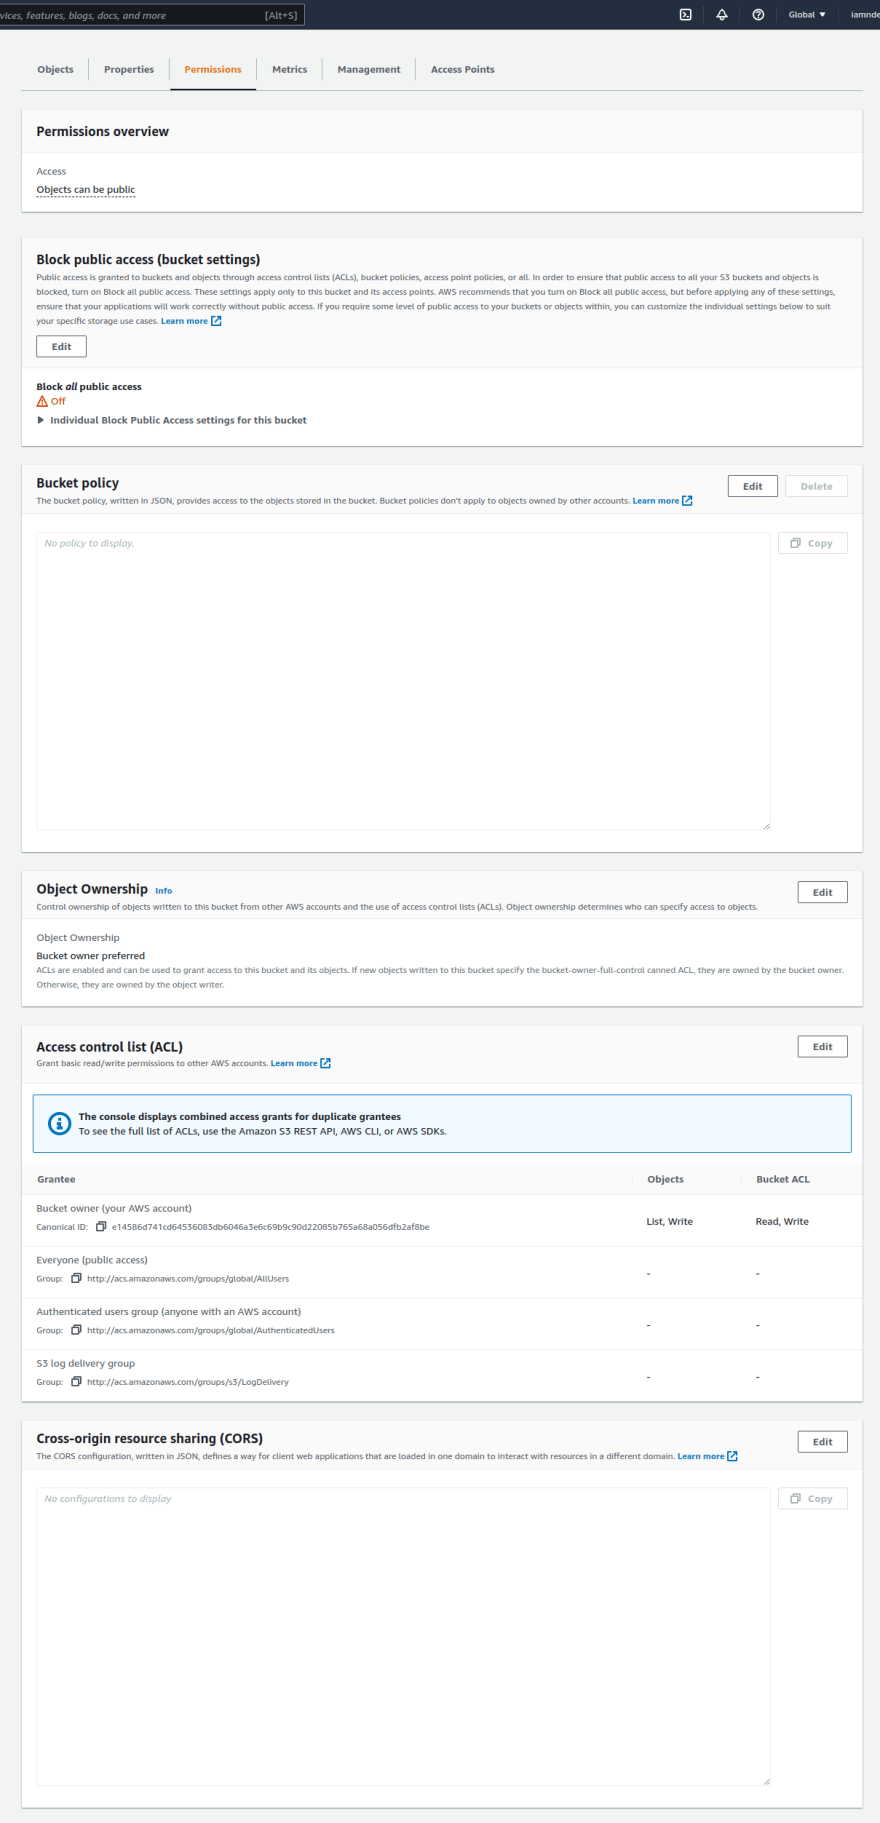
make sure you edit the object ownership to appear as shown here to avoid getting the error AccessControlListNotSupported:
Having setup your bucket successfully , its time to update our yml file by adding some env variables to connect our bucket with github repository.
Back to your github repository , click on settings the select secrets,in the dropdown select actions
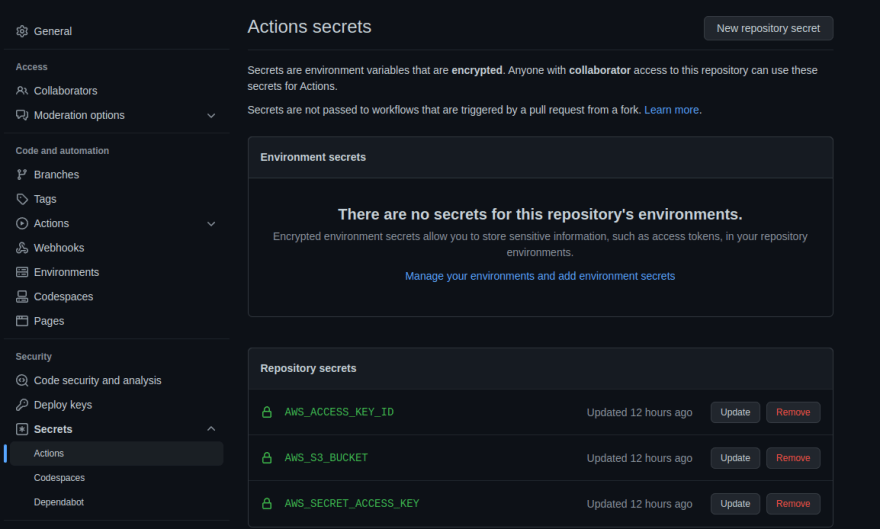
Click on new repository secrets and we are going to add three secrets ie AWS_ACCESS_KEY_ID **,AWS_S3_BUCKET,AWS_SECRET_ACCESS_KEY.**
These keys will be generated directly from your** aws account** by heading to the top right corner of your account then selecting security credentials
Copy the secrets and add them as shown on the above
We are going to use jakejarvis/s3-sync-action which is a simple action to sync a directory (either from your repository or generated during your workflow) with a remote S3 bucket.
Update your yml file as shown here

After updating the yml re-run your workflow .This syncs your github repository with aws s3 bucket and it updates the changes on your dashboard.
You have successfully deployed your app.
Click on the index.html to visit and click the object link which is the url of your deployed app

Congrats!!!Lets keep building!.
Original Link: https://dev.to/iamndeleva/deploying-a-react-application-to-amazon-s3-and-github-actions-4558
Dev To
More About this Source Visit Dev To