
An Interest In:
Web News this Week
- April 19, 2024
- April 18, 2024
- April 17, 2024
- April 16, 2024
- April 15, 2024
- April 14, 2024
- April 13, 2024
Some of Our Sources
- Smashing Magazine
- Creative Curio
- Fudge Graphics
- CSS Globe
- Wal You
- CSS Tricks
- Spyre Studios
- Freelance Switch
- Willems Lab
- TechPowerUp
Help Webnuz
Referal links:
How to collect tips with Stripe Terminal
Recently, my colleague Charles Watkins wrote a 4-part intro series to Stripe Terminal, our in-person payment solution. Charles' articles will teach you how to set up and register a Terminal device and build an app to accept or cancel payments. Let's take it a step further and look into an additional feature: collecting tips via the Terminal device so your customers can easily tip you while going through the checkout process.
Setting up on-reader tips
Displaying tipping options on the Terminal reader is done by creating a Configuration object with the tipping details.
Three types of tipping suggestions can be configured:
- Smart tips, showing three percentages or amounts based on the pre-tip amount.
- Percentages, showing only the percentage-based tip amounts.
- Amounts, showing only the amounts.
Suggest fixed amounts or percentages with smart tips
To suggest smart tips, the configuration object needs to be created with the following options:
const configuration = await stripe.terminal.configurations.create({ tipping: { usd: { smart_tip_threshold: 1000, fixed_amounts: [100, 200, 300], percentages: [15, 20, 25] }, },});With smart_tip_threshold set to $10, if the total amount of the purchase is under $10, the reader will display the fixed amounts specified, so in this case, $1, $2 and $3. If the amount of the purchase is over the threshold, the reader shows the percentage options (15%, 20%, 25%).
Using the smart tips option, here is an example of what the readers screen looks like when the total amount of the purchase is $20 and the smart tips threshold is $10. You can see that the options displayed are the percentages.

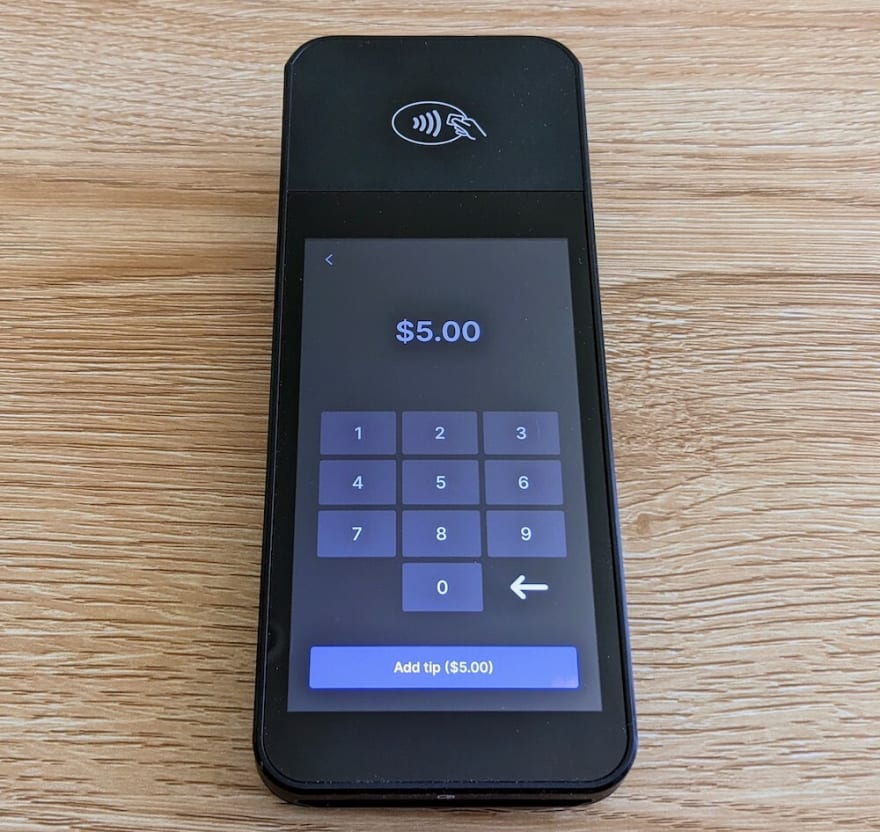
If the total amount of the purchase is changed to $5, the readers screen shows the fixed amounts.

A configuration object needs to be assigned to an account or location. Each Terminal device is assigned a location and you can find it using the list method.
const locations = await stripe.terminal.locations.list();If you only have one location configured, the list will contain only one object and you will be able to update it using the configuration_overrides property.
await stripe.terminal.locations.update( locations.data[0].id, { configuration_overrides: configuration.id } );If you have multiple locations configured, you can find the one assigned to your device by comparing the id of the reader, and the one shown in the id property of the locations.
If youre unsure how to find the ID of the reader, you can refer to this blog post series that steps through how to set everything up.
An important thing to note is that, this code needs to be run before the code creating the payment intent.
When youre ready, you will need to restart your Terminal reader for the changes to apply. Then, you should be able to start your application, connect to a reader, request payment and the Terminals screen should show the three tipping amounts.
If you havent created an application yet, check out the Get Paid IRL series for more details.
Suggest percentages
If youd like to only always show percentages of the pre-tip amount, you can use the percentages attribute only.
const configuration = await stripe.terminal.configurations.create({ tipping: { usd: { percentages: [15, 20, 25] }, },});This will show three options to tip 15%, 20%, and 25%.
Suggest amounts
If you only want to show specific amounts, you can use the fixed_amount attribute:
const configuration = await stripe.terminal.configurations.create({ tipping: { usd: { fixed_amounts: [100, 200, 300] }, },});This will show the amounts $1, $2 and $3, no matter the total amount of the purchase.
Custom amounts
If youd like to let your customers choose the tip amount, a Custom button is shown on the screen, below the other options. Clicking this button reveals a screen with a number pad so customers can enter their preferred amount.
Skipping tips
If, for some reason, youd like to disable the tipping options for certain transactions or temporarily for all transactions, you can do so by adding a config_override object with a property skip_tipping set to true in your frontend, when calling collectPaymentMethod.
const result = await terminal.collectPaymentMethod( paymentIntent.secret, { config_override: { skip_tipping: true, }, },);This way, you could implement some logic to avoid asking customers for tips for purchases under a certain amount for example, or on a specific day where your business is doing charity donations.
Now, you should be able to customize your tipping screen on the Terminal reader with the different options available and programmatically decide when to show or skip this step to have more control over your checkout experience!
Follow @StripeDev and our team on Twitter
Subscribe to our Youtube channel
Join the official Discord server
Sign up for the Dev Digest
About the author

Charlie Gerard is a Developer Advocate at Stripe, a creative technologist and Google Developer Expert. She loves researching and experimenting with technologies. When shes not coding, she enjoys spending time outdoors, trying new beers and reading.
Original Link: https://dev.to/stripe/how-to-collect-tips-with-stripe-terminal-18l6
Dev To
More About this Source Visit Dev To