
An Interest In:
Web News this Week
- April 2, 2024
- April 1, 2024
- March 31, 2024
- March 30, 2024
- March 29, 2024
- March 28, 2024
- March 27, 2024
Some of Our Sources
- Engadget
- Simplebits
- TutsPlus - Code
- Smashing Magazine
- Smashing Apps
- You The Designer
- 24 Ways
- CSS Tricks
- Android Dissected
- Dev To
Help Webnuz
Referal links:
Getting started with Sanity
Creating a Sanity account
- Go to sanity.io
- Click
log in - Click
create an account - Sign up, I use GitHub for this
You should get routed to your Sanity dashboard sanity.io/manage
Setting up Sanity CLI
Install the Sanity CLI globally by running this in a command line.i is short for install-g is to install a package globally
npm i -g @sanity/cliThen, make sure you are still inside of your project folder and run
sanity initIt should ask you to login, use the method that you used when signing up. So for myself I would select
GitHubIf this is your first project then it will ask you for a project name, if you already have a project it will ask you to create a new one or use existing. When you select
Create new project, (or you don't have any projects yet), you will be asked for a project name.
I'm going to name mineexample-blogjust because that is what my project folder is called.Hit
enterto accept default data config.Edit the last path in your output path from the folder name to
studio
EXAMPLE
From this:\Documents\Projectsutorial\example-blog\example-blogTo this:\Documents\Projectsutorial\example-blog\studio5 . Select Clean project with no predefined schema as the template to start with a fresh setup.
6 . Hit enter to select no to using TypeScript
And that should be it! Sanity is now setup and if you run this you should be taken to your project's dashboard on Sanity.io.
cd studio && sanity manageConnecting our app to our new Sanity project
Go back into your text editor and create a filed name .env in the root folder.
This is where we are going to put the environment variables to connect our project.
Make you you add .env to your .gitignore file as well so that your variables don't get leaked on GitHub.
Add this code to your new .env file
SANITY_STUDIO_API_PROJECT_ID=""SANITY_STUDIO_API_DATASET="production"NEXT_PUBLIC_SANITY_PROJECT_ID=""NEXT_PUBLIC_SANITY_DATASET="production"SANITY_API_TOKEN=""For both of the PROJECT_ID lines we will add the PROJECT ID from our project's dashboard we opened when we ran sanity manage.
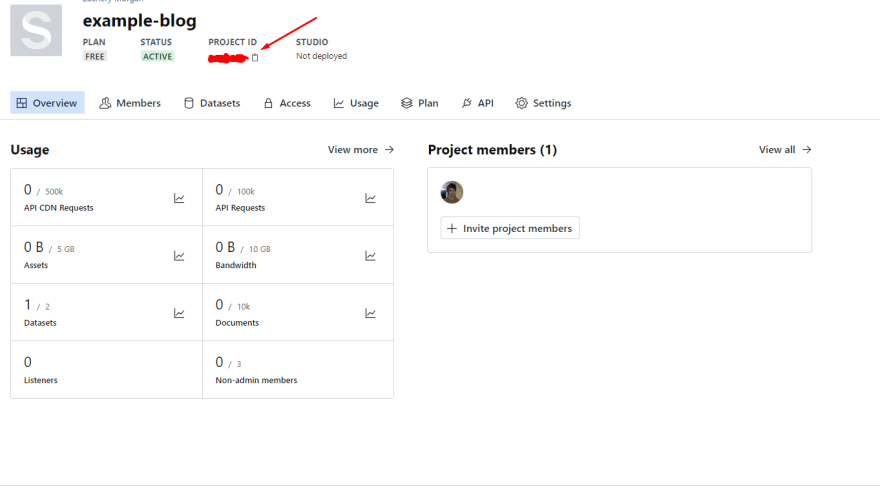
Now back in your dashboard...
- Click
APIon the right - Scroll down to
Tokens - Click
Add API token - Add a name (I used
example-blog) - Select
Editor - Copy the token that it created
- Paste it into your .env file for
SANITY_API_TOKEN
Launching our Studio
To make sure this all works, go back into your command line, inside of your studio folder and run
npm i url && sanity startThe url install is just to fix an error that will prevent studio from launching.
After this runs it should tell you that
Sanity Studio is running at http://localhost:3333Go to that url in your browser and login with the same credentials you've used all lesson for Sanity.
If it all works you should see a screen like this at url localhost:3333/desk
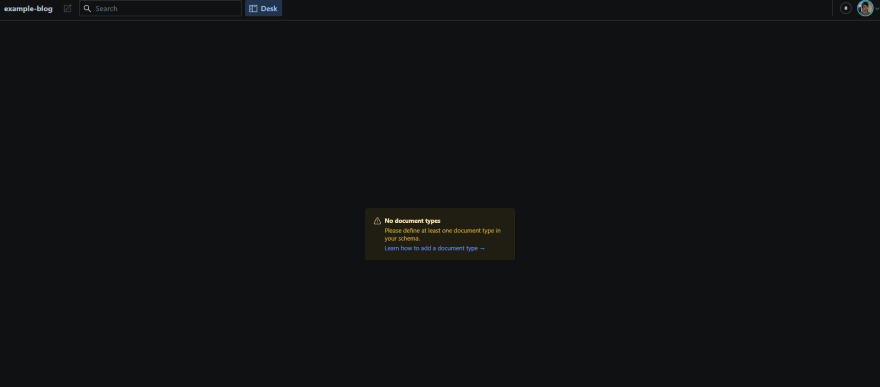
Don't worry about that warning, it just means that we haven't given Studio any data yet, we will do that in the next lesson.
That's everything to get Sanity Studio up and running locally. In the next lesson I will show you how to add your own datatypes and data.
Original Link: https://dev.to/zacherymorgan/getting-started-with-sanity-1ohj
Dev To
More About this Source Visit Dev To