
An Interest In:
Web News this Week
- April 2, 2024
- April 1, 2024
- March 31, 2024
- March 30, 2024
- March 29, 2024
- March 28, 2024
- March 27, 2024
Some of Our Sources
- Techcrunch
- Technology Review
- Web Designer Wall
- Joshua Blankenship
- TutsPlus - Design
- Crazy Leaf Design
- CSS Tricks
- Freelance Switch
- Design Modo
- TechPowerUp
Help Webnuz
Referal links:
How to Build/Publish your V3 chrome extension!
Have you ever wanted to create your chrome extension and publish it on the chrome web store?
In this article, we will walk through the process of building a demo extension, and for this to be achieved, we will separate this article into three main parts.
1. How to build your extension?
Let's start by creating an empty "Demo" folder.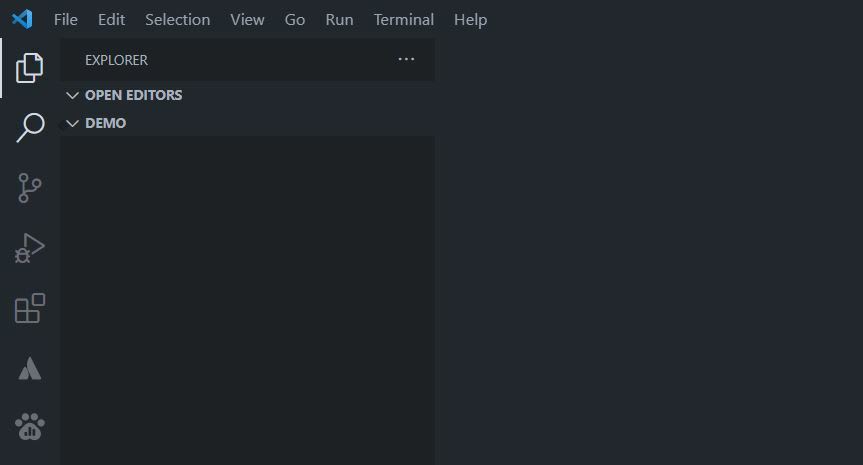
Then we will create three simple files (.html, .css, .js) and name them as you want. I will name them popup.html, popup.css and popup.js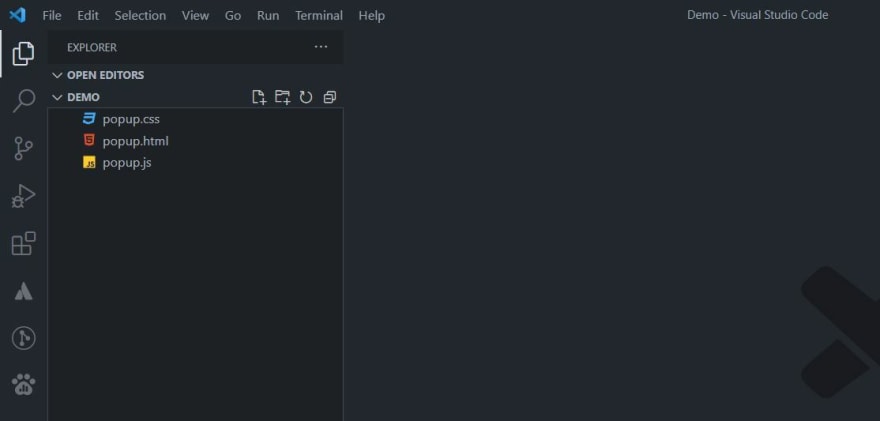
Here is our HTML one.
<meta charset="UTF-8" /><link href="popup.css" rel="stylesheet" type="text/css" /><script type="module" src="popup.js"></script><body> <h2 class="message"> Congratulations , You have built your own chrome extension! </h2> <button class="btn" id="redirectButton"> Press me, I'm working! </button></body>And here is our CSS one.
body { width: 500px; background-image: linear-gradient(120deg, #d4fc79 0%, #96e6a1 100%); display: flex; justify-content: center; align-items: center; flex-direction: column;}.message { text-align: center; margin: 20px 0;}.btn { font-size: 16px; font-weight: 200; letter-spacing: 1px; padding: 13px 50px 13px; outline: 0; cursor: pointer; position: relative; background-color: #000; margin-bottom: 40px; color: white;}And finally our JS one.
document.querySelector('#redirectButton').addEventListener( 'click', function () { window.open('https://www.linkedin.com/in/adhamniazy/') })And guess what!. We finished the markup of our extension!!
As you can see that all the files that we have created are just HTML, CSS, and JS? So what makes the chrome extension different from any website?
The answer is: (manifest.json)
The manifest.json file is the only file that every extension using WebExtension APIs must contain.
Using manifest.json, you specify basic metadata about your extension, such as the name and version and aspects of your extension's functionality (such as background scripts, content scripts, and browser actions).
So Let's create our manifest.json file, and here is what we will write.
{ "manifest_version": 3, "name": "Adham Niazy", "version": "1.0.0", "description": "My First Chrome Extension", "permissions": [ "storage", "tabs" ] "action": { "default_icon": "logo.png", "default_title": "My First Extension", "default_popup": "popup.html" }}(JUST FOR UNDERSTANDING) Let's discuss each Key in this file.
manifest_version: This key specifies the version ofmanifest.jsonused by this extension, we will use the latest version which is3.name: Name of the extension. This is used to identify the extension in the browser's user interface.version: Version of the extension, formatted as numbers and ASCII characters separated by dots.description: Description of the extension. This is used to identify a detailed explanation of your extensionpermissions: Use the permissions key to request special powers for your extension. This key is an array of strings, and each string is a request for permission. for our example we are giving the array two values:storage=> which means that we inform google that our extension needs local storage, andtabs=> this informs google that our extension needs permission to access Tabs Google API. for more details I highly recommend Permissionsaction: An action is a button that your extension adds to the browser's toolbar. The button has an icon, and may optionally have a popup whose content is specified using HTML, CSS, and JavaScript. for example:default_iconspecify the default icon that you want to be in the browser's toolbar,default_titlespecify a title that appear while hovering the extension button,default_popupspecify the HTML file that you want to open when the user clicks your extension button. for more details I highly recommend Action
(Those are just the basic ones I highly recommend you to reach MDN - documentation to checkout other keys there are a tons of them.)
Offff!! That was a lot of explanation I know, but lets have a look on the bright side, After this manifest.json file NOW WE HAVE OUR EXTENSION!!
2. How to run & test your extension on chrome?
Now we are missing something!, how to test it in the browser? Because all we have now is just those files.

It's easier than you think. Let's open a new chrome window and do the following:
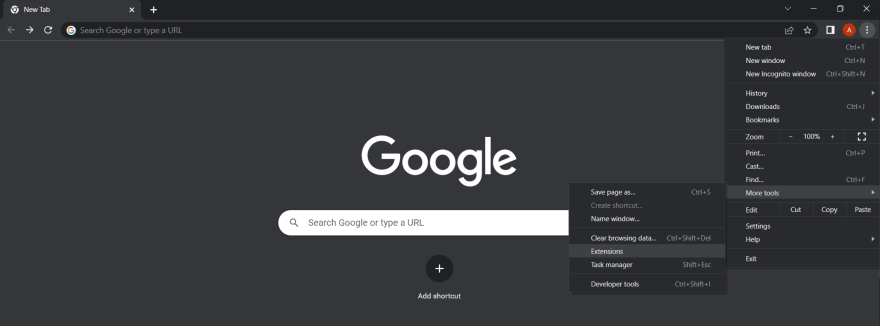
- Go to the top right corner icon that has three vertical dots and click on it.
- Select More tools option.
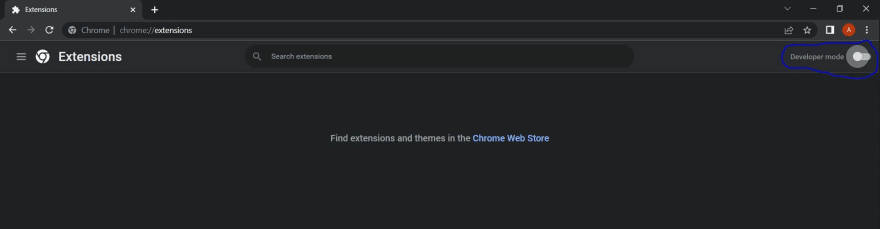
- Select Extensions option.
In the Extensions page you will find a toggle button called Developer Mode Toggle it to ON
After that you will find three buttons appeared click on Load unpacked Button

Then select the folder that we have created together.
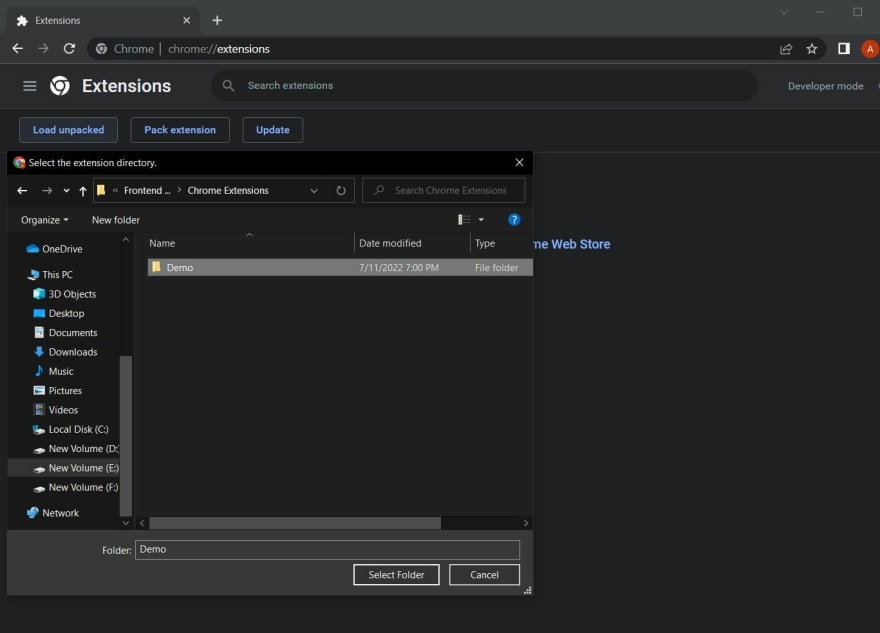
After selecting your extension folder this will happen.
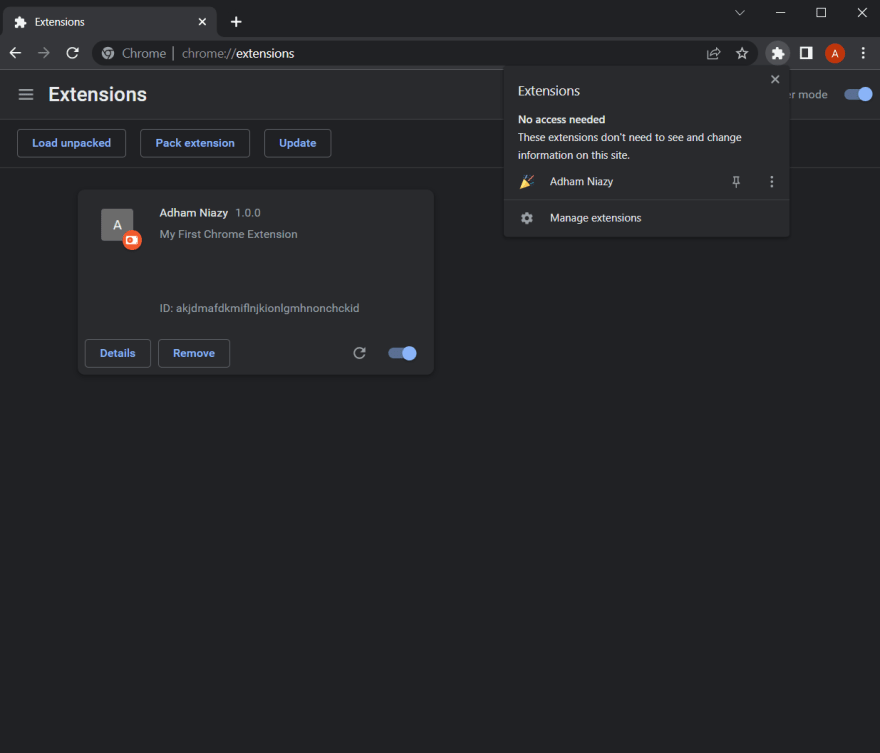
By clicking on the extension this will appear. Congrats!! You did it 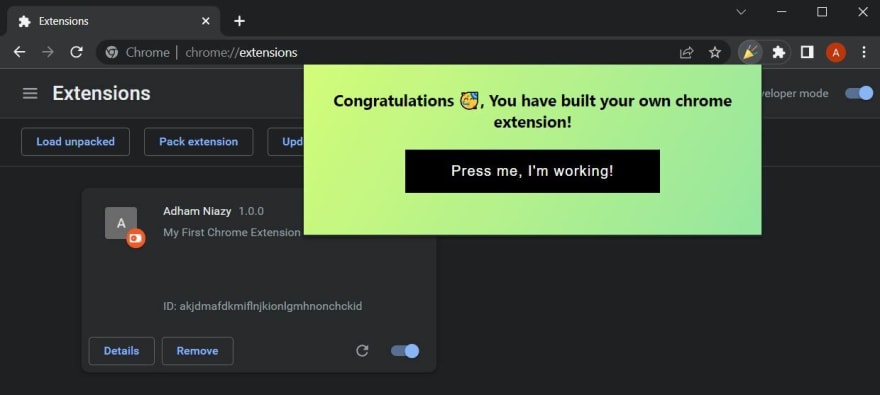
3. How to Publish your extension?
We have built our extension. So what about publishing it?
(The following points are from Google Docs)
Before you can publish items on the Chrome Web Store, you must register as a CWS developer and pay a one-time registration fee 5 USD. You must provide a developer email when you create your developer account.
To register, just access the Developer Console. The first time you do this, the following registration screen will appear. First agree to the developer agreement and policies then pay the registration fee.
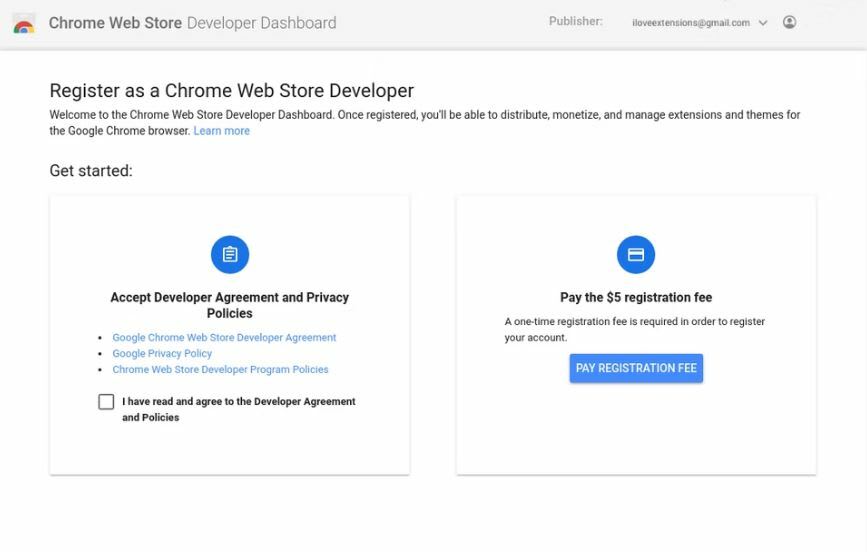
Once you pay the registration fee and agree to the terms, you will not see this registration page again.
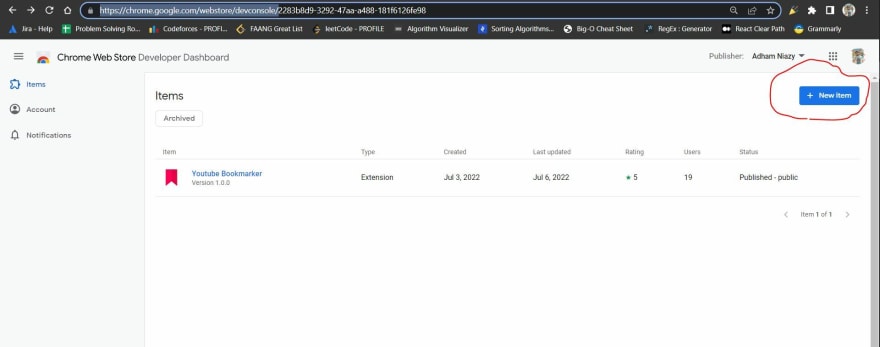
After all, those steps go to your dashboard and click on New Item button
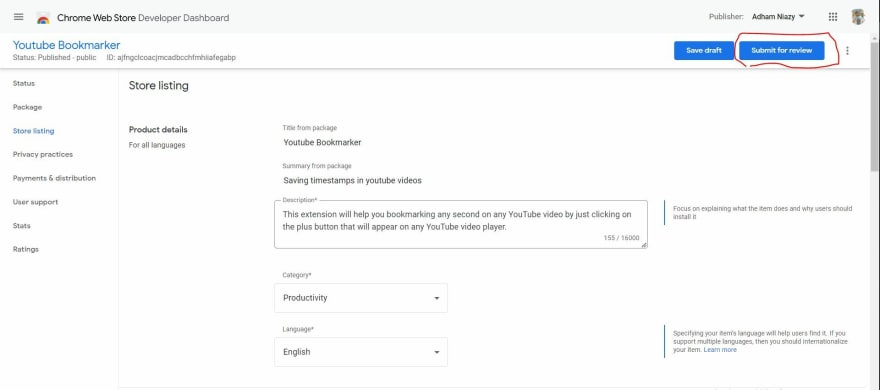
Then upload your extension to chrome as a .zip file then you will be directed to this form. Complete all mandatory fields then hit the Submit for review button.
After submitting your extension now your mission is done, just relax and let google review your extension then it will send you an email for the feedback.
Finally, I'm excited that we reached this point together. I hope this article was helpful to you and didn't waste your time. You will find the code of this demo Github Repo
And thanks for reading, waiting for you in the upcoming articles
Original Link: https://dev.to/adhamniazy/how-to-buildpublish-your-v3-chrome-extension-23no
Dev To
More About this Source Visit Dev To