
An Interest In:
Web News this Week
- March 23, 2024
- March 22, 2024
- March 21, 2024
- March 20, 2024
- March 19, 2024
- March 18, 2024
- March 17, 2024
Some of Our Sources
- Mashable
- Pearsonified
- Web Designer Depot
- Crazy Leaf Design
- Design Modo
- Web Resource Source
- Android Headlines
- Willems Lab
- Daily Now
- Dev To
Help Webnuz
Referal links:
Phone Authentication with Appwrite and Twilio
Appwrite 0.15 was just announced and brings with it one of the most anticipated Appwrite features! Yes, you guessed that right! Were introducing phone authentication in Appwrite! With this release youll now be able to authenticate users using their phone numbers. This release also introduces 3 new phone providers including Twilio, TextMagic & TeleSign!
In this tutorial well learn how to set up a Twilio account and configure it for use with Appwrite and build a Svelte app to put it all together! The app will demonstrate the usage of all the new phone authentication endpoints introduced in Appwrite 0.15! Here's what we will learn:
- To create sessions using a phone number and verify them.
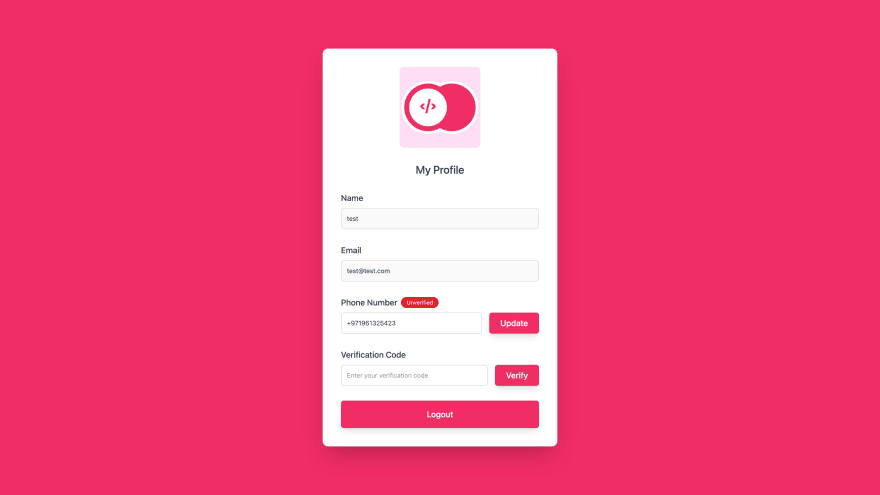
- To update a users phone number, send verification codes and update the verification status.
Without further ado, lets get started!
New to Appwrite?
Appwrite is an open-source back-end-as-a-service that abstracts all the complexity of building a modern application by providing you with a set of REST and Realtime APIs for your core back-end needs. Appwrite takes the heavy lifting for developers and handles user authentication and authorization, databases, file storage, cloud functions, webhooks, and much more!
Setting up Twilio
The first step is to create a Twilio account. Head over to the Sign Up page, fill in your details, verify your email and phone number. On the Twilio Dashboard, click on the Get a Twilio phone number button.
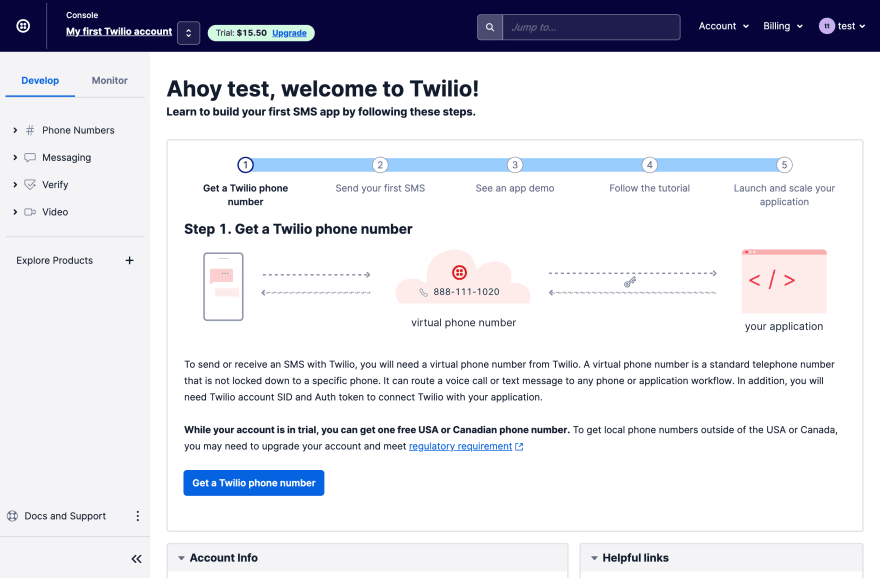
This generates a phone number that we can use to send messages from. Under the Account Info section, youll find the Account SID, Auth Token and the newly generated phone number. Keep these handy as youll need them in the next step.
Theres one last thing that we need to do in the Dashboard before we move to the next step. Since were using Twilios free trial, we can only send an SMS to verified phone numbers. Head over to the Verified Callers IDs page and enter the numbers that youd like to send messages to.
Install Appwrite
Next, we need to get an Appwrite server up and running. You can either choose to install it locally on your system or deploy it on the cloud with one of our one click setups.
TLDR; It only takes a single magic command!
docker run -it --rm \ --volume /var/run/docker.sock:/var/run/docker.sock \ --volume "$(pwd)"/appwrite:/usr/src/code/appwrite:rw \ --entrypoint="install" \ appwrite/appwrite:0.15.1This command installs Appwrite and creates an appwrite folder with docker-compose.yml and .env files. Once the installation is complete, head over to the appwrite folder.
We need to update two variables in the .env file namely _APP_PHONE_PROVIDER and _APP_PHONE_FROM. _APP_PHONE_FROM is the phone number you just obtained from Twilio and _APP_PHONE_PROVIDER is a DSN string that helps Appwrite connect to the Twilio API.
_APP_PHONE_PROVIDER takes the following format
_APP_PHONE_PROVIDER=phone://<Account SID>:<Auth Token>@twilio_APP_PHONE_FROM takes the following format
_APP_PHONE_FROM=+14344251928
You can obtain the Account SID, Auth Token and the phone number from the Account Info section of the Twilio Dashboard.
Once that is done, we need to restart the Appwrite server for the environment variables to take effect. Please note that this command needs to be executed from the appwrite folder that was created during installation.
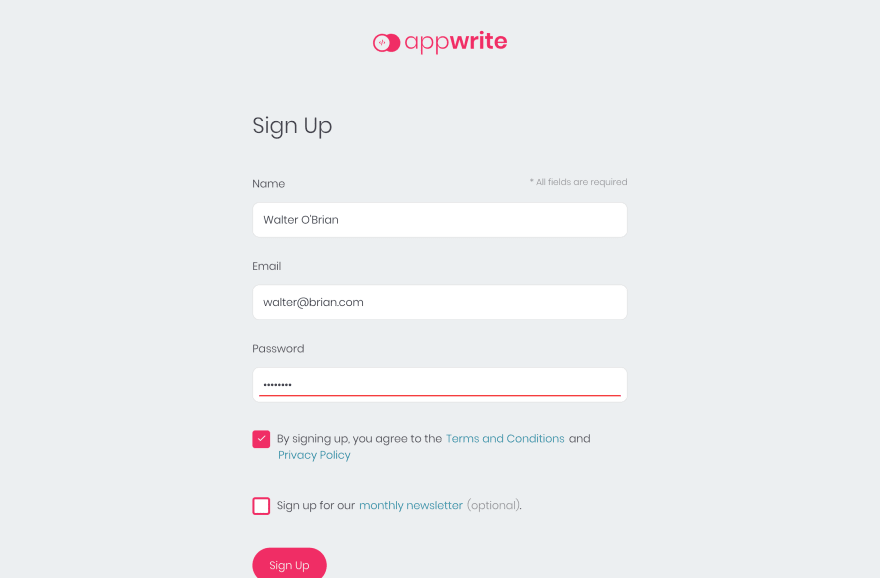
docker compose up -d --force-recreateNext, head over to localhost ( or your public IP address ) and create a new user account followed by a project with a name of your choosing.
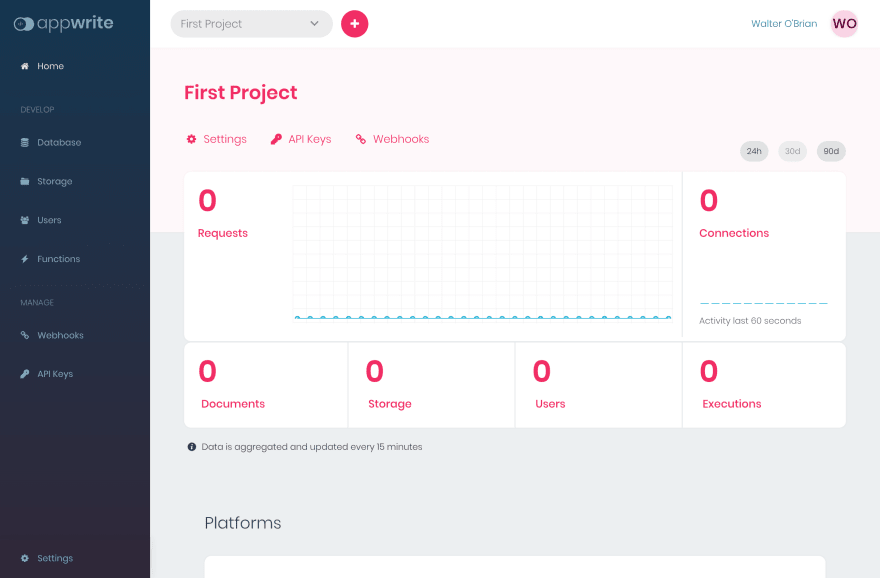
Copy the projectId and the endpoint from the Settings page as well need it for the web app we build in the next step!
Setting up Our SvelteKit Project
For the sake of this example, well be using SvelteKit but the concepts and code examples remain true for all frameworks out there. First, well need to create a new SvelteKit project and set up Tailwind CSS. Ive found the official Tailwind installation guide to be extremely helpful here.
Instead of re-inventing the wheel here, Id recommend you to complete the setup and return back to this tutorial.
Alright! Its time to install some of our dependencies! Well be using two dependencies for our project. Head over to the project folder and install them with the following commands
npm i -D @zerodevx/svelte-toastnpm i appwriteNext, add the following entries into your .env file. You might need to create this file if it does not exist already.
VITE_APPWRITE_ENDPOINT=http://localhost/v1VITE_APPWRITE_PROJECT_ID=<YOUR_PROJECT_ID]Dont forget to replace the values with your own Appwrite projectId and endpoint that you obtained from the Dashboard earlier.
Setting up the Appwrite SDK
Next, lets create our Appwrite service that will help abstract all the SDK calls to a single place. Create a new file src/lib/appwrite.ts and fill in the following contents
import { Client, Account } from 'appwrite';const client = new Client();client .setEndpoint(import.meta.env.VITE_APPWRITE_ENDPOINT) .setProject(import.meta.env.VITE_APPWRITE_PROJECT_ID);const account = new Account(client);export class AppwriteService { public static async getAccount(): Promise<any> { return account.get(); } public static async createAccount(email: string, password: string, name?: string): Promise<any> { return account.create('unique()', email, password, name); } public static async createEmailSession(email: string, password: string): Promise<any> { return account.createEmailSession(email, password); } public static async deleteSession(): Promise<any> { return account.deleteSession('current'); } /** Phone Authentication endpoints */ public static async createPhoneSession(number: string): Promise<any> { return account.createPhoneSession('unique()', number); } public static async updatePhoneSession(userId: string, secret: string): Promise<any> { return account.updatePhoneSession(userId, secret); } public static async updatePhone(number: string, password: string): Promise<any> { return account.updatePhone(number, password); } public static async createPhoneVerification(): Promise<any> { return account.createPhoneVerification(); } public static async updatePhoneVerification(userId: string, secret: string): Promise<any> { return account.updatePhoneVerification(userId, secret); }}Here, we import the appwrite SDK and initialize the Client and Account services. We also export an AppwriteService class with a lot of static methods that we can use across our app. The appwrite.ts file is all it takes to integrate Appwrite into the project. All the other files deal with the UI of the project and should be fairly straightforward to read and understand.
In order to keep this tutorial concise, well just copy over the contents for all the other files from the completed GitHub project. Here are a list of files we need to copy
- Toast.ts - This file contains the theming configuration for our toast messages
- __layout.svelte - This file defines the base layout for all our screens
- index.svelte - UI for the user profile page
- login.svelte - UI for the login with email page
- loginPhone.svelte - UI for the login with phone page
- signup.svelte - UI for the signup page
Once complete, were all ready to preview the project. Run the following command to run a local development server.
npm run devThat brings us to the end of this tutorial! I hope this guide helped you set up phone authentication in your web app and above all, I hope you enjoyed learning something new! I had a lot of fun learning Svelte and building a web app for this tutorial and I cant wait to build some more apps!
Resources
If youre stuck at any point during the tutorial, feel free to reach out for help in our friendly discord channels run by humans! If you like what we do at Appwrite, dont forget to drop us a tiny star on GitHub Here are some great resources to help you get started.
Original Link: https://dev.to/appwrite/phone-authentication-with-appwrite-and-twilio-26ek
Dev To
More About this Source Visit Dev To