
An Interest In:
Web News this Week
- March 20, 2024
- March 19, 2024
- March 18, 2024
- March 17, 2024
- March 16, 2024
- March 15, 2024
- March 14, 2024
Some of Our Sources
- Technology Review
- Just Creative
- Smashing Apps
- TutsPlus - Design
- Web Designer Depot
- My Ink Blog
- CSS Globe
- Specky Boy
- Android Dissected
- The Verge
Help Webnuz
Referal links:
Installing Pi-hole with an LCD screen
I had already made an article on Pi-hole a few years ago, this one adds the fact that there is an LCD screen.

In this article, we will discover how to install Pi-hole with an LCD screen.
The reference of the screen is XPT2046 Touch 3.5" RPI Display 480x320 16bit.
Introduction
We will install Pi-hole on a Raspberry Pi 3B.

Pi-hole Network-wide protection
Pi-hole is used to block unwanted requests and URLs that you don't want to load on the network.
It protects you from trackers and optimizes your network traffic.
Installation
1. Prepare Raspbian
First, flash your SD drive from Etcher or another application.

Wait a few minutes until the disk is ready.
2. Update the dependencies
Connect to your Raspberry Pi and update the dependencies.
sudo apt-get update -y && sudo apt-get upgrade -yWait a good few minutes... in the meantime, drink a good cappuccino.
Install curl and git if this is not available on your small machine:
sudo apt-get install curl -y && sudo apt-get install git -y3. Install Pi-hole
Then, when everything is good, you can start installing Pi-hole.
You can clone from the Pi-hole repository or directly curl with this command:
curl -sSL https://install.pi-hole.net | bashWhen asked if you want to install on your Raspberry and put in static IP, check yes, and remember the IP.

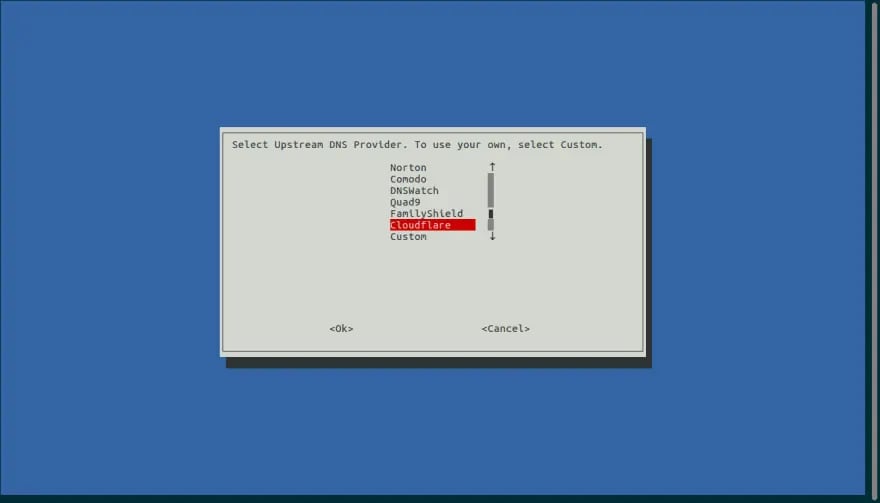
Then choose your preferred DNS. You can put more than one if you want. This is editable after installation.
You can select block lists:
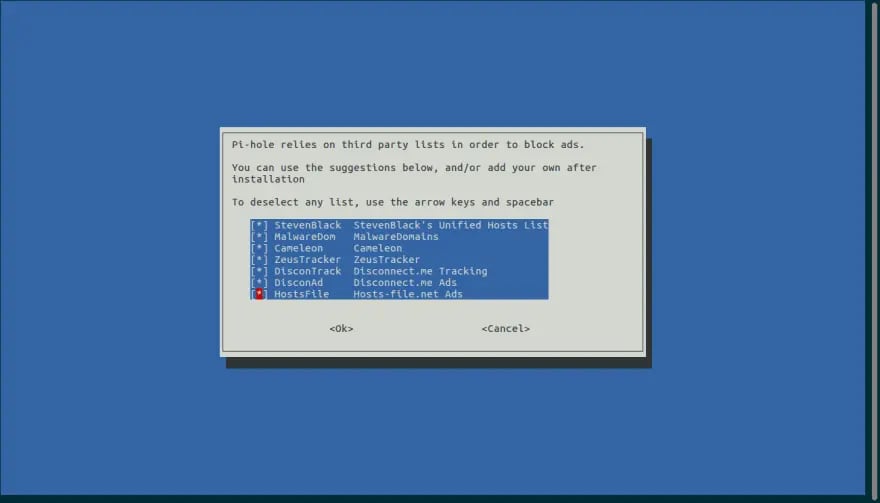
I actually have a huge list with over 1,000,000 blocked domains/IPs. The repository of this list on GitHub. Feel free to add your own domains/IPs.
It will also ask you if you want a web panel.
I strongly recommend that you leave it enabled so that you can connect to the Raspberry Pi with a password and manage your DNS/blacklist and view your statistics.
4. Configuring the web panel
As soon as you have finished installing Pi-hole, it will give you the local host address and the generated password.
To change the password :
sudo pihole -a -pThis is a preview of the panel when you are logged in

Setting up the LCD screen
The most complicated part is here!
There may be some things I've written that don't work for you, or that aren't essential to do.
1. Install the LCD screen on the Raspberry Pi
Simple part to do, just put the Display on the branches of the RPI.
I found a YouTube video that shows you how to position it.
2. Install PADD
PADD is a software that allows you to see the data transmitted by Pi-hole on your screen.
The project has been taken over by Pi-hole, and even if there are some errors, it is still usable.
To install it and make it executable :
cd ~wget -N https://raw.githubusercontent.com/pi-hole/PADD/master/padd.shsudo chmod +x padd.shMake PADD run when the RPI is launched:
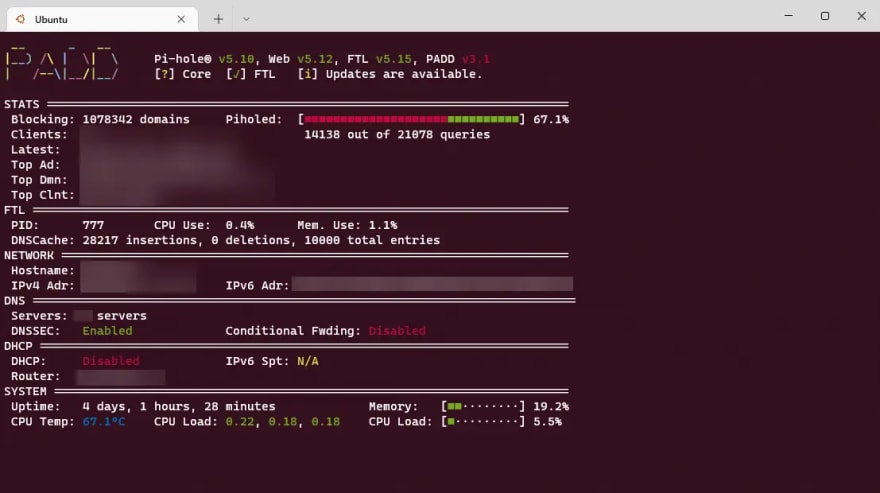
# Run PADD# If we're on the PiTFT screen (ssh is xterm)if [ "$TERM" == "linux" ] ; then while : do ./padd.sh sleep 1 donefiIf you wish, you can test the script and view it from your terminal:
./padd.shThis gives:
After you have done everything, you need to reboot your machine.
3. Make the screen turn off at night.
On the PADD wiki, they show you how to make the screen turn off at night. The script works with cron, to modify it, do sudo crontab -e :
# PiTFT+ SLEEPY TIME# Turn off the PiTFT+ at midnight00 00 * * * sh -c 'echo "0" > /sys/class/backlight/soc\:backlight/brightness'# Turn on the PiTFT+ at 8:00 am00 08 * * * sh -c 'echo "1" > /sys/class/backlight/soc\:backlight/brightness'Possible mistakes
During my installation, I had a few errors, including one where the screen would not turn on.
So I forced him to do it with Adafruit.
A. Installation of Adafruit
Let's already install the prerequisites:
sudo apt-get install python3-pip -yThen Adafruit from the GitHub repository :
cd ~git clone https://github.com/adafruit/Raspberry-Pi-Installer-Scripts.gitAnd finally, we will install Adafruit :
cd Raspberry-Pi-Installer-Scriptssudo python3 adafruit-pitft.py --display=35r --rotation=90 --install-type=consoleThis script will modify /boot/config.txt to make adafruit-pitft run when the RPI is launched.
See how to do it manually
sudo nano /boot/config.txtInsert at the end:
[all]hdmi_force_hotplug=0dtparam=spi=ondtparam=i2c1=ondtparam=i2c_arm=ondtoverlay=pitft35-resistive,rotate=90,speed=20000000,fps=20dtoverlay=piscreen,speed=16000000,rotate=90B. Invalid number" errors
If you get this kind of error on your screen:
/home/pi/padd.sh: line 900: printf: 0,3: invalid number/home/pi/padd.sh: line 244: printf: 42,236: invalid number/home/pi/padd.sh: line 873: printf: 9,1: invalid number/home/pi/padd.sh: line 900: printf: 0,91: invalid numberLeave the local of the Raspberry Pi on en_GB.UTF-8,
an issue is in progress and therefore displays errors on the Display. (View issue on GitHub)
Sources:
Original Link: https://dev.to/thomasbnt/installing-pi-hole-with-an-lcd-screen-2m70
Dev To
More About this Source Visit Dev To