
Some of Our Sources
- Slashdot
- Engadget
- Simplebits
- Abduzeedo
- TutsPlus - Design
- Naldz Graphics
- Web Design Ledger
- Line 25
- Android Dissected
- The Verge
Help Webnuz
Referal links:
Hasura Custom Authentication UsingJWT
Hasura, as in Hasura GraphQL engine is a very popular web application that helps in building API's 10 times faster than before. It has built in authorization and caching; and gives instant realtime GraphQL APIs on a Postgres database.
Hasura supports two modes of authentication configuration.
- Using webhook
- Using JWT token
Today I will be talking about authentication using JWT. Before that lets talk about JWT.
JWT means JSON Web Token. It is mainly used to identify an authenticated user and share information between two parties, like client and server. It contains a JSON object which bears public information but only can be verified by the signer who originally created the token by a secret key.
JWT has mainly 3 parts:
Header:
It contains the signing algorithm such as SHA256, RSA and the type of the token which is JWT
{ "alg": "HS256", "typ": "JWT"}Payload:
It contains the claims and the data to be shared. Claims are statements about an entity (i.e user).
{ "sub": "1234567890", "name": "John Doe", "iat": 1516239022}Signature:
It is generated by the using the algorithm mentioned in the header in encoded header, encoded payload and a secret key together. It is used to verify the information wasn't changed along the way and the authenticity of the sender by the secret key.
HMACSHA256( base64UrlEncode(header) + "." + base64UrlEncode(payload), your-256-bit-secret) Putting all these 3 parts together a token is formed.
eyJhbGciOiJIUzI1NiIsInR5cCI6IkpXVCJ9.eyJzdWIiOiIxMjM0NTY3ODkwIiwibmFtZSI6IkpvaG4gRG9lIiwiaWF0IjoxNTE2MjM5MDIyfQ.SflKxwRJSMeKKF2QT4fwpMeJf36POk6yJV_adQssw5cWhen a user is signed up or logged in, a JWT is returned; which is used to access private routes in a server. In order to access private routes, the client should send the JWT, typically in the Authorization header using the Bearer schema. The server's protected routes will check for a valid JWT in the Authorization header. If the JWT is decoded and verified, the user will be allowed to access protected routes.
The GraphQL engine is configured to use JWT authorization mode to authorize all incoming requests to the Hasura GraphQL engine server. Hasura docs is self sufficient enough to explain the flow of JWT. It has provide a flow diagram:

courtesy - hasura.io
Before using JWT mode, the GraphQL end point has to be secured using admin secret. Otherwise JWT won't be effective. In order to secure the endpoint, HASURA_GRAPHQL_ADMIN_SECRET has to be added on the config vars.
After that, you need to pass HASURA_GRAPHQL_JWT_SECRET on the environment variable. The format would be:
{"type": "<standard-JWT-algorithms>","key": "<optional-key-as-string>"}where-
Type: Standard JWT algorithms-Hasura supports HS256, HS384, HS512, RS256, RS384, RS512, Ed25519
Key: The secret key used to decode and encode the JWT.
JWT contains several parts. The data one needed to send and the custom claims as mentioned above. By default Hasura engine looks under "https://hasura.io/jwt/claims". 2 things are mandatory to be present in the custom claims:
- x-hasura-default-role field: default role of the user
- x-hasura-allowed-roles field: an array of allowed roles for the user
The claims in the JWT can have other x-hasura-* fields where their values can only be strings.
{ "sub": "1234567890", "name": "John Doe", "admin": true, "iat": 1516239022, "https://hasura.io/jwt/claims": { "x-hasura-allowed-roles": ["editor", "user", "mod"], "x-hasura-default-role": "user", "x-hasura-user-id": "1234567890", "x-hasura-org-id": "123", "x-hasura-custom": "custom-value" }}Now the JWT should be sent by the client to the Hasura GraphQL engine via the Authorization: Bearer header.
One can find many blogs on authentication by JWT using Auth0 or firebase and many more. But there are less resources of doing custom authentication without using any auth server. I am going to lay out the procedure step bystep.
We are going to use Next.JS which is a frontend framework in that it is ReactJS, React-DOM with a NextJS development server for server-side rendering so that we wont need separate backend framework. For GraphQL client, we are going to use urql. You can learn more about urql here.
Before going to the coding part, we need to setup our hasura console. We will run our hasura graphql engine on heroku. We need to visit this page and press on the button: Deploy to Heroku. And deploy our app. Now we can find our container in Hasura. We can open our console from there.
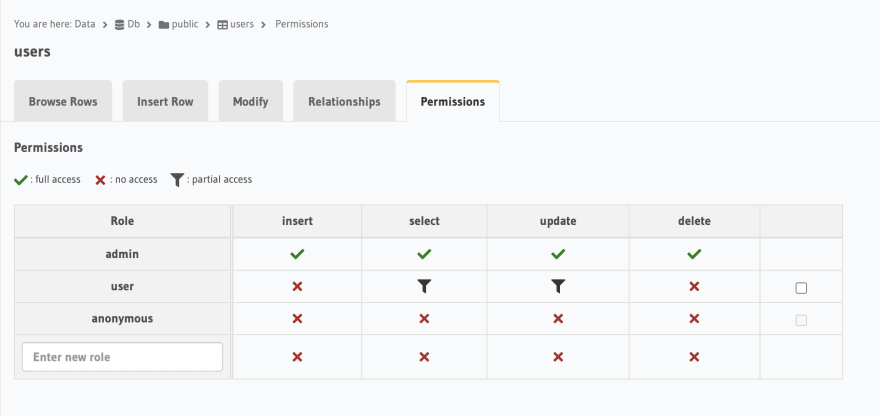
In our console, we will create a schema first i.e our database. Then we will create all the tables we need. For authentication, we need a user table containing email, password, id. If you want you can add any number of columns. Then we have to set permission of the tables as per need.
SignUp
We basically do mutation for signing up. In hasura, we make this graphql mutation code:
mutation($email: String!, $password: String!) { insert_users_one(object: { email: $email, password: $password }) { id }}It means, we need to pass email and password to the insert_users_one; which will insert the user on the users table and return us the id of that user.
This mutation has to be done on the backend. So we need to use urql/core package for Node.js. To learn about the core and node.js usage, visit here.
We need to first install some packages.
npm install @urql/core graphqloryarn add @urql/core graphqlThen we have to create a graphql client file anywhere for setting up the client. Lets say we have named it gql-client.js and contents of the file:
import { createClient } from "@urql/core";const client = createClient({ url: "your_graphql_post_url", fetchOptions: { headers: { "content-type": "application/json", "x-hasura-admin-secret": "your_admin_secret", }, },});export default client;Your url part will the url present here-

x-hasura-admin-secret will be the HASURA_GRAPHQL_ADMIN_SECRET you have added in the environment vars in order to secure the endpoint.
Next we will create a file under api on the pages folder which will work as our api for signing up.
As we are doing authentication using jwt, we need to generate the token. First we need to set our data we want to send and the claims.
const tokenContents = { sub: "id that we will get from mutation", "https://hasura.io/jwt/claims": { "x-hasura-allowed-roles": ["user"], "x-hasura-default-role": "user", "x-hasura-user-id": "id that we will get from mutation", },};You can also add email in the content or can send and anything with x-hasura prefix under claims.
Then we need to produce the token by passing the contents and the key that we added in HASURA_GRAPHQL_JWT_SECRET. For that we will be using the jsowebtoken package. We need to install it first.
npm install jsonwebtokenoryarn add jsonwebtokenThen we have to use the sign method from jsonwebtoken.
const token = jsonwebtoken.sign(tokenContents, "your_jwt_secret_key");It is not a good idea to keep password of the users in the table. It is certainly a breach in privacy. So, we will hash the password using bcrypt hashing function
We need to install the package.
npm install bcryptjsoryarn add bcryptjsIf you want to learn more about bcrypt, check here. We will generate a salt ( a random string that makes the hash unpredictable) and hash that password using the salt.
const salt = await bcrypt.genSalt(10);const hashedPassword = await bcrypt.hash(password, salt);We need to import client from gql-client.js to use the client for mutation. Then call the mutation function from the client and get our id from the handler.
Here's the full code-
import jsonwebtoken from "jsonwebtoken";import bcrypt from "bcryptjs";import client from "your_gql-client_file_path";const SIGNUP = `mutation($email: String!, $password: String!) {insert_users_one(object:{email: $email, password: $password}){id}}`;const generateToken = (id) => { const tokenContents = { sub: id, "https://hasura.io/jwt/claims": { "x-hasura-allowed-roles": ["user"], "x-hasura-default-role": "user", "x-hasura-user-id": id, }, }; return jsonwebtoken.sign(tokenContents, "your_jwt_secret_key");};const handler = async (req, res) => { const { email, password } = req.body; const salt = await bcrypt.genSalt(10); const hashedPassword = await bcrypt.hash(password, salt); client .mutation(SIGNUP, { email: email, password: hashedPassword }) .toPromise() .then((result) => { if (result.error) { return res.status(400).json({ message: result.error.message, }); } else { return res.status(200).json({ data: result.data, token: generateToken( result.data.insert_users_one.id.toString() ), }); } });};export default handler;Login
Login is much easier than signup. All we need to do is to make a query graphql code.
query($email: String!) { users(where: { email: { _eq: $email } }) { id, password }}Here we will match the email and return the id and password of the user. Next we will match the hashing the password using bcrypt. For that we are going to use bcrypt.compare function.
The full code is:
import jsonwebtoken from "jsonwebtoken";import bcrypt from "bcryptjs";import client from "your_gql-client_file_path";const LOGIN = `query($email: String!) {users(where: {email: {_eq: $email}}) {id,password}}`;const generateToken = (id) => { const tokenContents = { sub: id, "https://hasura.io/jwt/claims": { "x-hasura-allowed-roles": ["user"], "x-hasura-default-role": "user", "x-hasura-user-id": id, }, }; return jsonwebtoken.sign(tokenContents, "your_jwt_secret_key");};const handler = async (req, res) => { const { email, password } = req.body; const result = await client.query(LOGIN, { email: email }).toPromise(); if (result.error) { res.status(400).json({ message: result.error.message, }); } if ( result.data.users.length == 1 && (await bcrypt.compare(password, result.data.users[0].password)) ) { return res.status(200).json({ data: result.data, token: generateToken(result.data.users[0].id), }); } else { return res.status(200).json({ message: "Invalid Credentials" }); }};export default handler;Now just calling these two api from the frontend, we are good to go.
Congrats! Now you can implement authentication without using any auth services.
Original Link: https://dev.to/dristy03/hasura-custom-authentication-using-jwt-cik
Dev To
More About this Source Visit Dev To