
An Interest In:
Web News this Week
- April 2, 2024
- April 1, 2024
- March 31, 2024
- March 30, 2024
- March 29, 2024
- March 28, 2024
- March 27, 2024
Some of Our Sources
- Slashdot
- Engadget
- Spoon Graphics
- TutsPlus - Design
- Inspiredology
- Web Designer Depot
- My Ink Blog
- Fudge Graphics
- Dev To
- The Verge
Help Webnuz
Referal links:
Setting up a dev environment with React, Vite, and Tailwind
Written by Lawrence Eagles
Tailwind and React are two leading technologies in their sphere. Tailwind CSS simplifies the concept of Atomic CSS, enabling developers to style their UI by adding some classes to their markup. And with the performance improvements that come with the new JIT compiler, Tailwind CSS has become a clear developer's favorite.
Vite also simplifies the bundling process but takes a different approach than traditional bundlers. Vite gives us instant dev sever start times and ultra fast bundling by leveraging native JavaScript modules and esbuild under the hood.
Both Vite and Tailwind CSS excel in simplicity, performance, and developer experience.
As software becomes more sophisticated to meet the needs of end users, app size increases linearly and leads to a demand for faster development tools and bundlers. Although Create React App works well, as the app size increases, its performance declines. This is where Vite comes in.
In this article, well learn about Vite and how to set up a React and Tailwind CSS application using it.
- Background information
- What is Vite?
- Vite vs. webpack and traditional bundlers
- Performance advantages
- Cold starting apps
- Bundling process
- Code splitting
- Setting up a project with React, Vite, and Tailwind
Background information
Historically, JavaScript did not have an API for developers to write code in a modular way. This is because JavaScript was originally designed for small browser scripts.
Over the years, JavaScript has become wildly popular and is used in different aspects of programming. However, its main drawback has been its lack of modularity. This has led JavaScript developers to come up with different ways of creating modules, such as:
IFFE modules, seen below:
(function () {// declare priate variables and/or functionsreturn {// declare public variables and/or functions})();Third party module specifications such as CommonJS (CJS) and asynchronous module definition (AMD)
The problem is that not all module specifications work in the browser. For example, CJS supports only server-side module declaration. Additionally, building a modern web application involves the use of some libraries and packages that are not supported by the browser, like React, Vue, TypeScript, etc.
This problem, however, is solved by the concept of bundling. The process involves using a bundler (intuitive, right?) to combine all our apps files and assets into a single package that works in the browser. This has led to the development of traditional bundlers such as webpack, Parcel, and Rollup.
There are two main issues with these: slow cold start of the dev server and slow updates. Next generation JavaScript build tools, like Vite, identify and solve these issues for us.
What is Vite?
Vite is the French word for fast. Its is a modern build tool for frontend web development that leverages ES modules, or ESM. Vite features a leaner and faster bundler that comes with a preconfigured dev server.
Vite vs. webpack and traditional bundlers
As an ESM bundler, Vite solves the problems of traditional bundlers mentioned above. Well walk through a few key differentiators below.
Cold starting apps
Unlike webpack, Vite starts the dev server immediately when we cold start our application, as seen below:
 Source: https://vitejs.dev/assets/esm.3070012d.png.
Vite can cold start the dev server instantly because of the following factors:
- Vite prebundles the apps dependencies using esbuild, built with Golang, making it 10100x faster than JavaScript bundlers. This redounds to the performance of Vite
- Vite dynamically determines which part of the code needs to be loaded by using route-based code splitting. Thus, Vite does not have to rebundle our entire application
- Vite only transforms and serves source code requested by the browser. This is possible because Vite serves our application code over native ESM, enabling the browser to take over some part of the bundling process in development
Bundling process
When compared to traditional bundlers like webpack, Vite takes a different approach in the implementation details of its bundling process. traditional bundlers like webpack rebuild the whole app on each update. The main problem with this is that it can get very expensive.
To address this issue, these bundlers use a technique called Hot Module Replacement, or HMR. HMR is a way of updating the changed modules in a running application so you dont have to update the rest of the page.
However, the update speed of HMR decreases linearly as the app size grows.
Since Vite uses ESM, it performs HMR over ESM. This enables Vite to only invalidate the chain between the updated module and its closest HMR boundary when a module is updated. Thus, HMR in Vite is consistently fast regardless of the size of the application.
Performance advantages
Vite uses the browser to speed up full page reloads by leveraging HTTP headers. It handles cache dependency module requests via Cache-Control: max-age=31536000, immutable, so they don't hit the server again.
Lastly, source code module requests are made conditional via 304 Not Modified.
All these give Vite a significant performance advantage over bundle-based build tools.
Code splitting
Another major difference between Vite and traditional bundlers is the handling of code splitting. Traditional bundlers like webpack and Rollup produce common chunk code that is shared between two or more other chunks. This, when combined with dynamic import, can lead to multiple network round trips as shown below:
 Source: https://vitejs.dev/assets/graph.8f2f36b7.png.
As shown in the image, in unoptimized scenarios when async chunk A is imported, the browser has no way of figuring out it needs common chunk C without first requesting and parsing A. And after it figures out it needs common chunk C, it then imports it, leading to an extra network round trip.
Vite implements the code split dynamic import calls in a different way that adds a preload step. This way, when chunk A is requested, chunk C is fetched in parallel. This completely eliminates network round trips.
When compared with Create React App, Vite outshines it in terms of performance for the reasons listed above. Although both are Node.js applications that can ultimately achieve the same thing, the one drawback with Create React App is its performance.
While Create React App works only for React, Vite is framework agnostic and supports a lot of libraries and frameworks out of the box.
In the next section, well learn how to work with Vite by scaffolding a React application with Vite.
Setting up a project with React, Vite, and Tailwind
To scaffold a project, run the following code from your terminal:
npm create vite@latestChoose a project name and select a template. Follow the on-screen instructions to complete the setup, as seen below: 
Alternatively, we can select a template by using the template flag in the CLI, as seen in the code below:
# npm 6.xnpm create vite@latest my-vue-app --template vue# npm 7+, extra double-dash is needed:npm create vite@latest my-vue-app -- --template vue# npm 6.xnpm create vite@latest my-react-app --template react# npm 7+, extra double-dash is needed:npm create vite@latest my-react-app -- --template reactNext, install the app dependencies and start the dev server by running:
# Installs dev dependenciesnpm install#Starts dev servernpm run devAnd we get: 
Now we will integrate Tailwind CSS. The most seamless way to do this is to use postCSS by following the steps below: First, install Tailwind CSS and its peer dependencies by running:
npm install -D tailwindcss postcss autoprefixerNext, create your tailwind.config.js file by running:
npx tailwindcss initAdd Tailwind to your postCSS configuration. To do this, create a postcss.config.js file and add the following code:
module.exports = { plugins: { tailwindcss: {}, autoprefixer: {}, }}Vite automatically applies all valid postCSS configuration in the postcss.config.js object to all imported CSS. Configure your template paths by modifying the tailwind.config.js file as seen below:
module.exports = { content:["./src/**/*.{js,jsx}"], theme: { extend: {}, }, plugins: [],}Add the Tailwind directives to your CSS by replacing the code of your index.css file with the following code:
@tailwind base;@tailwind components;@tailwind utilities;Now, run the build process by running npm run dev. You can see that Tailwind CSS styles have been applied.
To see this in action, we can apply some Tailwind CSS classes to the counter app.
In the src directory, create a components directory.
In the components directory, create a Counter.jsx component with the following code:
import React, { useState } from "react";const Counter = () => { const [count, setCount] = useState(0) return ( <div className="flex h-screen"> <div className="m-auto"> <div className="text-6xl text-red-600">{count}</div> <button className="px-6 py-2 rounded bg-green-800 hover:bg-green-600 text-white" type="button" onClick={() => setCount((count) => count + 1)}> count+ </button> </div> </div> )}export default Counter;Now replace the App.jsx component with the following code:
import Counter from './components/Counter'function App() { return ( <div> <Counter /> </div> )}export default App;Now, we get: 
And this confirms that we have successfully bootstrapped our application with Vite, React, and Tailwind CSS!
Conclusion
In this article, we learned about Vite and how it works. We compared Vite with traditional bundlers like webpack and saw that Vite has some clear performance advantages, as well as learned how to work with Vite by bootstrapping a React and Tailwind application.
By following this, I do hope you are ready to give Vite a try in your next React application.
Full visibility into production React apps
Debugging React applications can be difficult, especially when users experience issues that are hard to reproduce. If youre interested in monitoring and tracking Redux state, automatically surfacing JavaScript errors, and tracking slow network requests and component load time, try LogRocket.
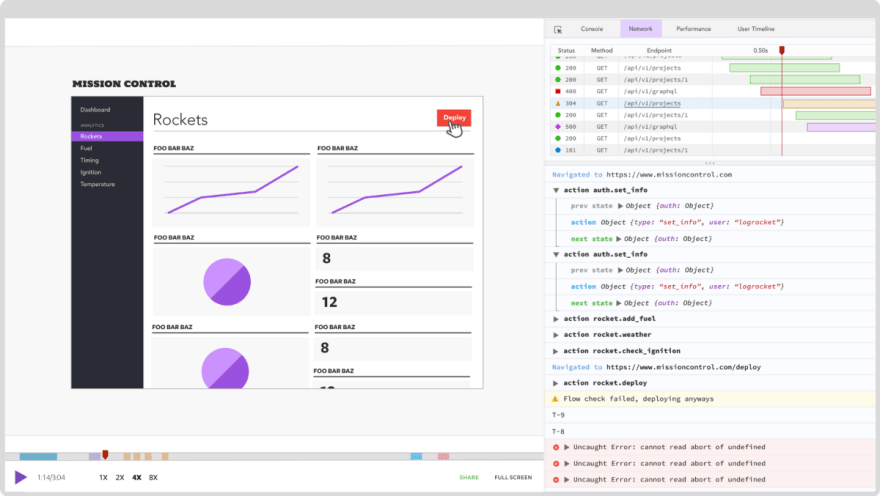
LogRocket is like a DVR for web and mobile apps, recording literally everything that happens on your React app. Instead of guessing why problems happen, you can aggregate and report on what state your application was in when an issue occurred. LogRocket also monitors your app's performance, reporting with metrics like client CPU load, client memory usage, and more.
The LogRocket Redux middleware package adds an extra layer of visibility into your user sessions. LogRocket logs all actions and state from your Redux stores.
Original Link: https://dev.to/logrocket/setting-up-a-dev-environment-with-react-vite-and-tailwind-3c7c
Dev To
More About this Source Visit Dev To