
An Interest In:
Web News this Week
- April 2, 2024
- April 1, 2024
- March 31, 2024
- March 30, 2024
- March 29, 2024
- March 28, 2024
- March 27, 2024
Some of Our Sources
- Web Designer Wall
- Smashing Magazine
- Smashing Apps
- Abduzeedo
- Fuel Your Creativity
- My Ink Blog
- Fudge Graphics
- CSS Tricks
- The Verge
- TechPowerUp
Help Webnuz
Referal links:
Convert your website into an android app using capacitor .
According to Atwood's Law, "Any application that can be written in JavaScript, will eventually be written in JavaScript."
In this article, we will learn how to convert a website or web application to an android app that can be deployed on the Android play store or installed on a mobile device using a library from Ionic called a capacitor. I will use react for this demo, but you can use any other framework or even plain old JavaScript.
Prerequisite
- A production build folder. Most frameworks have a build command to create a build folder for you. If you are using vanilla JavaScript add all your assets and files to a folder.
- Android studio
Step 1: Create a react application.
We will begin by creating a react application using the following commands. You can skip steps 1 and 2 if you already have an existing project and build folder.
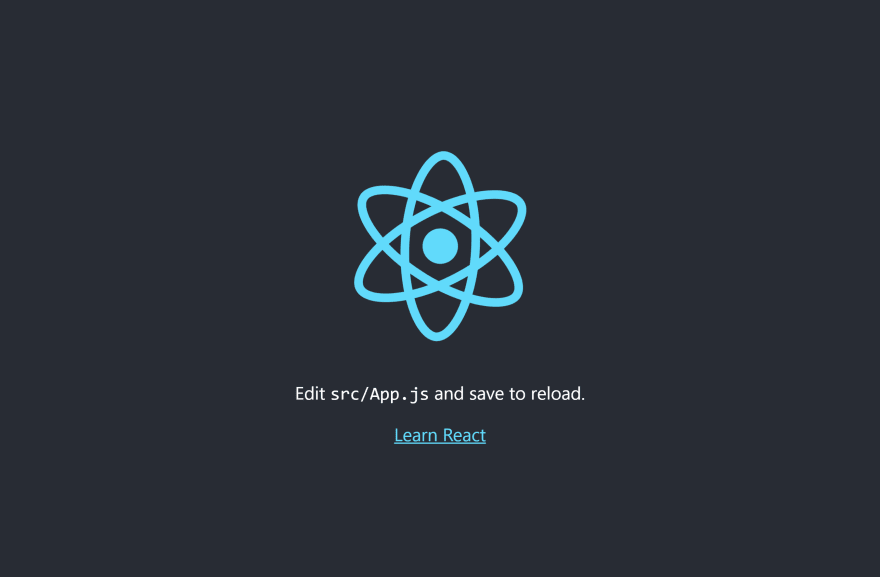
npx create-react-app my-appcd my-appNow to run our react application we use the below command
npm startOur demo application will look something like this.
Step 2: Create a Build folder for your application.
A build folder is crucial in converting our react application to an android application. We use the following command to create a build folder for our react application. If you are using another framework, it might have different commands, so I recommend reading the documentation for the framework you are using. If you are using plain JavaScript, create a folder that contains all your files and assets.
npm run buildStep 3: Install capacitor
To create our android application, lets first install capacitor cli and its core library.
npm install @capacitor/cli @capacitor/corenpx cap initThe first question will be to enter the name of your application, and the second one will be to enter the package id of application com.yourAppName.android.

Now, open the capacitor.config.ts file in webDir and enter the name of your build folder if it is different.

Step 4: Create your android application
To create an android application, make sure you have installed and configured your android studio properly.
Assuming everything above has been set up, run the following command.
npm install @capacitor/androidnpx cap add androidWith the first command, we will download the capacitor android library into our project, and with the second command, we will generate the android code.
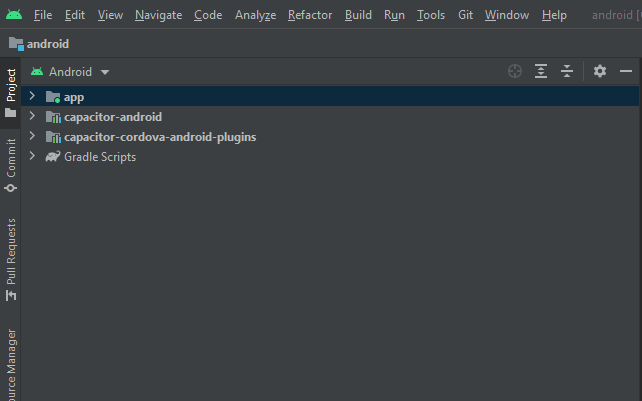
Now, it's time to open the android studio using the following command.
npx cap open androidAlternatively, you can open Android Studio and import the android/ directory as an Android Studio project.
It will take some time for your application to open, but it should look something like this once it is ready.
By clicking on the play button in android studio, you can now run your android application.

The emulator screen on my potato laptop was entirely black for some reason. However, if you have the same problem as me, create an apk and run it either on an android simulator like Nox player for windows or on an actual android device.
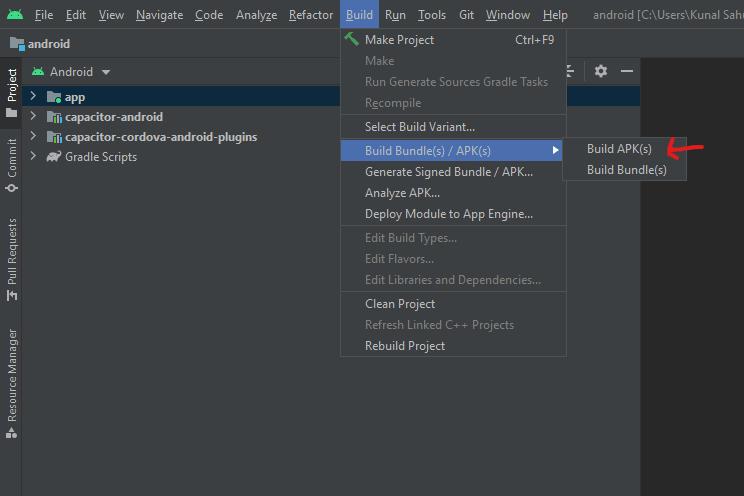
Click on Build >> Build Bundle(s) / APK(s) >> Build APK(s) to generate a installable debug apk file.
To submit the app to the play store, we need to create a signed bundle, but now for testing, we will create a debug application.
It will show a similar message in the bottom right corner if successfully built.
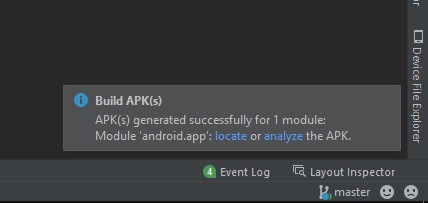
click on locate folder or navigate to android\app\build\outputs\apk. Now you can run your application either on your android phone or android simulator like nox player etc.
Hurray! it works .
Bonus Section: Create a custom splash screen for your android application
An app would not be complete without a customized splash screen and icon. If we want to create a splash screen and custom icon, we must install the capacitor plugin first.
npm install -g cordova-rescordova-res expects a Cordova-like structure: place one icon and one splash screen file in a top-levelresources folder within your project, like so:
resources/ android/ icon-background.png icon-foreground.png icon.png splash.png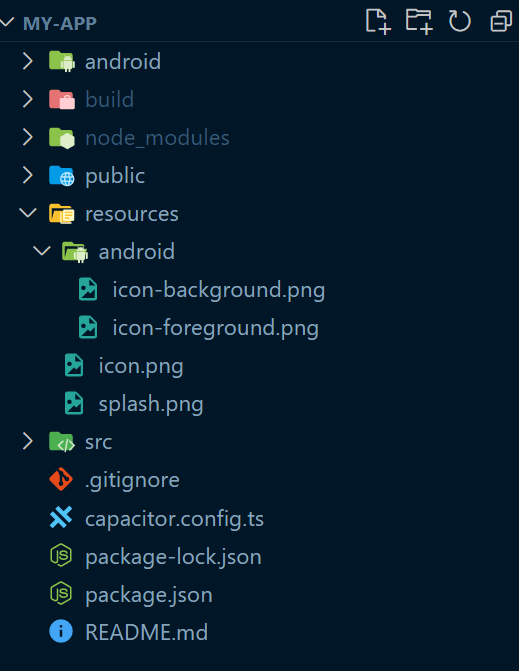
I am using icon and splash from the project I worked on for two months. With my new project, newbie cryptocurrency investors will be able to try investing in cryptocurrencies without any risk. If you are interested in learning more, subscribe to my newsletter to receive updates onhttps://blog.webdrip.in/
Next, run the following to generate icons and splash screens of different sizes for your app.
cordova-res android --skip-config --copyThe command should generate two folder icons and a splash. You will not need to configure anything because all assets generated on this folder will be copied to your Android code folder.

Now to test our splash screen follow step 4 again.

Reference

I hope this post was informative. Feel free to comment or reach out to me if you have any questions.In the next blog, we will be adding a push notification feature to our capacitor app.

For more such insights, checkout my blog website blog.webdrip.in
Original Link: https://dev.to/narottam04/convert-your-website-into-an-android-app-using-capacitor--5bh2
Dev To
More About this Source Visit Dev To