
An Interest In:
Web News this Week
- March 21, 2024
- March 20, 2024
- March 19, 2024
- March 18, 2024
- March 17, 2024
- March 16, 2024
- March 15, 2024
Some of Our Sources
- Simplebits
- TutsPlus - Code
- Web Designer Wall
- Creative Curio
- My Ink Blog
- CSS Globe
- Wal You
- Specky Boy
- CSS Tricks
- Codrops
Help Webnuz
Referal links:
Appwrite Storage Meets Backblaze B2
Appwrite is an open-source backend-as-a-service that abstracts all the complexity involved in building a modern application by providing you with a set of REST APIs for your core backend needs. Appwrite handles user authentication and authorization, real-time databases, cloud functions, webhooks, and much more!
One of the core functionalities of Appwrite is Appwrite Storage. It permits you to upload, view, download, and query your project files. Appwrite Storage not only takes care of encryption, compression and antivirus scans, its also built on top of Appwrites flexible, yet simple permission system. Appwrite lets you store any files such as text documents, icons, images, videos, and more.
Recently, Appwrite introduced support for Backblaze as a storage adapter, allowing you to use Appwrite while not having to worry about your storage running out!
Backblaze B2 Setup
Well first need to set up our bucket and get some credentials before we can start using Backblaze storage with Appwrite.
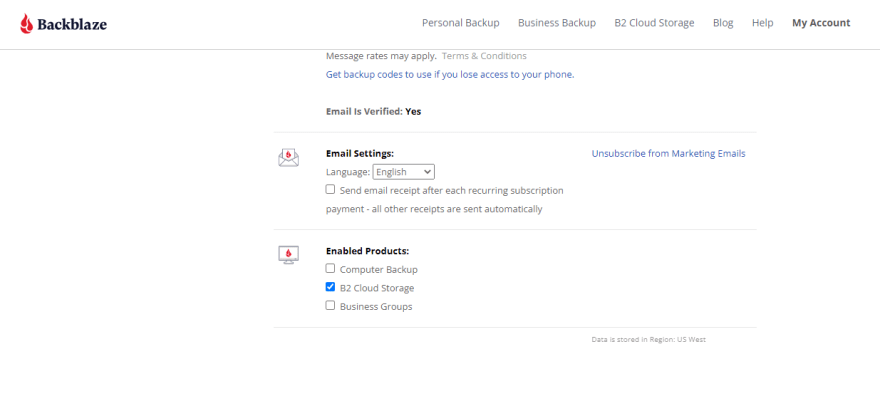
1) Sign up for a Backblaze account and ensure B2 Cloud Storage service is enabled under Enabled Products in your account settings.
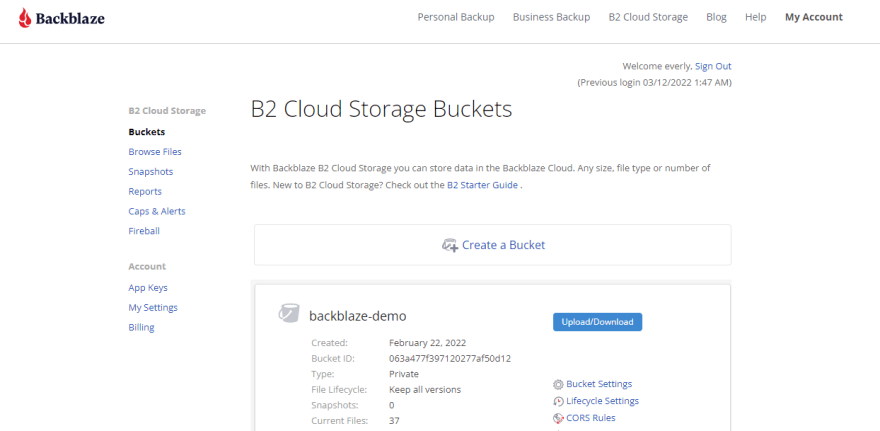
2) On the left navigation, you should see the products and their navigation display. Select the Buckets option from the navigation menu.
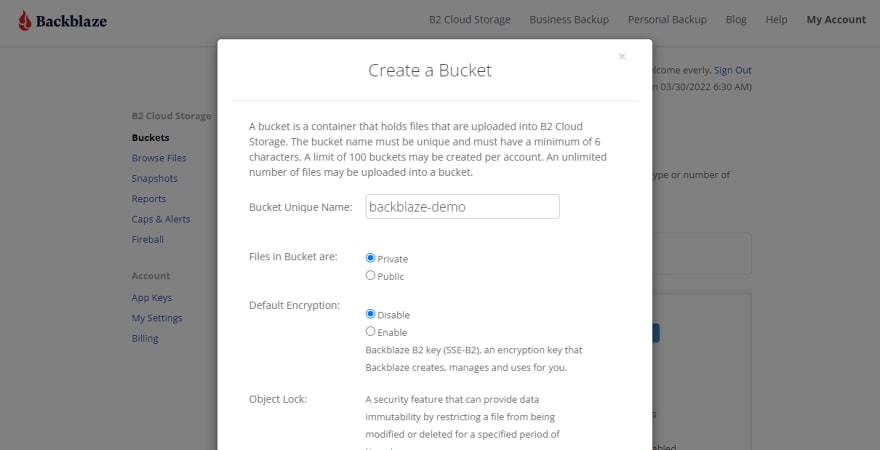
Navigating to Buckets will give you the option to create a bucket and configure it.
3) Once you have your bucket created and configured, you can now go ahead and create your application key and key IDs. To create your application key and key ID navigate to Account > App Keys from the left navigation.
Scroll down past the master key section to create a new application key.(Please note that you should not be creating a master key)
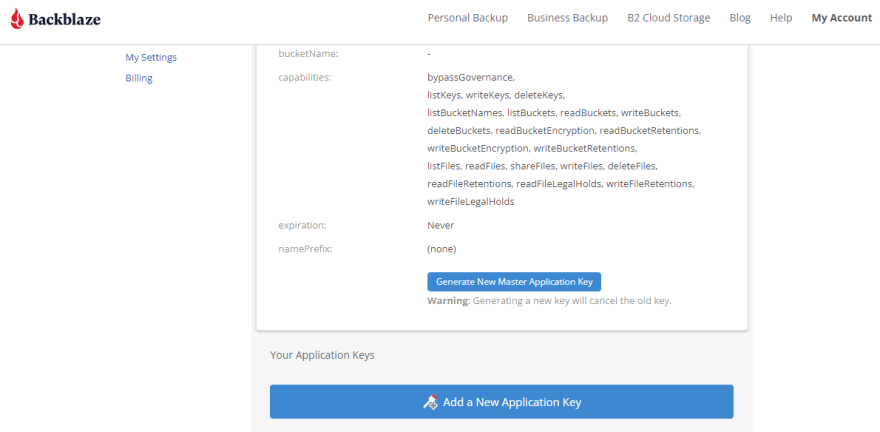
This will give you your keyID and applicationKey which we will later use to connect Appwrite with Backblaze.

4) You will also need to get your region for the integration. You will be able to get your region details easily from your s3 endpoint which can be found on your Buckets page.
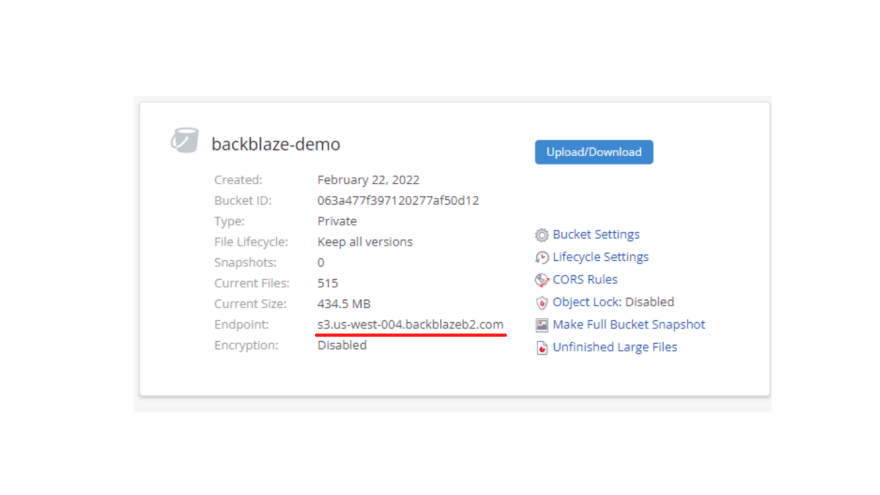
The format of endpoints for the Backblaze S3 Compatible API looks as follows:
s3.<region>.backblazeb2.comHence, the region for the bucket backblaze-demo is us-west-004. Similarly, you can get your region from your buckets endpoint.
With this we conclude the initial setup and now we will proceed to connect Backblaze B2 storage with Appwrite.
Appwrite + Backblaze B2
Before you start, make sure that you have your Appwrite instance up and running. Installation of Appwrite is as simple as running one command:
docker run -it --rm \ --volume /var/run/docker.sock:/var/run/docker.sock \ --volume "$(pwd)"/appwrite:/usr/src/code/appwrite:rw \ --entrypoint="install" \ appwrite/appwrite:latestTo learn more about the installation process, you can check out our installation guide.
We can now start configuring our .env file to integrate Backblaze B2 with Appwrite.
Here are some pointers before we start editing our .env file.
1) _APP_STORAGE_DEVICE_BACKBLAZE_ACCESS_KEY will hold your keyID from the Backblaze console.
2) _APP_STORAGE_DEVICE_BACKBLAZE_SECRET will hold your applicationKey from the Backblaze console.
As a first step, navigate to _APP_STORAGE_DEVICE in the .env file and change it from Local (default) to Backblaze. This tells the Appwrite server to use Backblaze as the storage adapter and to expect Backblaze credentials in the other environment variables.
You will also need to edit the following .env variables to get Appwrite connected with Backblaze.
_APP_STORAGE_DEVICE=Backblaze_APP_STORAGE_DEVICE_BACKBLAZE_BUCKET=your bucket name_APP_STORAGE_DEVICE_BACKBLAZE_REGION=region_APP_STORAGE_DEVICE_BACKBLAZE_SECRET=your application key_APP_STORAGE_DEVICE_BACKBLAZE_ACCESS_KEY=your key idAfter editing your .env file, you will need to restart Appwrite. This can be easily done by running the following command.
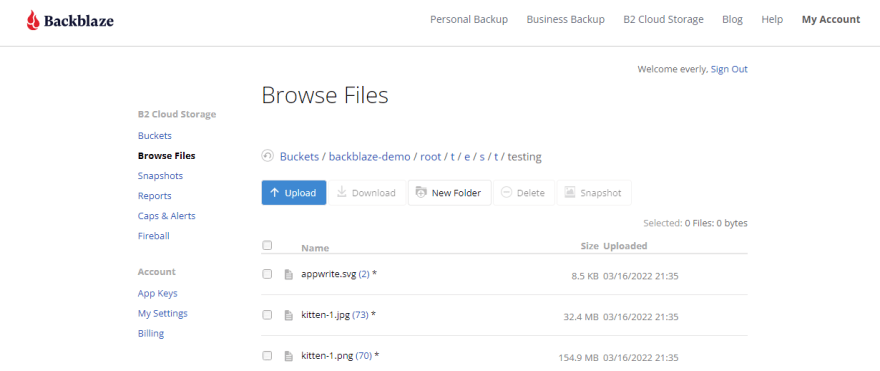
docker-compose up -dOnce Appwrite has restarted, create a new account and a new project. In the left menu, select Storage and create a new bucket. Finally, upload a file into your bucket. You should see your uploaded files in the Backblaze console as well.
Conclusion
With the newly released provider system for Appwrite Storage service, you can now connect Appwrite with external storage providers instead of storing the files on your system. This prevents exhausting hard drive and bandwidth limits, as well as lets you use your favorite provider alongside Appwrite. And as you have seen in the tutorial above, you can easily connect Appwrite with Backblaze B2 in just a few steps!
If you have a project to share, need help, or simply want to become a part of the Appwrite community, I would love for you to join the official Appwrite Discord server. I cant wait to see what you build!
Learn more
You can use the following resources to learn more and get help:
Original Link: https://dev.to/appwrite/appwrite-storage-meets-backblaze-b2-4m2e
Dev To
More About this Source Visit Dev To