
An Interest In:
Web News this Week
- April 23, 2024
- April 22, 2024
- April 21, 2024
- April 20, 2024
- April 19, 2024
- April 18, 2024
- April 17, 2024
Some of Our Sources
- Just Creative
- Vandelay Design
- Naldz Graphics
- FanExtra - PSD
- Crazy Leaf Design
- Web Design Ledger
- Freelance Switch
- Design Modo
- Android Dissected
- Android Headlines
Help Webnuz
Referal links:
Create a restaurant barcode menu in Next.js.
Barcodes have a proven to increase the speed to product utilization thereby improving the efficiency of enterprises worldwide. Barcodes are utilized in commerce, technology, and industrial sectors for almost 50 years.
Barcode consists of bars representing the binary digits 0 and 1. The binary numbers can represent values ranging from 0 to 9 and are processed by a digital computer.
This article briefly discusses the application of barcode technology in building a restaurant barcode menu.
Codesandbox and Github
The completed project is on CodeSandbox. Fork it to get started quickly.
<Codesandbox id="friendly-kepler-tb8pcj" title="Create a restaurant barcode menu in Next.js" />The source code is on Github.
Prerequisite
Adequate knowledge of JavaScript and React.js is required for this article. The knowledge of Next.js is preferred but not required.
Getting Started with Next.js
Next.js is a React-based framework with functionalities like pre-rendering, automatic code-splitting for faster page loads, and API routes to build API endpoints with serverless functions for back-end features.
Created by Vercel, Next.js is open source and based on Node.js and Babel and also integrates with React to create single-page apps.
Project setup and installation
To create a new project, well run the following command in our terminal:
npx create-next-app <project-name>Next, well navigate into the project directory and install the react-barcode package with the command below:
cd <project-name> && npm install react-barcode Running npm run dev will start the development server by default at http://localhost:3000 in our browser.
What is react-barcode?
react-barcode is a lightweight, high-performance component for React applications that display standard 1D and 2D barcodes. It is seamless to use and does not require fonts. The barcodes generated are optimized for printing and on-screen scanning.
react-barcode is easily customizable, as it provides options to customize its color, height, width, and more. It can display different barcodes forms such as svgs, canvas, images, etc. It uses a set of default option values to display a barcode.
Building the barcode component
With our project fully set up and configured, we can start building the barcode menu.
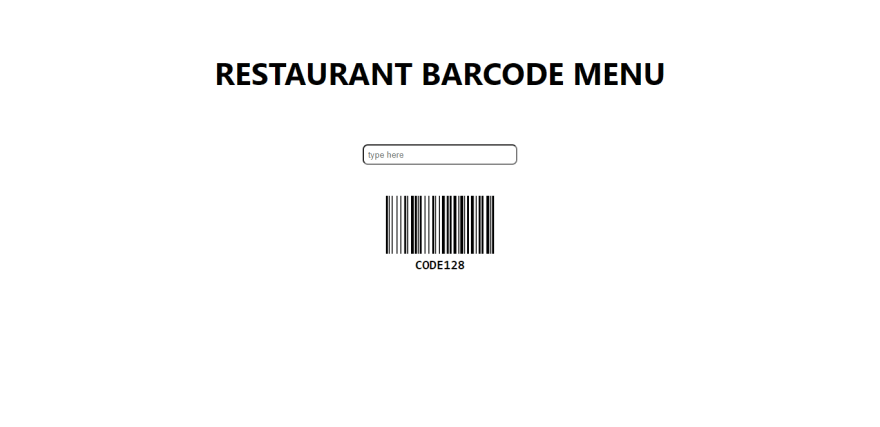
First, well create an input element and a state variable called barcode in ./pages/index.js. The input is to accept the restaurants URL, which will be transformed into a barcode and then stored in the barcode state variable. The input will trigger an event to update the barcode value as the input value changes.
Well also import the barcode component from react-barcode to create a barcode from our input value.
import React, { useState } from "react";import Barcode from "react-barcode";export default function Home() {const [barcode, setBarcode] = useState("CODE128");const handleChange = (event) => { setBarcode(event.target.value ? event.target.value : "");};return (<div className="App"> <h1 className="title"> Restaurant Barcode Menu </h1> <input type="text" placeholder="type here" onChange={handleChange} /> </div> ); }Next, well add the barcode component, which utilizes some options on how to display the barcode.
<Barcode value={barcode} format={"auto"} height={90} width={1.5} fontOptions="600" textMargin={4} margin={0} ref={barcodeRef} />The options in the code snippet above do the following:
value- This holds the input value converted to a barcode.format- Select which barcode type to use. For example, CODE128, CODE39, EAN13, etc.height- This is the height of the barcode.width- This is the width of a single bar.fontOptions- This adds a bold or italic text to the barcode.textMargin- This sets the space between the barcode and the text.margin- Sets the space margin around the barcode. All sides will inherit the margins property if nothing else is set but can be replaced if we set them separably.ref: To access theBarcodeelement after it has been mounted to the DOM.
Our barcode menu should look like this in our browser:
Testing the barcode menu
Well transform a random restaurants URL into a barcode to ensure the barcode menu is fully functional.
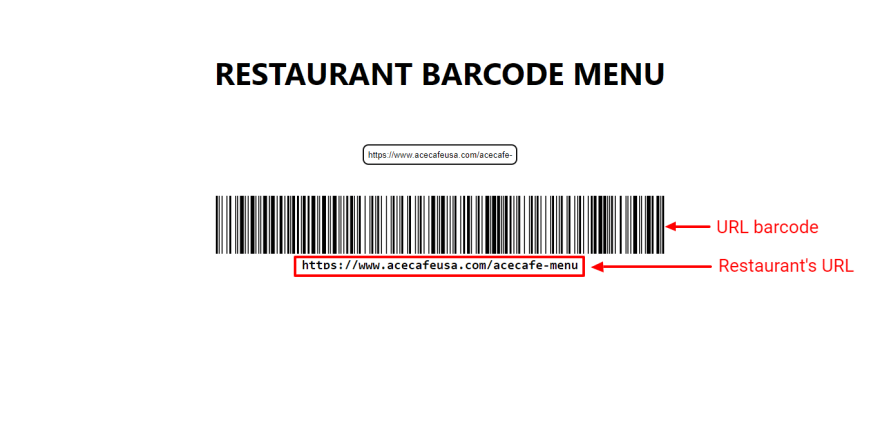
Then, well have to scan the barcode with the help of any barcode scanner application on our computer system or phone. The barcode scanner will show the same URL as the one in the barcode menu above to show our application is fully functional.
Conclusion
This article discussed how to transform URLs into barcodes and, more importantly, integrate barcodes into web applications.
Resources
Original Link: https://dev.to/hackmamba/create-a-restaurant-barcode-menu-in-nextjs-1i67
Dev To
More About this Source Visit Dev To