
An Interest In:
Web News this Week
- April 24, 2024
- April 23, 2024
- April 22, 2024
- April 21, 2024
- April 20, 2024
- April 19, 2024
- April 18, 2024
Some of Our Sources
- Technology Review
- Simplebits
- TutsPlus - Code
- Smashing Apps
- TutsPlus - Design
- Fuel Your Creativity
- My Ink Blog
- Specky Boy
- Willems Lab
- Hashedout
Help Webnuz
Referal links:
Create a dynamic allowlist with Airtable and Next.js
Introduction
In this guide, we are going to create an edition where people will be able to sign up their wallets to an allowlist and those wallets can later mint the NFT!
Sounds cool, right!? Let's get started.
Setup
I am going to use the Next typescript starter template of thirdweb for this guide. If you already have a Next.js app you can simply follow these steps to get started:
- Install
@thirdweb-dev/reactand@thirdweb-dev/sdk - Add metamask authentication to the site. You can follow this guide
- You all are set to go now!
If you are also going to use the Next TypeScript template then follow these steps
- Click on the use template button in the repo
- Clone the repo
- Install the dependencies:
npm install # npmyarn install # yarnBy default the network in _app.tsx is Mainnet, we need to change it to Mumbai
import type { AppProps } from 'next/app';import { ChainId, ThirdwebProvider } from '@thirdweb-dev/react';// This is the chainId your dApp will work on.const activeChainId = ChainId.Mumbai;function MyApp({ Component, pageProps }: AppProps) { return ( <ThirdwebProvider desiredChainId={activeChainId}> <Component {...pageProps} /> </ThirdwebProvider> );}export default MyApp;Creating an edition and NFT
We also need to create an edition and an NFT inside of the edition to be able to mint them to the users. So, go to the thirdweb dashboard and create an edition. I am doing it with an Edition contract for this demo but it can be also done with one of one NFTs (ERC-721).
Fill out the details and deploy the contract!

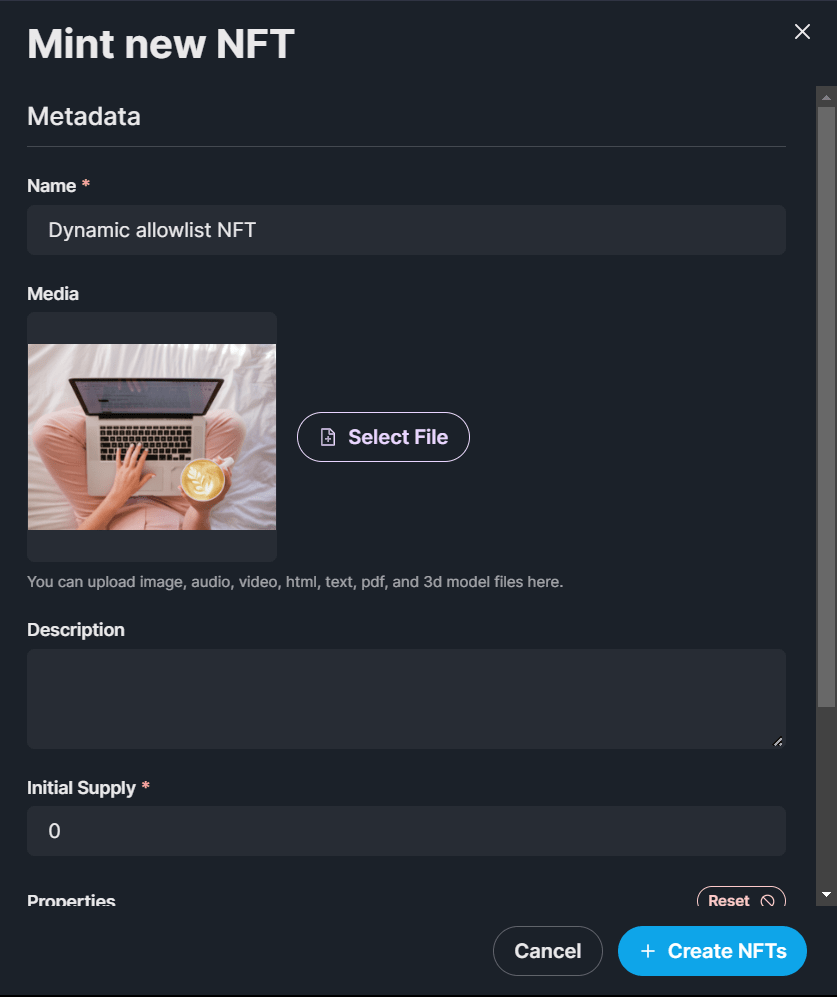
Now, let's create and mint a new NFT inside of it. Fill out the details and make sure to set the initial supply to 0.
Making the website
Creating an nft card
To showcase our nft, we are going to create a simple card and we will get the data from the edition contract itself! So, inside index.tsx add the useEdition hook like this:
const edition = useEdition("EDITION_CONTRACT_ADDRESS");We need to import it from the thirdweb sdk:
import { useEdition } from "@thirdweb-dev/react";Now, we are going to create a new state to hold the nft data:
const [nftData, setNftData] = useState<EditionMetadata["metadata"] | null>( null );We also need to import EditionMetadata and useState:
import { EditionMetadata } from "@thirdweb-dev/sdk";import { useState } from "react";Finally, create a useEffect to get the data from the contract and update the variable:
useEffect(() => { edition?.get("0").then((nft) => { setNftData(nft.metadata); }); }, [edition]);If you console log the nft metadata you will get something like this:

If the user is logged in we will show them this nft instead of there address, so replace the fragment (<>) with this:
<div> {nftData?.image && ( <Image src={nftData?.image} alt={nftData?.name} width="280" height="210" objectFit="contain" /> )} <p> <span>Name:</span> {nftData?.name} </p> <p> <span> Description:</span> {nftData?.description} </p> <button>Mint</button></div>You will now get an error because we are using the next <Image /> component but haven't whitelisted the domain, so go to next.config.js and add the following:
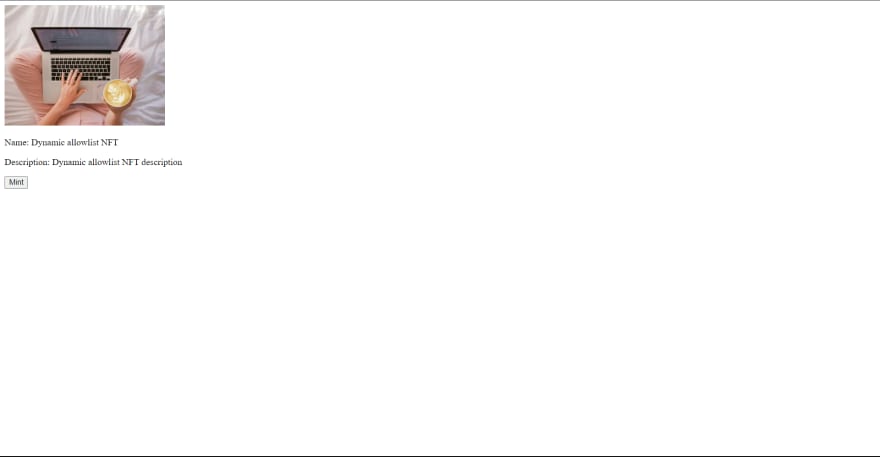
/** @type {import('next').NextConfig} */const nextConfig = { reactStrictMode: true, images: { domains: ["gateway.ipfscdn.io"], },};module.exports = nextConfig;Since we are changing the next.js config we need to restart the server. Once you restart the server you will see something like this
Creating the mint api
We are going to use the signature minting on our backend to ensure that the address is present in the airtable, but first let's get the signature minting working.
Create a new folder api in the pages folder and generate-mint-sig.ts inside it.
We will now build a basic api that will output "gm wagmi"
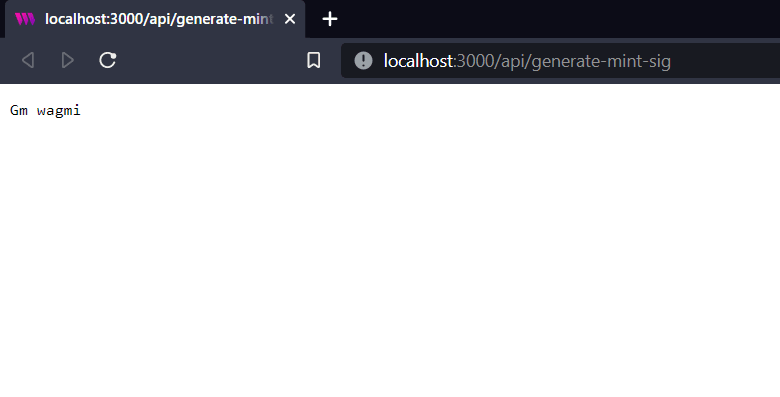
import type { NextApiRequest, NextApiResponse } from "next";const generateMintSignature = async ( req: NextApiRequest, res: NextApiResponse) => { res.send("gm wagmi");};export default generateMintSignature;This creates a basic api for us, if you now go to the api/generate-mint-sig endpoint you will get a response of Gm wagmi.
Let's now initialize the thirdweb sdk!
const sdk = new ThirdwebSDK( new ethers.Wallet( process.env.PRIVATE_KEY as string, ethers.getDefaultProvider(process.env.ALCHEMY_API_URL) ) );as you can see we are using 2 environment variables to initialize the sdk. The first is the PRIVATE_KEY which is the private key of the wallet. The second is the ALCHEMY_API_URL which is the url of the Alchemy api. Create a new file .env.local and add the two variables.
PRIVATE_KEY=<private_key>ALCHEMY_API_URL=<alchemy_api_url>Let's see how to get these two variables.
Getting the wallet private key
In your metamask wallet, click on the three dots, then click account details. You will see an option to export private key there. Export your private key and paste it into the PRIVATE_KEY variable.

This will give full access to your wallet to make sure to keep it secret!
Getting the alchemy api key
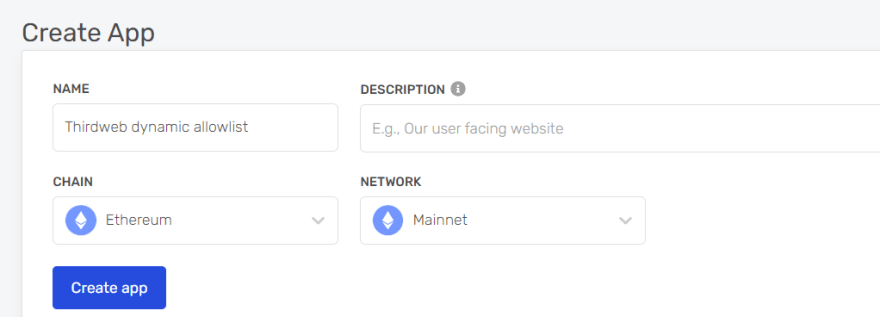
Go to Alchemy and sign up for an account. You need to create a new app, so click on create app. Fill out the details, and hit submit. I am using Mumbai network for this demo but you need to use the network that you are using!
Finally, paste this in the .env.local file too. Since we have changed the env variables we need to restart the server. So, cut the terminal and run yarn dev again.
We also need to import ethers and ThirdwebSDK:
import { ThirdwebSDK } from "@thirdweb-dev/sdk";import { ethers } from "ethers";Generating the siganture mint
In the api we are going to use the sdk to get access to the edition contract and generate a mint signature:
const edition = sdk.getEdition("EDITION_CONTRACT_ADDRESS"); try { const signedPayload = await edition.signature.generate({ tokenId: 0, quantity: "1", to: address, }); res.status(200).json({ signedPayload: signedPayload, }); } catch (err) { res.status(500).json({ error: err, }); }We will get the address from the frontend so, add this:
const { address } = JSON.parse(req.body);Let's now mint the api on the frontend by calling this api:
const mintWithSignature = async () => { const signedPayloadReq = await fetch(`/api/generate-mint-sig`, { method: "POST", body: JSON.stringify({ address }), }); const signedPayload = await signedPayloadReq.json(); try { const nft = await edition?.signature.mint(signedPayload.signedPayload); return nft; } catch (err) { console.error(err); return null; } };This function will request the api that we just built with the address. It will give us a signed payload that we can use to mint the nft via our edition contract. So, let's attach it to the button:
<button onClick={() => mintWithSignature()}>Mint</button>Now our mint works! But wait, everyone can mint now so let's create an airtable database to store the addresses that can mint.
Creating an allowlist with airtable
Go to Airtable and create a new base.
After you create a new base, give a name to your base and add two columns: Address and Minted like this:

Getting airtable api keys and id
We now need to get some api key's and id's to interact with the base. So, go to your Airtable account and generate an api key

Store this api key somewhere safe as we are going to need it.
Now to get the base id go to the Airtable API and click on the base that you just created. When you open the page, at the top itself you would see "Your base id is app......".
Inside .env.local add three new variables:
AIRTABLE_API_KEY=AIRTABLE_BASE_ID=AIRTABLE_TABLE_NAME=Creating a utility function for accessing the table
To keep our code clean we are going to create a file where we initialize the airtable with the api key, name, and id. So, create a new folder utils and Airtable.ts inside it. Now, add in the following in Airtable.ts:
import Airtable from "airtable";// AuthenticateAirtable.configure({ apiKey: process.env.AIRTABLE_API_KEY,});// Initialize a baseconst base = Airtable.base(process.env.AIRTABLE_BASE_ID!);// Reference a tableconst table = base(process.env.AIRTABLE_TABLE_NAME!);export { table };As you can see we are going to need to install a new package called airtable:
npm i airtable # npmyarn add airtable # yarnNow, we need to update the api to first check if the wallet is present in the table. So, in api/generate-mint-sig.ts add the following:
const record = await table .select({ fields: ["Addresses", "minted"], filterByFormula: `NOT({Addresses} != '${address}')`, }) .all(); if (record.length === 0) { res.status(404).json({ error: "User isn't in allowlist", }); }So, this queries the airtable to get the records of the address present in the addresses column and we are checking if the length record is 0. If it is 0, then we are not allowing the user to mint and send an error. We will also wrap the part where we send the response in an else block. The api should now look similar to this:
import type { NextApiRequest, NextApiResponse } from "next";import { ThirdwebSDK } from "@thirdweb-dev/sdk";import { ethers } from "ethers";import { table } from "../../utils/Airtable";const generateMintSignature = async ( req: NextApiRequest, res: NextApiResponse) => { const { address } = JSON.parse(req.body); const record = await table .select({ fields: ["Addresses", "minted"], filterByFormula: `NOT({Addresses} != '${address}')`, }) .all(); if (record.length === 0) { res.status(404).json({ error: "User isn't in allowlist", }); } else { const sdk = new ThirdwebSDK( new ethers.Wallet( process.env.PRIVATE_KEY as string, ethers.getDefaultProvider(process.env.ALCHEMY_API_URL) ) ); const edition = sdk.getEdition( "0x62C84CC051544c43d05a5Ff0E8Da596fBdB15032" ); try { const signedPayload = await edition.signature.generate({ tokenId: 0, quantity: "1", to: address, }); res.status(200).json({ signedPayload: signedPayload, }); } catch (err) { res.status(500).json({ error: err, }); } }};export default generateMintSignature;In the mintWithSignature function we will now add a simple alert to show the error if the user is not in the allowlist.
const mintWithSignature = async () => { const signedPayloadReq = await fetch(`/api/generate-mint-sig`, { method: "POST", body: JSON.stringify({ address }), }); const signedPayload = await signedPayloadReq.json(); if (signedPayload.error) { alert(signedPayload.error); return; } try { const nft = await edition?.signature.mint(signedPayload.signedPayload); return nft; } catch (err) { console.error(err); return null; } };Now if you try minting you should now see an error that you are not in the allowlist. But if you add the address you are using to mint to the address column, it would allow you to mint!
Setting the minted to true when the address mints
We will create another api to not expose the api keys, so in the api folder create a new file set-minted.ts and add the following:
import type { NextApiRequest, NextApiResponse } from "next";import { table } from "../../utils/Airtable";const generateMintSignature = async ( req: NextApiRequest, res: NextApiResponse) => { const { address } = JSON.parse(req.body); const record = await table .select({ fields: ["Addresses", "minted"], filterByFormula: `NOT({Addresses} != '${address}')`, }) .all(); try { record[0].updateFields({ minted: "true", }); res.status(200).json({ success: true, }); } catch (err) { res.status(500).json({ error: err, }); }};export default generateMintSignature;Basically what this code block is doing is getting the record of the address and then updating the minted column to true. And for basic error handling if there is an error we will return the error. Now, in the mintSignature function I will add the fetch request to the set-minted api if the nft was minted successful like this:
if (nft) { await fetch(`/api/set-minted`, { method: "POST", body: JSON.stringify({ address }), });}If you try minting again and check the airtable it would now set the minted column to true! If you get an error like the column name not found then make sure that the names are same.
Adding users to allowlist
I am going to add a simple button for adding users to allowlist. You can even create an early access form or something similar. So, create a button in index.tsx:
<button>Add wallet to allowlist</button>Now, let's create an api to add the wallet to the allowlist. So, create a new file add-to-allowlist.ts and add the following:
import type { NextApiRequest, NextApiResponse } from "next";import { table } from "../../utils/Airtable";const addToAllowlist = async (req: NextApiRequest, res: NextApiResponse) => { const { address } = JSON.parse(req.body); const record = await table .select({ fields: ["Addresses", "minted"], filterByFormula: `NOT({Addresses} != '${address}')`, }) .all(); if (record.length > 0) { res.status(400).json({ success: false, error: "User is already in allowlist", }); } if (record.length === 0) { try { await table.create([ { fields: { Addresses: address, }, }, ]); res.status(200).json({ success: true, message: "User added to allowlist", }); } catch (err) { res.status(500).json({ success: false, error: err, }); } }};export default addToAllowlist;Here, we are first checking if the user already exists and if it exists we will return an error saying that the user is already in the allowlist. If the user doesn't exist we will create the user in the allowlist. Now, let's head back to the frontend code and create a function to call this api:
const addWallet = async () => { const payload = await fetch(`/api/add-to-allowlist`, { method: "POST", body: JSON.stringify({ address }), }); const payloadJson = await payload.json(); console.log(payloadJson); if (payloadJson.success) { alert(payloadJson.message); } else { alert(payloadJson.error); } };Finally, add an onClick event to the button:
<button onClick={addWallet}>Add wallet to allowlist</button>If you try switching the connected wallet or remove the wallet from the database you will see that the user's wallet address is being added to the base!
Minor improvements (Optional)
Let's just add some minor improvements to our app!
Styling
Currently the site looks pretty boring, so let's add some simple styling. Create a new file globals.css in the styles folder and add the following to reset the styles:
html,body { padding: 0; margin: 0; font-family: -apple-system, BlinkMacSystemFont, Segoe UI, Roboto, Oxygen, Ubuntu, Cantarell, Fira Sans, Droid Sans, Helvetica Neue, sans-serif;}a { color: inherit; text-decoration: none;}* { box-sizing: border-box;}Import it in the _app.tsx file:
import "../styles/globals.css";Now, create a new file Home.module.css in the styles folder and add these simple stylings:
.container { display: flex; flex-direction: column; align-items: center; justify-content: center; height: 100vh; background-color: #c0ffee;}.container > button,.btn { background: #1ce; color: #fff; font-size: 1rem; padding: 0.5rem 1rem; border: none; border-radius: 0.5rem; cursor: pointer;}.btn { margin-top: 10px;}.NFT { display: flex; flex-direction: column; justify-content: center;}.nftDesc { margin: 10px 0px; font-size: 0.8rem; color: #000;}.nftDesc > span { font-weight: bold;}Now let's implement these stylings in index.tsx by adding the classNames:
<div className={styles.container}> {address ? ( <div className={styles.NFT}> {nftData?.image && ( <Image src={nftData?.image} alt={nftData?.name} width="280" height="210" objectFit="contain" /> )} <p className={styles.nftDesc}> <span>Name:</span> {nftData?.name} </p> <p className={styles.nftDesc}> <span> Description:</span> {nftData?.description} </p> <button className={styles.btn} onClick={addWallet}> Add wallet to allowlist </button> <button className={styles.btn} onClick={() => mintWithSignature()}> Mint </button> </div> ) : ( <button onClick={connectWithMetamask}>Connect with Metamask</button> )} </div>Our website now looks much better!

Loading
Currently if you click the mint button or add to allowlist button nothing happens for a while, so let's add a loading text to tell the user that something is happening. So, create 2 states in the Home.tsx file:
const [addWalletLoading, setAddWalletLoading] = useState(false);const [mintLoading, setMintLoading] = useState(false);Add this ternary operator for changing the text of the buttons and disable the button if it is loading:
<button className={styles.btn} disabled={addWalletLoading} onClick={addWallet}> {addWalletLoading ? "loading..." : "Add wallet to allowlist"}</button> <button className={styles.btn} disabled={mintLoading} onClick={() => mintWithSignature()}> {mintLoading ? "loading..." : "Mint"}</button>Nothing happens yet because we aren't changing the states so, in the functions we need to change the loading states:
const mintWithSignature = async () => { setMintLoading(true); const signedPayloadReq = await fetch(`/api/generate-mint-sig`, { method: "POST", body: JSON.stringify({ address }), }); const signedPayload = await signedPayloadReq.json(); if (signedPayload.error) { alert(signedPayload.error); return; } try { const nft = await edition?.signature.mint(signedPayload.signedPayload); if (nft) { await fetch(`/api/set-minted`, { method: "POST", body: JSON.stringify({ address }), }); } return nft; } catch (err) { console.error(err); return null; } finally { setMintLoading(false); } }; const addWallet = async () => { setAddWalletLoading(true); const payload = await fetch(`/api/add-to-allowlist`, { method: "POST", body: JSON.stringify({ address }), }); const payloadJson = await payload.json(); setAddWalletLoading(false); if (payloadJson.success) { alert(payloadJson.message); } else { alert(payloadJson.error); } };If you now try to click any of the buttons you would see the loading text for a second.
Error handling
Currently, the user can be on the wrong network and get weird errors, so we will disable the button if the user is not on the correct network.
Get access to the network by using the useNetwork hook:
const network = useNetwork();It will be imported from the thirdweb sdk:
import { useAddress, useEdition, useMetamask, useNetwork,} from "@thirdweb-dev/react";Now, in the mint button add the checks-
<button className={styles.btn} disabled={mintLoading || network[0]?.data?.chain?.id !== ChainId.Mumbai} onClick={() => mintWithSignature()}> {network[0]?.data?.chain?.id === ChainId.Mumbai ? mintLoading ? "loading..." : "Mint" : "Switch to Mumbai"}</button>I built this Dapp on the Mumbai network so I am checking for the Mumbai network but you need to do this for the network you built upon.
Conclusion
This was a lot, now give yourself a pat on the back and share your amazing apps with us! If you want to have a look at the code, check out the GitHub Repository.
Original Link: https://dev.to/thirdweb/create-a-dynamic-allowlist-with-airtable-and-nextjs-4c13
Dev To
More About this Source Visit Dev To