
An Interest In:
Web News this Week
- March 30, 2024
- March 29, 2024
- March 28, 2024
- March 27, 2024
- March 26, 2024
- March 25, 2024
- March 24, 2024
Some of Our Sources
- Mashable
- Technology Review
- TutsPlus - Code
- Just Creative
- Joshua Blankenship
- Abduzeedo
- Web Design Ledger
- Stylized Web
- Web Resource Source
- Daily Now
Help Webnuz
Referal links:
How to Integrate SendGrid in Your Open Source Ecommerce
Medusa is an open source headless commerce platform that aims to provide a good developer experience. One thing it does well is it integrates with other popular services hassle-free to provide developers and merchants alike with more features in their ecommerce store.
SendGrid is an email delivery and marketing service that allows you to create personalized emails for your customers. SendGrid makes it easy for you to customize your email templates without any technical knowledge.
In this tutorial, youll learn about how you can integrate SendGrid in Medusa as the primary email notification system using the ready-made plugin.
Integration Features
By integrating SendGrid and Medusa youll be able to send emails to your customers and users in the following cases:
- Order-related events include new orders, shipments created, and orders canceled.
- Swaps and Returns related events including new return requests of orders and items returned successfully.
- When Gift Cards are created in an order.
- User-related events including reset passwords for both customers and admin users.
- Restock Notifications for when product stocks are low.
This plugin also allows you to cater to multiple languages using localized templates if you define them in your SendGrid account.
Prerequisites
Medusa Server
If you dont have a Medusa server set up, make sure to follow the Quickstart guide to get started in minutes.
Redis
In Medusa, events are triggered asynchronously and Subscribers handle these events if they are subscribed to them. This is done through Redis which is used as an event queue. So, you need to have Redis installed and configured on your Medusa server before you proceed.
You can follow the development environment setup guide for steps on this.
SendGrid Account
Lastly, you need a SendGrid account that youll connect with Medusa. If you dont have one, make sure to create one first. You also need to set up a single sender in your account. If you dont you wont be able to send emails through your SendGrid account.
Obtain SendGrid API Key
The SendGrid plugin requires an API key to give Medusa access to send emails through SendGrid.
To obtain an API Key from SendGrid, choose from the sidebar on your SendGrid dashboard Settings > API Keys.
Then, click on the Create API Key button.

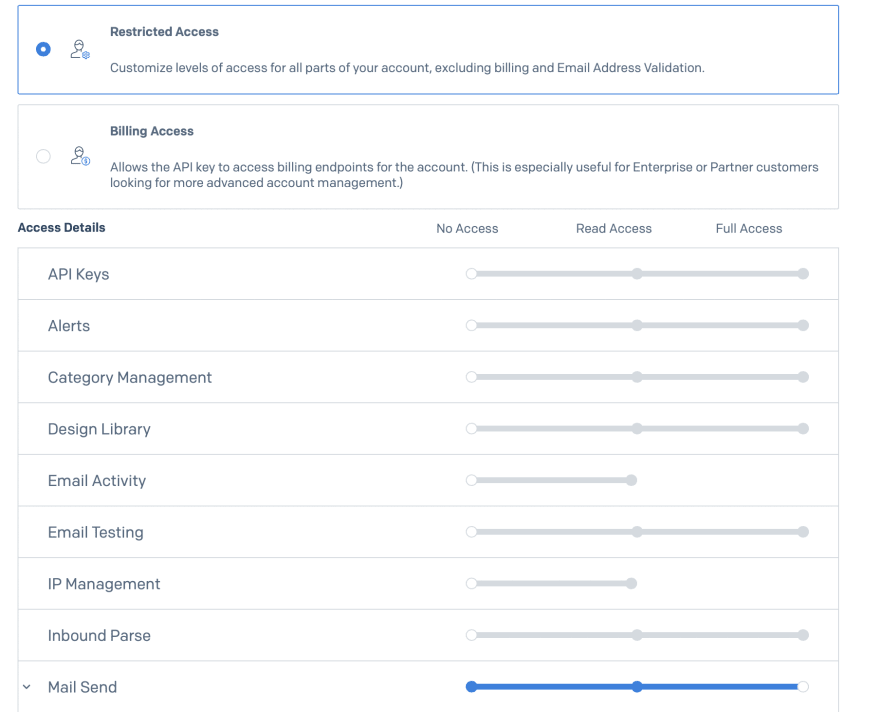
API keys in SendGrid have 3 types of access: Full Access, Restricted Access, and Billing Access. To make sure this API key allows Medusa to send emails on your behalf, you should either choose Full Access or Restricted Access giving it at least the Mail Send access.
Once youre done click Create & View. This will create the API key and youll be allowed to view it only once. So, make sure to copy it for later use.
Create Email Templates
As mentioned earlier, the SendGrid plugin will send emails to customers in many cases. For example, when a customer places an order. These emails are only sent if you provide the necessary template ID for each event.
When these emails are sent from Medusa to SendGrid, Medusa also passes variables that you can use to display certain information in the email. For example, for the order placed email you can display the order total, the items ordered, and more information.
So, you should create a Dynamic Template for every type of email you want this plugin to send. Dynamic templates allow you to display the variables sent from Medusa using Handlebars.
If youre interested in checking out all types of emails you can send in this plugin and what data your dynamic template will receive, be sure to check out the Template Reference in the Medusa documentation.
Order Placed Template
In this tutorial, youll just be creating a template for the order placed emails.
To create the email template, from the sidebar go to Email API > Dynamic Templates. Then, click Create a Dynamic Template.

Youll then be asked to give your template a name. Once youre done, click Create. The new template will be added to the list of templates on the page. If you click the template name, youll see the template ID. Youll need this one later on.
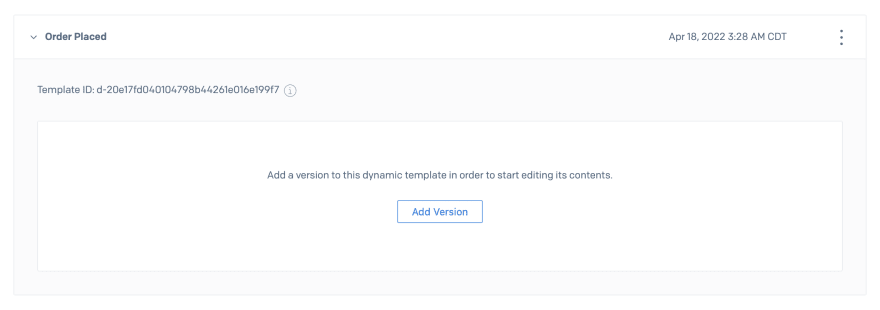
To edit the content of the email, click on Add Version. You can then choose a Blank Template or a SendGrid template. For this tutorial, youll choose the Blank Template.
After that, youll be asked to select a Design Editor or Code Editor. Choose the Design Editor.

This will take you to the drag & drop email editor. For the simplicity of the tutorial, youll be adding two things to the email:
- The customers name
- The order total
To do that, click on the Build tab then drag the Code module to the email content. This will open a code editor.
Add the following in the code editor:
<p>Hello, {{#if customer.first_name}} {{ customer.first_name }}{{ else }} {{ shipping_address.first_name }}{{/if}}</p><p>Your order total: {{ total }}</p>You use the customer, shipping_address, and total variables that will be sent from Medusa. Notice that the customers first name will not be set if the customer checks out as a guest. So, you display the name on their shipping address instead.
You can check out more variables that will be sent for the Order Placed Template in the Template Reference.
Then click Update. After that, click on the Save button at the top.
You have everything you need now to make the integration happen.
Install the SendGrid Plugin
In the root directory of your Medusa server, run the following command to install the SendGrid plugin:
npm i medusa-plugin-sendgridAdd Plugin Configuration
Next, youll need to add the API Key, the send from email, and the Template ID in your .env file. Notice that youll need to add the Template ID of all templates you create:
SENDGRID_API_KEY=<API_KEY>SENDGRID_FROM=<YOUR_SEND_FROM>SENDGRID_ORDER_PLACED_ID=<ORDER_PLACED_TEMPLATE_ID>Where <API_KEY> is your API Key, <YOUR_SEND_FROM> is the single sender email address you set up in SendGrid, and <ORDER_PLACED_TEMPLATE_ID> is the ID of the template you created earlier.
Then, in the medusa-config.js file in the root of your Medusa server, add the SendGrid plugin into the plugins array:
const plugins = [ ..., { resolve: `medusa-plugin-sendgrid`, options: { api_key: process.env.SENDGRID_API_KEY, from: process.env.SENDGRID_FROM, order_placed_template: process.env.SENDGRID_ORDER_PLACED_ID, } }];And thats all you need to integrate SendGrid with Medusa.
Test the Integration
To test the integration, you need to create an order. The simplest way to do that is to install either Medusas Next.js or Gatsby starter storefronts.
After installing one of them, start the Medusa server from its directory:
npm startThen, start your Medusa storefront and create an order.

If you check the email you made the order with, youll receive an email and youll see that the first name and order total are replaced based on your order data.

Whats Next
There are still more use cases you can cater for using this plugin. Make sure to check out the Template Reference to know what kind of emails you can send and what data they hold.
As mentioned earlier, you can also send localized emails with this plugin. Check out the SendGrid plugin documentation for more details on how you can do that.
Should you have any issues or questions related to Medusa, then feel free to reach out to the Medusa team viaDiscord.
Original Link: https://dev.to/medusajs/how-to-integrate-sendgrid-in-your-open-source-ecommerce-1e4d
Dev To
More About this Source Visit Dev To