
Some of Our Sources
- BoingBoing
- Techcrunch
- Team Treehouse
- Spoon Graphics
- Naldz Graphics
- Crazy Leaf Design
- Reencoded
- Stylized Web
- Dev To
- TechPowerUp
Help Webnuz
Referal links:
Creating a Local Kubernetes Cluster from the Ground Up
From the ground up? Yep, from the ground up!
Overview
Creating a Kubernetes cluster can be tricky.
There are multiple tools designed just for that job. There are even companies that provide "installing K8s" as a service. And, to create a production-ready Kubernetes cluster with all the best practices in mind requires detailed designing and planning.
So, the scope of this article isn't to help you to create a "production-ready" cluster.
However, after reading this article, you should be able to create a local "testing" Kubernetes cluster, and for the developing and testing of DevStream, it should more than suffice.
Even for a local testing cluster, there are multiple tools you can choose from. For example, there is minikube, and there is kind. kind is a tool for running local Kubernetes clusters using Docker container nodes. kind was primarily designed for testing Kubernetes.
In this article, we are going with kind. We are not opinionated; we are not saying that kind is better than minikube or vice versa; we are merely choosing a tool to get the job done. If you are more familiar with other tools, it's completely fine!
This article uses macOS as our local development environment. If you are using Windows or Linux, you can still read this post to get a general idea and achieve the same.
Install Docker
Docker works in a way using Linux's Namespace and Cgroup. It's quite easy to install Docker on Linux. On macOS and Windows, Docker runs with virtualization. However, we do not need to worry too much detail here, because it's quite simple to download and run Docker Desktop.
Go to https://www.docker.com/products/docker-desktop, find the correct version of Docker Desktop (Intel/amd64, or M1/arm64):

Double click on the Docker.dmg file, and we see the installation interface like the following:
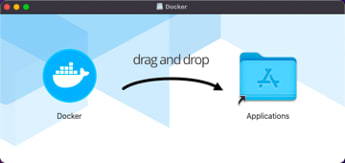
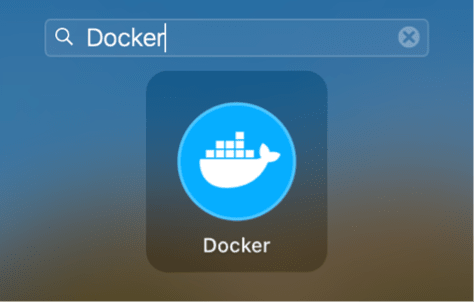
Simply drag "Docker" to our "Applications," and within a few seconds, it's done! We can start it from the Launchpad:
Wait a few seconds and we can see the starting page:

Click the gear" icon to change settings about Docker Desktop. For example, if we need to run a lot of containers, we might need to increase the memory. Here, we changed the memory to 4.00 GB:
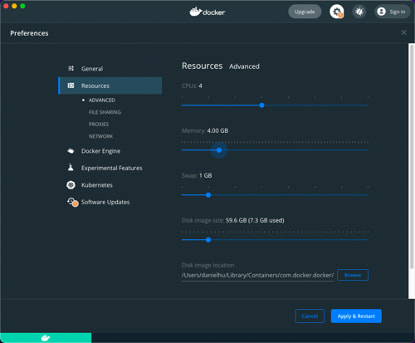
Remember to "Apply & Restart" to ensure the changes are effective.
Introduction to kind
kind (Kubernetes-in-docker) uses a Docker container as a "node" to deploy Kubernetes. It's mainly used for testing Kubernetes itself.
kind is simple, containing a command-line tool named kind and a Docker image which has Kubernetes and systemd. kind uses Docker on the host machine to create a container, which runs systemd, which in turn runs the container runtime, kubelet, and other Kubernetes components. So, we end up with a whole Kubernetes cluster in one container.
Note that although in the explanation above, the Cluster is only a single node cluster, it's possible to create a multi-node Kubernetes cluster.
Creating a Kubernetes Cluster with Kind at the Click of a Button
- clone DevStream's repo: https://github.com/devstream-io/devstream
- cd devstream;
make e2e-up
That's it.
If you check out the Makefile, you will see it actually runs a shell script that runs kind to create the cluster.
However, you wouldn't be satisfied if we end this article right here, right now, would you.
So, let's have a deep dive into kind. Fasten your seat belt, because we are gonna fly!
Creating a Kubernetes Cluster with Kind at Two Clicks of a Button
On GitHub, we can find the latest release of kind: https://github.com/kubernetes-sigs/kind/releases.
Choose relatively new versions, and install:
# method 1: download pre-compiled binarycd /tmpcurl -Lo ./kind https://github.com/kubernetes-sigs/kind/releases/download/v0.12.0/kind-darwin-arm64chmod +x ./kindsudo mv kind /usr/local/bin/# method 2: go get and compile locallygo get sigs.k8s.io/[email protected]We can also download the Docker image beforehand. Here we choose v1.22 of Kubernetes:
kindest/node:v1.22.0@sha256:b8bda84bb3a190e6e028b1760d277454a72267a5454b57db34437c34a588d047Create cluster:
kind create cluster --image=kindest/node:v1.22.0 --name=devSample output:
Creating cluster "dev" ... Ensuring node image (kindest/node:v1.22.0) Preparing nodes Writing configuration Starting control-plane Installing CNI Installing StorageClass Set kubectl context to "kind-dev"You can now use your cluster with:kubectl cluster-info --context kind-devHave a question, bug, or feature request? Let us know! https://kind.sigs.k8s.io/#community Follow the hints above, next, let's run kubectl cluster-info --context kind-dev to switch the context and make sure you are in the right Kubernetes context.
$ kubectl get nodeNAME STATUS ROLES AGE VERSIONdev-control-plane Ready control-plane,master 7m4s v1.22.0$ kubectl get pod -n kube-systemNAME READY STATUS RESTARTS AGEcoredns-78fcd69978-hch75 1/1 Running 0 10mcoredns-78fcd69978-ztqn4 1/1 Running 0 10metcd-dev-control-plane 1/1 Running 0 10mkindnet-l8qxq 1/1 Running 0 10mkube-apiserver-dev-control-plane 1/1 Running 0 10mkube-controller-manager-dev-control-plane 1/1 Running 0 10mkube-proxy-mzfgc 1/1 Running 0 10mkube-scheduler-dev-control-plane 1/1 Running 0 10mNow we have a local cluster for testing and developing Kubernetes.
Creating a Kubernetes Cluster with Kind at Three Clicks of a Button
A minimum highly-available Kubernetes cluster is composed of 3 nodes. In this section, let's see how to create a multi-node, highly-available cluster locally using kind.
kind Cluster Config
We can pass a config file to kind by using the --config parameter. Let's have a look at a kind config file:
# this config file contains all config fields with comments# NOTE: this is not a particularly useful config filekind: ClusterapiVersion: kind.x-k8s.io/v1alpha4# patch the generated kubeadm config with some extra settingskubeadmConfigPatches:- | apiVersion: kubelet.config.k8s.io/v1beta1 kind: KubeletConfiguration evictionHard: nodefs.available: "0%"# patch it further using a JSON 6902 patchkubeadmConfigPatchesJSON6902:- group: kubeadm.k8s.io version: v1beta2 kind: ClusterConfiguration patch: | - op: add path: /apiServer/certSANs/- value: my-hostname# 1 control plane node and 3 workersnodes:# the control plane node config- role: control-plane# the three workers- role: worker- role: worker- role: workerWe can see that the config has two sections: the upper part being kubeadm related stuff and the lower part being nodes related settings. Apparently, the "nodes" part is where we are going to edit to achieve a multi-node cluster.
1 Control Plane Node, 3 Worker Nodes Cluster
Let's create a config named multi-node-config.yaml with the following content:
kind: ClusterapiVersion: kind.x-k8s.io/v1alpha4nodes:- role: control-plane- role: worker- role: worker- role: workerThen run:
$ kind create cluster --config multi-node-config.yaml \ --image=kindest/node:v1.22.0 --name=dev4We will get some output similar to the previous single-node cluster output, except for the "Joining worker nodes" part:
Creating cluster "dev4" ... Ensuring node image (kindest/node:v1.22.0) Preparing nodes Writing configuration Starting control-plane Installing CNI Installing StorageClass Joining worker nodes Set kubectl context to "kind-dev4"You can now use your cluster with:kubectl cluster-info --context kind-dev4Thanks for using kind! Let's run the following command to check out our new cluster:
$ kubectl cluster-info --context kind-dev4Kubernetes control plane is running at https://127.0.0.1:51851CoreDNS is running at https://127.0.0.1:51851/api/v1/namespaces/kube-system/services/kube-dns:dns/proxyTo further debug and diagnose cluster problems, use 'kubectl cluster-info dump'.$ kubectl get nodeNAME STATUS ROLES AGE VERSIONdev4-control-plane Ready control-plane,master 3m28s v1.22.0dev4-worker Ready <none> 2m54s v1.22.0dev4-worker2 Ready <none> 2m54s v1.22.0dev4-worker3 Ready <none> 2m54s v1.22.0From the result above, we can see that this cluster has 1 control plane node and 3 worker nodes.
3 Control Plane Nodes, 3 Worker Nodes, Highly Available Cluster
Note: "Highly available" here only means that we have three control plane nodes. It's not strictly "highly available" because apparently, the three control plane nodes are actually on the same host, so when the host is down, everything is gone.
Prepare the ha-config.yaml with the following content:
kind: ClusterapiVersion: kind.x-k8s.io/v1alpha4nodes:- role: control-plane- role: control-plane- role: control-plane- role: worker- role: worker- role: workerRun:
$ kind create cluster --config ha-config.yaml \ --image=kindest/node:v1.22.0 --name=dev6We can see familiar outputs, with the exception being "Configuring the external load balancerJoining more control-plane nodes":
Creating cluster "dev6" ... Ensuring node image (kindest/node:v1.22.0) Preparing nodes Configuring the external load balancer Writing configuration Starting control-plane Installing CNI Installing StorageClass Joining more control-plane nodes Joining worker nodes Set kubectl context to "kind-dev6"You can now use your cluster with:kubectl cluster-info --context kind-dev6Have a nice day! Some fun facts:
- the number of boxes after "Preparing nodes" equals the number of nodes
- the final greeting message is different: it was "Thanks for using kind! " previously and now it's "Have a nice day! "
Heck, those kind developers sure went some extra miles to enhance the user experience!
Check the cluster:
$ kubectl cluster-info --context kind-dev6Kubernetes control plane is running at https://127.0.0.1:52937CoreDNS is running at https://127.0.0.1:52937/api/v1/namespaces/kube-system/services/kube-dns:dns/proxyTo further debug and diagnose cluster problems, use 'kubectl cluster-info dump'.$ kubectl get nodeNAME STATUS ROLES AGE VERSIONdev6-control-plane Ready control-plane,master 8m19s v1.22.0dev6-control-plane2 Ready control-plane,master 7m46s v1.22.0dev6-control-plane3 Ready control-plane,master 7m20s v1.22.0dev6-worker Ready <none> 7m v1.22.0dev6-worker2 Ready <none> 7m v1.22.0dev6-worker3 Ready <none> 7m v1.22.0We can see this cluster has 3 control plane nodes.
So far, we have mastered how to use kind to create a multi-node Kubernetes cluster locally.
Advanced kind Features
Now that we know how to create clusters using kind, let's have a look at some advanced operations which could help you better use the clusters.
Port Mapping
Imagine you are running an Nginx container listening on port 8080 in a kind cluster but you wish the outside world (outside of the cluster) to access the Nginx port. To achieve this, we can add the extraPortMappings configuration:
kind: ClusterapiVersion: kind.x-k8s.io/v1alpha4nodes:- role: control-plane extraPortMappings: - containerPort: 8080 hostPort: 8080 listenAddress: "0.0.0.0" protocol: tcpIn this way, the port on the pod 8080 is mapped to the port on the host.
Expose kube-apiserver
Sometimes we want to install Kubernetes with kind on one host, but access the cluster from another host. By default, the kube-apiserver installed by kind listens on 127.0.0.1 (with a random port.) To make the kind cluster accessible from another host, we need to make kube-apiserver listen on a network interface (for example, eth0.)
In the config file, we add networking.apiServerAddress. The IP is your local nic's IP:
kind: ClusterapiVersion: kind.x-k8s.io/v1alpha4networking: apiServerAddress: "192.168.39.1"Enable Feature Gates
Feature gates are a set of key=value pairs that describe Kubernetes features that are only available in Alpha, Beta or GA stage.
If we want to try some of those features, we can enable Feature Gates. In the config file, use:
kind: ClusterapiVersion: kind.x-k8s.io/v1alpha4featureGates: FeatureGateName: trueImporting Images
Because the Kubernetes cluster is in fact running in a Docker container, by default, it can't access Docker images that are on the host. However, we can import those images from hosts to the Kubernetes cluster created by kind:
# import my-image:v1kind load docker-image my-image:v1 --name dev# import my-image.tarkind load image-archive my-image.tar --name devWith this method, when we are building a new Docker image on the host which we want to run in a kind Kubernetes cluster, we can:
docker build -t my-image:v1 ./my-image-dirkind load docker-image my-image:v1kubectl apply -f my-image.yamlHow to see the images that are available in the kind Kubernetes cluster? Easy:
docker exec -it dev-control-plane crictl imagesdev-control-plane is the name of the kind cluster.
You can also use crictl -h to see all the supported commands. For example, we can delete an image by using crictl rmi <image_name>.
Summary
Have fun playing with Kubernetes locally!
If you like this article, please like, comment, and subscribe. See you in the next article!
Original Link: https://dev.to/devstream/creating-a-local-kubernetes-cluster-from-the-ground-up-1pln
Dev To
More About this Source Visit Dev To