
An Interest In:
Web News this Week
- April 2, 2024
- April 1, 2024
- March 31, 2024
- March 30, 2024
- March 29, 2024
- March 28, 2024
- March 27, 2024
Some of Our Sources
- BoingBoing
- Techcrunch
- Web Designer Wall
- TutsPlus - Design
- Vandelay Design
- You The Designer
- Web Designer Depot
- My Ink Blog
- Web Design Ledger
- Willems Lab
Help Webnuz
Referal links:
How to create a dApp with React & Solidity on Ethereum Blockchain
In this tutorial I will show you how you can build a fullstack dApp, that will run on Ethereum and many Layer 2 platforms (Polygon, Celo, ..)
We will start with the backend part, were we will write an Smart Contract with help of Hardhat and Solidity.
Afterwards we build a frontend with React and Ethers.js to interact with our smart contract. We will also use IPFS with the help of the Pinatata API.
What is a dApp?
dApp stands for decentralised App. In a classic way an app would run on a single server (maybe the backend is on another server). In a decentralised world the the frontend part will be served on IPFS (where a node in a distributed network is servering the files) and the backend will be running on a Smart Contract or Program on a node in a decentralised network.

You must be that tall to ride
I know everyone is hyped about web3, and this is nice ! really. But Web3 is an extension to web2 so please, make sure that you know the basics of web development before you continue with this tutorial.
Tools we are using
Now that we know what a dApp is in general, here are the tools we are going to use to build one.
Frontend part:
React
Ether.js (for communicating with the smart contract)
Backend part:
Solidity (writing the smart contract)
Hardhat (enviornment for easily write, test and deploy solidity code)
Starter Template
I will use this starter template for this tutorial, you can get it here: 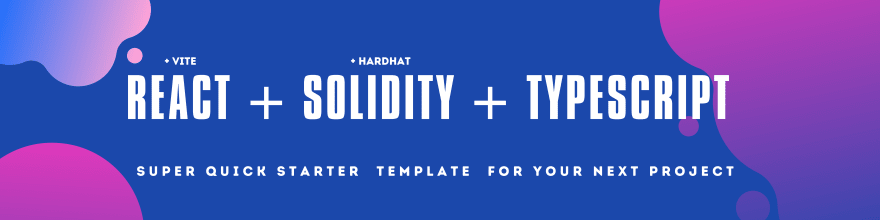
https://github.com/XamHans/React-Solidity-Typescript-Starter
The finished project can be found here:
https://github.com/XamHans/image-contest
What we will build
We are going build an voting app. Users can upload and vote for images. 
Smart Contract for the backend
Lets see what needs to be done from the backend part to achieve this dApp goal. We need a way to
create a canidadate ( a candidate is simply a user that has uploaded
an image)Get all candidates with their images
Increase the votes from one candidate, if a user likes the image from
that specific candidate
Head over to /backend/contracts/ExmapleContract.sol
delete the boilerplate/example code in there and rename the file and contract to VoteManager
#### Defining the struct for our candidates
We are going to use a struct ( is like a class but without any implementation logic) for defining the properties of a candidate.
struct Candidate {
        uint id;
        uint totalVote;
        string name;
        string imageHash;
        address candidateAddress;
    }
totalVote keeps track of the current canddiates votes
imageHash will store the IPFS Hash for the image
candidateAddress is the public key address of the candidate
Lets start with some logic, create a candidate
mapping(address => Candidate) private candidates;mapping(uint=> address) private accounts;function registerCandidate(string calldata _name, string calldata _imageHash) external { require(msg.sender != address(0), "Sender address must be valid"); candidatesIds.increment(); uint candidateId = candidatesIds.current(); address _address = address(msg.sender); Candidate memory newCandidate = Candidate(candidateId, 0, _name, _imageHash, _address); candidates[_address] = newCandidate; accounts[candidateId] = msg.sender; emit candidateCreated(_address, _name); }registerCandidate is an external function, this means that this function can only be called from outside the contract. You could also mark it as public, but this would be gas inefficient.
The function takes two parameters, the name and the image from the candidate (ipfs hash). These two parameters are from memory type calldata.
calldatais a non-modifiable, non-persistent area where function
arguments are stored
We use require(msg.sender != address(0)); to check if the caller of the function really exists.
Require acts like an early out, where the condition (inside thebrackets) is checked. If the condition is false the error message is returned.
In the next two following lines we make use of openzeppelin counter to manage our ID's. With candidatesIds.increment();*we increase the value by 1 and get the current value with *candidatesIds.current(); In order to use the address of the caller we need to "parse" it before usage, this is simply achieved with address(msg.sender).
OpenZeppelin Contracts helps you minimize risk by using battle-tested libraries of smart contracts for Ethereum and other blockchains, learn more here: https://openzeppelin.com/contracts/
We now can create a new Candidate by passing all neccessary parametersmemory newCandidate = Candidate(candidateId, 0, _name, _imageHash, _address);
Look out here to the memory keyword before "newCandidate". In Solidity you have to explitcity set the storage type if you want to create new objects. Storage from type memory will live as long as the function is executed, if you need permantent storage use storage type.
candidates[_address] = newCandidate; Here we create a new key->value assignment in the candidates mapping. The key is the address of the caller (the candidate) and the value is the newly created candidate object. We use this mapping to organize our candidates, this mapping is permanently stored on the blockchain because its a state variable.
State Variables Variables whose values are permanently stored in a contract storage.
Local Variables Variables whose values are present till function is executing.
accounts[candidateId] = msg.sender;Same game but with candidateId as key and the caller address as a value. You might ask why the heck we need this mapping, but just be patient, it will all make sense soon :)
Now lets implement the vote function
function vote(address _forCandidate) external { candidates[_forCandidate].totalVote += 1; emit Voted(_forCandidate, msg.sender, candidates[_forCandidate].totalVote);}The vote function is super simple. We pass in the address of the candidate who will recieve the vote.
candidates[_forCandidate].totalVote += 1;In candidates mapping we use the address as our key to get the candidate object and increase the totalVote by one.
After that we will emit an event
emit Voted(_forCandidate, candidates[_forCandidate].totalVote);that event will act as an response. It contains informations that we will use on the frontend to update the UI.
The last function, get all candidates
function fetchCandidates() external view returns ( Candidate[] memory) { uint itemCount = candidatesIds.current(); Candidate[] memory candidatesArray = new Candidate[](itemCount); for (uint i = 0; i < itemCount; i++) { uint currentId = i + 1; Candidate memory currentCandidate = candidates[accounts[currentId]]; candidatesArray[i] = currentCandidate; } return candidatesArray; }Maybe you see this code and ask, heee, why we not just return the mapping? Well I also thought this, googled it and it turned out we cant. Therefore we will need a helper array to store our candidates. We get the current id (just a simple number) with
candidatesIds.current();okay know we know the maximum for our iteration and we store it in a variable called itemCount, we also use this variable in order to create our helper array candidatesArray . Here we will make use of our helper mapping accounts.
accounts
| 0 | 0x1234.. |
|--|--|
| 1 | 0x8521.. |
candidates
| 0x1234.. | {...} |
|--|--|
| 0x8521.. | {...} |
Otherwise we would have no chance to iterate over the candidates because we dont know the keys (addresses of the candidates) to iterate over. We could used ID as the key for the candidates mapping but then the vote function would more complicated.
Wow there were many "woulds" in the previous section.
Take a short break, we will continue with the deployment of the smart contract.
Compile & Deploy the VoteManager.sol
1) Spin up local testnet
First we need to spin up our local ethereum blockchain. With the template starter you can simply use
npm run testnet or with npx hardhat node
2) Compile contract
Before we deploy the contract we need to compile it first. Open a new terminal and write
npm run compile or npx hardhat compile
This will also create the ABI. The ABI is essential for other programs (like our frontend) in order to communicate with the contract. It defines what functions can be called with the corresponding parameters.
3) Deploy contract
First go the deploy script (backend/scripts/deploy.ts) and make sure ethers.getContractFactory is grabbing the right contract 
Finally deploy the votemanager contract to the local testnet with
npm run deploy or npx hardhat run --network localhost scripts/deploy.ts
Copy the address of the deployed contract we will need it afterwards.
Connect MetaMask to the local testnet
If you have spinned up the local testnet you will see an output like this:
copy one of these private keys and head over to
MetaMask --> Click on Profile Pictrue --> Import Account
Paste the private key to the input field and make sure that you have set up the local network.
Setup the frontend
Head over to the frontend/App.tsx and create these state variables
const [contract, setContract] = useState()const [selectedImage, setSelectedImage] = useState()const [candidates, setCandidates] = useState<>([])const [candidateFormData, setCandidateFormData] = useState({ name: '', imageHash: '' })const contractAddress = "0xf899d9772a6BB9b251865ed33dc2CC733Ab4Bd65"Paste the copied address to the contractAddress variable.
Now copy this useEffect and paste it below the variables section.
useEffect(() => { setContract(getContract(contractAddress))}, [])In this useEffect we assign our contract with the help of the helper function getContract and pass in the address of the contract. The helper functions return the contract, lets see how its done.
import { Contract, ethers } from "ethers";import VoteManagerContract from '../../../../backend/artifacts/contracts/VoteManager.sol/VoteManager.json'export default function getContract(contractAddress: string): Contract { const provider = new ethers.providers.Web3Provider( (window as any).ethereum); const signer = provider.getSigner(); const contract = new ethers.Contract( contractAddress, VoteManagerContract.abi, signer ); return contract;}
First we need to create an Ethereum Provider. A provider is an abstraction for connection to a blockchain, in this case for Ethereum. MetaMask injects a global API into websites withwindow.ethereum. This API allows websites to request users' Ethereum accounts, read data from blockchains the user is connected to, and so on. Ethers.js wrapping this API in its Provider API. I know, what you are thinking...

From the Provider we get the Signer and then we can create the Contract (have a look at the picture above for the Ethers.js Terminology).
In order to create the contract we need to pass in the ABI as second parameter. The ABI is a JSON file defining our smart contract functionality and how it needs to be called (meaning the parameters of each function). Because the starter template is a monorepo we can easily import the VoteManager ABI from the artifacts/contracts directory. Thats it, our contract abstraction is created and we return it to the App.tsx where its used to call the contract.
Creating the candidate
We need a form with an input for the candidates name and a input for the candidates image.
I have used mui for the frontend part but feel free to rewrite to your needs
<Container maxWidth="md" sx={ marginY: "2rem" }> <Box component="form"> <Stack direction="row" alignItems="center" spacing={2} mb={4}> <TextField id="filled-basic" label="Name" variant="filled" name="name" value={candidateFormData.name} onChange={handleChange} /> <label htmlFor="contained-button-file"> <input type="file" accept="image/*" onChange={(e) => setSelectedImage(e.target?.files[0])} /> </label> <Button variant="contained" component="span" onClick={() => registerCandidate()}> Register as Candidate </Button> </Stack> </Box></Container>
Nothing special in here, lets head over register to the candidate logic, where the magic will happen
async function registerCandidate() { // get the name from formdata const name = candidateFormData.name; // getting the IPFS Image Hash from the Pinata API Service const ipfsImageHash = await IPFSUploadHandler() // call the VoteManager registerCandidate Contract Function contract.registerCandidate(name, ipfsImageHash); // response from the contract / the candidateCreated Event contract.on("candidateCreated", async function (evt) { getAllCandidates() })}First we get the name of the first input. Second, we call the Pinata IPFS API with our image to get the IPFS Image Hash of this picture.
Have a look at the GitHup Repository https://github.com/XamHans/image-contest in the services folder to gain more insights about the the IPFSUploadHandler and the Pinata API function call.
If you need more infos about IPFS check my slides about IPFS https://drive.google.com/drive/folders/11qKP4BydqOytD5ZCn7W9pMSi1XiU5hj7?usp=sharing
Then we will use the contract variable (that we have set in the useEffect with the helper function) to call the registerCandidate function.
With on we subscribe to events that are triggered from the contract.
flashback: emit candidateCreated(_address, _name)
contract.on("candidateCreated", async function (event) { getAllCandidates() })the first paramter is the name of the event, the second the handler function. If we recieve the event, we will call the getAllCAndidates() function to get all candidates, including the newest that we have just created :)
Get all candidates
async function getAllCandidates() { const retrievedCandidates = await contract.fetchCandidates(); const tempArray = [] retrievedCandidates.forEach(candidate => { tempArray.push({ id: candidate.id, name: candidate.name, totalVote: candidate.totalVote, imageHash: candidate.imageHash, candidateAddress: candidate.candidateAddress }) }) setCandidates(tempArray)}Pretty straight forwards, we call the fetchCandidates function from the contract, the response looks like this:
Wee see that we get the properties double, I have no clue why. If you know why, please let me know !
We create a temporary array , iterate over the response and fill the temporary Array with the candidates objects. Finally we set assign the candidates state variable with the tempArray.
Let's show the candidates with their images, therefore paste this below the register candidate part.
{candidates.length > 0 && (<Container sx={ bgcolor: "#F0F3F7" }> <Box sx={ flexGrow: 1, paddingY: "3rem", paddingX: "2rem" }}> <Grid container spacing={ xs: 2, md: 3 } columns={ xs: 4, sm: 8, md: 12 }> { candidates.map((candidate, index) => <Grid item sm={4} key={index}> <Card> <CardMedia component="img" image={candidate.imageHash alt="candidate image" /> <CardContent> <Typography gutterBottom component="div"> Total votes: {(candidate.totalVote as BigNumber).toNumber()} </Typography> <Typography variant="body2" color="text.secondary"> {candidate.name} </Typography> <Typography variant="body2" color="text.secondary"> {candidate.candidateAddress} </Typography> </CardContent> <CardActions disableSpacing sx={paddingTop: "0"}> <IconButton aria-label="like picture" sx={bgcolor: 'info.contrastText', color: 'info.main'} onClick={() => vote(candidate.candidateAddress)}> <FavoriteIcon/> </IconButton> </CardActions> </Card> </Grid>) } </Grid> </Box> )}
We are almost done ! Whats missing is vote functionality.
function vote(address: string) { if (!address) { throw Error("no address defined") } contract.vote(address); contract.on("Voted", function (event) { getAllCandidates() })}This one is simple. In our iteration over the candidates we have the like button:
onClick={() => vote(candidate.candidateAddress)}>So we pass in the address of the candidate to this function and then we check if the address is not null. Afterwars we call the vote() function of contract with the candidates address.
If the vote is done, we will listen to the "Voted" event and then, for the sake of simplicity, we fetch all the Candidates again to show the updates value(s).
This way is cleaner to register the event handlers because it happens
only if the contract is changing instead of every function calluseEffect(() => { if (contract) { contract.on("Voted", async function () { getAllCandidates() }) contract.on("candidateCreated", async function () { getAllCandidates() })}}, [contract])
Congratulation, your first dApp is ready
You did it, do you feel the power ?

We covered a lot of topics in this tutorial.
You now know
- the memory types calldata, memory and storage of solidity
- what openzeppelin is and how to import their contracts
- use require as an early out criterium to be code and gas efficient
- how to store images on IPFS with the help of Pinata service.
- that you can send events from your smart contract as a kind ofresponse to your frontend.
- that the ABI defines your smart contract and that you can useethers.js to interact with the ethereum blockchain
Thanks for reading
If you like this kind of content or have any questions (I am not an expert) let's connect on twitter or linkedin
https://twitter.com/XamHans |
https://www.linkedin.com/in/johannes-m%C3%BCller-6b8ba1198/
PS
I have a little exercise for you. Candidates can vote unlimited for their own images, this is not fair. Can you expand the functionality, so that a candidate can only vote once?
Original Link: https://dev.to/xamhans/how-to-create-a-dapp-with-react-solidity-on-ethereum-blockchain-1gg0
Dev To
More About this Source Visit Dev To