
An Interest In:
Web News this Week
- April 19, 2024
- April 18, 2024
- April 17, 2024
- April 16, 2024
- April 15, 2024
- April 14, 2024
- April 13, 2024
Some of Our Sources
- Mashable
- Smashing Magazine
- Six Revisions
- Abduzeedo
- Inspiredology
- Naldz Graphics
- FanExtra - PSD
- CSS Tricks
- Daily Now
- TechPowerUp
Help Webnuz
Referal links:
How to Publish Android Library on JitPack.io with GitHub?
Many tutorials are outdated and incorrect. Thus, I create these most up-to-date guides to publish Android library on JitPack.io.
This article was originally published at vtsen.hashnode.dev on March 5, 2022.
I was searching for how to publish Android library on MavenCentral() and it turned out the process seems very complicated and troublesome. So I found another easy method is to publish my Android library on JitPack.io instead.
Although it is simple, I still spent my whole day to figure that out. It is mainly due to the tutorials out there (even the official documentation) are missing information and not beginner-friendly enough.
So, I'm going to share the step-by-step guides how to do it and hopefully this can save you a lot of your time.
1. Create a New Project
- Go to File -> New -> New Project...
- Choose either Empty Activity or Empty Compose Activity, click Next
- Update Name and Save Location
- Click Finish

2. Create a New Module
- Go to File -> New -> New Module...
- Select Android Library, update Module Name and Package Name
- Click Finish
3. Add Code Into Your Module
The module should be created at the root project folder.
- Go to the package, right click, select New -> Kotlin Class/File
- Implement this code as an example
package com.vtsen.sydneysuburbsobject Sydney { val suburbs = listOf("Ryde", "Chippendale")}4. Use the Local Module
In order to use the module that you just created,
- Add
implementation project(':<Module_Name>')dependency in thebuild.gradle(app level) file.
dependencies { ... implementation project(':SydneySuburbs')}- Access / use the code that you created in step 3 above. E.g.
Sydney.suburbs[0]
import com.vtsen.sydneysuburbs.Sydney... // Example of accessing SydneyBurbs module Surface(color = MaterialTheme.colors.background) { Greeting(Sydney.suburbs[0]) }...- Run your app, it should work! 5. Setup and Configure for JitPack.io
- Add
maven-publishplugin inbuild.gradlefile (module level).
plugins { ... id 'maven-publish'}Note: There are 3
build.gradlefiles - project level, app level and module level (the module you just created). Please make sure you update the correctbuild.gradlefile.
- Add
afterEvaluateat the end of thebuild.gradlefile (module level)
afterEvaluate { publishing { publications { release(MavenPublication) { from components.release groupId = 'com.github.vinchamp77' artifactId = 'demo-simple-android-lib' version = '0.0.0' } } }}
- groupId =
com.github.<Your_GitHub_User_Name>- artifactId =
'<Your_GitHub_Repository_Name>'
- Switch to project mode, add the
jitpack.ymlin project root folder

The content in jitpack.yml:
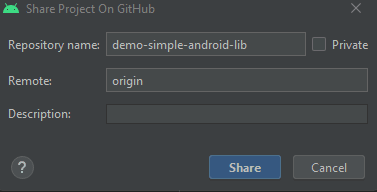
jdk: - openjdk116. Share Project on GitHub
Now, it is ready to upload your projects to GitHub repository.
You can also clean up unused dependencies before you upload your project to GitHub. This can help save the build time when JitPack.io builds your project.
- Follow the detailed steps below if you don't know how to do it
How to Upload Android Studio Project to GitHub?
- Please make sure the repository name match the
artifactIdin step 5 and uncheck the private check box
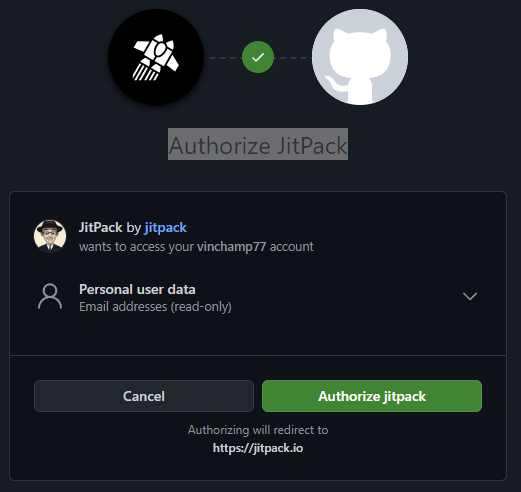
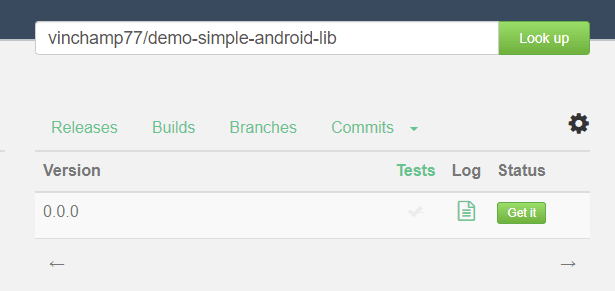
7. Sign Up JitPack
- Go to jitpack.io, click the Sign In button at the top left
- Authorize JitPack to allow JitPack accessing to your GitHub account
- Select your repository and click Look Up. You should see the following:

8. Create a New Release to Trigger JitPack Build
- Go to your repository, click Releases at the right.
- Click Create a New Release
- Click Chose a tag, enter the same version that you specify in step 4
- Press enter
- Click Publish release

9. Monitor JitPack Build
- Go back to jitpack.io, and click Look Up.
- While file a while, you should see the Log icon is build in progress.

- When the build is done, you should see something like this:
Note: If the build failed, you should see the red report. If it passes, you should see the green report above.
- Click on the green report, you should see something like this at the end.
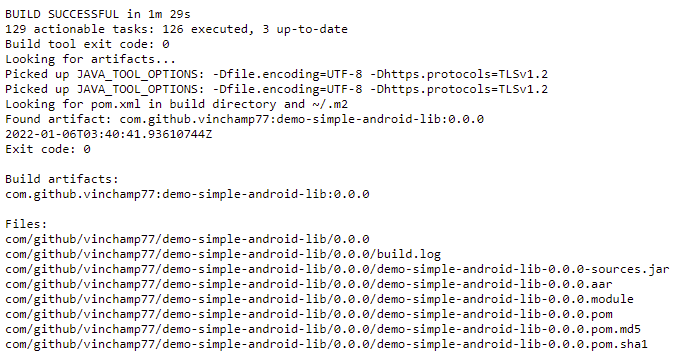
10. Import JitPack Android Library
Once the JitPack has successfully built your Android library, it is ready to import your Android library to your project from JitPack.io.
Note: I'm using the same project that I use to create this Android library as an example.
- In
settings.gradle, addmaven { url 'https://jitpack.io' }
dependencyResolutionManagement { repositoriesMode.set(RepositoriesMode.FAIL_ON_PROJECT_REPOS) repositories { google() mavenCentral() maven { url 'https://jitpack.io' } }}Note: If you add this in
build.gradle(project level), it won't work. You must add it in thesettings.gradleinstead.
- In
build.gradle(app level), replaceimplementation project(':SydneySuburbs')withimplementation 'com.github.<github_user_name>:<repository_name>:<version_name>'
dependencies { ... implementation 'com.github.vinchamp77:demo-simple-android-lib:0.0.0'}- Now, your project can import the Android library package and start using it. For example:
import com.vtsen.sydneysuburbs.SydneySummary
Some feedbacks that I get from twitter that some people in the community won't even consider your library if it's not on mavenCentral(). So it is worth to consider publishing to mavenCentral().
Well, I want to, but if you have any easy to follow tutorial, please let me know. For learning and beginner purpose, JitPack.io is good enough for me, at least for now. It is easy and simple to set it up.
Source Code
GitHub repository: vinchamp77/demo-simple-android-lib
See Also
Original Link: https://dev.to/vtsen/how-to-publish-android-library-on-jitpackio-with-github-50n1
Dev To
More About this Source Visit Dev To