
An Interest In:
Web News this Week
- March 22, 2024
- March 21, 2024
- March 20, 2024
- March 19, 2024
- March 18, 2024
- March 17, 2024
- March 16, 2024
Some of Our Sources
- Mashable
- Technology Review
- Pearsonified
- Fuel Your Creativity
- Naldz Graphics
- Noupe
- Crazy Leaf Design
- Spyre Studios
- Design Modo
- Daily Now
Help Webnuz
Referal links:
Securing a Blazor WebAssembly Hosted Apps with Azure Active Directory - Part 1
If you are developing an enterprise application, I am quite sure that you need to implement an authentication flow.
In this article we are going to see how to use Azure Active Directory to secure a Blazor WebAssembly hosted application.
For a standalone Blazor WebAssembly the process is very similar, but as an enterprise application, it's more common if you are facing with an ASP.NET Core hosted architecture (or Blazor Server).
Create the project with Visual Studio 2022
From Visual Studio 2022, select "Create a new Project" and in the new screen, click on "Blazor WebAssembly App".
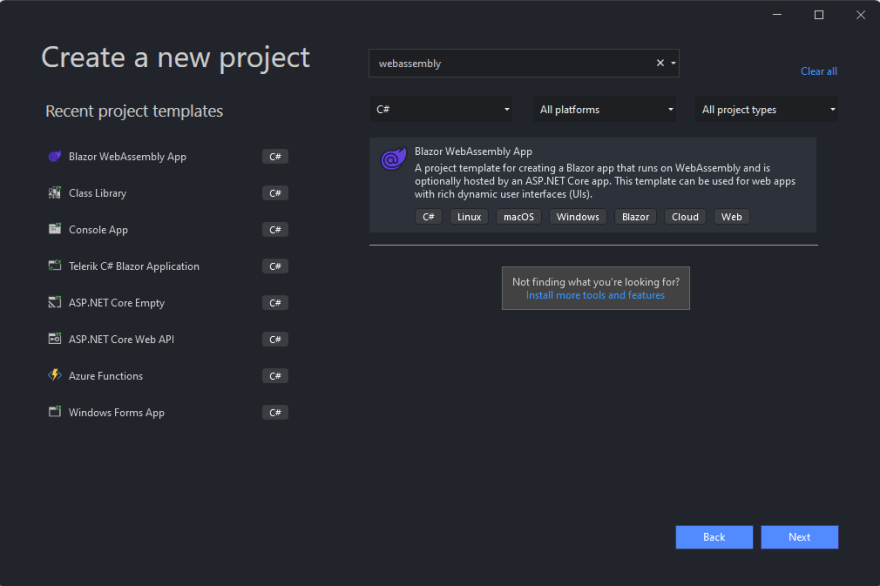
Choose the name of the project.
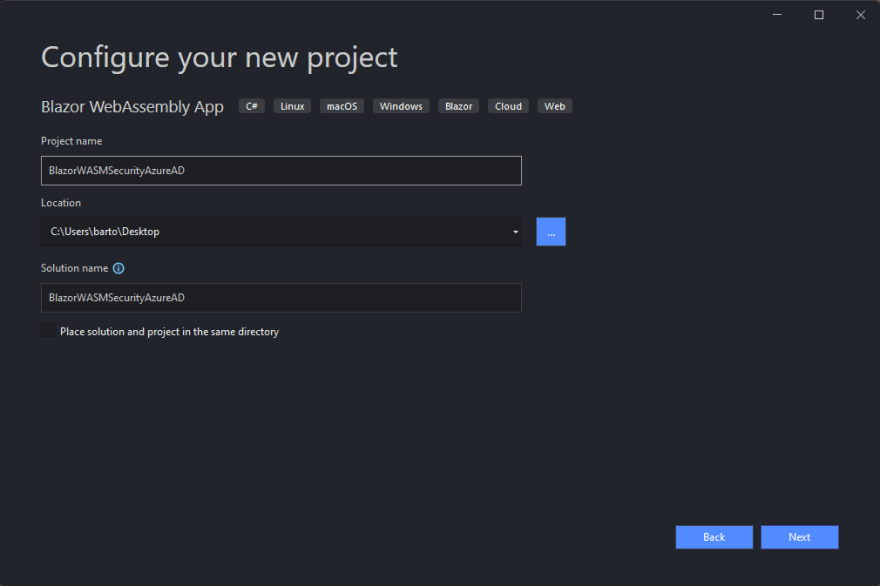
In this screen, pay attention to select "Microsoft identity platform" as Authentication type and check "ASP.NET Core hosted".

Open the file launchSettings.json from the Server project and change the ports of the applicationUrl key to 5001 and 5000.
"BlazorWASMSecurityAzureAD.Server": { "commandName": "Project", "dotnetRunMessages": true, "launchBrowser": true, "inspectUri": "{wsProtocol}://{url.hostname}:{url.port}/_framework/debug/ws-proxy?browser={browserInspectUri}", "applicationUrl": "https://localhost:5001;http://localhost:5000", "environmentVariables": { "ASPNETCORE_ENVIRONMENT": "Development" } }For the moment you can leave Visual Studio.
Register the Server application on Azure Active Directory
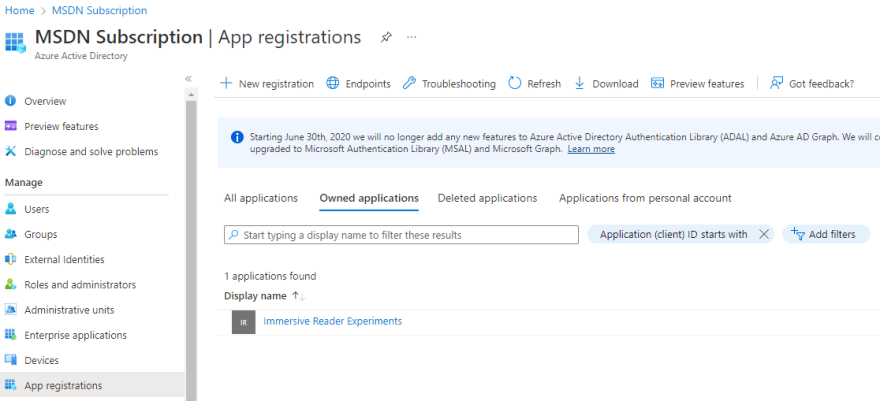
Login to the Azure Portal and open "Azure Active Directory" from the top bar or search for it.
Select "App Registrations" on the left navigation bar.

You should see the list of your existing App registrations.
Click on "New registration" on the top bar.
Choose the name of your application. For this demo I will use "BlazorWASMHosted Server".
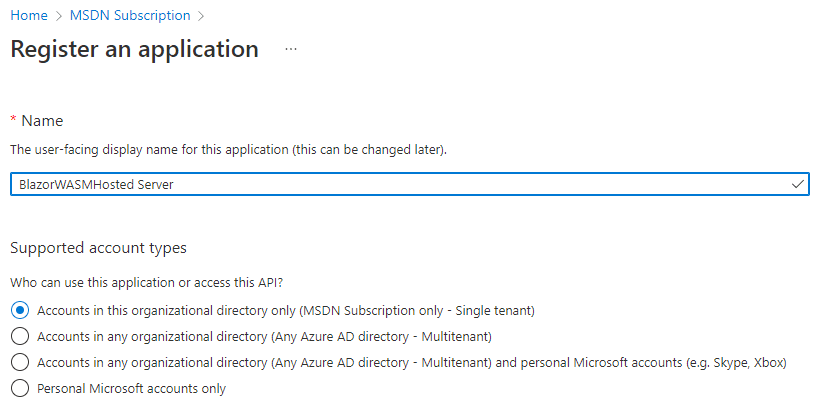
Click on "Register" and then click on "API Permissions". Remove the permission "User.Read".
We don't need it.
Now from the left navigation click on "Expose an API" and then to "Add Scope" in the new screen.
Choose your prefer scope name. For this demo I will use "BlazorWAMSHosted.API".
Fill the mandatory fields below and save the form.
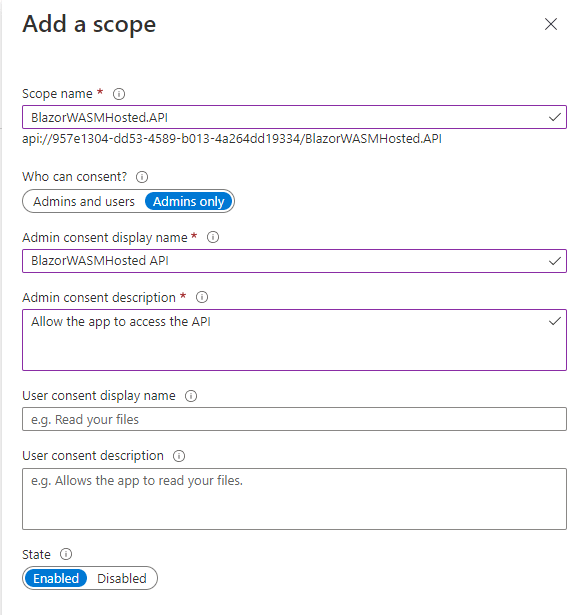
From the Scopes list, copy the value of the scope. We need it later in Visual Studio.

Register the Client application on Azure Active Directory
Now we are going to create the App Registration for the Client part of our application.
The steps are quite the same as the server, but with small different details.
Let's start.
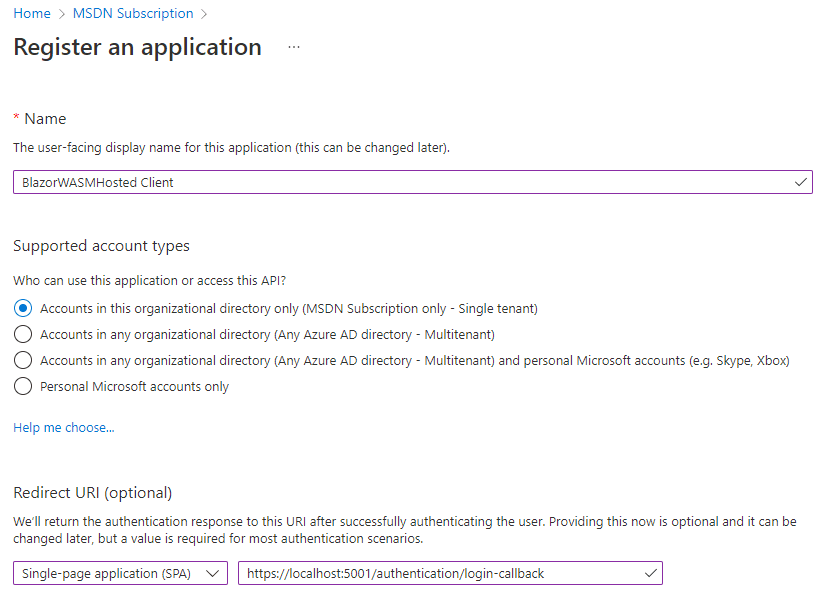
Come back to the "Apps Registration" menu and click on "New Registration".
Let's call the application "BlazorWASMHosted Client" and from the "Redirect Uri*" section choose "Single-page application*" and insert the value "https://localhost:5001/authentication/login-callback".
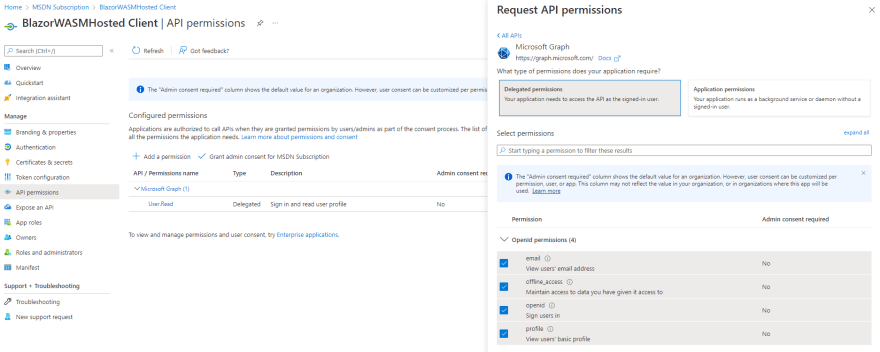
After the app creation, click on "API permissions" on the left navigation pane and then "Add a permission".
Select "Microsoft Graph API" and then click on "Delegated Permissions".
Check all the Openid permissions from the list.
We don't need all of them at the moment, but they are useful if you want to display the information about the user inside the application.
Click again on "Add a permission" and in the new screen select "My API".
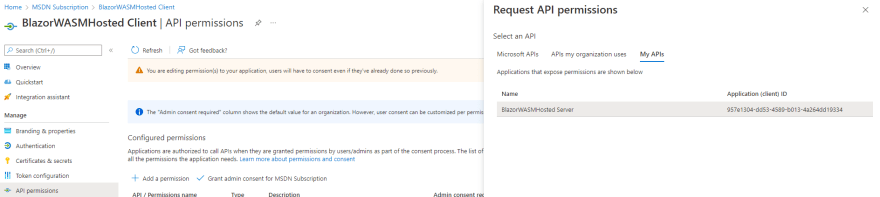
Check the name of the API that you have created a few steps before.
In our example is called "BlazorWASMHosted.API".
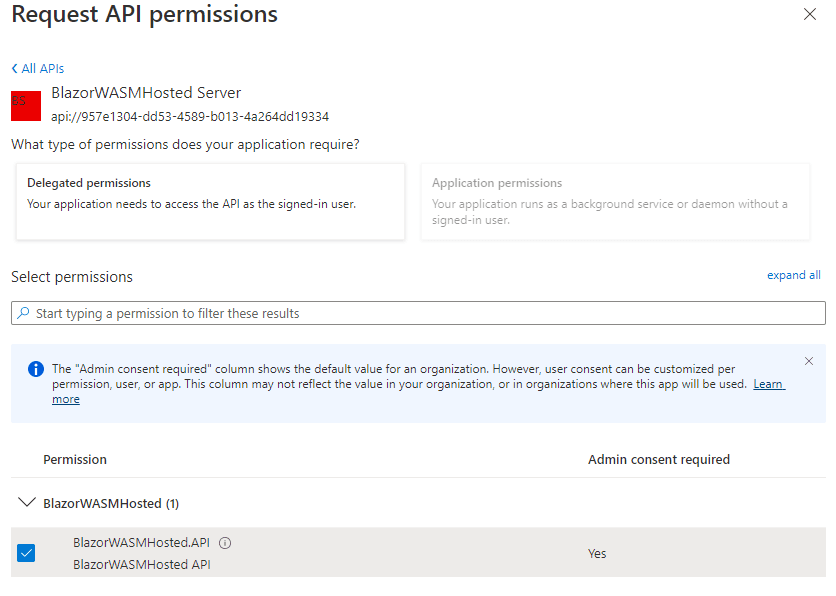
Click on "Grant the permission for ..." and the name of your tenant.

Now it's time to come back on Visual Studio 2022 and configure the project with the latest information from Azure AD.
Configure the projects in Visual Studio 2022
Server
Open the file "appsettings.json" and update the section "AzureAd" with the following values:
"AzureAd": { "Instance": "https://login.microsoftonline.com/", "Domain": "aspnetadtutorial.onmicrosoft.com", "TenantId": "fbf22b03-0a17-4c1c-8454-9abc4d424be0", "ClientId": "957e1304-dd53-4589-b013-4a264dd19334", "Scopes": "BlazorWASMHosted.API", "CallbackPath": "/signin-oidc" }You can retrieve the information about the TenantId and the ClientId directly fom the App Registration of the Server app.
Client
Open the file "Program.cs" and add the scope in the following section of code:
builder.Services.AddMsalAuthentication(options =>{ builder.Configuration.Bind("AzureAd", options.ProviderOptions.Authentication); options.ProviderOptions.DefaultAccessTokenScopes.Add("api://957e1304-dd53-4589-b013-4a264dd19334/BlazorWASMHosted.API");});In the file "appsettings.json" of the Client project (under the folder wwwroot), change the value of the Authority with the TenantId.
Update the ClientId with the Client app registration ClientId.
"AzureAd": { "Authority": "https://login.microsoftonline.com/fbf22b03-0a17-4c1c-8454-9abc4d424be0", "ClientId": "067c7e53-31e0-4a7b-8cb7-8b5d4b853568", "ValidateAuthority": true }Run the Application
Now we are ready to launch the application for a test.
Press "F5" to run the Server project and click on the "Login" link on the top navigation bar of our new web application.
Insert your credentials and KABOOOOM! :)

To check if everything working well, click on the navigation link "Fetch data" and make sure that the call to the server runs.

Conclusion
These steps are the very basic implementation to have an application secured with the Azure AD.
With the Blazor helper "AuthorizeView" you can hide or show informations, links or section of your application directly from the razor code.
You can access to the authorization state in every page and component of your application.
<AuthorizeView> <Authorized> Hello, @context.User.Identity.Name! <button class="nav-link btn btn-link" @onclick="BeginLogout">Log out</button> </Authorized> <NotAuthorized> <a href="authentication/login">Log in</a> </NotAuthorized></AuthorizeView>Source code
You can find the source code of the example on GitHub.
Follow the instructions in the Readme file.
Thank you and drop me a comment if you have questions or feedbacks!
Original Link: https://dev.to/kasuken/securing-a-blazor-webassembly-hosted-apps-with-azure-active-directory-part-1-382d
Dev To
More About this Source Visit Dev To