
An Interest In:
Web News this Week
- April 19, 2024
- April 18, 2024
- April 17, 2024
- April 16, 2024
- April 15, 2024
- April 14, 2024
- April 13, 2024
Some of Our Sources
- Simplebits
- Abduzeedo
- Stylized Web
- Specky Boy
- Design Modo
- Web Resource Source
- Android Headlines
- Dev To
- Hashedout
- TechPowerUp
Help Webnuz
Referal links:
Start selling online using Appwrite and Stripe
Appwrite is an open source backend-as-a-service that abstracts all the complexity involved in building a modern application by providing you with a set of REST APIs for your core backend needs. Appwrite handles user authentication and authorization, realtime databases, cloud functions, webhooks, and much more! If anything is missing, you can easily extend Appwrite using your favorite backend language.
Every website is a unique project with unique requirements. Appwrite understands the need for backend customization and provides Appwrite Functions to allow you to do exactly that. Thanks to 7 supported programming languages and more coming soon, Appwrite lets you use the language you are the most familiar with for your backend needs.
What is new in Appwrite 0.13
Appwrite 0.13 introduced new features regarding storage, CLI, and functions. With a fully rewritten execution model, Appwrite now allows you to run functions as quick as 1 millisecond! With such a performance, Appwrite now also ships with synchronous execution, allowing you to execute a function and get a response within one HTTP request.
Thanks to the new execution model, Appwrite 0.13 also allows the creation of global variables to share cache between multiple executions of a function. This drastically improves the performance of real-world applications, as they only need to load dependencies, initiate 3rd party communication, and pre-load resources in the first execution.
Last but not least, Appwrite got a new build process that is capable of downloading your project dependencies on the server side, so you no longer need to deploy your function with dependencies. This makes the flow much simpler, deployments smaller, and developers happier
Online payments with Stripe
Stripe is a huge set of payments products that allows you to do business online. Stripe allows you to receive payments online, set up and manage subscriptions, automatically include taxes into payments, manage the online receipt, generate a checkout page, and much more. Stripe proudly supports multiple payment methods and countries, which makes it one of the best options for any online product.
Stripe is loved by developers too! Online payments are hard Stripe managed to create a fast, secure and easy to understand environment that lets developers set up online payments within a few minutes.
From a technical point of view, Stripe payments are initiated using REST API, and payment status updates are sent through webhooks. Lets look at how you can use Appwrite Functions to securely communicate with Stripe to implement online payments into an application.
What is a webhook?
Webhook is an HTTP request sent from one server to another, to inform it about some change. Webhooks are a smarter alternative to pulling data through an API server if you need to quickly adapt to an external change.
Stripe uses webhooks to inform applications about changes to the status of a payment. For a second lets imagine webhooks were not implemented in Stripe, how would you know a payment was successful? For each ongoing payment, you would need to have a loop to send API requests to get payment status every few seconds and dont stop until you have a status change. As you can imagine, this would be a resource-consuming solution that wouldnt scale well with many payments pending at the same time, hitting API limits in the worst scenarios. Thanks to webhooks, you can give Stripe an URL, and the Stripe server will hit the URL with an HTTP request, providing a bunch of data about what has changed.
Similarly to Stripe, Appwrite also supports webhooks and can trigger HTTP requests when a change occurs inside Appwrite, such as a new user registered, or a database change. That means Appwrite can send out webhooks, but can it receive one?
Appwrite webhook proxy
Appwrite can receive webhook requests by default, thanks to Appwrite Functions. There is an endpoint in Appwirte HTTP API that can create a function execution. This method allows passing data in, and also providing request headers. Thats all you need for such a webhook listener, but there is one small hiccup.
Looking at Appwrite documentation, it expects a JSON body where all data is stringified under the data key. On the other hand, looking at Stripe documentation, it sends a webhook with all data in the root level as a JSON object.
Alongside this schema miss-match, Appwrite also expects some custom headers (such as API key), which Stripe cannot send. This problem can be solved by a simple proxy server that can properly map between these two schemas, and apply authentication headers.
You can expect official implementation from Appwrite itself, but as of right now, you can use Meldirons Appwrite webhook proxy. This project adds a configuration into your Appwrite setup that defined a new /v1/webhook-proxy endpoint in Appwrite API to solve the problem from earlier. Later in the article, we will take a look at how to set up this webhook proxy, and how to connect it to Stripe.
Lets code a store
To present Stripe integration in Appwrite, I decided to create a simple application cookie store, where a customer can buy one of two cookie packs. After payment, users can look at their order history and see a payment status. This is a minimal implementation that does not include invoicing, fulfillment, or any eCommerce logic. The project was made with simplicity in mind to serve as a learning resource for anyone integrating Stripe into their Appwrite projects.
The application was made using NuxtJS framework with TypeScript, and Tailwind CSS for designing utility classes. You can follow along, or download the source code from the GitHub repository.
Stripe Setup
Lets start by properly setting up our Stripe account, to make sure we have all secrets we might need in the future. For this example, we will be using test mode, but the same steps could be followed in production mode.
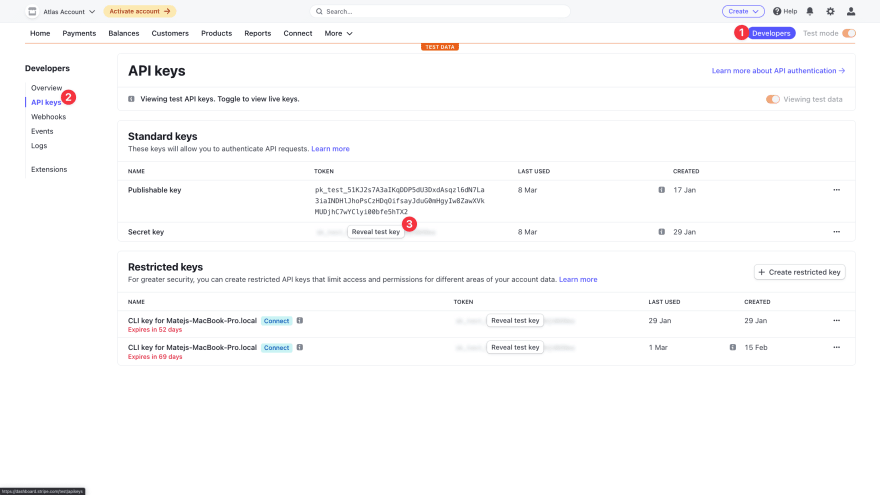
You start by visiting the Stripe website and signing up. Once in the dashboard, you can switch to the Developers page and enter the API keys tab. In there, you click the Reval key button and copy this key. It will be used later when setting up createPayment function in Appwrite.
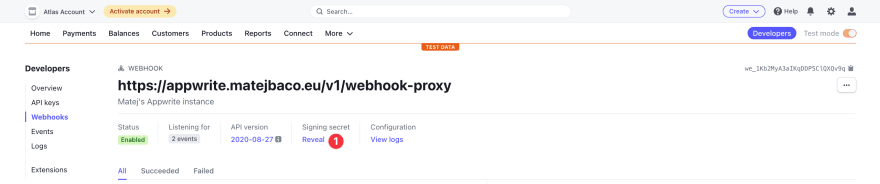
Next, lets switch to the Webhooks tab, and set up a new endpoint. When adding an endpoint, make sure to use URL http://YOR_ENDPOINT/v1/webhook-proxy, and provide any description you want. Last but not least, you select events to listen to, in the case of simple online payment, you only need events payment_intent.succeeded and payment_intent.canceled.

After adding the endpoint, copy your Signing secret, as you will need this in updatePayment Appwrite Function later.
Appwrite project setup
Before diving into frontend development, you first set up the Appwrite project. After following installation instructions and signing up, you can create a project with a custom project ID cookieShop.

Once the project is created, lets hop into the Services tab on the Settings page. Here you can easily disable services that you wont be using in our project. In your application, you will only be using account, database and function services. Make sure to keep this enabled, and disable the rest.

Last but not least, lets open the Settings tab on the Users page. Here you can disable all authentication methods except anonymous session, as this will be the only one your application will use.

With all of these configurations in place, your Appwrite project is ready!
Now, you need to apply programmatic setup from the cookie store GitHub repository that sets up database structure and prepares Appwrite Functions. After cloning the repository and setting up Appwrite CLI, all you need to do is to run appwrite deploy all to apply all of the programmatic setups. If you are interested in understanding the underlying code of these Appwrite Functions, you can check them out in respective folders:
- createPayment (NodeJS)
- updatePayment (NodeJS)
Once these functions are deployed, you need to set their environment variables. You visit Functions in your Appwrite Console and open up the Settings tab of your createPayment function. In there, near the end of the settings, you need to add a variable called STRIPE_KEY with your secret key from the Stripe dashboard. Next, you switch to settings of updatePayment and set up a few environments variables there:
STRIPE_SIGNATURE- Webhook signature key from Stripe dashboard.APPWRITE_FUNCTION_ENDPOINT- Endpoint of your Appwrite instance, found inSettings.APPWRITE_FUNCTION_API_KEY- Appwrite project API key. You can generate one in the left menu.
With that configured, lets see how our Appwrite Functions actually work!
Appwrite Functions
To better understand our Appwrite Functions logic, lets look at their source code. Both functions are written in Node.JS
1. Create Payment
First of all, you add Stripe library to our code, as you will be creating a payment in this function:
const stripe = require('stripe')Next, you set up a variable holding all possible packs (products), and their basic information:
const packages = [ { id: 'pack1', title: 'Medium Cookie Pack', description: 'Package incluces 1 cookie', price: 1.99, preview: '/pack1.jpg', }, { id: 'pack2', title: 'Large Cookie Pack', description: 'Package incluces 6 cookies', price: 4.99, preview: '/pack2.jpg', },]You continue by setting up a function that will get executed when an execution is created:
module.exports = async function (req, res) { // Future code goes in here}Inside your function, lets make sure function as properly configured in Appwrite, and provides required environment variables:
// Setup if (!req.env.STRIPE_KEY) { throw new Error('Environment variables are not set.') }Next, lets validate user input - payload:
// Prepate data const payload = JSON.parse(req.payload) const stripeClient = stripe(req.env.STRIPE_KEY) const package = packages.find((pack) => pack.id === payload.packId) if (!package) { throw new Error('Could not find the pack.') }You continue by creating a Stripe payment session:
// Create Stripe payment const session = await stripeClient.checkout.sessions.create({ line_items: [ { price_data: { currency: 'eur', product_data: { name: package.title, description: package.description, }, unit_amount: package.price * 100, }, quantity: 1, }, ], mode: 'payment', success_url: payload.redirectSuccess, cancel_url: payload.redirectFailed, payment_intent_data: { metadata: { userId: req.env.APPWRITE_FUNCTION_USER_ID, packageId: package.id, }, }, })Last but not least, lets return stripe payment session URL, so client can be redirected to the payment:
// Return redirect URL res.json({ paymentUrl: session.url, })2. Update Payment
Similar to our first function, you require libraries and set up a main function:
const stripe = require('stripe')const sdk = require('node-appwrite')module.exports = async function (req, res) { // Future code goes in here}Did you notice you imported Appwrite this time? Thats right! This function is executed by Stripe webhook when a payment session status changes. This means, you will need to update the Appwrite document with a new status, so you need a proper connection with the API.
Anyway, you continue by validating environment variables, but this time you also initialize Appwrite SDK:
// Setup Appwrite SDK const client = new sdk.Client() const database = new sdk.Database(client) if ( !req.env.APPWRITE_FUNCTION_ENDPOINT || !req.env.APPWRITE_FUNCTION_API_KEY || !req.env.STRIPE_SIGNATURE ) { throw new Error('Environment variables are not set.') } client .setEndpoint(req.env.APPWRITE_FUNCTION_ENDPOINT) .setProject(req.env.APPWRITE_FUNCTION_PROJECT_ID) .setKey(req.env.APPWRITE_FUNCTION_API_KEY)Next, lets parse the function input (payload), and validate it using Stripe:
// Prepate data const stripeSignature = req.env.STRIPE_SIGNATURE const payload = JSON.parse(req.payload) // Validate request + authentication check let event = stripe.webhooks.constructEvent( payload.body, payload.headers['stripe-signature'], stripeSignature )Furthermore, you can parse data from Stripe event and pick information relevant to your usage:
// Prepare results const status = event.type === 'payment_intent.succeeded' ? 'success' : event.type === 'payment_intent.canceled' ? 'failed' : 'unknown' const userId = event.data.object.charges.data[0].metadata.userId const packId = event.data.object.charges.data[0].metadata.packageId const paymentId = event.data.object.id const document = { status, userId, packId, paymentId, createdAt: Date.now(), }To finish it off, lets add a logic to update or create a document, depending on if it already exists or not:
// Check if document already exists const existingDocuments = await database.listDocuments( 'orders', [`paymentId.equal('${paymentId}')`], 1 ) let outcome if (existingDocuments.documents.length > 0) { // Document already exists, update it outcome = 'updateDocument' await database.updateDocument( 'orders', existingDocuments.documents[0].$id, document, [`user:${userId}`], [] ) } else { // Document doesnt exist, create one outcome = 'createDocument' await database.createDocument( 'orders', 'unique()', document, [`user:${userId}`], [] ) }Finally, lets return what you just did as a response, so you can inspect execution response in Appwrite Console when you need to double-check what happened in some specific payment:
res.json({ outcome, document, })Appwrite webhook proxy
As mentioned earlier, you will need to use Meldirons webhook proxy to translate Stripes schema to a schema that Appwrite API supports. To do that, you will add a new container into the Appwrite Docker containers stack, which will add a new endpoint to Appwrite API.
Lets start by adding a new container definition inside the docker-compose.yml file in an appwrite folder:
version: "3"services: appwrite-webhook-proxy: image: meldiron/appwrite-webhook-proxy:v0.0.4 container_name: appwrite-webhook-proxy restart: unless-stopped labels: - "traefik.enable=true" - "traefik.constraint-label-stack=appwrite" - "traefik.docker.network=appwrite" - "traefik.http.services.appwrite_webhook_proxy.loadbalancer.server.port=4444" # http - traefik.http.routers.appwrite_webhook_proxy_http.entrypoints=appwrite_web - traefik.http.routers.appwrite_webhook_proxy_http.rule=PathPrefix(`/v1/webhook-proxy`) - traefik.http.routers.appwrite_webhook_proxy_http.service=appwrite_webhook_proxy # https - traefik.http.routers.appwrite_webhook_proxy_https.entrypoints=appwrite_websecure - traefik.http.routers.appwrite_webhook_proxy_https.rule=PathPrefix(`/v1/webhook-proxy`) - traefik.http.routers.appwrite_webhook_proxy_https.service=appwrite_webhook_proxy - traefik.http.routers.appwrite_webhook_proxy_https.tls=true - traefik.http.routers.appwrite_webhook_proxy_https.tls.certresolver=dns networks: - appwrite depends_on: - appwrite environment: - WEBHOOK_PROXY_APPWRITE_ENDPOINT - WEBHOOK_PROXY_APPWRITE_PROJECT_ID - WEBHOOK_PROXY_APPWRITE_API_KEY - WEBHOOK_PROXY_APPWRITE_FUNCTION_ID # ...# ...With this in place, a new proxy server will be listening on /v1/webhook-proxy endpoint.
Now lets update the .env file in the same appwrite folder to add authentication variables this container needs for proper secure communication:
WEBHOOK_PROXY_APPWRITE_ENDPOINT=https://YOUR_ENDPOINT/v1WEBHOOK_PROXY_APPWRITE_PROJECT_ID=YOUR_PROJECT_IDWEBHOOK_PROXY_APPWRITE_API_KEY=YOUR_API_KEYWEBHOOK_PROXY_APPWRITE_FUNCTION_ID=updatePaymentFinally, lets spin up the container by running docker-compose up -d. With all of that in place, you can now point Stripe to https://YOR_ENDPOINT/v1/webhook-proxy , and Stripe will start executing your updatePayment function while providing all data in a proper schema.
Frontend website setup
A process of designing frontend is not the focus of this article, so if you are interested in details of implementation, make sure to check out the GitHub repository of this project.
With that out of the way, lets look at communication between the frontend and Appwrite project. All of this communication is implemented in a separated appwrite.ts file that holds functions for:
- Authentication
- Payment
- Order History
Before coding functions for these services, lets set up our service file and do all of the initial setups:
import { Appwrite, Models } from "appwrite";if (!process.env.appwriteEndpoint || !process.env.appwriteProjectId) { throw new Error("Appwrite environment variables not properly set!");}const sdk = new Appwrite();sdk .setEndpoint(process.env.appwriteEndpoint) .setProject(process.env.appwriteProjectId);const appUrl = process.env.baseUrl;export type Order = { status: string, userId: string, packId: string, paymentId: string, createdAt: number} & Models.Document;Lets start by creating trio of the most important authentication functions. You will need one to login, one to log out, and one to check if visitor is logged in. All of this can be done within a few lines of code when using AppwriteSDK:
export const AppwriteService = { async logout(): Promise<boolean> { try { await sdk.account.deleteSession("current"); return true; } catch (err) { console.error(err); alert("Something went wrong. Please try again later."); return false; } }, async login(): Promise<void> { await sdk.account.createOAuth2Session( "discord", `${appUrl}/app`, `${appUrl}/login` ); }, async getAuthStatus(): Promise<boolean> { try { await sdk.account.get(); return true; } catch (err) { console.error(err); return false; } }, // Future code goes in here};Next, you create a function that will trigger our previously coded createPayment Appwrite Function, and use url from the response to redirect user to Stripe, where they can pay they order:
async buyPack(packId: string): Promise<boolean> { try { const executionResponse: any = await sdk.functions.createExecution("createPayment", JSON.stringify({ redirectSuccess: `${appUrl}/cart-success`, redirectFailed: `${appUrl}/cart-error`, packId }), false); if (executionResponse.status === 'completed') { } else { throw new Error(executionResponse.stdout + "," + executionResponse.err); } const url = JSON.parse(executionResponse.stdout).paymentUrl; window.location.replace(url); return true; } catch (err) { console.error(err); alert("Something went wrong. Please try again later."); return false; } },Last but not least, let's implement a method to get users order history that supports offset pagination:
async getOrders(page = 1): Promise<Models.DocumentList<Order> | null> { try { const offset = (page - 1) * 10; const ordersResponse = await sdk.database.listDocuments<Order>("orders", undefined, 10, offset, undefined, undefined, ['createdAt'], ['DESC']); return ordersResponse; } catch (err) { console.error(err); alert("Something went wrong. Please try again later."); return null; } }With all of this login in place, all you need to do is to finish off the rest of the frontend application by creating pages, components, and hooking into our AppwriteService to talk to the Appwrite backend.
You have just successfully created your very own store using Appwrite and Stripe! If there are any concerns about skipped parts of the frontend code, and I cant stress this enough, make sure to check out the whole GitHub repository of this project, that holds a fully working demo application. There are some screenshots too!
Conclusion
The ability to integrate your application with 3rd party tools and APIs can become critical for any scalable application. Thanks to Appwrite 0.13, as you just experienced, Appwrite Functions can now communicate both ways, allowing you to prepare your projects without any limitations. This not only means you can implement pretty much any payment gateway into your Appwrite project, but it also means all of you can enjoy preparing your Appwrite-based applications without any limitations!
If you have a project to share, need help or simply want to become a part of the Appwrite community, I would love for you to join our official Appwrite Discord server. I cant wait to see what you build!
Learn more
You can use the following resources to learn more and get help:
Original Link: https://dev.to/appwrite/start-selling-online-using-appwrite-and-stripe-3l04
Dev To
More About this Source Visit Dev To