
An Interest In:
Web News this Week
- March 20, 2024
- March 19, 2024
- March 18, 2024
- March 17, 2024
- March 16, 2024
- March 15, 2024
- March 14, 2024
Some of Our Sources
- Slashdot
- Technology Review
- Pearsonified
- The Logo Smith
- Noupe
- CSS Globe
- Spyre Studios
- Web Resource Source
- Android Dissected
- TechPowerUp
Help Webnuz
Referal links:
Automatic ambient light controller
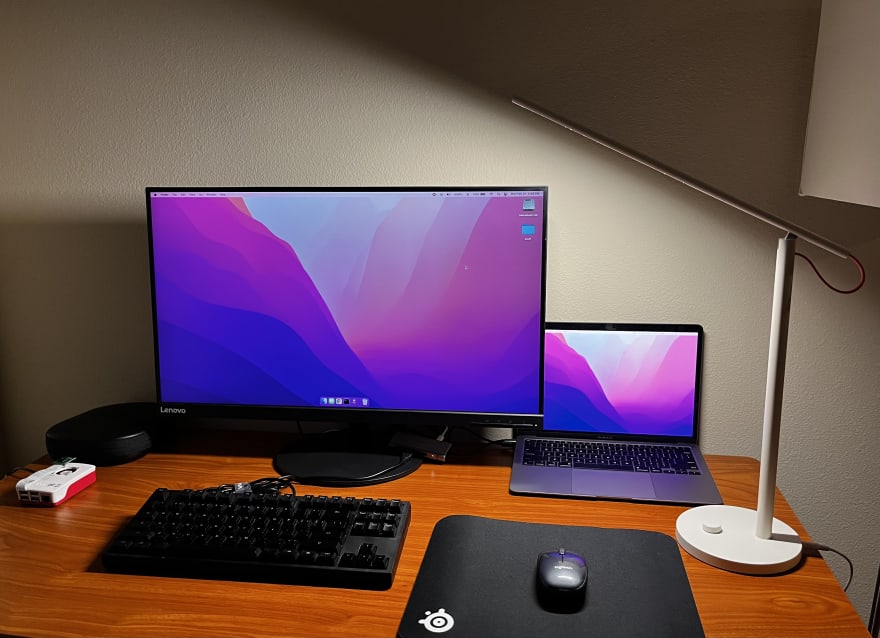
Not so surprisingly this problem was staring at my face all along. Sitting right next to french windows has its pros and cons. Although the balcony view is great, the fluctuating light coming from outside the window really annoys me. I end up straining my eyes looking a bright screen in a dim lit environment for hours. I forget to turn on the lamp near my desk when its too dark, sigh.. if only Google Home could read my mind!
This seemed like an easy enough problem I could fix using my Raspberry Pi 4.
Introducing SIRIUS (named after the brightest star) the ambient light controller and picture-taker .
The purpose of Sirius is to adjust ambient lighting. Sirius controls lighting by periodically taking a photo and calculating levels of brightness in the image. Then the lamp near my desk is turned on if the ambient brightness drops. The lamp is also turned off when the brightness hits the max threshold. Why is this important to me, you ask because I prefer working in a well lit (mostly bright) environment.
I started off using our existing lamp which was connected to the outlet via a smart plug. But then I realized that I wanted to also try the same approach with a dimmable lamp.
I will go over the implementation for both a regular lamp and dimmable lamp to control ambient lighting. My favorite was the dimmable lamp, but the regular lamp is much simpler to adjust.
Components used:

STEP 1: Connecting Camera to RPi
The camera port in the RPi is located between HDMI and audio port. The black tab on the port should be pulled up before inserting the ribbon.
Black tab needs to be pulled up before inserting the ribbon.
The camera ribbon that comes with the camera should be inserted into the camera port. Take extra caution here because the ribbon and the port are delicate and can be easily damaged.
NOTE: while pushing the camera ribbon into the port, make sure that the silver connectors are facing the HDMI port and the blue side should be facing outwards.
Now push the tab to securely connect the camera to RPi

- Enable the camera by navigating to Main Menu Preferences Raspberry Pi Configuration Interfaces Camera Select Enabled
- Update OS if necessary sudo apt update and sudo apt full-upgrade
- Let the fun begin!
I started by taking pictures using raspistill.
raspistill -vf -hf -o test.jpg this command gave me useable pictures.
I did not care much about the quality of the image, because my focus (pun intended ) was only on measuring the brightness. raspistill and libcamera have awesome features to enhance picture quality. Refer to their documentation.
STEP 2: Measuring ambient brightness
I tried two approaches and ended up using the latter, as it gave me higher precision which I needed for adjusting brightness of the lamp, more on that later.
Option 1: Using Python Image Librarys (PIL) ImageStat modules for extracting statistics of an image.
def brightness(image): img = Image.open(image).convert('L') stat = ImageStat.Stat(img) print(stat.mean) return stat.mean[0]convert(L) returns 8-bit pixels, black and white copy of the original image. The mean stat of the B&W image is then used to get the average pixel brightness and therefore a numerical value representing the brightness in a picture.
Option 2: Using LAB color space to extract the luminous channel in an image. I used OpenCV (Open Source Computer Vision Library), a popular library used for image processing.
pip3 install opencv-python
In the following snippet of code, COLOR_BGR2LAB converts image to RGB image to LAB color scheme.
After conversion, the image is represented in the following three dimensional format,
L* perceptual lightness (0 = black and 100 = white)
a* represents value between red and green (negative = green and positive = red)
b* represents value between blue and yellow (negative = blue and positive = yellow)
def LABColorSpace (image): img = cv2.imread(image) # Convert to LAB format L, A, B = cv2.split(cv2.cvtColor(img, cv2.COLOR_BGR2LAB)) # Normalize the result L = L/np.max(L) return np.mean(L)STEP 3: Controlling a regular lamp using a smart plug
I installed python-kasa, a Python library to control any device connected to the outlet using the TP-Link SmartPlug.
$ pip3 install python-kasa
kasa command Lists devices connected using TP-Link SmartPlug and their IP address.
Once we have the IP address of the lamp, its straightforward to control the device. After a lot of fine tuning, I arrived at this range (0.370.55) by taking into consideration my personal lighting preference, the location of my work desk and lamps brightness.
regularLamp = SmartPlug('<ipAddr>')print('outsideBrightness: ', outsideBrightness)if (outsideBrightness < 0.37) : await regularLamp.turn_on()elif (outsideBrightness > 0.55): await regularLamp.turn_off()await regularLamp.update()print('light.is_on: ', regularLamp.is_on)Once the lamp is turned on, it is not turned off until the brightness index increased to over 0.55 and not turned on until it drops to 0.37.
STEP 4: Controlling a dimmable lamp
First, I installed the necessary library to access and operate the Mi LED lamp python-miio
pip3 install python-miio
The device IP address and token are needed to communicate with it. The lamp can be discovered by running the following command
miiocli discover
If you are having any trouble obtaining the token, other ways to get the token are listed here.
With the IP address and token we can control the device. Initially the lamp is turned on with brightness set to 20. Then the brightness is adjusted based on ambient light.
dimmableLamp = Yeelight('<ipAddr>', '<token>') if not dimmableLamp.status().is_on and outsideBrightness < 0.53: dimmableLamp.set_brightness(20) dimmableLamp.toggle() print('outsideBrightness: ', outsideBrightness) if (outsideBrightness > 0.37 and outsideBrightness < 0.5): dimmableLamp.set_brightness(50) elif (outsideBrightness > 0.5 and outsideBrightness < 0.53): dimmableLamp.set_brightness(30) elif (outsideBrightness > 0.53): dimmableLamp.toggle() print('lamp.brightness: ', dimmableLamp.status().brightness)These videos have been sped up and I altered lighting in the room by opening/closing the blinds to showcase the changing lamp states. In reality I dont often adjust the blinds, so the transition between lamp states would be less frequent.
You can also replace the camera with a Photoresistor because it indicates the presence/absence of light. There are several implementations that use these light-dependent resistors (LDR) as brightness sensors. So all you would need is a breadboard, a photoresistor and a smart home device to try a simpler implementation.
The coding implementation can be found on my GitHub https://github.com/sindhunaydu/Sirius.
Cheers to the open source community and their amazing contributions which have made this project possible.
This was a fun one to work on, Happy New Year! Have a well lit year ahead!
Original Link: https://dev.to/s1ndhu/automatic-ambient-light-controller-53mk
Dev To
More About this Source Visit Dev To