
An Interest In:
Web News this Week
- April 18, 2024
- April 17, 2024
- April 16, 2024
- April 15, 2024
- April 14, 2024
- April 13, 2024
- April 12, 2024
Some of Our Sources
- Web Designer Wall
- Pearsonified
- The Logo Smith
- TutsPlus - Design
- Vandelay Design
- Fuel Your Creativity
- Naldz Graphics
- Crazy Leaf Design
- Specky Boy
- The Verge
Help Webnuz
Referal links:
February 20, 2022 01:44 pm GMT
Original Link: https://dev.to/abhidatta0/creating-our-ui-5gh4
Creating our UI
Let us write down the two components.
- AddFruit - for adding a fruit name along with its count.It also has a validation logic before adding the fruit.
- FruitList - to display the fruits.
(I am using Bootstrap(currently version 5) as the CSS framework in order to lessen our styling efforts.It is completely optional.)
public/index.html (For adding bootstrap)

Next, create a folder named components inside the src and add two files inside it.
AddFruit.js
import React, {useState} from 'react';const AddFruit = ()=>{ const [fruitName, setFruitName] = useState(''); const [fruitCount, setFruitCount] = useState(0); const [error, setError] = useState(null); const addFruitHandler= ()=>{ setError(null); if(fruitName.length > 0 && Number.isInteger(fruitCount) && fruitCount > 0){ console.log(fruitName, fruitCount); } else{ setError('Please enter a fruit name and count should be more than 0'); } } return ( <div> <p className='lead'>Add Fruit Detail</p> <input className='form-control my-3' placeholder='Fruit Name' type="text" onChange={(e)=> setFruitName(e.target.value)} value={fruitName} /> <input className='form-control mb-3' placeholder='Number of fruit' type="number" onChange={(e)=> setFruitCount(parseInt(e.target.value))} value={fruitCount} /> <button type="button" className="btn btn-primary" onClick={addFruitHandler}>Add fruit</button><br/> <p className='text-danger'>{error}</p> </div> )}export default AddFruit;FruitList.js
import React from 'react';const FruitList = ()=>{ const fruits = [ {name: 'Mango', count: 2}, {name: 'Gooseberries', count: 3}, ]; return ( <div> <h1 className="display-4">Fruits</h1> <ul class="list-group list-group-flush w-25"> { fruits.map((fruit, index)=> <li className="list-group-item" key={index}>{fruit.name}{' '} <span class="badge bg-info rounded-pill mr-3">{fruit.count}</span> </li>) } {fruits.length === 0 && <p className='lead'>No fruits added yet!</p>} </ul> </div> )}export default FruitList;App.js
we imported the two files and added them in our App.js.
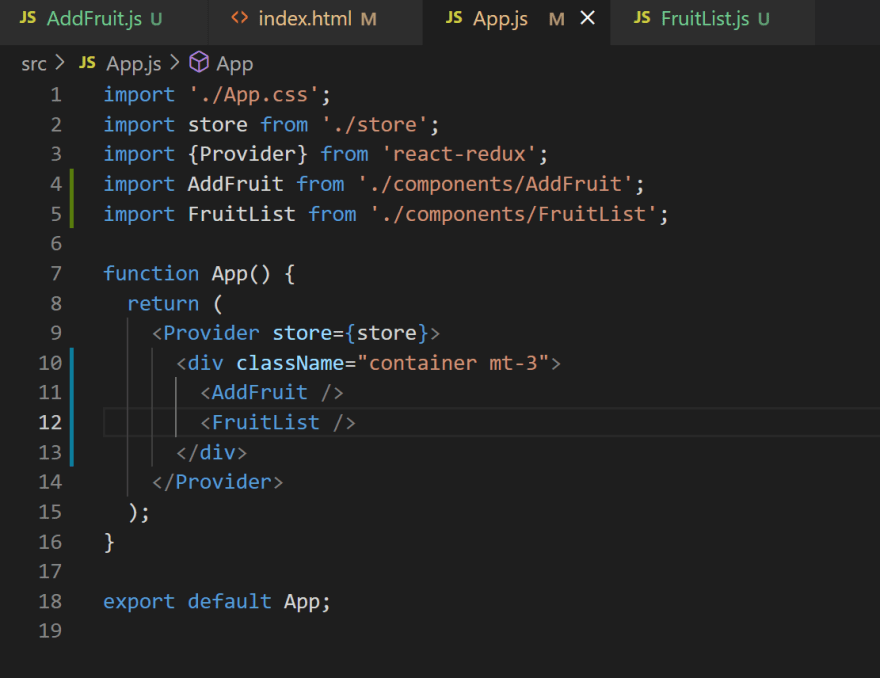
For now, in AddFruit.js file we are console.log-ing our fruit details .Later we will be sending it to our reducer.
And in FruitList, we are using a hardcoded data, later we will be provided from our state.
So our UI will look like this,

In the next blog, we will be writing the reducer code and hooking it up with the store and so it can be accessed by the components.
Original Link: https://dev.to/abhidatta0/creating-our-ui-5gh4
Share this article:
Tweet

View Full Article
Dev To
More About this Source Visit Dev To