
An Interest In:
Web News this Week
- April 18, 2024
- April 17, 2024
- April 16, 2024
- April 15, 2024
- April 14, 2024
- April 13, 2024
- April 12, 2024
Some of Our Sources
- Slashdot
- Simplebits
- TutsPlus - Code
- Abduzeedo
- My Ink Blog
- CSS Globe
- Line 25
- Freelance Switch
- Android Dissected
- The Verge
Help Webnuz
Referal links:
How to Deploy a Jupyter Notebook to Docker
There are only two ways to live your life. One is as though nothing is a miracle. The other is as though everything is a miracle. -Albert Einstein
In this article, we will talk about what Docker is, how it works and how to deploy a Jupyter notebook to a Docker Container.
What is Docker?

According to the Docker Website, Docker is an open platform for developing, shipping, and running applications. Docker enables you to separate your applications from your infrastructure so you can deliver software quickly.
In other words, Docker is a platform that provides a container for you to run host, and run your applications in without bothering about things like platform dependence, it provides infrastructure called a container where your platforms can be held and run.
What makes up Docker (In a Nutshell)
Here we will provide an overview of what docker up, if you want a comprehensive overview of how docker works, check this article out.
The Docker Architecture is divided into three(3) sections:
- Docker Engine(dockerd)
- docker-containerd (contained)
- docker-runc (runc)
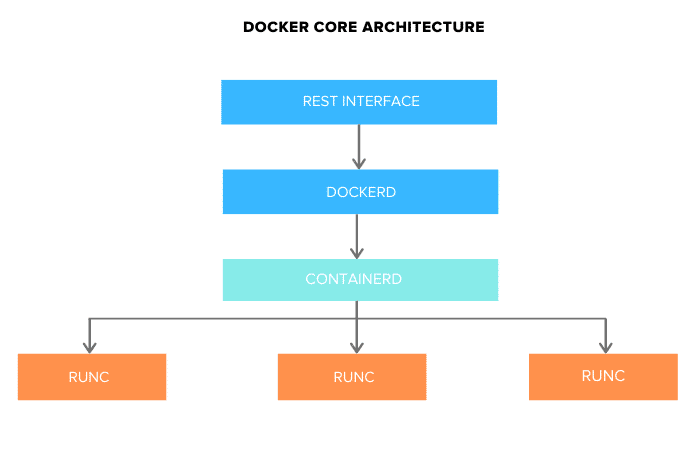
Docker Engine(dockerd)
Docker engine comprises the docker daemon, an API interface, and Docker CLI. Docker daemon (dockerd) runs continuously as dockerd system service. It is responsible for building the docker images.
Docker-containerd
containerd is another system daemon service that is responsible for downloading the docker images and running them as a container. It exposes its API to receive instructions from the dockerd service
Docker-runc
runc is the container runtime responsible for creating the namespaces and cgroups required for a container. It then runs the container commands inside those namespaces. runc runtime is implemented as per the OCI specification.
How to Deploy a Colab Jupyter Notebook to a Docker Container

In this part, we are going to work build a simple classifier model using the Iris Dataset, after that we will import the code from colab and finally we install and run deploy the script containing the model into a docker container.
Building Model
In this section, we will build the classifier model using the sklearn's inbuilt Iris Dataset.
STEP 1:
Create a new notebook in google colab.
STEP 2
Import the dependencies.
import matplotlib.pyplot as pltfrom sklearn import metricsfrom sklearn.datasets import load_irisfrom sklearn.model_selection import train_test_splitfrom sklearn.neighbors import KNeighborsClassifierSTEP 3
Here we are going to load the iris dataset, split the data into the training set and test set, and build our classification model.
iris = load_iris()X = iris.datay = iris.targetAbove we loaded the Iris dataset.
X_train, X_test, y_train, y_test = train_test_split(X, y, test_size=0.2 , random_state=4)Above we used the train_test_split function in sklearn to split the iris dataset into a training set and test set.
knn = KNeighborsClassifier(n_neighbors=10)knn.fit(X,y)Above we instantiated the KNeighbors Classifier model and tuned the n_neighbours hyperparameter to contain ten(10) neighbors.
Installing and deploying to Docker
This is the final chapter, here we are going to install the docker desktop application and write the scripts which will deploy our script to a docker container.
STEP 1
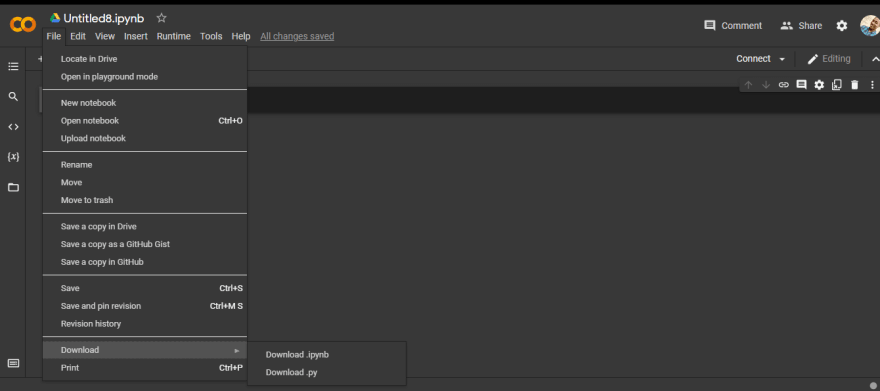
Firstly, you download the python script containing your trained model from colab.
STEP 2
Now we are going to install and set up docker.
You can install docker using thislink
STEP 3
Now create a directory called iris-classifier where we are going to host our model and docker scripts.
Move the python file containing the iris classification model to the iris-classification folder just created.
In the same folder, create a text file called requirements, below are the contents it will contain.
sklearn==0.0matplotlib==3.2.2STEP 4
Here we will create the Dockerfile, go to your main directory and create a file called Dockerfile without any extension. A dockerfile is a script that is used to create a container image. Below are the items that will be contained in your Dockerfile.
FROM python:3.8ADD requirements.txt /RUN pip install -r /requirements.txtADD iris-classifier.py /ENV PYTHONUNBUFFERED=1CMD [ "python", "./iris-classifier.py" ]Above we simply told docker what to do each time the container is run.
STEP 5
Here we are going to create our Docker Compose file, docker-compose files are simply configuration files that make it easy to maintain different Docker containers.
In your project directory, create a file called docker-compose.yml, below are the contents to be contained in the file.
version: "3"services: iris-classifier-uplink: # if failure or server restarts, container will restart restart: always container_name: iris-classifier-uplink image: iris-classifier-uplink build: # build classifier image from the Dockerfile in the current directory context: . Now in your directory, iris-classifier you should have three(3) files.
- docker-compose.yml
- Dockerfile
- iris-classifier.py
- requirements.txt
Running Docker Container
This is the final step, here we will run our docker container using the commands stated below.
docker compose builddocker compose up -dThis is the end, our Python model is now running in a docker container!
Useful Links
EndNote
Jupyter Notebooks are really good places for building models and you can also use them as back ends for applications, unfortunately, they don't run forever.
Docker helps you fix that by re-running your jupyter notebook when it fails and this makes it a tool worth knowing.
Original Link: https://dev.to/edemgold/how-to-deploy-a-jupyter-notebook-to-docker-4glb
Dev To
More About this Source Visit Dev To